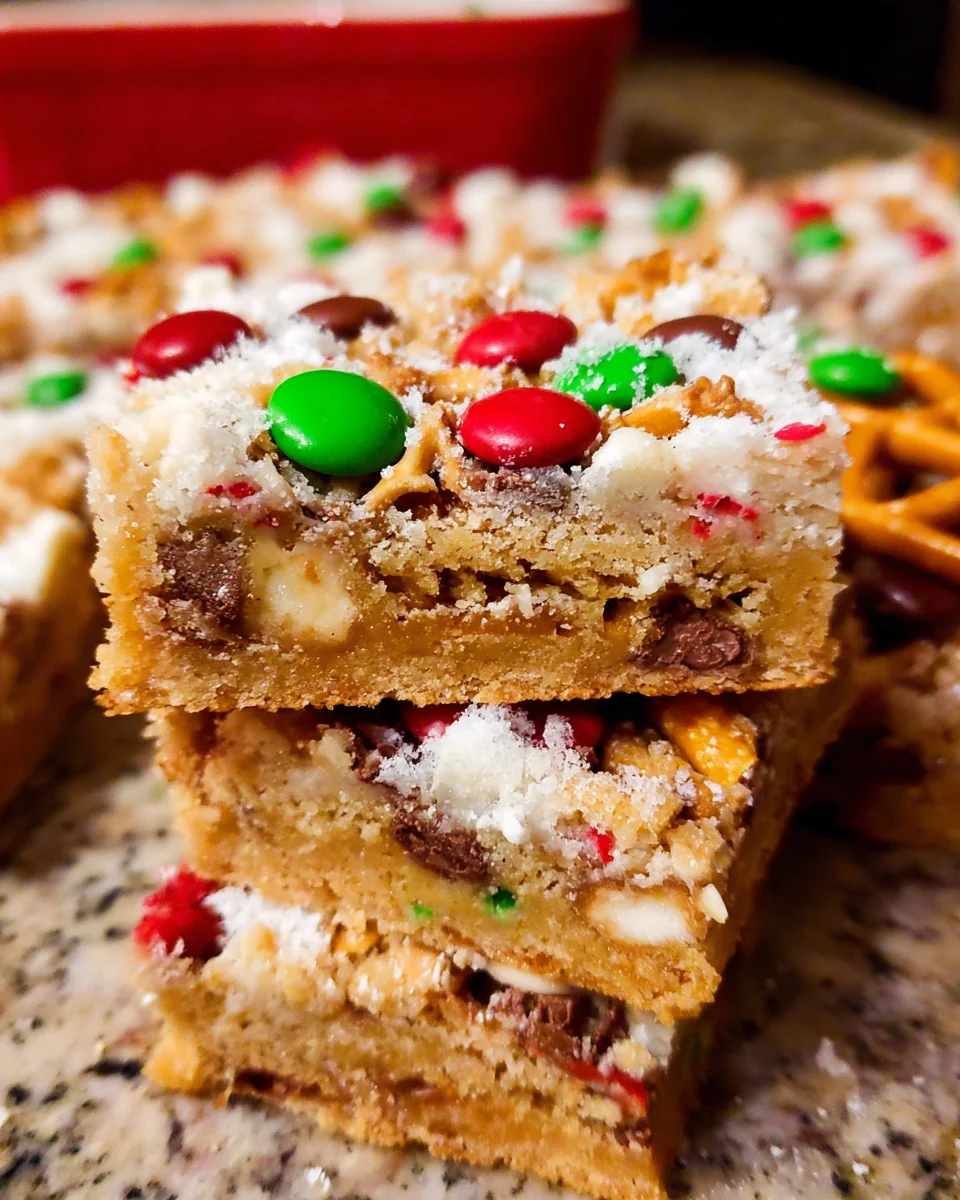
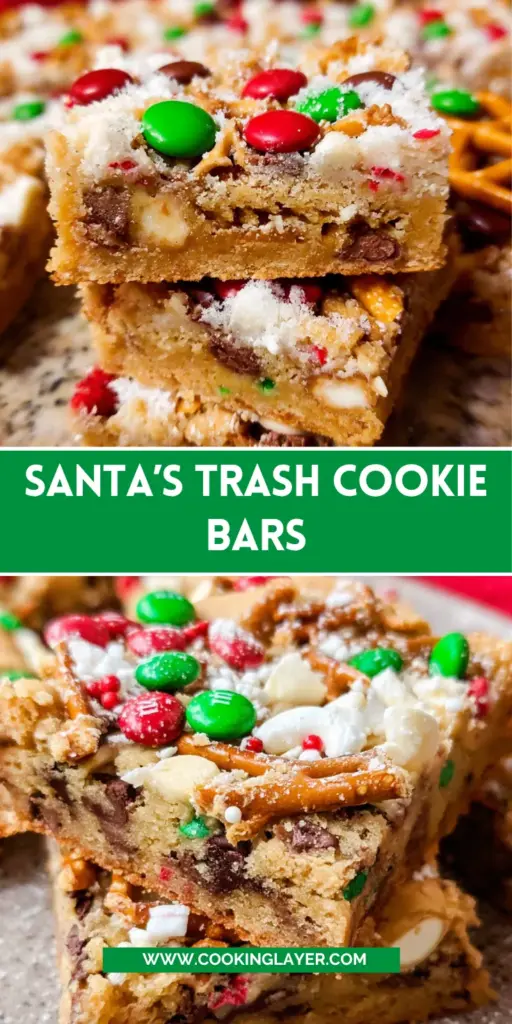
Introduction to Santa’s Trash Cookie Bars
As the holiday season approaches, I often find myself juggling festive preparations while searching for a quick and delightful treat. That’s when I whip out my recipe for Santa’s Trash Cookie Bars! These bars are a heavenly mix of sweet and salty flavors, guaranteed to bring smiles to your loved ones’ faces. With just a few simple steps, you can create something that looks impressive and tastes even better. Trust me, this quick solution is perfect for busy days filled with holiday cheer!
Why You’ll Love This Santa’s Trash Cookie Bars
Why do I adore Santa’s Trash Cookie Bars? First off, they’re a breeze to make! With minimal prep time, you can have a delicious treat ready in about 40 minutes. The rich combination of creamy butter, crunchy pretzels, and sweet chocolate chips create a delightful explosion of flavor in every bite. Plus, they’re perfect for kids and adults alike—easy to share and even easier to enjoy during those busy holiday festivities!
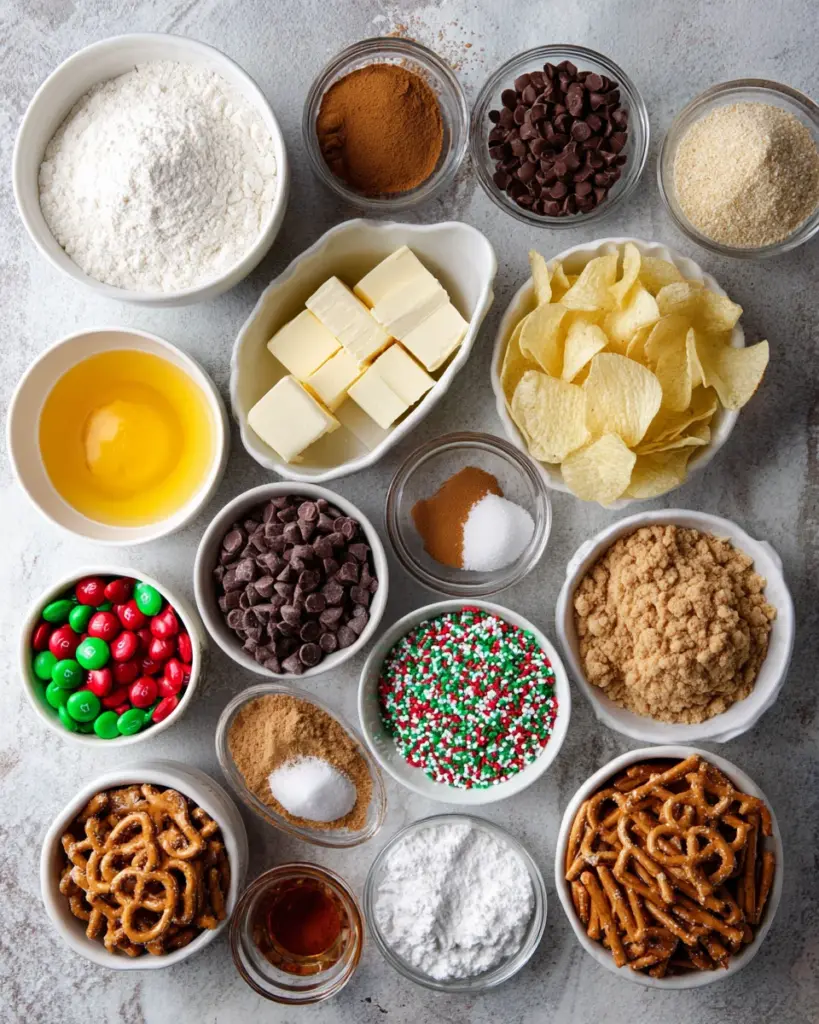
Ingredients for Santa’s Trash Cookie Bars
Let’s dive into the delightful ingredients that make Santa’s Trash Cookie Bars a festive favorite! Each component plays a role, contributing unique flavors and textures.
- Cornstarch: Helps achieve that perfect chewy texture in your cookie bars.
- Baking soda: The key leavening agent that provides lift, making the bars fluffy.
- Salt: A pinch enhances the sweetness and balances the flavors beautifully.
- Unsalted butter: Softer butter brings richness; it’s a classic choice for cookie recipes.
- Granulated sugar: Adds sweetness and lightness to the overall texture.
- Light brown sugar: Imparts moisture and a hint of caramel flavor—yum!
- Vanilla extract: A splash brings warmth and depth to the bars, elevating their flavor.
- Eggs: Essential for binding and creating a lovely soft texture.
- Potato chips: Crushed for adding a salty crunch that perfectly contrasts with the sweetness.
- Pretzels: Their crunch pairs wonderfully with the chocolate, adding an unexpected twist.
- Chocolate chips: Essential! Melty and sweet, they’re always a hit in any dessert.
- Christmas M&Ms: These festive candies add colorful flair and a delightful chocolate burst.
- Christmas sprinkles: Perfect for that extra sprinkle of holiday cheer on top!
Remember, if you’re feeling adventurous or have picky eaters at home, you can customize your mix-ins. Get creative with the ingredients! For exact measurements, check the bottom of the article, where I’ve provided everything for easy printing.
How to Make Santa’s Trash Cookie Bars
Now, let’s get that holiday spirit cooking! Making Santa’s Trash Cookie Bars is an adventure filled with joy and laughter. Follow these simple steps, and soon enough, your kitchen will be filled with delicious aromas.
Preheat and Prepare Your Pan
First things first, preheat your oven to 350 degrees Fahrenheit. This warms up those holiday vibes! While it’s heating, grab a 9-inch by 13-inch cake pan and line it with aluminum foil or parchment paper. This makes for easy removal and cleanup later. Trust me; your future self will thank you!
Combine Dry Ingredients
Next up, let’s whisk together the flour, cornstarch, baking soda, and salt in a medium bowl. This mix helps give your cookie bars that irresistible chewy texture. Make sure there are no lumps! Just like Santa, we want everything to be merry and bright!
Creaming the Buttery Mixture
In a large mixing bowl, it’s time to cream together the softened butter, granulated sugar, brown sugar, and vanilla extract. Use a hand mixer or stand mixer—whichever you prefer! Mix until the mixture becomes light and fluffy, like a cloud of joy. This step is crucial for incorporating air, ensuring our bars rise beautifully.
Adding Eggs
Now, it’s time for the eggs! Crack them in, one at a time. Mix for about 10 seconds after each addition. This ensures that each egg gets fully incorporated, giving the bars their deliciously rich texture. Think of this like a dance—each partner takes a turn, and they perform so much better together!
Mixing it All Together
Once the eggs are in, gently fold the dry ingredients into the buttery mixture. Don’t overmix—it’s like a gentle hug for our dough! Then, add in the crushed potato chips, pretzels, chocolate chips, M&Ms, and most of the holiday sprinkles. This party of ingredients creates an explosion of flavors and textures in every single bite!
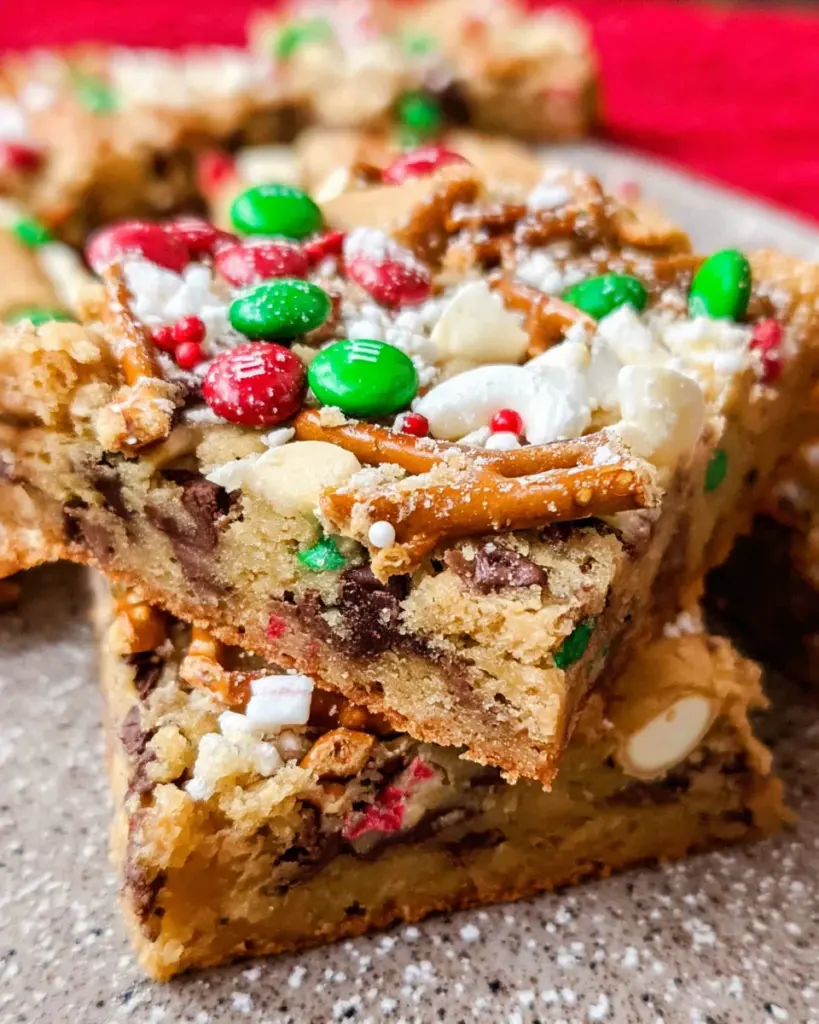
Spreading and Topping
Now, spread that delightful dough evenly into your prepared pan. Use a spatula to make it nice and smooth. Feeling festive? Top it off with extra chocolate chips, M&Ms, crushed pretzels, and the remaining sprinkles. More is definitely merrier in this case!
Baking and Cooling
Finally, bake your cookie bars in the preheated oven for about 22 to 25 minutes. You’ll know they’re ready when the edges are golden brown. Once out, let them cool in the pan on a wire rack for at least an hour. Cooling is key—this will help them set perfectly before slicing into squares. The anticipation makes tasting them all the more delightful!
Tips for Success
- Measure your ingredients accurately for the best results.
- Let your butter soften at room temperature for easier mixing.
- For a fun twist, try swapping out M&Ms for other festive candies!
- Use the toothpick test; insert one to check if the bars are done.
- Let the bars cool completely before slicing for clean edges.
Equipment Needed
- 9-inch by 13-inch cake pan (a square baking dish works too!)
- Mixing bowls (two—one for dry, one for wet ingredients)
- Hand mixer or stand mixer (if you don’t have one, a whisk and muscle work, too!)
- Spatula for spreading the dough
- Wire rack for cooling the bars
Variations of Santa’s Trash Cookie Bars
- For a nuttier flavor, add chopped walnuts or pecans to the mix. They’ll add a lovely crunch!
- Swap out regular chocolate chips with dark chocolate or white chocolate chips for a different taste sensation.
- To make these bars gluten-free, substitute all-purpose flour with a gluten-free baking blend.
- Add a touch of peppermint extract for a refreshing twist that’s perfect for the holiday season!
- For a healthier option, use oats instead of some of the flour, creating a chewy texture while adding fiber.
Serving Suggestions for Santa’s Trash Cookie Bars
- Pair these bars with a cold glass of milk for a classic combination that everyone loves.
- Serve alongside a warm cup of hot cocoa topped with marshmallows for a cozy treat.
- For festive flair, plate the bars on a holiday-themed platter sprinkled with extra Christmas sprinkles.
FAQs about Santa’s Trash Cookie Bars
Got questions about Santa’s Trash Cookie Bars? Don’t worry! I’ve got answers to make your baking experience as smooth as the butter in these bars.
Can I make Santa’s Trash Cookie Bars ahead of time?
Absolutely! These cookie bars store well. Bake them a day or two in advance, and just keep them in an airtight container. They’ll stay fresh and delicious for up to a week!
Can I use vegan substitutes in this recipe?
Yes! You can certainly use vegan butter and flax eggs as a substitute for the eggs. This way, your Santa’s Trash Cookie Bars cater to everyone.
What are some fun mix-ins I can try?
Feel free to get creative! Consider adding dried fruits, toasted coconut, or even white chocolate chips for a unique twist on the traditional recipe.
Why are my cookie bars falling apart?
If your bars crumble, it might be due to overbaking. Keep an eye on them, and remember—let them cool completely before cutting to maintain their structure!
Can I freeze Santa’s Trash Cookie Bars?
Definitely! Just wrap them tightly in plastic wrap or foil and store them in an airtight container. You can freeze them for up to three months. Perfect for a future sweet craving!
Final Thoughts
Making Santa’s Trash Cookie Bars brings a sense of festive joy into my kitchen that’s hard to beat. The delightful combination of sweet and salty flavors creates a magical treat that is just perfect for sharing with family and friends. Every bite is a crunchy, chewy, chocolatey dream! I love watching the faces light up as they take their first delicious bite. Plus, with such a simple recipe, I can whip them up anytime the holiday spirit strikes. So, roll up your sleeves, grab your apron, and let’s create sweet memories together with these delightful cookie bars!
Print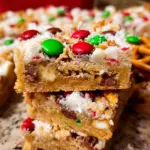
Santa’s Trash Cookie Bars
- Prep Time: 15 minutes
- Cook Time: 25 minutes
- Total Time: 40 minutes
- Yield: 15 servings 1x
- Category: Dessert
- Method: Baking
- Cuisine: American
- Diet: Vegetarian
Description
Santa’s Trash Cookie Bars are a festive treat that combines sweet and salty flavors, perfect for the holiday season.
Ingredients
- 1 tablespoon cornstarch
- 1 teaspoon baking soda
- 1 teaspoon salt
- 1 cup unsalted butter, softened
- ¾ cup granulated sugar
- ¾ cup light brown sugar, packed
- 1 teaspoon vanilla extract
- 2 large eggs
- ¾ cup potato chips, crushed
- ¾ cup pretzels, crushed
- ¾ cup chocolate chips
- ¾ cup Christmas M&Ms
- 2 tablespoons Christmas sprinkles
Instructions
- Preheat the oven to 350 degrees F and line a 9-inch × 13-inch cake pan with aluminum foil or parchment paper and set aside.
- In a medium bowl, whisk together the flour, cornstarch, baking soda, and salt. Set aside.
- In a large bowl with a hand mixer or in a stand mixer fitted with a paddle attachment, cream together the butter, sugar, brown sugar, and vanilla until light and fluffy.
- Add the eggs one at a time, mixing after each addition for about 10 seconds.
- Add the dry ingredients to the butter mixture and mix just until combined. Fold in the chips, crushed pretzels, chocolate chips, M&Ms, and most of the sprinkles.
- Spread the cookie dough out evenly in the cake pan and top with extra M&Ms, chocolate chips, potato chips, pretzels, and the remaining sprinkles.
- Bake the cookie bars for 22 to 25 minutes until the edges are golden brown. Remove from the oven and place on a wire rack.
- Allow the bars to cool for at least 1 hour in the pan before removing and slicing them into squares.
Notes
- For a fun presentation, use festive colored M&Ms and sprinkles.
- Store any leftovers in an airtight container for up to a week.
- Feel free to customize the mix-ins according to your taste.
Nutrition
- Serving Size: 1 bar
- Calories: 250
- Sugar: 18g
- Sodium: 150mg
- Fat: 12g
- Saturated Fat: 7g
- Unsaturated Fat: 3g
- Trans Fat: 0g
- Carbohydrates: 33g
- Fiber: 1g
- Protein: 2g
- Cholesterol: 30mg


