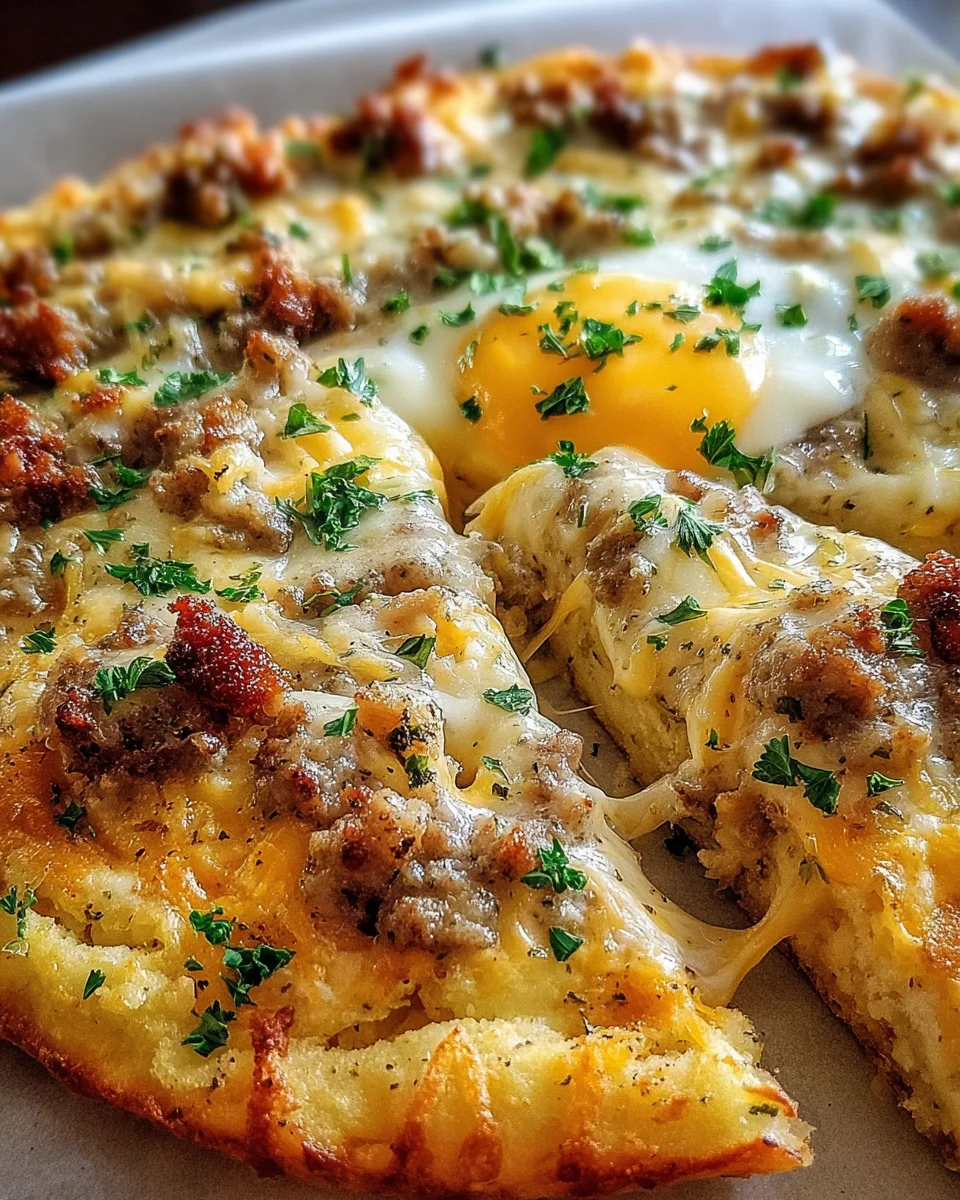
Introduction to Sausage Gravy Biscuit Breakfast Pizza
I am an avid home cook and enjoy the alchemy of turning simple daily meals into something special: Sausage Gravy Biscuit Breakfast Pizza. That sausage flavor is melded with the comforting taste of classic sausage gravy and crispy biscuit crust-all lavishly layered with oozing cheese. If you’ve ever found breakfast especially challenging on a busy morning, here’s your quick, easy, and extremely rewarding solution. It’s ideal for family brunch if ever friends decide to pop by unannounced. Seriously, you’ll want to have this recipe up your sleeve!
Why You’ll Love This Sausage Gravy Biscuit Breakfast Pizza
This Sausage Gravy Biscuit Breakfast Pizza is a game-changer for your mornings! It’s easy to whip up, taking just about 40 minutes from start to finish. The combination of warm, buttery biscuits and savory sausage gravy is simply irresistible. Plus, it’s a dish that pleases everyone—kids and adults alike. In a world that often feels rushed, this pizza brings comfort and joy to your breakfast table, making it a perfect weekend treat!
Ingredients for Sausage Gravy Biscuit Breakfast Pizza
Gathering the right ingredients is key to making the best Sausage Gravy Biscuit Breakfast Pizza. Here’s what you’ll need:
- All-purpose flour: The base for our biscuit crust, providing the perfect texture.
- Baking powder: This leavening agent helps the biscuits rise and stay fluffy.
- Salt: Enhances the flavors of the dish. Don’t skip it!
- Cold butter: Adds richness and flakiness to the biscuit dough. Keep it cold for the best texture.
- Milk: Brings the dough together and keeps it moist. You can use whole milk for creaminess or any milk you prefer.
- Ground sausage: The star of the show, bringing that savory goodness. Choose your favorite sausage or any type you have on hand.
- Extra flour: Used for making the sausage gravy thicker and more scrumptious.
- Seasonings: Salt, black pepper, and garlic powder add layers of flavor to the gravy mix.
- Shredded mozzarella cheese: Provides a gooey, melty topping. Feel free to swap for a different cheese if you like!
- Shredded cheddar cheese: Adds a sharp flavor that complements the mozzarella beautifully.
- Eggs (optional): For those who like them, add scrambled eggs or bake them right on top for added protein.
- Chopped parsley: A fresh garnish that brightens the dish.
- Extra sausage crumbles (optional): Perfect for those who can’t get enough sausage flavor—feel free to load it up!
You can find exact measurements for all these ingredients at the bottom of the article, ready for printing. Happy cooking!
How to Make Sausage Gravy Biscuit Breakfast Pizza
Step 1: Preheat and Prepare
Start by preheating your oven to 425°F. This step is crucial because a hot oven helps the biscuit crust rise perfectly. While the oven heats, grab your baking sheet or pizza stone. If you use parchment paper, it makes for easier cleanup! Greasing the surface will also prevent sticking. Trust me, you want to set the stage for a delicious pizza. Now that you’re ready, let’s move on!
Step 2: Make the Biscuit Base
In a mixing bowl, combine your all-purpose flour, baking powder, and salt. This blend forms the backbone of your biscuit base. Now, it’s time to cut in the cold butter. You can use a pastry cutter or just your fingers for this task. Aim for a crumbly texture like coarse crumbs. Next, pour in the milk and mix gently with a fork until a soft dough forms. It shouldn’t be sticky, and it should come together nicely.
Step 3: Bake the Biscuit Crust
Take your biscuit dough and transfer it to the prepared baking sheet. Press or roll it out into a pizza shape—about 12 inches wide. Pop it in the oven for 8 to 10 minutes. You want the edges to be just lightly golden. It won’t be fully cooked yet, but this creates a sturdy foundation for all that creamy sausage gravy!
Step 4: Prepare the Sausage Gravy
While your crust is baking, it’s time to whip up the sausage gravy! Heat a skillet over medium heat and add your ground sausage, cooking until it’s nicely browned and crumbled. Once that’s done, sprinkle in flour to coat the sausage, stirring well. Now, gradually pour in the milk, stirring constantly to prevent lumps. Let it simmer for about 5 to 7 minutes. Expect it to thicken beautifully. Season with salt, pepper, and garlic powder for that savory goodness!
Step 5: Assemble the Pizza
Once your crust is out of the oven, it’s time for the fun part! Spread a generous layer of that delicious sausage gravy over your biscuit base. Top it off with shredded mozzarella and cheddar cheese. If you want to add extra sausage crumbles or eggs, now’s the time! Picture a mountain of cheesy goodness, waiting to be devoured!
Step 6: Bake to Perfection
Pop your assembled pizza back into the oven. Bake for another 11 to 12 minutes, or until the cheese is melted and bubbly. The edges should be golden brown and looking divine. Keep an eye on it; you don’t want to miss that melty moment. Once it’s done, sprinkle some chopped parsley on top for freshness. Slice it up, and you’re ready to serve!
Tips for Success
- Keep your butter cold for a flakier biscuit crust.
- For a thicker gravy, let it simmer slightly longer after adding the milk.
- Don’t rush the baking time; you’ll want that golden edge.
- Use parchment paper for easy cleanup and to prevent sticking.
- Feel free to swap cheeses based on your family’s preferences for a personal touch!
Equipment Needed
- Baking sheet or pizza stone: A baking sheet works great, but a pizza stone gives a crispier crust.
- Mixing bowl: Any large bowl will do for combining ingredients.
- Pastry cutter or fork: Use either to cut in butter for a flaky texture.
- Skillet: A non-stick skillet is perfect for cooking the sausage.
- Spatula: Handy for spreading the sausage gravy evenly!
Variations
- Vegetarian option: Swap the ground sausage for a mix of sautéed mushrooms and spinach for a delicious vegetarian version.
- Spicy twist: Add some chopped jalapeños or a dash of hot sauce to the sausage gravy for a kick of heat.
- Herb-infused crust: Incorporate herbs like chives or thyme into the biscuit dough for added flavor.
- Gluten-free alternative: Use a gluten-free baking mix instead of all-purpose flour to make this dish gluten-free friendly.
- Breakfast burrito style: Instead of pizza, use the sausage gravy and cheese to fill warm tortillas for breakfast burritos!
Serving Suggestions
- Pair your Sausage Gravy Biscuit Breakfast Pizza with fresh fruit for a balanced breakfast.
- Complement it with a side of crispy hash browns, perfect for sopping up extra gravy.
- Serve with iced coffee or a refreshing orange juice for a delightful brunch experience.
- Garnish with additional parsley for a pop of color and freshness on the plate.
FAQs about Sausage Gravy Biscuit Breakfast Pizza
Curious about Sausage Gravy Biscuit Breakfast Pizza? Here are some commonly asked questions that might help clarify any uncertainties!
Can I make the biscuit base ahead of time?
Absolutely! You can prepare the biscuit dough ahead of time and store it in the fridge for a few hours. Just remember to roll it out when ready to bake.
What if I don’t have ground sausage?
No worries! You can substitute ground sausage with cooked diced ham, turkey sausage, or even a veggie sausage for a different twist. The flavor will change, but it will still be delicious!
How do I store leftovers?
Leftover Sausage Gravy Biscuit Breakfast Pizza can be stored in an airtight container in the fridge for up to three days. Just reheat in the oven or microwave until warmed through!
Can I freeze this breakfast pizza?
Yes! You can freeze the assembled pizza before baking. Just wrap it tightly in plastic wrap and then foil. When you’re ready to eat, bake it from frozen, allowing a little extra time.
What can I serve with this breakfast pizza?
This breakfast pizza pairs wonderfully with a crisp salad, fresh fruit, or even some homemade biscuits on the side. Be creative—you can’t go wrong!
Final Thoughts
Making Sausage Gravy Biscuit Breakfast Pizza is truly a delightful experience. From the moment the warm, buttery aroma fills your kitchen, you know you’re creating something special. It’s not just food; it’s a chance to gather loved ones around the table and share a moment of joy together. This dish is all about comfort and nostalgia, reminding us of lazy weekend mornings filled with laughter. Whether it’s a family brunch or a quick weekday breakfast, this pizza will surely bring a smile to your face and warmth to your heart. Enjoy every cheesy, savory bite!
Print
Sausage Gravy Biscuit Breakfast Pizza: A Must-Try Recipe!
- Prep Time: 20 minutes
- Cook Time: 20 minutes
- Total Time: 40 minutes
- Yield: Serves 4-6 1x
- Category: Breakfast
- Method: Baking
- Cuisine: American
- Diet: Gluten Free
Description
Sausage Gravy Biscuit Breakfast Pizza is a delicious twist on a classic breakfast dish, combining the flavors of sausage gravy, cheese, and biscuits into a mouthwatering pizza.
Ingredients
- 2 cups all-purpose flour
- 1 tablespoon baking powder
- ½ teaspoon salt
- ½ cup cold butter, cubed
- ¾ cup milk
- ½ pound ground sausage
- 3 tablespoons all-purpose flour
- 1½ cups whole milk
- 1 teaspoon salt
- ⅛ teaspoon black pepper
- 1 teaspoon garlic powder
- 1½ cups shredded mozzarella cheese
- ½ cup shredded cheddar cheese
- 2 eggs (optional: scrambled or lightly baked on top)
- Chopped parsley, garnish
- Extra cooked sausage crumbles (optional, for topping)
Instructions
- Preheat the oven to 425°F. Grease or line a large baking sheet or pizza stone.
- In a mixing bowl, combine flour, baking powder, and salt. Cut in the cold butter using a pastry cutter or fingers until crumbly. Add milk and mix just until a soft dough forms. Press or roll out the dough into a pizza shape (about 12 inches) and place on the baking sheet.
- Bake the biscuit base for 8–10 minutes, until just lightly golden on the edges. Set aside.
- In a skillet, cook sausage over medium heat until browned and crumbled.
- Sprinkle in flour and stir well to coat. Gradually pour in milk while stirring constantly. Simmer until thickened, about 5–7 minutes. Season with salt, pepper, and garlic powder.
- Spread a generous layer of sausage gravy over the pre-baked crust. Top with mozzarella, cheddar, and optional extra sausage crumbles.
- If adding eggs directly to the pizza, crack them over the top now (for baked eggs) or scramble separately and add after baking.
- Return the pizza to the oven and bake for 11–12 more minutes, or until the cheese is melted and bubbly with a golden edge.
- Sprinkle chopped parsley on top and serve warm.
Notes
- Perfect for a cozy brunch or crowd-pleasing breakfast!
- Feel free to customize toppings as desired.
- Leftovers can be stored in the refrigerator for a few days.
Nutrition
- Serving Size: 1 slice
- Calories: 350
- Sugar: 2g
- Sodium: 720mg
- Fat: 22g
- Saturated Fat: 10g
- Unsaturated Fat: 10g
- Trans Fat: 0g
- Carbohydrates: 28g
- Fiber: 1g
- Protein: 14g
- Cholesterol: 80mg


