
Introduction to Slime-Filled Halloween Cookies
As the leaves turn and the days grow shorter, it’s that magical time of year again—Halloween! What better way to celebrate than with some delightful, Slime-Filled Halloween Cookies? These spooky treats bring smiles and laughter, making them perfect for busy moms and professionals alike. Whether you’re impressing little goblins at home or sweetening up a Halloween gathering, these cookies are sure to be a hit. Their vibrant green cheesecake filling oozes fun and flavor, making them a quick solution for any festive occasion. Trust me, your loved ones will be begging for more!
Why You’ll Love This Slime-Filled Halloween Cookies
What’s not to love about these Slime-Filled Halloween Cookies? They’re a breeze to whip up, perfect for even the most hectic schedules. In just a few steps, you will create sweet treats that are not only delicious but visually captivating. The creamy, green cheesecake center adds a twist of joy to your baking experience. Plus, who can resist sharing fun and spooky snacks that make everyone smile? It’s a win-win!
Ingredients for Slime-Filled Halloween Cookies
To create these festive Slime-Filled Halloween Cookies, you’ll need a delightful mix of ingredients. Here’s what you’ll gather:
- Cream cheese: This provides a rich and creamy base for the cheesecake filling. Soften it to ensure an easy blend.
- Confectioners’ sugar: This sweetener adds just the right amount of sweetness to the cream cheese filling.
- All-purpose flour: Essential for binding and giving structure to both the filling and the cookie dough.
- Vanilla extract: A touch of vanilla enhances the flavors, giving a lovely aroma to your cookies.
- Neon green food coloring: Essential to achieve that vibrant green color for the cheesecake filling. Make it as bright as you like!
- Salted butter: This adds richness and moisture to the cookie dough. Using room temperature butter allows it to cream more easily.
- Light brown sugar: This brings a hint of caramel flavor while contributing to the cookies’ moist texture.
- Granulated sugar: A classic sweetener that balances the flavors in your cookie dough.
- Large egg: Acts as a binder, giving your cookies structure while helping them rise.
- Milk: A little splash helps keep the cookie dough moist and workable.
- Baking soda: This leavening agent helps the cookies rise and become delightfully chewy.
- Dark chocolate cocoa powder or black gel food coloring: Choose cocoa for a rich chocolate flavor or gel for deep color; it adds another layer of fun!
- Halloween sprinkles: These colorful additions provide a festive flair, making your cookies visually exciting.
Remember, exact measurements can be found at the bottom of this article, along with options for printing. Feel free to get creative with your cookie decorations and baking style!
How to Make Slime-Filled Halloween Cookies
Prepare the Cheesecake Filling
Start by mixing the softened cream cheese and confectioners’ sugar in a medium bowl. Use an electric mixer to combine them until you achieve a smooth and creamy texture. Gradually add the all-purpose flour and a splash of vanilla extract, mixing gently. Then, bring on the fun! Add neon green food coloring bit by bit until you reach a vibrant shade that makes your filling pop. This filling is the heart of your Slime-Filled Halloween Cookies, so feel free to get creative with the color intensity!
Chill the Filling
Now, it’s time to chill! Scoop out 1 ½ teaspoons of the cheesecake filling and place each scoop on a lined baking sheet. This is crucial—freezing the filling for at least 2 hours allows it to set properly. A well-chilled filling prevents it from oozing out during baking. Trust me, this step is key for that perfect, gooey surprise inside your cookies!
Make the Cookie Dough
In a large bowl, beat the room-temperature salted butter, light brown sugar, and granulated sugar together until the mixture is creamy and fluffy. Next, add the large egg, milk, and vanilla extract, mixing well. Now, in a separate medium bowl, whisk together the baking soda, dark chocolate cocoa powder, and all-purpose flour. Gradually stir the dry ingredients into the wet ingredients. Be careful not to overmix; a gentle hand creates tender cookies. Once fully combined, cover and chill the dough for at least 2 hours to ensure it holds its shape while baking.
Assemble the Cookies
After your cookie dough has chilled, it’s assembly time! Preheat your oven to 350°F and line two baking sheets with parchment paper. Roll 1 tablespoon of chilled dough into a ball, then gently flatten it and place it on one of the baking sheets. Repeat this process until you’ve used half of the dough. Now, carefully place a frozen cheesecake ball into the center of each flattened dough piece. Roll another tablespoon of dough, flatten it, and place it on top of each cookie. Gently press the edges together to secure the filling, and don’t forget to add Halloween sprinkles on top for that festive flair!
Chill and Bake
Chilling the assembled cookies is the last step before baking. Allow them to chill for 30 minutes to help maintain their shape. When you’re ready, slide them into the preheated oven and keep an eye on them! Bake for 12-15 minutes, or until they appear set and slightly firm around the edges. Let the cookies cool on the baking sheet for about 10 minutes before transferring them to a cooling rack. Trust me, the anticipation will make the first bite even sweeter!
Tips for Success
- Always ensure your cream cheese is softened for easy mixing.
- Chill your cheesecake filling thoroughly. This prevents it from leaking out during baking.
- Don’t rush the dough chilling; it helps create perfectly shaped cookies.
- Use a kitchen scale for precise measuring if you prefer accuracy.
- Experiment with different food coloring shades for fun variations!
Equipment Needed
- Mixing bowls: A set of various sizes is ideal; you can also use a large pot as a mixing bowl in a pinch.
- Electric mixer: A hand mixer works great, but a whisk is an alternative for a good workout!
- Baking sheets: Parchment-lined sheets are a must; if you don’t have them, aluminum foil will do.
- Ice cream scoop: Perfect for portioning dough. If unavailable, a tablespoon works fine.
Variations on Slime-Filled Halloween Cookies
- Colorful Fillings: Swap out the neon green coloring for vibrant oranges, purples, or blues. Each color can reflect your favorite Halloween character!
- Flavored Cream Cheese: Infuse your cheesecake filling with different flavors like pumpkin spice, chocolate, or raspberry for delicious twists.
- Gluten-Free Option: Substitute all-purpose flour with a gluten-free flour blend, making these cookies suitable for gluten-sensitive friends.
- Vegan Version: Replace cream cheese with a dairy-free alternative and use flax eggs instead of traditional eggs to create a vegan-friendly cookie.
- Nutty Surprise: Add crushed nuts or chocolate chips into the cookie dough for added texture and flavor.
Serving Suggestions for Slime-Filled Halloween Cookies
- Pair these cookies with a spooky punch or a simple glass of milk for a delightful combination.
- Present them on a vibrant Halloween-themed platter for an eye-catching display at parties.
- For an extra fun twist, serve with ice cream for a gooey cookie sundae!
- Use spiderweb or pumpkin decorations to enhance spooky vibes on your serving table.
FAQs about Slime-Filled Halloween Cookies
Can I make the dough ahead of time?
Absolutely! You can prepare the cookie dough a day in advance and store it in the refrigerator. Just be sure to chill it thoroughly before assembly for the best results.
What if I can’t find neon green food coloring?
No worries! You can use regular green food coloring or mix yellow and blue food coloring to create your desired shade. It’s all about being creative!
Can I use a different filling instead of cheesecake?
Of course! Try swapping the cheesecake filling for cookie dough or even a ganache for a chocolatey twist. Just ensure your substitute holds its shape when frozen!
How should I store leftover cookies?
Store your Slime-Filled Halloween Cookies in an airtight container at room temperature for up to five days. They’ll stay fresh and delicious for everyone to enjoy!
Are these cookies suitable for kids with allergies?
Depending on the modifications you make, these cookies can cater to various dietary needs. Just be mindful of the specific allergies and substitute ingredients accordingly, such as using dairy-free cream cheese for lactose intolerance.
Final Thoughts
Baking these Slime-Filled Halloween Cookies is more than just cooking; it’s about creating joyful moments in the kitchen. Each vibrant cookie not only tastes fantastic but also sparks smiles and laughter from friends and family. This Halloween, let your creativity run wild as you whip up these spooky treats. With each bite, you’ll share the delight of homemade goodies that bring festive cheer. Remember, the magic lies in the memories you create while baking together. So, roll up your sleeves and enjoy the delightful chaos of making these cookies. Happy Halloween baking!
Print
Slime-Filled Halloween Cookies
- Prep Time: 30 minutes
- Cook Time: 15 minutes
- Total Time: 2 hours 45 minutes
- Yield: 24 cookies 1x
- Category: Dessert
- Method: Baking
- Cuisine: American
- Diet: Vegetarian
Description
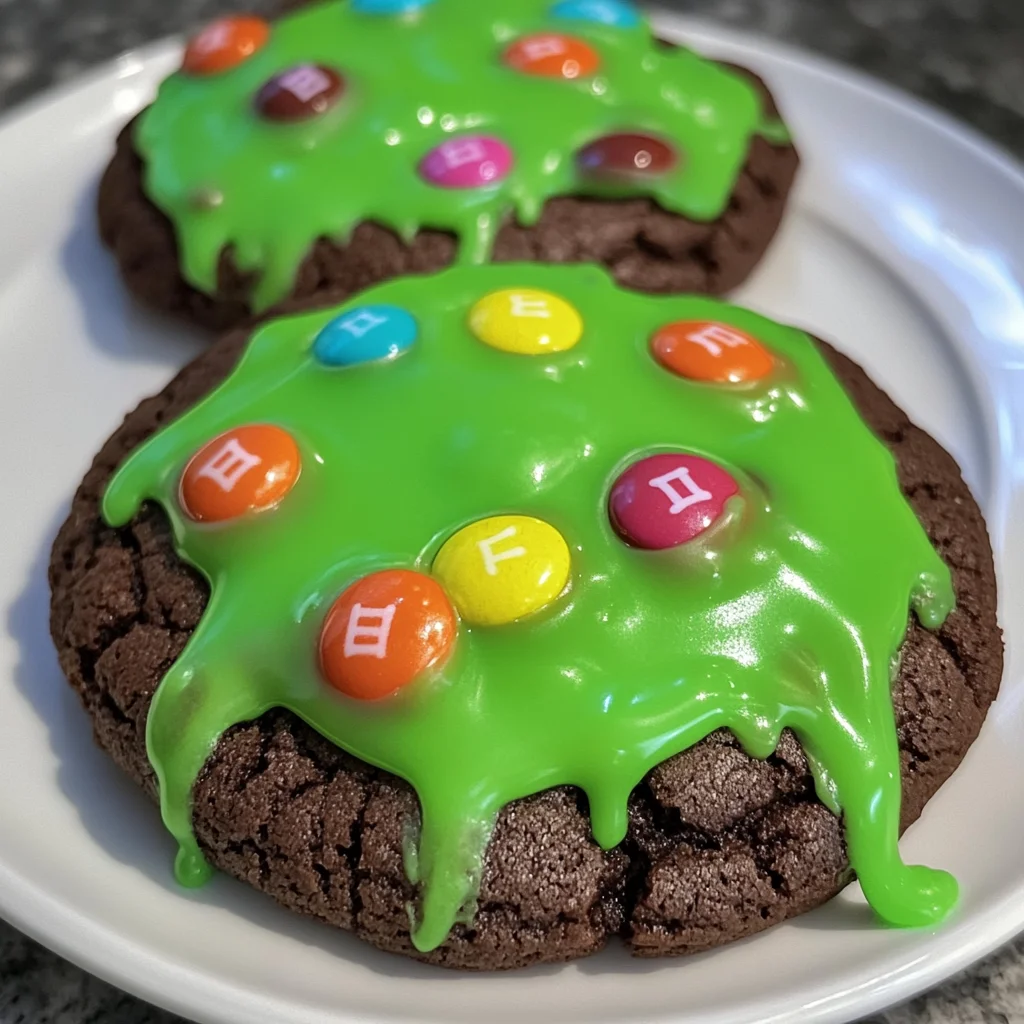
Slime-Filled Halloween Cookies are delightful spooky treats filled with a vibrant green cheesecake center, perfect for Halloween parties and celebrations.
Ingredients
- 4 ounces cream cheese, softened
- 2 cups confectioners sugar
- 1 ½ Tablespoons all-purpose flour
- 1 teaspoon vanilla extract
- neon green food coloring
- ½ cup salted butter, room temperature
- ½ cup light brown sugar, packed
- ½ cup granulated sugar
- 1 large egg, room temperature
- 1 Tablespoon milk
- 1 teaspoon baking soda
- 2 teaspoons vanilla extract
- ¼ cup dark chocolate cocoa powder or black
- black gel food coloring
- 1 ⅔ cups all-purpose flour
- Halloween sprinkles
Instructions
- In a medium mixing bowl, use an electric mixer to combine the cheesecake filling ingredients, adding enough food coloring to reach your desired shade of green.
- Line a baking sheet with parchment paper. Scoop out 1 ½ teaspoons of the filling and place it on the lined baking sheet. Repeat until all the filling has been scooped. Freeze for at least 2 hours.
- In a large bowl, use an electric mixer to beat together the butter, brown sugar, and granulated sugar until creamy and well-combined. Mix in the egg, milk, vanilla, and black food coloring.
- In a medium bowl, whisk to combine the baking soda, cocoa powder, and flour. Stir the dry ingredients into the wet ingredients until just combined. Do not overmix.
- Cover and chill the dough for at least 2 hours.
- Line 2 cookie sheets with parchment paper.
- Roll 1 Tablespoon of dough into a ball, flatten slightly, and place on a prepared baking sheet. Repeat until you have used half of the black dough.
- Place a cream cheese ball in the center of each.
- Roll and slightly flatten another 1 Tablespoon of cookie dough and place it on top of each cookie. Gently press the two layers of cookie dough together to seal the edges.
- Add sprinkles, gently pressing them into the top of the cookies.
- Chill for 30 minutes before baking.
- When ready to bake, preheat the oven to 350°F.
- Bake for 12-15 minutes. Allow the cookies to cool on the baking sheet for about 10 minutes before transferring to a cooling rack to cool fully.
Notes
- Ensure the cream cheese is softened for easy mixing.
- You can adjust the amount of food coloring for a brighter or darker green.
- For best results, chill the dough thoroughly to prevent spreading.
- Store the cookies in an airtight container to maintain freshness.
Nutrition
- Serving Size: 1 cookie
- Calories: 150
- Sugar: 12g
- Sodium: 120mg
- Fat: 7g
- Saturated Fat: 4g
- Unsaturated Fat: 2g
- Trans Fat: 0g
- Carbohydrates: 18g
- Fiber: 0g
- Protein: 2g
- Cholesterol: 20mg


