
Introduction to S’mores Sliders
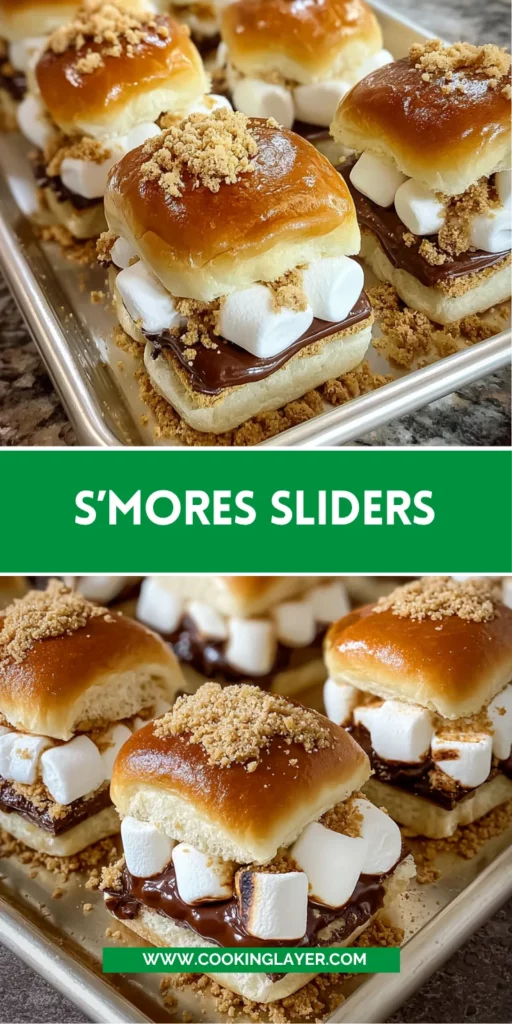
Ah, S’mores Sliders! They’ve become my little culinary treasure, a delightful twist on the classic campfire treat. Whenever I crave something sweet and quick, these sliders are my go-to solution. They come together effortlessly, combining tender slider buns with gooey chocolate and toasty marshmallows. It’s like bringing a summer campfire right into my kitchen. Plus, they’re great for impressing friends or satisfying a sugar craving after a busy day. If you’re a mom juggling schedules or a professional needing a sweet escape, this recipe will fit right into your life. Let’s dive into the scrumptious details!
Why You’ll Love This S’mores Sliders
S’mores Sliders make dessert a breeze. They’re quick to whip up, requiring just 25 minutes from prep to plate—perfect for busy nights. The combination of warm chocolate and toasted marshmallows wrapped in soft buns is simply irresistible. Plus, they evoke fond memories of summer nights around the campfire. It’s an easy and fun way to please the entire family, ensuring smiles all around with every gooey bite!
Ingredients for S’mores Sliders
To make these delightful S’mores Sliders, you’ll need a few simple ingredients that pack a punch. Here’s what you’ll need:
- Slider buns or dinner rolls: These are the foundation of your sliders. Soft and fluffy, they hold all that deliciousness together. You can swap these for gluten-free rolls if needed.
- Chocolate bars or chocolate chips: The star of the show! Use whatever type you love—milk chocolate for classic sweetness or dark chocolate for a rich twist.
- Large marshmallows or mini marshmallows: These bring that signature gooeyness. I prefer using large marshmallows for their stretchy texture, but mini ones work great too.
- Graham crackers: They add that delightful crunch and classic s’mores flavor. Consider crushing some into finer bits for an even spread.
- Melted butter: This acts as a glue and gives a golden finish to the sliders. You could substitute with coconut oil for a dairy-free option.
- Extra graham crackers: This is for the topping, adding even more texture. Feel free to sprinkle some cinnamon on top for a fun twist!
Exact quantities are listed at the bottom of this article for easy printing. Gather these ingredients, and let’s get ready for a treat that will transport you back to those cherished campfire days!

How to Make S’mores Sliders
Step 1: Preheat the Oven
First things first—let’s get that oven warmed up! Preheat to 350°F. While that’s happening, line a sheet pan with parchment paper or foil. This makes for easy cleanup later, which we all appreciate after a long day. Trust me, it’s worth this small step.
Step 2: Prepare the Buns
Now, take your slider buns and slice them in half. Set the tops aside for later. I like to place the bottoms on the sheet pan, evenly distributing all that rich chocolate goodness right on top. You can use either chocolate bars or chips, but make sure it covers the entire base for maximum indulgence!
Step 3: Add the Graham Crackers
Grab those graham crackers and crush them into small pieces. You want them to resemble coarse sand—a great texture for our sliders! Sprinkle the crushed graham crackers over the chocolate layer, ensuring every bite gets that delightful crunch we love so much.
Step 4: Toast the Marshmallows
Now it’s time for the marshmallows! Place them evenly over the graham cracker layer. This is where the magic happens. Pop the sheet pan into the oven for about 5-6 minutes. Keep a close eye; we want them toasted but not burnt. They should puff up and get a golden brown color.
Step 5: Assemble the Sliders
Once those marshmallows are toasty paradise, it’s assembly time! Gently place the slider tops over the marshmallows. Press them down lightly. This step helps seal in all that gooey goodness and keeps every layer intact when you pull them apart later.
Step 6: Butter and Top the Sliders
Yum, it’s butter time! Brush the tops of the sliders with warm melted butter. This gives them a lovely sheen and irresistible flavor. Next, crush up a couple of graham crackers and mix them with the remaining melted butter. Sprinkle this delicious mixture over the tops for an extra crunch!
Step 7: Final Baking
Slide your assembled S’mores Sliders back into the oven for another 4-5 minutes. We’re looking for those tops to turn a beautiful golden brown. That golden color brings warmth and a hint of crispiness to the already-soft buns!
Step 8: Serve and Enjoy
After baking, pull those sliders from the oven and let them cool for a few minutes. This is the hardest part—waiting! Once they’re ready, you can pull them apart or slice them gently to serve. Enjoy with a glass of milk for the ultimate sweet treat experience!
Tips for Success
- Don’t overfill the sliders; too much chocolate or marshmallows can make them messy.
- For extra flavor, add a pinch of sea salt on top before serving.
- Keep an eye on the marshmallows while toasting; they can go from perfect to burnt in seconds!
- Use stale graham crackers for a better crunch—they crush more easily!
- Feel free to customize toppings to suit your family’s tastes!
Equipment Needed
- Baking sheet: A standard size is perfect for holding all the sliders.
- Parchment paper or foil: This helps with easy cleanup and prevents sticking.
- Knife: For slicing the slider buns in half with ease.
- Silicone brush: Great for applying melted butter evenly.
- Bowl: Useful for mixing graham cracker topping. Any mixing bowl will do!
Variations
- Nutty Delight: Add chopped nuts like almonds or walnuts for a crunchy contrast. They pair beautifully with chocolate.
- Peanut Butter Bliss: Spread a layer of creamy peanut butter on the slider buns before adding chocolate for a delightful flavor boost.
- Fruit Fusion: Incorporate sliced strawberries or bananas alongside the marshmallows for a fruity twist.
- Dark Chocolate Indulgence: Swap out milk chocolate for dark chocolate for a richer flavor that’s sure to impress.
- Dairy-Free Option: Use dairy-free chocolate and coconut oil instead of butter for a delicious vegan-friendly treat.
Serving Suggestions for S’mores Sliders
- Milk: A cold glass of milk pairs perfectly for dunking and balancing the sweetness!
- Fresh Fruit: Serve with a side of fresh berries or sliced bananas for a refreshing contrast.
- Ice Cream: Add a scoop of vanilla or chocolate ice cream on the side for an over-the-top treat!
- Fancy Plating: Serve on a wooden board for a rustic vibe, adding a touch of charm.
- S’mores Dip: Complement with a s’mores dip for extra fun and indulgence!
FAQs about S’mores Sliders
Can I make S’mores Sliders ahead of time? Absolutely! You can prepare all the layers and assemble them in the morning. Just cover them and store in the fridge. Bake before serving for that fresh, gooey goodness!
What can I use instead of slider buns? If you don’t have slider buns, any soft bread will work. Dinner rolls, brioche buns, or even bagels can be fun alternatives!
Can I use different chocolate or toppings? For sure! Feel free to switch up the chocolate type to dark or even white chocolate. Also, toppings like crushed cookies or flavored nuts can elevate your S’mores Sliders!
Are these sliders easy to make with kids? Yes! Making S’mores Sliders can be a fantastic family activity. Let the kids help crush graham crackers or build their own sliders!
How should I store leftovers? If you happen to have any left, just place them in an airtight container. They can be stored in the fridge for up to three days. Reheat in the oven or microwave for enjoyment later!
Final Thoughts
Making S’mores Sliders is like bringing a piece of summer into your home, no campfire required! These delightful treats unify family, friends, and fun in one gooey bite. The simple steps make cooking enjoyable, even for the busiest of moms and professionals. I cherish the laughter during assembly and the smiles that follow each bite. It’s a recipe that not only satisfies your sweet tooth but also creates beautiful memories. So, gather your loved ones and whip up a batch. Trust me, you’ll all be reminiscing about those sweet moments for years to come!
Print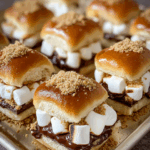
S’mores Sliders
- Prep Time: 10 minutes
- Cook Time: 15 minutes
- Total Time: 25 minutes
- Yield: 12 sliders 1x
- Category: Dessert
- Method: Baking
- Cuisine: American
- Diet: Vegetarian
Description
S’mores Sliders are a delightful twist on the classic campfire treat, combining slider buns with gooey chocolate, toasted marshmallows, and crunchy graham crackers for a sweet delight.
Ingredients
- 12 slider buns or dinner rolls
- 3 bars chocolate (100 gram bars or 1.5 cups chocolate chips)
- 20 large marshmallows or 1.5 cups mini marshmallows
- 6 graham crackers
- 3 tablespoons melted butter
- 2 graham crackers
Instructions
- Preheat oven to 350°F. Line a sheet pan with parchment paper or foil.
- Place the slider buns on the sheet pan and slice in half. Set the tops aside. Evenly distribute the chocolate on the bottoms of the buns.
- Crush 6 graham crackers into small bite-sized pieces and spread them evenly over the chocolate. Add an even layer of marshmallows on top.
- Place the sheet pan in the oven for 5-6 minutes, or until the marshmallows are lightly toasted. Remove from the oven.
- Position the slider bun tops over the toasted marshmallows, gently pressing them to secure in place.
- Use a silicone brush to apply melted butter over the slider tops. Crush 2 graham crackers and mix with the remaining melted butter. Sprinkle the mixture evenly over the slider tops.
- Return the sliders to the oven. Bake for 4-5 minutes or until the slider tops are lightly toasted.
- Let the sliders cool for 2-3 minutes. Pull apart or slice to serve and enjoy.
Notes
- For a richer chocolate flavor, use dark chocolate instead of milk chocolate.
- Feel free to adjust the number of marshmallows according to your preference for sweetness.
- Experiment with adding other toppings like nuts or peanut butter for a twist.
Nutrition
- Serving Size: 1 slider
- Calories: 200
- Sugar: 10g
- Sodium: 150mg
- Fat: 8g
- Saturated Fat: 4g
- Unsaturated Fat: 3g
- Trans Fat: 0g
- Carbohydrates: 29g
- Fiber: 1g
- Protein: 2g
- Cholesterol: 5mg


