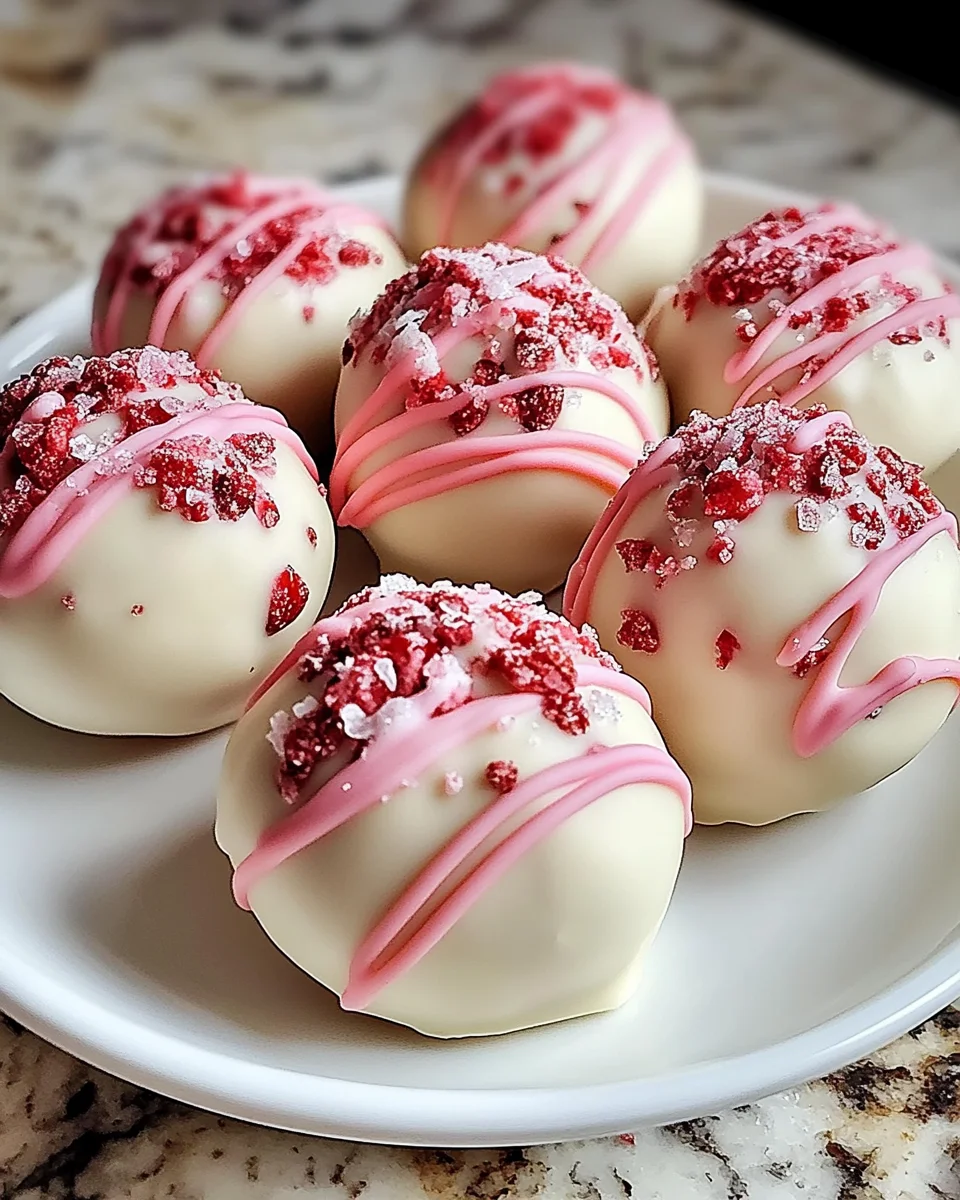
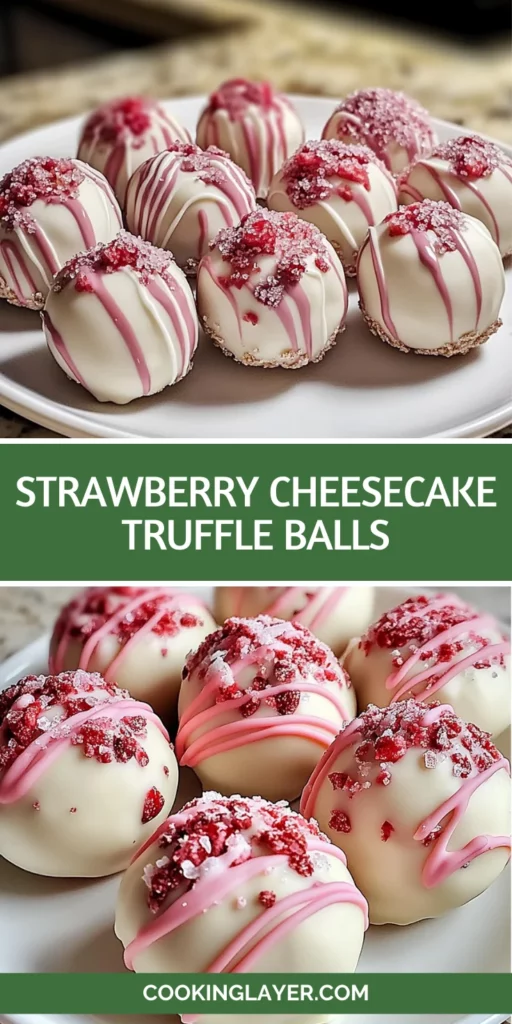
Introduction to Strawberry Cheesecake Truffle Balls
As a busy mom, I know how precious time can be, especially when it comes to whipping up something sweet. That’s why I absolutely adore these strawberry cheesecake truffle balls! They’re not just a treat; they’re a delightful escape from the everyday hustle. Imagine creamy, dreamy bites of strawberry cheesecake, all wrapped up in a luscious white chocolate coating. Perfect for any occasion, these truffles are sure to impress your loved ones without taking hours in the kitchen. Trust me, once you try them, you’ll want to make them again and again!
Why You’ll Love This Strawberry Cheesecake Truffle Balls
These strawberry cheesecake truffle balls are a game-changer for busy days. They come together in just an hour, making them a quick and easy dessert option. The creamy texture and sweet strawberry flavor will have everyone asking for seconds. Plus, they’re no-bake, so you can skip the oven and still impress your family and friends. Trust me, these little bites of joy will become a staple in your dessert repertoire!
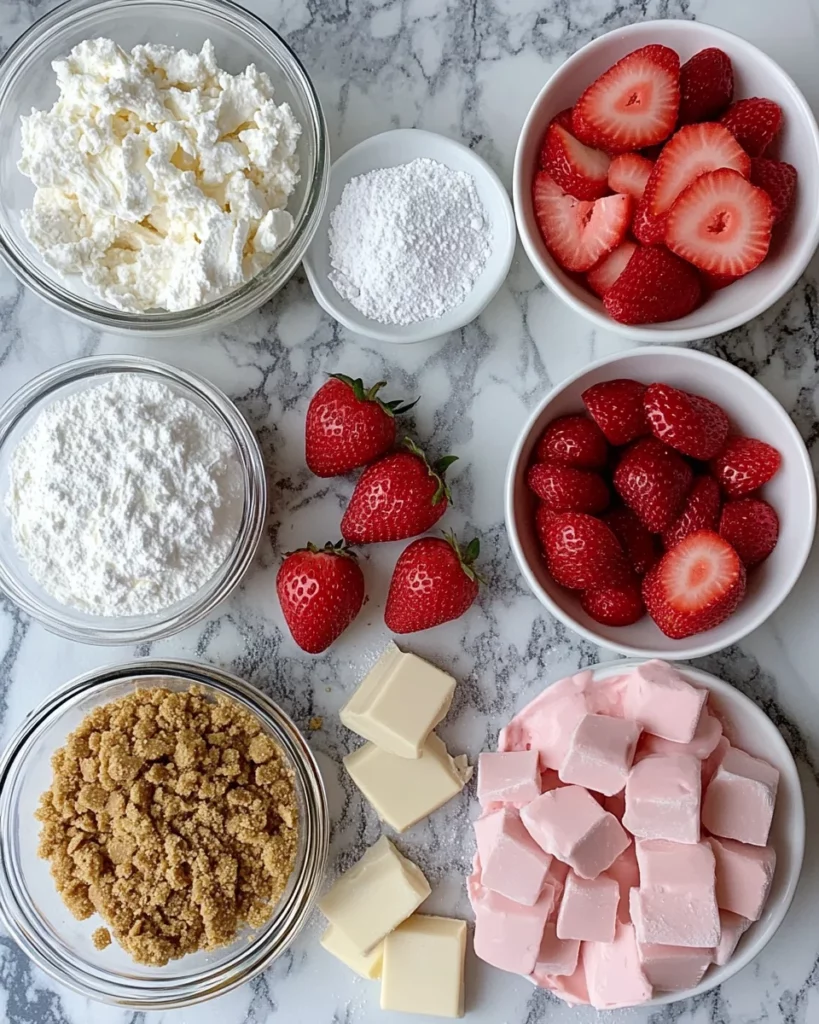
Ingredients for Strawberry Cheesecake Truffle Balls
Gathering the right ingredients is half the fun of making these strawberry cheesecake truffle balls! Here’s what you’ll need:
- Cream Cheese: This is the star of the show! Softened cream cheese gives the truffles their rich, creamy texture.
- Powdered Sugar: A touch of sweetness that balances the tanginess of the cream cheese. It also helps achieve that smooth consistency.
- Vanilla Extract: Just a splash adds warmth and depth to the flavor profile, making each bite even more delightful.
- Fresh Strawberries: The heart of this recipe! Use finely chopped or mashed strawberries for that fresh, fruity burst.
- Graham Cracker Crumbs: These provide a nod to traditional cheesecake crust, adding a bit of crunch and flavor.
- White Chocolate: Melted to coat the truffles, it adds a sweet, creamy layer that complements the strawberry cheesecake filling perfectly.
- Freeze-Dried Strawberries (optional): For an extra pop of flavor and color, sprinkle these on top. They’re a fun way to elevate your truffles!
For exact measurements, check the bottom of the article where you can find everything listed for easy printing. Feel free to get creative with your ingredients! You can swap in different fruits or even use flavored cream cheese for a unique twist.
How to Make Strawberry Cheesecake Truffle Balls
Step 1: Prepare the Cheesecake Mixture
Let’s kick things off by making the cheesecake mixture! In a medium-sized mixing bowl, beat the softened cream cheese until it’s smooth and creamy. I like to use an electric mixer for this, but a sturdy whisk works too if you’re feeling adventurous. Next, add in the powdered sugar and vanilla extract. Beat until everything is well combined and fluffy. Now comes the fun part! Gently fold in the finely chopped or mashed fresh strawberries along with the graham cracker crumbs. This step is crucial because it gives your truffles that classic cheesecake flavor. The mixture should be thick yet smooth, with little bursts of strawberry peeking through. Trust me, the aroma alone will have your mouth watering!
Step 2: Form the Truffle Balls
Now that your cheesecake mixture is ready, it’s time to roll up your sleeves! Use your hands or a small cookie scoop to form the mixture into 1-inch balls. I find that wetting my hands slightly helps prevent sticking. Place each truffle on a baking sheet lined with parchment paper. This makes cleanup a breeze! Once you’ve rolled all the truffles, pop them in the refrigerator for at least 30 minutes. This chilling time helps them firm up, making them easier to coat later. Plus, it builds anticipation for that first bite!
Step 3: Melt the White Chocolate
While your truffles are chilling, let’s melt the white chocolate. You can do this using a double boiler or the microwave. If you’re using a double boiler, fill the bottom pot with water and bring it to a simmer. Place the white chocolate in the top pot, stirring until it’s completely melted and smooth. If you prefer the microwave, heat the chocolate in a heatproof bowl in 20-second intervals, stirring in between. Be careful not to overheat it! You want it silky and ready to coat those delicious truffles.
Step 4: Coat the Truffles
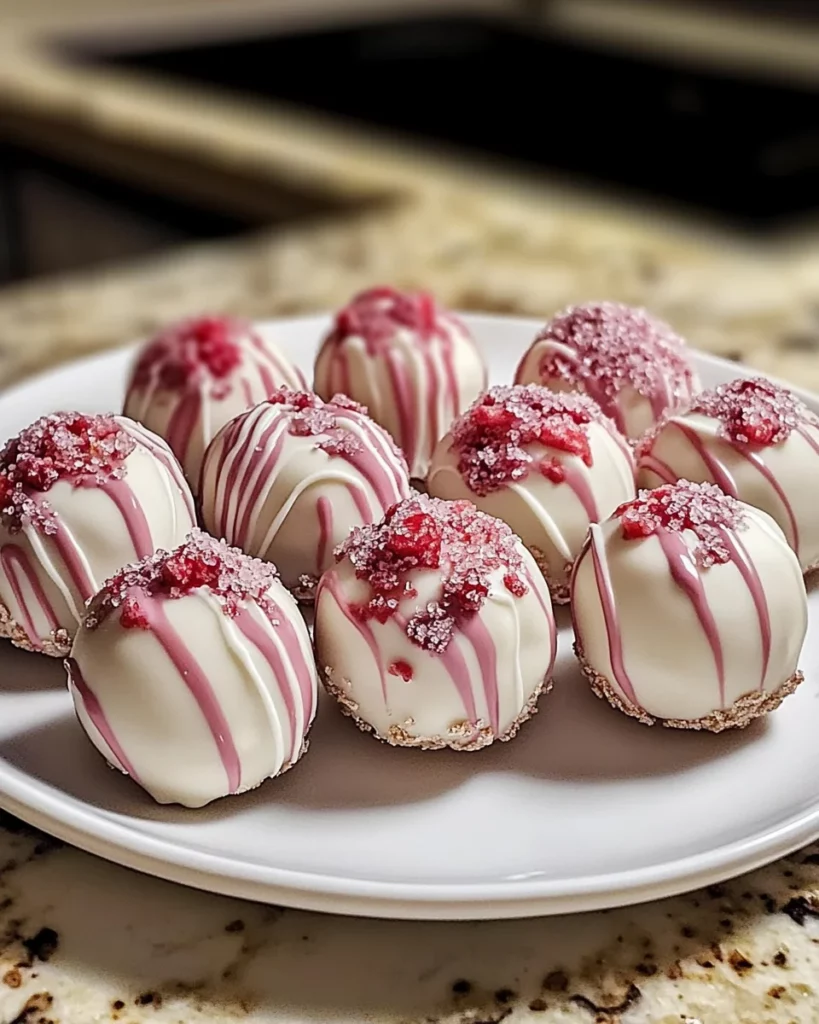
Once your truffles are firm and the chocolate is melted, it’s time for the fun part—coating! Using a fork, dip each truffle into the melted white chocolate, ensuring it’s fully covered. Let any excess chocolate drip off before placing it back on the parchment-lined baking sheet. This step is where the magic happens! The creamy white chocolate adds a beautiful finish and a sweet contrast to the tangy cheesecake filling. Don’t worry if they’re not perfect; they’ll still taste amazing!
Step 5: Add Finishing Touches
To make your truffles even more special, consider adding some crushed freeze-dried strawberries on top. After coating each truffle, sprinkle a little of the crushed strawberries while the chocolate is still wet. This not only adds a pop of color but also enhances the strawberry flavor. It’s like giving your truffles a little crown! Plus, it makes them look extra fancy for any gathering or celebration.
Step 6: Chill and Serve
After you’ve coated all the truffles and added those lovely finishing touches, it’s time to chill them again. Place the baking sheet back in the refrigerator for another 30 minutes. This helps the chocolate set perfectly. Once they’re ready, you can serve them right away or store them in an airtight container in the fridge. They’ll stay fresh for up to a week, but I doubt they’ll last that long! Enjoy these delightful strawberry cheesecake truffle balls at your next gathering or as a sweet treat for yourself!
Tips for Success
- Make sure your cream cheese is softened for easy mixing.
- Use high-quality white chocolate for the best flavor.
- Chill the truffles long enough to firm up before coating.
- Experiment with different fruits for unique flavor combinations.
- Keep your hands slightly wet when rolling to prevent sticking.
Equipment Needed
- Mixing Bowl: A medium-sized bowl works best; a large one can be used if you prefer.
- Electric Mixer or Whisk: An electric mixer speeds things up, but a whisk is great for a workout!
- Baking Sheet: Any flat surface will do; just line it with parchment paper.
- Cookie Scoop: This helps with uniform truffle sizes; a spoon can work too.
- Heatproof Bowl: For melting chocolate; a regular bowl can suffice if it’s microwave-safe.
Variations
- Chocolate Cheesecake Truffles: Swap out the strawberries for cocoa powder and add chocolate chips for a rich chocolate flavor.
- Peanut Butter Swirl: Mix in some creamy peanut butter with the cheesecake mixture for a nutty twist.
- Berry Medley: Use a mix of fresh berries like blueberries and raspberries for a colorful and flavorful truffle.
- Vegan Option: Substitute cream cheese with a vegan alternative and use dairy-free chocolate for a plant-based treat.
- Gluten-Free: Use gluten-free graham cracker crumbs to make these truffles suitable for gluten-sensitive friends.
Serving Suggestions
- Pair these truffle balls with a refreshing glass of iced tea or sparkling lemonade for a delightful contrast.
- Serve them on a beautiful platter, garnished with fresh strawberries for an elegant touch.
- For a fun twist, add a scoop of vanilla ice cream on the side.
FAQs about Strawberry Cheesecake Truffle Balls
Can I make these strawberry cheesecake truffle balls ahead of time?
Absolutely! These truffles can be made a day in advance. Just store them in an airtight container in the refrigerator. They’ll be just as delicious the next day!
What can I use instead of fresh strawberries?
If fresh strawberries aren’t available, you can use frozen strawberries that have been thawed and drained. Alternatively, try using other fruits like raspberries or blueberries for a different flavor twist!
How do I store leftover truffles?
Keep your leftover strawberry cheesecake truffle balls in an airtight container in the refrigerator. They’ll stay fresh for up to a week, but I doubt they’ll last that long!
Can I freeze these truffles?
Yes, you can freeze them! Just make sure they’re in a single layer on a baking sheet until frozen, then transfer them to an airtight container. They can be frozen for up to three months.
What’s the best way to serve these truffles?
Serve them chilled for the best flavor and texture. You can also garnish them with extra crushed freeze-dried strawberries or a drizzle of melted chocolate for a beautiful presentation!
Final Thoughts
Making strawberry cheesecake truffle balls is more than just a recipe; it’s a delightful experience that brings joy to both the cook and the lucky eaters. Each bite is a burst of creamy sweetness, reminiscent of summer days and family gatherings. I love how these truffles can turn an ordinary day into something special, whether it’s a simple dessert after dinner or a showstopper at a party. Plus, they’re so easy to whip up! I hope you find as much joy in making and sharing these treats as I do. Happy cooking!
Print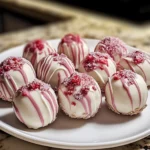
Strawberry cheesecake truffle balls that amaze every bite!
- Prep Time: 20 minutes
- Cook Time: 10 minutes
- Total Time: 1 hour
- Yield: 24 truffle balls 1x
- Category: Dessert
- Method: No-Bake
- Cuisine: American
- Diet: Vegetarian
Description
Delicious strawberry cheesecake truffle balls that are creamy, sweet, and perfect for any occasion.
Ingredients
- 8 oz (225g) cream cheese, softened
- 1/2 cup (60g) powdered sugar
- 1/2 tsp vanilla extract
- 1/4 cup (60g) fresh strawberries, finely chopped or mashed
- 1/2 cup (50g) graham cracker crumbs
- 8 oz (225g) white chocolate, melted
- 1/4 cup (25g) freeze-dried strawberries, crushed (optional, for extra flavor and decoration)
Instructions
- In a medium-sized mixing bowl, beat the softened cream cheese until smooth. Add the powdered sugar and vanilla extract, and beat until fully combined. Gently fold in the chopped or mashed strawberries and graham cracker crumbs.
- Use your hands or a small cookie scoop to roll the cheesecake mixture into 1-inch balls. Place the truffles on a baking sheet lined with parchment paper. Refrigerate for at least 30 minutes to firm up.
- Melt the white chocolate in a heatproof bowl over a double boiler or in the microwave in 20-second intervals, stirring between each, until smooth and completely melted.
- Once the truffles are firm, dip each one into the melted white chocolate, coating them evenly. Use a fork to lift the truffle out and allow any excess chocolate to drip off.
- If desired, sprinkle the crushed freeze-dried strawberries on top of the coated truffles for extra color and flavor.
- Place the coated truffles back onto the parchment-lined baking sheet and refrigerate them for another 30 minutes to set the chocolate coating.
- Once the chocolate has hardened, your Strawberry Cheesecake Truffle Balls are ready to serve! Keep them stored in an airtight container in the refrigerator for up to a week.
Notes
- For best results, use high-quality white chocolate for coating.
- These truffles can be made a day in advance and stored in the refrigerator.
- Feel free to experiment with different flavors of fruit for variations.
Nutrition
- Serving Size: 1 truffle ball
- Calories: 120
- Sugar: 10g
- Sodium: 50mg
- Fat: 7g
- Saturated Fat: 4g
- Unsaturated Fat: 2g
- Trans Fat: 0g
- Carbohydrates: 12g
- Fiber: 0g
- Protein: 1g
- Cholesterol: 15mg


