The Dessert You Never Knew You Needed
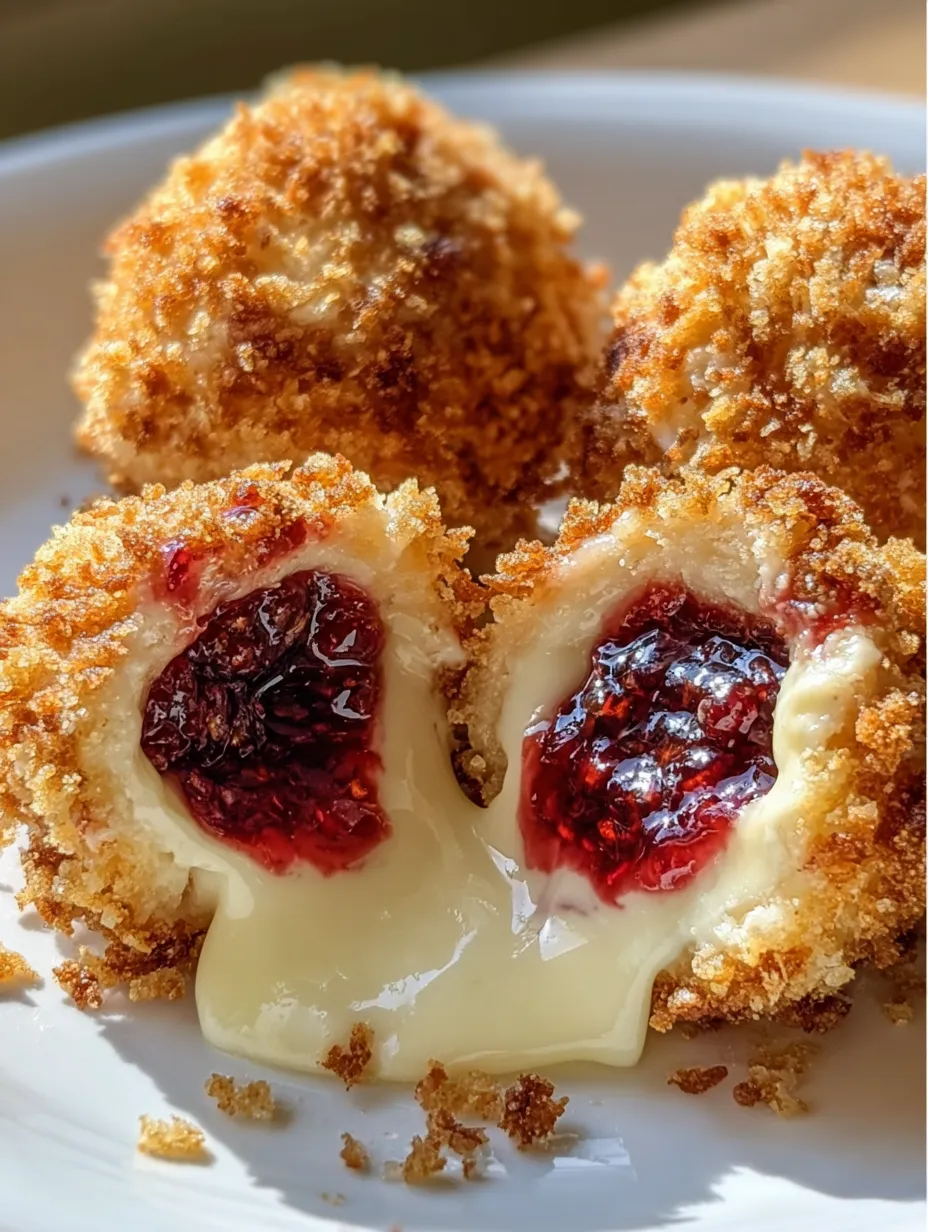
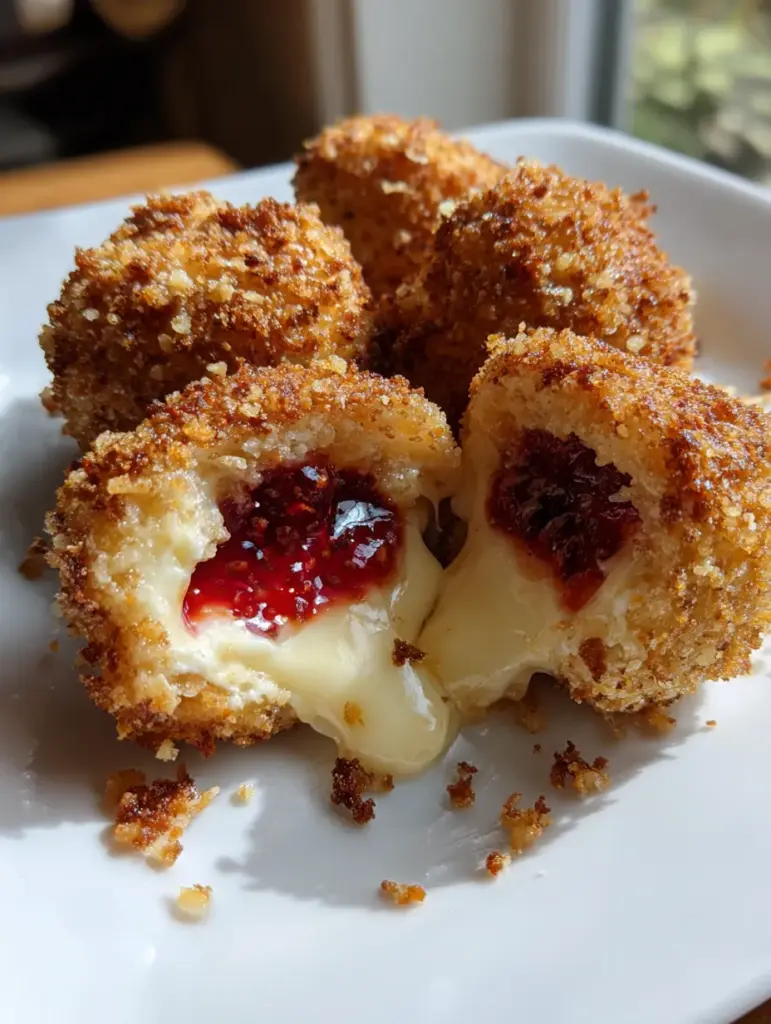
Imagine biting into a soft, creamy cheesecake ball that instantly melts in your mouth, revealing a sweet center of raspberry or strawberry jam, all wrapped in a buttery, golden Oreo crunch. That’s exactly what these Strawberry (or Raspberry) Cheesecake Crunch Bites deliver—an indulgent experience in every bite.
Whether you’re hosting a party, bringing dessert to a potluck, or just craving something sweet after dinner, these no-bake cheesecake bites will blow your mind. They’re rich but not heavy, fruity but not overly sweet, and crunchy on the outside yet creamy and gooey in the center—pretty much dessert perfection.
What Are Cheesecake Crunch Bites?
Let’s break it down: these aren’t your typical cheesecake slices or truffles. Cheesecake Crunch Bites are chilled, bite-sized treats made from whipped cream cheese and sugar, stuffed with a fruity jam center (strawberry or raspberry), and coated with a toasted crushed Golden Oreo crust.
And yes, they’re as addictive as they sound.
Unlike baked cheesecakes that require time, precision, and oven space, these are completely no-bake. That means less effort, less mess, and more deliciousness in less time.
Why This Recipe Is Going Viral
There’s something so satisfying about creamy and crunchy textures combined, especially when there’s a surprise jammy center oozing out like lava cake. Visually? Stunning. Flavor-wise? Insane.
Here’s why people can’t stop making them:
- They require no baking
- You can prep them in under an hour
- They look like fancy bakery treats
- They’re customizable with different jams or coatings
- They’re freezer-friendly and easy to store
You’ve probably seen these making the rounds on TikTok and Instagram—those crisp golden balls with a luscious berry center oozing out when cut open. This recipe matches that viral look exactly. Let’s dive into what makes it so amazing.
Essential Ingredients Breakdown
Let’s go over what you need to bring these dreamy bites to life. Don’t worry—most of this stuff is probably already in your pantry.
Cheesecake Filling Must-Haves
- 16 oz cream cheese – Softened to room temperature. This is the base. Don’t skimp on quality here.
- ½ cup granulated sugar – Adds sweetness and smoothness.
- 1 tsp vanilla extract – Adds depth and balances the tanginess.
- ½ cup heavy cream (cold) – Whipped to stiff peaks to give that airy, melt-in-your-mouth texture.
This combination gives you a velvety filling that stays rich but not too dense. Pro tip: Make sure the cream cheese is soft before mixing to avoid lumps.
Jam Center Options
Here’s where you can get creative.
- ½–1 cup strawberry or raspberry jam
- Strawberry jam: Sweeter, fruitier, and classic.
- Raspberry jam: A little tart, seedy, and sophisticated.
Both give that gorgeous red lava look when you cut into the bite. Based on the image you shared, raspberry jam seems to be the one used. The seeds and deep ruby color? That’s a raspberry giveaway.
Crunch Coating Choices
- 2 cups Golden Oreos, crushed
- 3 tbsp unsalted butter, melted
- ½ cup finely crushed Golden Oreos (optional) – For extra coating layer
Golden Oreos give a sweet, vanilla cookie crunch that tastes like graham cracker crumbs on steroids. Toasting them in butter takes things up a notch—adds flavor and gives a deeper golden color, just like in the photo.
Tools You’ll Need in Your Kitchen
Nothing too fancy here:
- Hand mixer or stand mixer
- Mixing bowls
- Cookie scoop or spoon
- Spatula
- Freezer-safe tray
- Skillet or pan (for toasting crumbs)
- Parchment paper
Step-by-Step Instructions
Now let’s get into the fun part: how to make these beauties. Here’s the full breakdown:
Step 1: Making the Cheesecake Filling
- In a mixing bowl, beat the softened cream cheese and sugar together until completely smooth. No lumps allowed.
- Add vanilla extract and mix again until incorporated.
- In a separate bowl, whip the cold heavy cream until stiff peaks form.
- Gently fold the whipped cream into the cream cheese mixture. You want it light, not deflated.
Important Tip: Once fully mixed, pop the bowl into the freezer for 20–25 minutes. This will help firm up the mixture, making it easier to shape later.
Step 2: Preparing the Crunchy Golden Coating
- Crush the Golden Oreos (cream removed) using a food processor or by smashing them in a ziplock bag.
- Melt the butter and mix it with the crushed Oreos until they resemble wet sand.
- Toast the mixture in a dry pan for 2–3 minutes until lightly golden and aromatic.
- Spread it on a plate to cool completely.
Optional: Use the extra ½ cup of finely crushed Oreos for a second round of coating later.
Step 3: Building the Bites
- Once the cheesecake filling is chilled, use a cookie scoop or spoon to scoop out a ball.
- Flatten it slightly in your palm.
- Add about ½ tsp of jam into the center.
- Carefully wrap the filling around the jam to seal it completely and form into a smooth ball.
Yes, this can get messy. A little jam might leak, but that’s okay! Just reseal the ball and keep going.
Step 4: Rolling and Coating Like a Pro
- Roll each sealed ball in the cooled Golden Oreo coating.
- Press gently to help the coating stick and give that rough crunchy surface, like in the picture.
- For extra crunch, roll them again in the finely crushed Oreos.
- Place each coated bite on a parchment-lined tray.
- Add a small dollop of jam on top for that pop of color.
Refrigerate for at least 1–2 hours before serving. You can also chill overnight.
Jam Tips: Strawberry vs. Raspberry
Let’s talk flavor choices. You’re free to use either jam, but based on the image provided, raspberry jam clearly wins here. Why?
- Texture: Raspberry jam often includes seeds, giving it that rustic, “real fruit” vibe that pops when you cut open the bite.
- Color: Raspberry jam has a deeper, jewel-toned red that looks incredible against the pale cheesecake center.
- Flavor: Raspberry brings a perfect balance of tart and sweet, which cuts through the richness of the cream cheese. Strawberry is sweeter and more mellow.
Verdict: Go raspberry for drama and flavor contrast. Go strawberry if you want something more traditional and crowd-pleasing. Either way, you can’t go wrong.
How to Get the Perfect Texture Every Time
Texture is everything when it comes to these bites—smooth, airy filling, juicy jam, and crispy coating. Here’s how to nail it:
- Don’t overmix the cream cheese or it can become too runny.
- Whip the cream to stiff peaks, not soft ones. This keeps the filling firm and scoopable.
- Chill long enough – The freezer step firms things up so your bites hold their shape.
- Cool the Oreo crumbs completely before rolling—hot crumbs will melt the filling.
Pro Tip: If your bites feel too soft after assembly, freeze them for 10 minutes before serving. This helps them stay intact and taste even more like frozen cheesecake truffles.
Print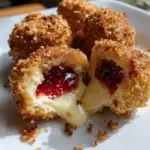
Strawberry (or Raspberry) Cheesecake Crunch Bites
- Prep Time: 15 minutes
- Total Time: ~1 hour 30 minutes
- Category: No-Bake Desserts | Cheesecake Bites | Party Treats
Description
🍓✨ Creamy, jam-filled, no-bake cheesecake bites rolled in crunchy Golden Oreo crumbs! These are rich, smooth, fruity, and absolutely irresistible. Perfect for parties, holidays, or anytime sweet cravings hit! 💕🎉
Ingredients
Cheesecake Filling:
16 oz cream cheese, softened
½ cup granulated sugar
1 tsp vanilla extract
½ cup heavy cream, cold
Jam Center:
½–1 cup strawberry or raspberry jam
Crunch Coating:
2 cups Golden Oreos, crushed
3 tbsp unsalted butter, melted
½ cup extra finely crushed Golden Oreos (optional, for extra crunch)
Instructions
Make the cheesecake base 🍰 (⏱️ 5 minutes)
Beat the cream cheese and sugar until smooth and creamy. Mix in the vanilla.Whip the cream 🥄 (⏱️ 3 minutes)
Whip the cold heavy cream to stiff peaks, then gently fold it into the cream cheese mixture.Chill the filling ❄️ (⏱️ 20–25 minutes)
Freeze the cheesecake mixture briefly to firm it up for shaping.Prepare the crunch coating 🍪 (⏱️ 5 minutes)
Combine crushed Golden Oreos with melted butter. Toast lightly in a pan for 2–3 minutes until fragrant and golden. Let cool completely.Shape the bites 🎯 (⏱️ 10–12 minutes)
Scoop the chilled cheesecake mixture, create a small indentation, and fill with jam. Wrap the cheesecake mixture around the jam to seal it into a ball.Coat the bites ✨ (⏱️ 3 minutes)
Roll each ball in the cooled Golden Oreo crunch mixture until fully covered.Finish and chill ❄️ (⏱️ 1–2 hours)
Add a tiny dollop of jam on top for decoration. Refrigerate until firm and set.
Notes
Creamy no-bake cheesecake centers with a fruity jam surprise inside.
Golden Oreo crunch coating gives the perfect texture contrast.
Works with strawberry, raspberry, or any berry jam you like.
Best served chilled to keep the bites firm, creamy, and easy to handle.
Great for holiday platters, parties, or fridge-friendly make-ahead treats.
Nutrition
- Serving Size: 16–20 bites
Can You Freeze These? (Yes, Here’s How!)
Absolutely! These cheesecake bites freeze beautifully. In fact, serving them slightly frozen adds a whole new texture—think frozen cheesecake meets ice cream bonbons.
To Freeze:
- Place bites on a baking sheet lined with parchment.
- Freeze for 2–3 hours until solid.
- Transfer to a sealed container or ziplock bag.
- They’ll keep for up to 1 month.
To Serve Frozen:
- Let them sit at room temp for 5–10 minutes before eating for the perfect creamy interior with a frozen crunch.
Make It Fancy: Plating and Presentation Ideas
Want to impress guests or upgrade your dessert game?
Try these ideas:
- Mini cupcake liners – Place each bite in a liner for a clean, professional look.
- Drizzle with white chocolate – Adds elegance and extra sweetness.
- Top with a mint leaf – For a fresh, color-contrasting garnish.
- Serve with a spoonful of jam on the side – Makes it look like plated restaurant dessert.
You can even skewer them with cocktail sticks and serve as party bites!
Similar recipes :
No-Bake Peppermint Cheesecake Bites Recipe: The Ultimate Festive Treat You’ll Crave All Winter Long 🎄❄️
🎄 Christmas Red Velvet Cheesecake Bites (Cheesecake-Filled Cake Balls)
Tips for Storing Leftovers
Let’s be real—you probably won’t have any leftovers. But if you do, here’s how to store them:
- Fridge: Store in an airtight container for up to 5 days.
- Freezer: See freezing instructions above. They taste great straight from the freezer with a slight thaw.
- Avoid heat/humidity: These will soften and lose their texture if not stored properly.
Pro Tip: Layer parchment paper between stacked bites to keep them from sticking together.
Easy Ingredient Swaps and Variations
Want to change it up? You totally can. Here are some fun variations:
- Use chocolate Oreos instead of Golden Oreos for a cookies-and-cream version.
- Swap in Nutella instead of jam for a chocolate-hazelnut center.
- Try lemon curd for a bright, citrusy twist.
- Use flavored cream cheese like strawberry or mixed berry for extra fruity flavor.
- Add mini chocolate chips to the cheesecake filling for added crunch.
The base recipe is super flexible, so don’t be afraid to get creative.
Making This Recipe Gluten-Free
It’s easier than you think!
- Swap the Golden Oreos for gluten-free vanilla cookies (many brands exist now).
- Check the jam label to ensure it’s gluten-free (most are, but better safe than sorry).
- All other ingredients are naturally gluten-free.
Just like that, you’ve got a dessert that everyone can enjoy!
What Pairs Well With These Cheesecake Bites
These bites are delicious on their own, but here’s what makes them even better:
- Coffee or espresso – The creaminess + bitterness = magic.
- Glass of bubbly – Like prosecco or champagne for special occasions.
- Berry compote drizzle – For extra berry overload.
- Vanilla bean ice cream – Serve with a scoop for an indulgent dessert plate.
Or keep it casual and serve with a tall glass of milk—either way, they’re a hit.
Final Thoughts: Dessert Goals Achieved
Let’s wrap it up: Strawberry (or Raspberry) Cheesecake Crunch Bites are the no-bake, no-stress dessert you didn’t know you needed in your life. They’re creamy, crunchy, fruity, and full of texture—basically, everything you want in a sweet treat.
And the best part? You can whip them up in under an hour with ingredients you probably already have. No oven. No water bath. No springform pans. Just you, a spoon, and pure joy in every bite.
So next time you’re in the mood for something sweet (or need to wow your friends at a party), remember this recipe. Your taste buds will thank you.
You may also like :
No-Bake Christmas Cheesecake Bites: The Ultimate Festive Holiday Treat
Strawberry Crunch Cheesecake Bites — Creamy, Crunchy, and Totally Addictive
FAQs
1. Can I use low-fat cream cheese?
Yes, but the texture will be slightly less rich and creamy. Full-fat cream cheese gives the best results.
2. How long do they last in the fridge?
They’ll stay fresh for up to 5 days when stored in an airtight container in the refrigerator.
3. Can I make these dairy-free?
Yes! Use dairy-free cream cheese and coconut whipped cream. They might be a little softer, but still delicious.
4. What if my bites aren’t holding shape?
Pop them in the freezer for 10 minutes before coating. That firms up the filling and makes rolling easier.
5. Can I make these ahead of time?
Totally. You can make and chill them a day or two ahead, or even freeze them a week in advance.