Introduction to Thumbprint Heart Cookies
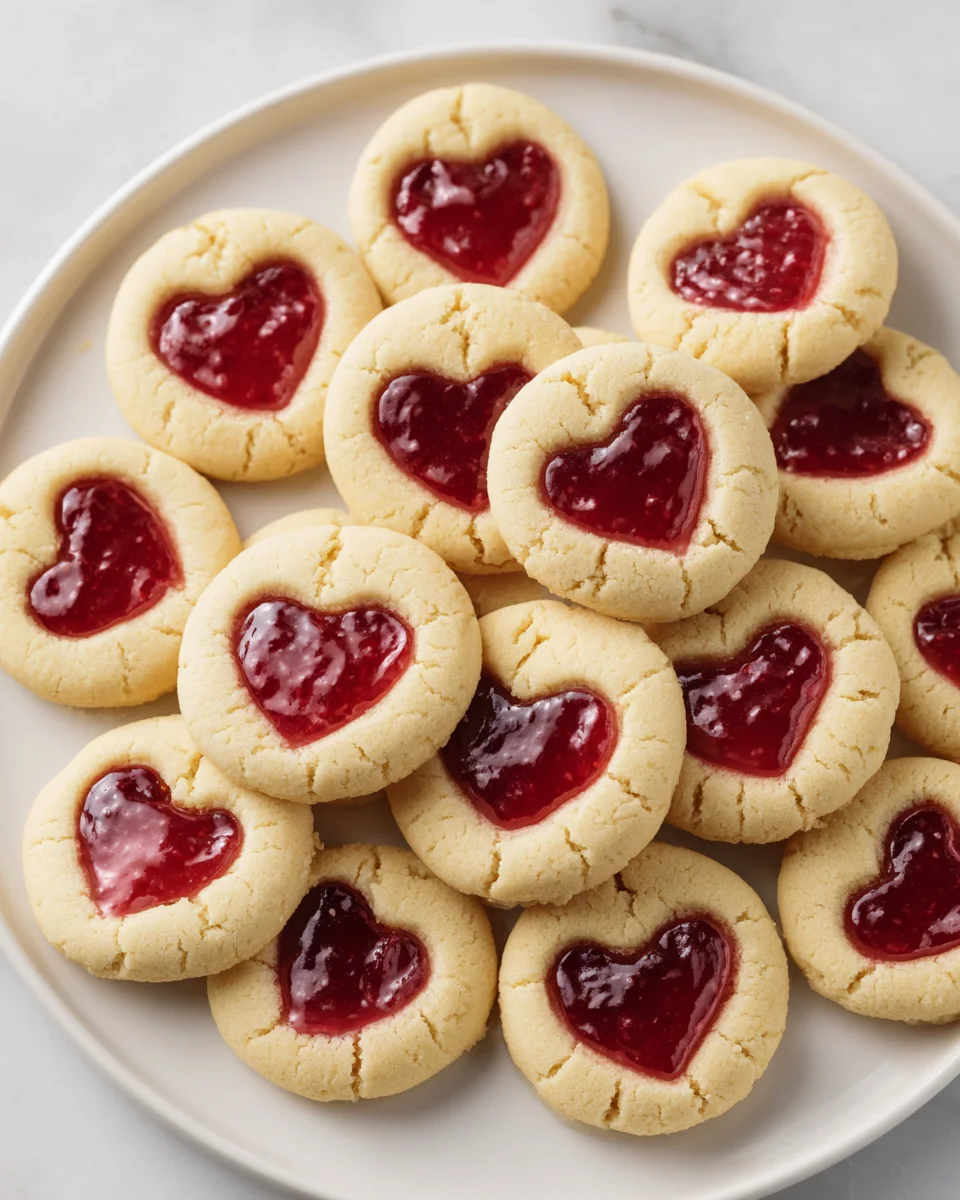
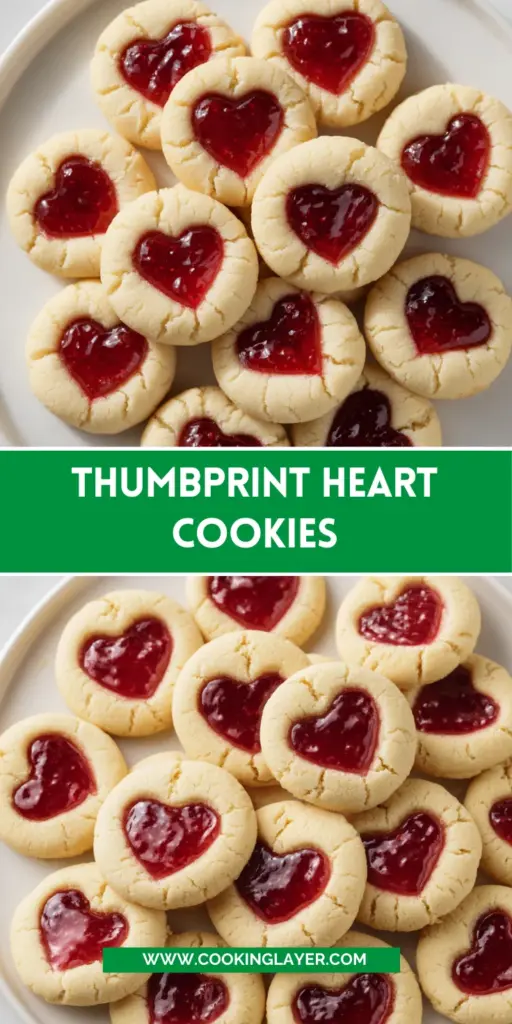
I totally understand the hustle of everyday life. That’s why I love making Thumbprint Heart Cookies. They’re not just adorable; they’re a delightful treat that can brighten anyone’s day! These buttery cookies, with their sweet jam filling, are perfect for spreading love on Valentine’s Day or any occasion you want to celebrate. Plus, they come together quickly, so you can whip them up even on the tightest schedule! So grab your apron, and let’s create a little sweetness together. Your loved ones will appreciate every heart-shaped bite!
Why You’ll Love This Thumbprint Heart Cookies
These Thumbprint Heart Cookies are a delightful combination of ease and taste, making them a go-to for busy days. You’ll love how quickly they come together, requiring just a few simple ingredients. The buttery flavor melts in your mouth, while the jam gives each cookie a fruity surprise. Whether for a special occasion or a sweet treat after dinner, these cookies make life a little sweeter, one heart at a time.
Ingredients for Thumbprint Heart Cookies
To create these sweet Thumbprint Heart Cookies, you’ll need a handful of simple ingredients, each playing a vital role in achieving that delightful buttery taste and tender texture.
- Egg: This adds richness and helps bind the ingredients together, ensuring your cookies hold their shape.
- Butter: Softened butter is key for that melt-in-your-mouth texture. It brings a creamy, luscious flavor to the cookies.
- Light Brown Sugar: Using light brown sugar adds a hint of caramel flavor, making your cookies more delectable.
- All-Purpose Flour: This forms the structure of your cookies. Too much flour can make them dense, so handle it gently.
- Salt: Just a pinch of salt enhances the overall flavor, balancing the sweetness perfectly.
- Vanilla Extract: A splash of vanilla gives depth to the cookies, enriching their flavor profile.
- Jam: The star of the show! You can choose your favorite flavor—raspberry, strawberry, or cherry—and it will add a sweet and fruity burst to each cookie.
For those looking to experiment, you might try substituting unsalted butter in place of regular butter to control sodium levels. If you have dietary restrictions, consider using a gluten-free flour blend to make these cookies gluten-free. For exact measurements, check the bottom of the article where you’ll find the full recipe available for printing!
How to Make Thumbprint Heart Cookies
Step 1: Preheat Your Oven
Before doing anything else, preheat your oven to 350 °F (175 °C). This important step ensures that your Thumbprint Heart Cookies bake evenly. While the oven heats up, you can focus on preparing your cookie dough. Who doesn’t love multitasking in the kitchen?
Step 2: Cream Butter and Sugar
In a large mixing bowl, cream together the softened butter and light brown sugar until it’s fluffy and pale in color. This should take about three minutes. It’s crucial for achieving that melt-in-your-mouth texture. Don’t rush this step; the air whipped in gives your cookies the perfect bite!
Step 3: Add Egg and Vanilla
Next, add the egg and vanilla extract to the creamed mixture. Blend everything together until smooth and well combined. This magical duo adds richness and flavor, making every cookie irresistible. Trust me, this is where it all starts to come together!
Step 4: Combine Dry Ingredients
In another bowl, whisk together the all-purpose flour and salt. Gradually add this dry mixture into your wet ingredients. Mix gently until everything is just combined. Be careful not to overwork the dough! We want our Thumbprint Heart Cookies tender and light.
Step 5: Form the Cookies
With your dough ready, it’s time to form the cookies. Scoop about one tablespoon of dough and roll it into a ball between your hands. Place the dough balls onto a lined baking sheet, leaving enough space between them. You’ll want them to spread just enough while baking for that heart shape!
Step 6: Create Indentations
To create the signature thumbprint shape, gently press your finger or the back of a spoon into the center of each dough ball. The indentation should be deep enough to hold your chosen jam. Don’t worry, they will puff up in the oven and retain that adorable heart shape!
Step 7: Fill with Jam
Now comes the fun part—filling those cute indents with jam! Use a small spoon to carefully place your favorite jam in each indentation. Be cautious not to overfill them, or your jam might bubble over during baking, stealing away some of that sweet goodness.
Step 8: Bake the Cookies
Pop your baking sheet into the preheated oven and bake the cookies for about 10-12 minutes. Keep an eye on them; the edges should be lightly golden, and the centers will look slightly soft. Your kitchen is about to fill with an irresistible buttery aroma!
Step 9: Cool and Serve
Once your cookies are perfectly baked, take them out and let them cool on the sheet for a few minutes. Then transfer them to a wire rack to cool completely. This helps them maintain that delicious chewy texture we all love. Serve them warm, or store them for later to enjoy!
Tips for Success
- Make sure your butter is at room temperature for optimal creaming with sugar.
- Don’t skimp on the chilling time if your dough feels too soft; it helps with shaping.
- Experiment with different jam flavors for unique twists on the recipe.
- Use parchment paper to prevent sticking, ensuring easy cleanup.
- Store cookies in an airtight container to maintain freshness.
Equipment Needed
- Mixing Bowl: A large bowl for mixing; any size will do, but a sturdy one is best.
- Electric Mixer: A hand mixer or stand mixer makes creaming easier, but a whisk works too!
- Baking Sheet: A standard baking sheet lined with parchment paper for easy removal.
- Wire Rack: Essential for cooling; you can substitute with a plate if needed.
- Spoon: Use a tablespoon for accurate dough scooping and a measuring spoon for jam filling.
Variations
- Try using almond flour for a nutty flavor and gluten-free option.
- For a chocolate twist, mix in cocoa powder with the dry ingredients!
- Swap out traditional jam for lemon curd for a zesty surprise.
- Mix in some chopped nuts or chocolate chips for added texture.
- For a more festive look, drizzle melted chocolate over cooled cookies!
Serving Suggestions for Thumbprint Heart Cookies
- Pair these delightful cookies with a hot cup of tea or coffee for a cozy treat.
- Serve them on a pretty dessert platter, perhaps with fresh strawberries or raspberries for a pop of color.
- For a festive touch, sprinkle some powdered sugar on top before serving.
- They also make perfect gifts when packaged in decorative boxes!
FAQs about Thumbprint Heart Cookies
As I’ve baked my fair share of Thumbprint Heart Cookies, I’ve gathered a few commonly asked questions. I hope these answers help you navigate your own cookie-making adventure!
Can I use any type of jam for the filling?
Absolutely! Feel free to experiment with your favorite jams or preserves. Raspberry, strawberry, and cherry all work wonderfully. Each one adds its unique burst of flavor!
How do I store Thumbprint Heart Cookies?
Store your cookies in an airtight container at room temperature. They’ll stay fresh for several days. If you want to prolong their life, consider freezing them!
Can I make the dough ahead of time?
Yes! You can prepare the dough a day in advance. Just wrap it well in plastic wrap and refrigerate. It’ll be easier to shape after chilling.
What can I do if my dough is too sticky?
If your dough feels sticky, don’t panic! Chill it in the refrigerator for about 15-30 minutes. This will help it firm up and make it easier to work with.
Can I make these cookies gluten-free?
Of course! Simply substitute all-purpose flour with a gluten-free flour blend. The cookies may have a slightly different texture but will still be delicious!
Final Thoughts
Baking Thumbprint Heart Cookies is not just about creating a delicious treat; it’s about nurturing connections with those we love. With each heart-shaped cookie, you’re sharing warmth and caring, making every occasion a little sweeter. The joy of seeing your family’s faces light up with delight is simply priceless. Plus, they’re fun to prepare, letting you unleash your creativity in the kitchen. Whether you’re celebrating Valentine’s Day or just a regular Tuesday, these cookies bring smiles and happiness to the table. So, gather the ingredients and start baking your love into every bite!
Print
Thumbprint Heart Cookies
- Prep Time: 20 minutes
- Cook Time: 12 minutes
- Total Time: 32 minutes
- Yield: ~24 cookies
- Category: Dessert
- Method: Baking
- Cuisine: American
- Diet: Vegetarian
Description
Delicious buttery cookies shaped like hearts, filled with jam, perfect for Valentine’s Day or any sweet occasion.
Ingredients
- 1 egg
- 3/4 cup butter (about 170 g), softened
- 1/2 cup light brown sugar, lightly packed
- 1 1/2 cups all-purpose flour
- 1/4 teaspoon salt
- 1/2 teaspoon vanilla extract
- ~1/4 cup jam of your choice (raspberry, strawberry, cherry…) for filling
Instructions
- Preheat your oven to 175 °C (350 °F).
- In a large bowl, cream the softened butter with the brown sugar until light and fluffy.
- Add the egg and vanilla extract, mixing well.
- Incorporate the flour and salt until the dough is well combined but not overworked.
- Form dough balls (about 1 tablespoon each) and place them on a baking sheet lined with parchment paper.
- Using your finger or the back of a spoon, make a small indentation in the center of each ball.
- Fill each indentation with a little jam.
- Bake for 10-12 minutes (the edges should be lightly golden).
- Let cool for a few minutes before transferring to a wire rack to cool completely.
Notes
- These cookies can be stored in an airtight container for several days.
- You can use any jam flavor you prefer.
Nutrition
- Serving Size: 1 cookie
- Calories: 110
- Sugar: 6g
- Sodium: 50mg
- Fat: 6g
- Saturated Fat: 4g
- Unsaturated Fat: 2g
- Trans Fat: 0g
- Carbohydrates: 12g
- Fiber: 0g
- Protein: 1g
- Cholesterol: 15mg