Introduction to Witch Hat Halloween Cookies
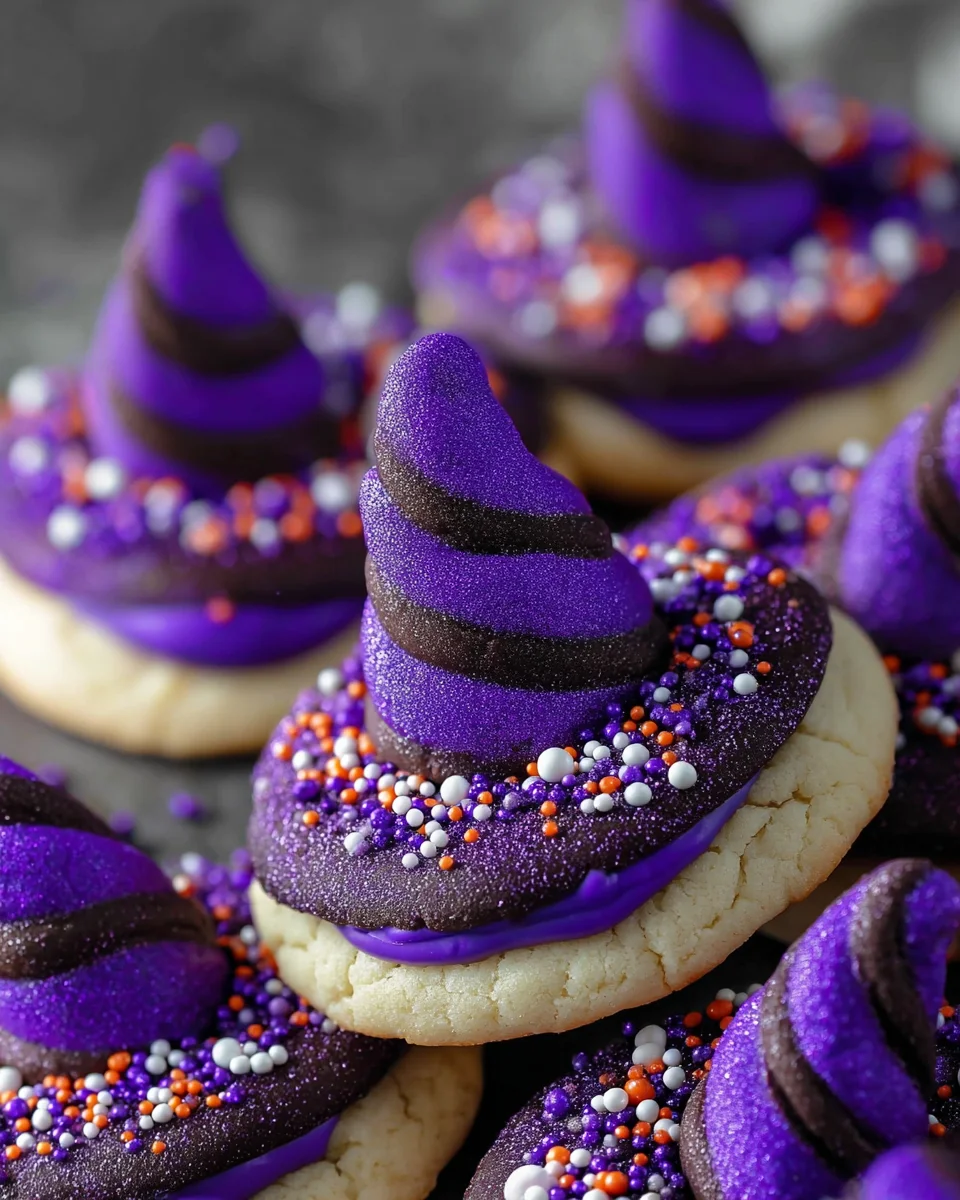
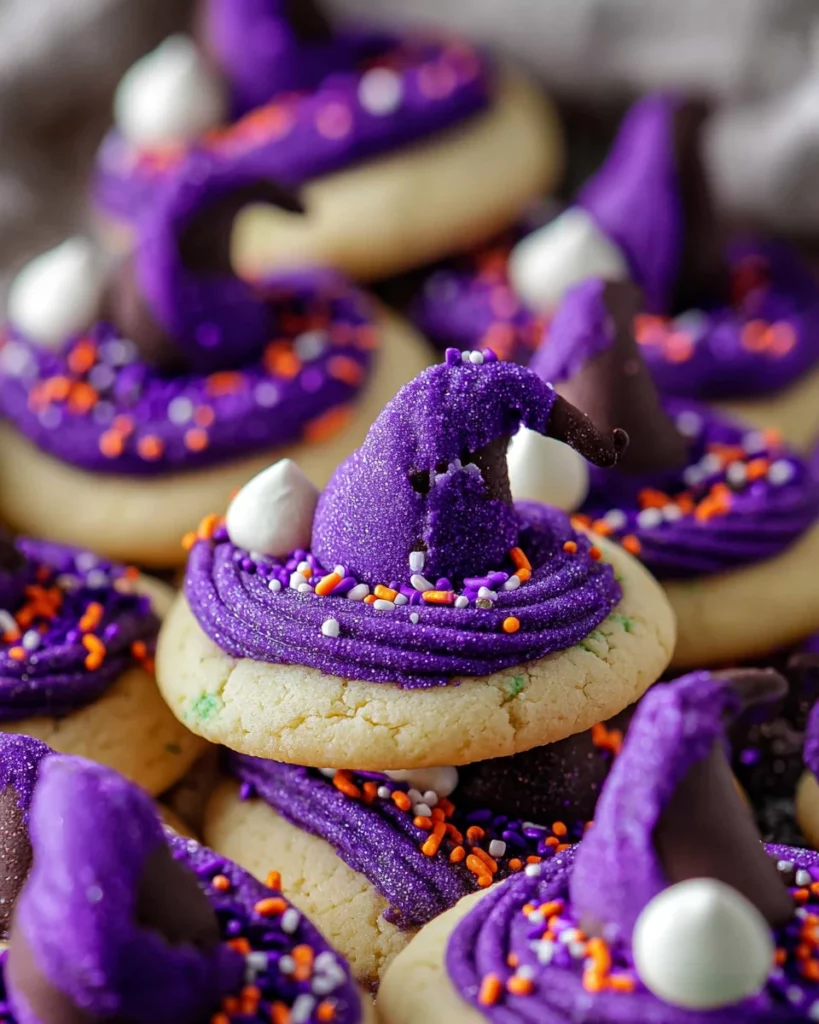
As the leaves turn colors and the air gets crisp, it’s time to think about Halloween treats! These Witch Hat Halloween Cookies are not only adorable but also incredibly easy to whip up. I know how hectic life can get, especially around holidays filled with school activities and parties. That’s why this recipe is a perfect solution for busy moms like you and me. With a simple peanut butter base topped with delightful chocolate hugs, these cookies will wow your family and friends, making your Halloween celebrations both tasty and fun!
Why You’ll Love This Witch Hat Halloween Cookies
These Witch Hat Halloween Cookies are a breeze to prepare, making them a go-to for busy schedules. The delightful combination of soft peanut butter and chocolate hugs brings a symphony of flavors that’ll have everyone asking for seconds. Plus, the kids can help with decorating, turning baking into a fun family activity. They are impressive enough for a potluck, yet simple enough for an after-school treat!
Ingredients for Witch Hat Halloween Cookies
To create these delightful Witch Hat Halloween Cookies, you’ll need a mix of pantry staples and a few fun additions. Here’s a rundown of what you’ll be gathering.
- All-purpose flour: This is the base of your cookies, providing structure and a soft texture.
- Cornstarch: A secret ingredient that contributes to the cookies’ soft, tender crumb.
- Baking powder and baking soda: These leavening agents ensure your cookies puff up perfectly while baking.
- Salt: Just a pinch to enhance the sweetness of the cookies and balance flavors.
- Unsalted butter: Softened butter brings richness to your dough while keeping the cookies cozy and chewy.
- Granulated sugar: This sweetener forms the backbone of your cookie’s sweetness, creating a lovely texture.
- Egg: A key binder that helps the ingredients come together in harmony.
- Vanilla extract: This classic flavor adds warmth and depth to your cookies.
- Creamy peanut butter: The star of the show, bringing that delicious nutty flavor we all adore.
- Purple gel food coloring: Use this to bring your cookies to life with that spooky witch hat hue!
- Chocolate hugs or kisses: The chocolaty topping that makes these cookies resemble adorable witch hats.
- Halloween sprinkles or purple sanding sugar: These fun extras are perfect for adding a festive touch.
For exact quantities of each ingredient, check the bottom of the article, where you’ll also find a printable version of the recipe! Get ready to get baking and delight in the festive spirit!
How to Make Witch Hat Halloween Cookies
Making these Witch Hat Halloween Cookies is easier than finding a ghost on Halloween night! Just follow these simple steps, and you’ll have a batch of delightful cookies ready to impress.
Prepare the Dry Ingredients
Start by gathering your dry ingredients. In a medium bowl, whisk together the all-purpose flour, cornstarch, baking powder, baking soda, and salt. This mix forms the base for our delicious cookies, ensuring they have a perfect texture. Set the bowl aside while you tackle the next steps.
Creaming the Butter and Sugar
Now it’s time to cream the butter and sugar together. Using a hand mixer or stand mixer, combine the softened butter and granulated sugar in a large bowl. Beat them together until the mixture looks creamy and fluffy, about two minutes. Scrape down the bowl’s sides if needed. This step adds air to the batter, which is key for light cookies!
Incorporate the Peanut Butter
Next, add the creamy peanut butter to your creamed mixture. Mix it until fully incorporated, melding the sweet and nutty flavors together. The rich peanut butter is what makes these cookies so irresistible. Kids love lending a hand during this step since it smells amazing!
Combine Wet and Dry Ingredients
Once your wet ingredients are happily blended, it’s time to introduce them to the dry mix. Gradually add the dry ingredients to the wet mixture. Mix on low speed until combined. We want to keep that soft texture, so be careful not to over-mix.
Adding Color to the Dough
Now it’s time for the fun part! Add a few drops of purple gel food coloring to the dough. Mix until you achieve your desired spooky hue. This magical transformation gives your cookies that witchy flair. Just remember, a little goes a long way!
Chill the Dough
Cover the dough with plastic wrap and place it in the fridge for at least two hours, or even overnight. Chilling helps the flavors meld and makes the dough easier to scoop. If it’s been chilling overnight, let it sit at room temperature for 15 minutes before scooping.
Baking the Cookies
When you’re ready to bake, preheat your oven to 350°F. Line your baking sheets with silicone mats or parchment paper to prevent sticking. Use a small cookie scoop or spoon to portion about a tablespoon of dough, rolling it into a ball. Place these on your prepared baking sheet, leaving about two inches between each cookie. Bake for 8 to 10 minutes until they puff and crack slightly, but don’t let them brown!
Adding the Chocolate Hats
After removing your cookies from the oven, let them cool on the baking sheet for five minutes. Now, gently press a chocolate hug or kiss into the center of each warm cookie. Don’t worry; these little chocolates have enough magic to hold their form. If you’re worried about melting, pop the cookie sheet in the freezer for about 10 minutes before transferring them to a wire cooling rack.
Tips for Success
- Always measure your ingredients accurately for consistent results.
- If your peanut butter is too thick, try warming it slightly in the microwave.
- Chill the dough to prevent spreading and achieve a puffier cookie.
- Use quality chocolate hugs or kisses for a richer flavor.
- Experiment with different colored sprinkles to match your Halloween theme.
Equipment Needed
- Mixing bowls: A large bowl for wet ingredients and a medium one for dry.
- Hand mixer or stand mixer: You can use a whisk if you prefer a workout!
- Baking sheets: Silicone mats or parchment paper make for easy cleanup.
- Cookie scoop: A tablespoon works just fine for portioning dough!
- Wire cooling rack: Essential for cooling your freshly baked cookies evenly.
Variations
- For a chocolate twist, substitute half of the all-purpose flour with cocoa powder for rich chocolate cookies.
- Make these cookies gluten-free by using a 1:1 gluten-free flour blend instead of all-purpose flour.
- Try creamy almond butter or sunflower seed butter in place of peanut butter for a nut-free alternative.
- Add chopped nuts, like peanuts or pecans, to the dough for added crunch and flavor.
- For a spicy kick, mix in a pinch of cinnamon or a sprinkle of pumpkin spice to complement the Halloween vibe.
Serving Suggestions for Witch Hat Halloween Cookies
- Serve these whimsical cookies on a festive platter lined with Halloween-themed paper or a spooky tablecloth.
- Pair with a chilled glass of milk or a warm cup of hot chocolate for a cozy treat.
- For an extra touch, sprinkle some edible glitter over the cookies before serving.
- Accompany with fun Halloween candy for a delightful dessert spread.
- They make a great addition to a Halloween party dessert table or school bake sale!
FAQs about Witch Hat Halloween Cookies
Can I make these Witch Hat Halloween Cookies ahead of time?
Absolutely! You can prepare the dough and chill it in the fridge for up to 24 hours. Just let it sit at room temperature for 15 minutes before scooping and baking. This way, you can save time on a busy day!
What can I use instead of peanut butter?
If you’re looking for nut-free options, sunflower seed butter is a great alternative! You can also use almond butter for a different flavor profile. Just ensure that whatever you choose, it’s creamy!
How do I store the Witch Hat Halloween Cookies?
Store the cookies in an airtight container at room temperature for up to a week. If you want to keep them fresher longer, consider freezing them. Just let them cool completely before placing them in a freezer-safe bag!
Can I use regular chocolate kisses instead of hugs?
Of course! Regular chocolate kisses work perfectly well and will still give you that delightful witch hat look. The choice is yours—both options are delicious!
Can I add extra decorations to my cookies?
Definitely! Feel free to get creative with your decorations. Add sprinkles, drizzle melted chocolate, or even use candy eyes to give your Witch Hat Halloween Cookies a spooky personality!
Final Thoughts
These Witch Hat Halloween Cookies are more than just a treat; they’re a celebration of creativity and fun in the kitchen! As I watch my family’s eyes light up with delight, it warms my heart to know I’ve created something special. The combination of soft peanut butter and chocolate hugs brings a sense of nostalgia, reminiscent of my own childhood baking adventures. Whether you’re sharing them at a party or enjoying them with your kids at home, these cookies create sweet memories that last far beyond Halloween. So, grab your ingredients and let the magic begin!
Print
Witch Hat Halloween Cookies
- Prep Time: 20 minutes
- Cook Time: 10 minutes
- Total Time: 2 hours 30 minutes
- Yield: Approximately 30 cookies 1x
- Category: Dessert
- Method: Baking
- Cuisine: American
- Diet: Vegetarian
Description
These Witch Hat Halloween Cookies are a delightful treat, featuring a soft peanut butter base topped with chocolate hugs to resemble witch hats.
Ingredients
- 1 ½ cups all purpose flour
- 2 teaspoons cornstarch
- ¼ teaspoon baking powder
- ½ teaspoon baking soda
- ¼ teaspoon salt
- ½ cup unsalted butter, softened
- 1 cup granulated sugar
- 1 egg, room temperature
- 1 teaspoon vanilla extract
- ¾ cup creamy peanut butter
- Purple gel food coloring
- 30 Hugs or chocolate kisses, carefully unwrapped
- Halloween sprinkles or purple sanding sugar
Instructions
- In a medium bowl, whisk together the flour, baking powder, baking soda, cornstarch and salt together. Set aside.
- Using a hand mixer or stand mixer, cream the butter and sugar together until creamy, about 2 minutes, scraping down the sides of the bowl as needed.
- Add the egg and vanilla extract and mix until combined.
- Add the peanut butter to the mixture and mix until combined, again, scraping down the sides of the bowl as needed.
- Add the dry ingredients to the wet ingredients and mix on low just until combined.
- Add violet or purple gel food coloring to the dough until you reach the desired color, ensuring it’s thoroughly mixed.
- Cover and chill the dough for 2 hours or overnight.
- Preheat the oven to 350°F. Line two large baking sheets with silicone baking mats or parchment paper.
- Place the colored sugar or sprinkles in a small bowl.
- Use a small cookie scoop or spoon to scoop about 1 tablespoon of cookie dough, roll into a ball, then roll in the sugar and place on the prepared baking sheet about 2 inches apart.
- Bake for 8 to 10 minutes or until cookies begin to puff and show small cracks. Do not brown.
- Remove from oven and allow to cool for 5 minutes on the baking sheet.
- Gently press a hug or kiss into the center of each cookie.
- Place the cookie sheet in the freezer for 10 minutes to prevent the chocolate from melting.
- Remove from freezer and transfer to a wire cooling rack while you bake the rest of the cookies.
Notes
- If chilling overnight, let the dough sit at room temperature for 15 minutes before scooping.
- The cookies should not brown while baking, they should remain soft and puffy.
Nutrition
- Serving Size: 1 cookie
- Calories: 120
- Sugar: 9g
- Sodium: 90mg
- Fat: 6g
- Saturated Fat: 3g
- Unsaturated Fat: 2g
- Trans Fat: 0g
- Carbohydrates: 15g
- Fiber: 1g
- Protein: 2g
- Cholesterol: 15mg


