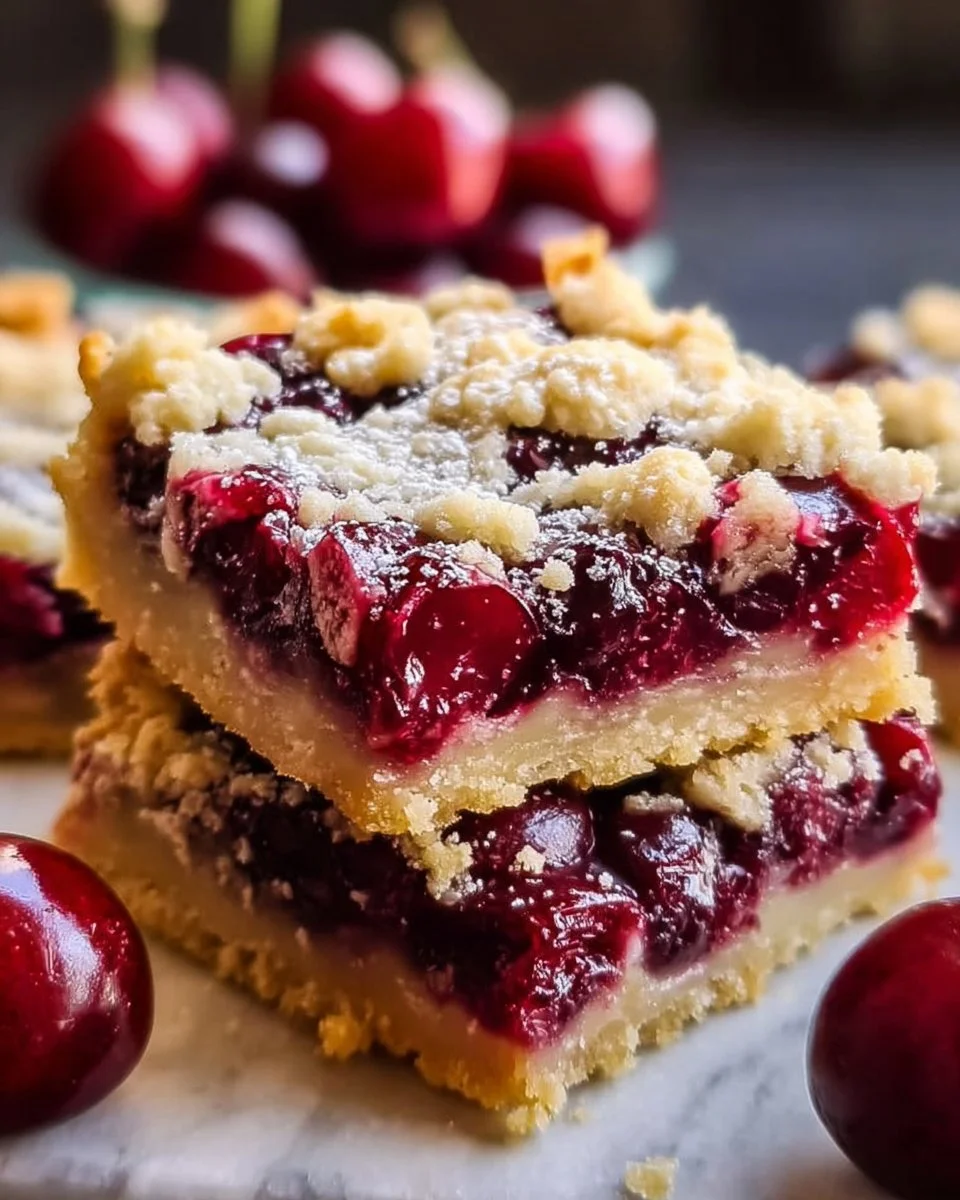
Cherry Pie Bars evoke a sense of nostalgia, wrapping you in a blanket of warm memories and sweet aromas. Imagine stepping into your grandmother’s kitchen, where the air thickens with the scent of cherries bubbling gently on the stove, dancing with buttery pastry. These bars capture that very essence, bringing together the tart juiciness of cherries with a buttery, crumbly crust that crumbles delightfully with each bite. The deep crimson color of the fruit contrasts beautifully with the golden crust, creating a visual feast that mirrors the taste – rich, satisfying, and utterly unforgettable.
As you sink your teeth into a freshly baked Cherry Pie Bar, you first encounter the slightly crunchy top, providing a delightful textural contrast to the soft, fruit-laden center. The cherries burst with flavor, their sweet and tangy notes singing a perfect harmony, while the buttery crust cradles them in a loving embrace. This dessert serves not just as a treat but as a celebration of simplicity and comfort, ideal for enjoying during sunny picnics, family gatherings, or cozy evenings at home with a friend over tea.
Save this recipe and cook smarter
Keep your favorite Cooking Layer recipes in one place, plan your weekly meals, and quickly find dinner ideas whenever you need them.
Free to download • Fast and easy to use
Why You’ll Love This Cherry Pie Bars
These Cherry Pie Bars are not your average dessert; they are a bridge to cherished moments and happy occasions. Creating these bars transforms your kitchen into a haven of delight. The combination of lush cherries and rich buttery flavor makes every bite feel like a hug. You’ll love how the bars are easy to prepare, ideal for baking novices and seasoned chefs alike, allowing everyone to experience the joy of homemade goodness.
Perfect for summer parties, and holidays, or just as a sweet escape after a long day, these treats will become your go-to dessert. They make for a fantastic option for potlucks; slice them into squares, and watch as they disappear in a heartbeat. Plus, they are simple to make ahead of time and store well, ensuring that whenever the cravings hit, you’re well-prepared to satisfy them.
Preparation Phase & Tools to Use
To craft these delightful Cherry Pie Bars, gather a few essential tools that facilitate a seamless baking experience. Each one plays a significant role in ensuring your bars turn out perfect every time.
- Mixing Bowl: A sturdy mixing bowl is essential for combining your dry and wet ingredients thoroughly.
- Measuring Cups and Spoons: Precision is key in baking; these tools will ensure your ingredient ratios are spot on.
- Baking Dish (8×8 inches): This size is perfect for creating thick, luscious bars that won’t overflow during baking.
- Spatula: A flexible spatula is perfect for spreading the crust evenly and for mixing your cherry filling without bruising the fruit.
Preparation Tips:
- Ensure your butter is softened to room temperature for easier mixing, which will enhance the texture of your crust.
- If you’re using fresh cherries, consider pitting them the day before to make the process quicker.
Ingredients for Cherry Pie Bars
When it comes to making Cherry Pie Bars, using quality ingredients enhances the overall flavor. Here’s what you’ll need:
- 1 cup all-purpose flour – The backbone of your crust, giving structure and texture.
- 1/4 cup granulated sugar – Sweetens the base just enough to complement the tart cherries.
- 1/2 cup unsalted butter, softened – The key ingredient that brings richness and a melt-in-your-mouth quality to the bars.
- 1/4 teaspoon salt -Elevates the flavors, balancing sweetness.
- 2 cups fresh or canned cherries, pitted – Use fresh when in season for the best flavor, but canned works beautifully too.
- 1/2 cup granulated sugar (for filling) – Enhances the sweet-tartness of the cherries.
- 1 tablespoon cornstarch – Helps thicken the cherry filling, giving it that perfect gooey texture.
- 1 teaspoon vanilla extract – Adds a warm depth of flavor that pairs beautifully with cherries.
- 1 teaspoon lemon juice – Brightens the filling, enhancing the cherry flavor.
Consider substitutions based on availability:
- For gluten-free options, you can replace all-purpose flour with a gluten-free flour blend.
- If you prefer less sugar, you can adjust the amount in the filling to suit your taste.
How to Make Cherry Pie Bars
Creating these Cherry Pie Bars is a simple and rewarding process. Follow these easy steps to bring this delectable treat to life:
- Preheat your oven to 350°F (175°C), allowing it to reach the perfect temperature for baking.
- In a mixing bowl, combine 1 cup of flour, 1/4 cup of sugar, 1/2 cup of softened butter, and 1/4 teaspoon of salt. Mix until a crumbly dough forms.
- Press this dough firmly into the bottom of a greased baking dish, creating an even crust that’s ready to hold the cherry filling.
- In another bowl, mix 2 cups of pitted cherries with 1/2 cup of sugar, 1 tablespoon of cornstarch, 1 teaspoon of vanilla extract, and 1 teaspoon of lemon juice. Stir until the cherries are evenly coated.
- Pour the cherry filling over your prepared crust, spreading it evenly to ensure every piece gets a delightful fruit center.
- Bake in the preheated oven for 30-35 minutes or until the edges turn a lovely golden brown.
- Allow the bars to cool in the baking dish for at least 15 minutes before cutting them into squares and serving.
Helpful Tips:
- For an extra touch, sprinkle some powdered sugar on top before serving.
- Serve warm, perhaps with a scoop of vanilla ice cream for a divine treat!
Chef’s Notes & Helpful Tips
- Make-ahead tips: These bars store beautifully! You can prepare the crust and filling a day in advance and bake them right before serving.
- Cooking alternatives: Consider using an air fryer for a quicker bake, adjusting the time according to your model.
- Customization ideas: Feel free to mix in a tablespoon of almond extract for an exciting flavor twist or top them with a crumbly oat topping for added texture.
Common Mistakes to Avoid
While baking Cherry Pie Bars is straightforward, a few common pitfalls lurk. Here’s how to prevent them:
- Overmixing the dough: This can lead to tough crusts. Mix just until combined for the best texture.
- Underbaking: A gooey filling can make your bars fall apart. Ensure the edges are golden brown for a firm set.
- Not cooling sufficiently: Cutting too soon can make your bars crumble. Let them cool for at least 15 minutes to firm up.
What to Serve With Cherry Pie Bars
The versatility of Cherry Pie Bars lends itself to a variety of delightful accompaniments:
- Vanilla ice cream – The creamy contrast to the sweet tartness of the cherries creates a dessert that’s hard to resist.
- Fresh whipped cream – A dollop of freshly whipped cream adds a light, airy touch that balances the dense fruit bars.
- A hot cup of tea or coffee – Perfect for afternoon snacks, their warmth complements the sweetness of the bars beautifully.
- Yogurt parfait – Layering with yogurt and granola creates a refreshing breakfast treat or lighter dessert option.
- Cheese platter – Serve with mild cheeses for a contrast of flavors; the creaminess pairs wonderfully with the fruit.
- Fresh fruit salad – Adding a side of fruity freshness elevates the experience, refreshing the palate.
- Lemonade or iced tea – The citrus brightness cuts through the richness, making for an invigorating pairing.
Storage & Reheating Instructions
Cherry Pie Bars store well in the refrigerator for about a week. Simply keep them in an airtight container to maintain their freshness. For longer storage, freeze them tightly wrapped in plastic wrap and foil to preserve flavor and texture for up to three months.
To enjoy the bars after freezing, simply allow them to thaw in the fridge overnight. You can also gently reheat them in the microwave for a few seconds or warm them in the oven for a delightful, freshly baked taste.
Estimated Nutrition Information
Each Cherry Pie Bar is approximately 220 calories, though the actual figures may vary based on portion sizes and specific ingredient choices. This makes them a sweet treat to enjoy in moderation! Always consult with a nutritionist for tailored dietary advice.
FAQs
1. Can I use frozen cherries instead of fresh ones?
Absolutely! Frozen cherries work well; just ensure they are thawed and drained before mixing for the filling.
2. What if I don’t have cornstarch?
You can substitute with arrowroot powder or even all-purpose flour, though cornstarch creates a clearer, thicker filling.
3. How do I know when the bars are done?
Look for a golden-brown edge and a center that’s not jiggly. A toothpick inserted should come out clean when they’re ready.
4. Can I make these bars vegan?
Yes! Replace butter with vegan butter, and use a flaxseed egg substitute if you wish to avoid animal products.
5. How can I make the bars more tart?
Feel free to increase the amount of lemon juice or add a touch of sour cherry juice to the filling for added tartness.
Conclusion
Indulging in Cherry Pie Bars is not just about satisfying your sweet tooth; it’s about creating a moment of joy, nostalgia, and delight. With their easy preparation and delectable flavor, these bars are sure to become a staple at your family gatherings and celebrations. So roll up your sleeves, embrace the aromas wafting through your kitchen, and create a treat that brings smiles and satisfaction. Your taste buds will thank you, and your loved ones will cherish every last bite. Dig in, and enjoy the sweet bliss of homemade Cherry Pie Bars!
Print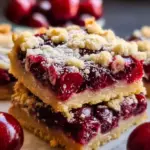
Cherry Pie Bars
- Prep Time: 15 minutes
- Cook Time: 35 minutes
- Total Time: 50 minutes
- Yield: 9 servings 1x
- Category: Dessert
- Method: Baking
- Cuisine: American
- Diet: Vegetarian
Description
Delicious Cherry Pie Bars with a buttery, crumbly crust and juicy cherry filling, reminiscent of grandmother’s kitchen.
Ingredients
- 1 cup all-purpose flour
- 1/4 cup granulated sugar
- 1/2 cup unsalted butter, softened
- 1/4 teaspoon salt
- 2 cups fresh or canned cherries, pitted
- 1/2 cup granulated sugar (for filling)
- 1 tablespoon cornstarch
- 1 teaspoon vanilla extract
- 1 teaspoon lemon juice
Instructions
- Preheat your oven to 350°F (175°C).
- Combine 1 cup of flour, 1/4 cup of sugar, 1/2 cup of softened butter, and 1/4 teaspoon of salt in a mixing bowl until crumbly.
- Press the dough into the bottom of a greased 8×8 baking dish.
- Mix 2 cups of pitted cherries with 1/2 cup of sugar, 1 tablespoon of cornstarch, 1 teaspoon of vanilla extract, and 1 teaspoon of lemon juice in another bowl.
- Pour the cherry filling over the crust, spreading it evenly.
- Bake in the preheated oven for 30-35 minutes or until edges are golden brown.
- Cool in the baking dish for at least 15 minutes before cutting into squares.
Notes
These bars can be made ahead of time and stored well. Serve with whipped cream or vanilla ice cream for added flavor.
Nutrition
- Serving Size: 1 bar
- Calories: 220
- Sugar: 12g
- Sodium: 150mg
- Fat: 10g
- Saturated Fat: 6g
- Unsaturated Fat: 4g
- Trans Fat: 0g
- Carbohydrates: 29g
- Fiber: 2g
- Protein: 2g
- Cholesterol: 30mg
Enjoyed this recipe?
Discover more delicious recipes, save your favorites, and plan your meals with the Cooking Layer app.
Free to download • Fast and easy to use