
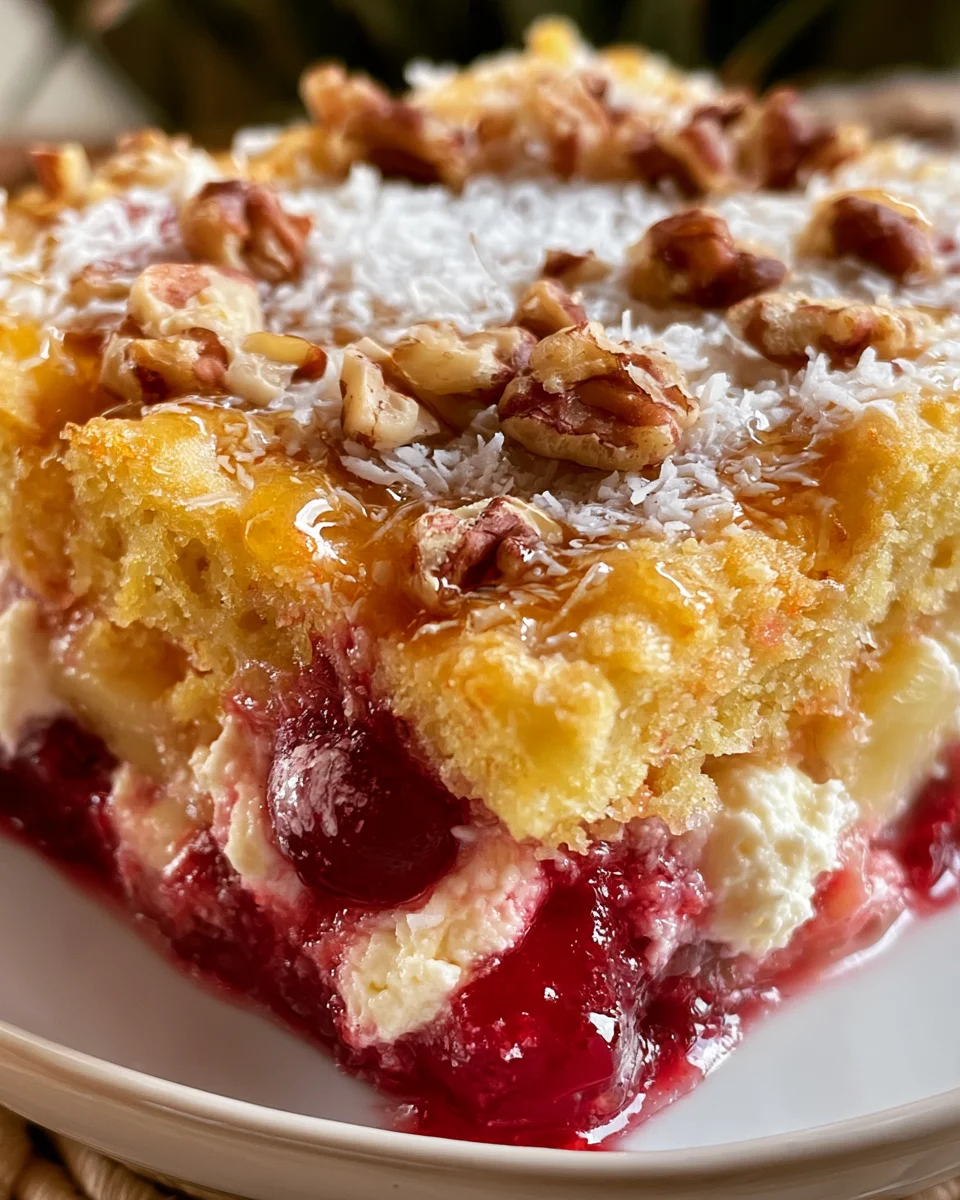
Introduction to Cherry Pineapple Cheesecake Dump Cake
Have you ever found yourself craving something sweet but feel too busy to make it happen? Well, let me introduce you to the delightful Cherry Pineapple Cheesecake Dump Cake! It’s a dream come true for those of us juggling work, family, and everything life throws our way. This dessert comes together in a snap, with minimal effort and maximum flavor! Imagine luscious layers of cherries and pineapples topped with a creamy cheesecake surprise and a golden cake crust. It’s not just a treat; it’s a celebration, perfect for impressing your loved ones or enjoying a quiet moment after a hectic day.
Why You’ll Love This Cherry Pineapple Cheesecake Dump Cake
This Cherry Pineapple Cheesecake Dump Cake is here to change your dessert game! It’s incredibly easy to whip up, taking just around an hour from start to finish. The combination of juicy cherries and tart pineapple makes each bite a burst of flavor, all thanks to the yummy cream cheese layer. Plus, it’s so versatile; you can serve it warm or chilled. Trust me, everyone will rave about this delightful dessert!
Ingredients for Cherry Pineapple Cheesecake Dump Cake
Gathering the ingredients is half the fun when making this Cherry Pineapple Cheesecake Dump Cake. Each one plays a vital role in crafting this delightful dessert.
- Cherry pie filling: This sweet and tart delight forms the base of our cake. It’s easy, quick, and adds that classic cherry flavor.
- Crushed pineapple: Choosing canned or fresh pineapples gives a tropical flair. Make sure to drain it well to avoid a soggy cake.
- Cream cheese: This creamy goodness is the secret ingredient that gives our dump cake its cheesecake-like texture and taste.
- Powdered sugar: Used to sweeten the cream cheese mixture elegantly. It’s finer than granulated sugar, allowing for smooth blending.
- Vanilla extract: A splash adds warmth and depth to our dessert. It complements the fruity layers perfectly.
- Yellow cake mix: The backbone of this cake, creating a light and fluffy topping. You’ll just sprinkle it on without stirring.
- Unsalted butter: Drizzling melted butter over the cake mix ensures it turns golden and delicious. It’s a must for that rich taste!
- Shredded coconut (optional): For those who love a tropical twist, adding coconut provides a delightful chew and extra flavor.
- Chopped pecans or walnuts (optional): For a crunchy topping that enhances texture and flavor, nuts are a wonderful addition. Chop them finely for even distribution.
You’ll find the exact amounts for each ingredient at the bottom of the article, all set up for easy printing!
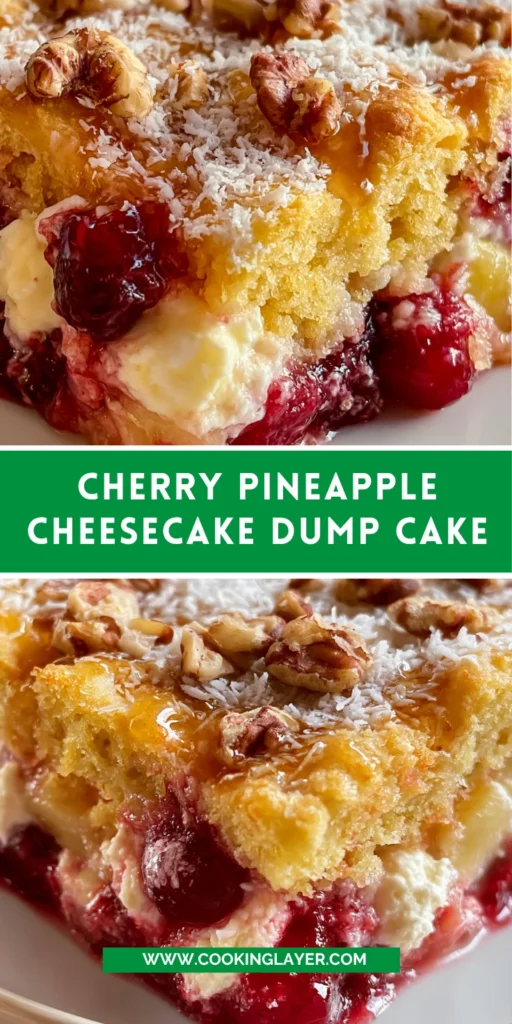
How to Make Cherry Pineapple Cheesecake Dump Cake
Step 1: Preheat the Oven
To start our Cherry Pineapple Cheesecake Dump Cake off right, we need to preheat the oven to 350°F (175°C). This step is crucial because it ensures even baking throughout the cake. An adequately heated oven helps the cake rise beautifully and gives it that tantalizing golden color we all crave!
Step 2: Prepare the Fruit Layer
Grab a 9×13 inch baking dish and spread the cherry pie filling evenly across the bottom. This luscious layer is where the magic begins! On top, add the drained crushed pineapple, making sure to distribute it well. The combination of these two fruits creates a sweet-and-tart symphony that sings with each bite. It’s like a fruity celebration in the dish, setting the stage for our creamy surprise!
Step 3: Make the Cream Cheese Mixture
In a mixing bowl, combine the softened cream cheese, powdered sugar, and vanilla extract. Beat them together until the mixture is smooth and creamy. It should be so velvety, your spoon might just want to dive in for a taste! This cream cheese layer gives our dump cake its signature cheesecake flavor, making it irresistible. Each scoop will be a delightful creamy contrast to the fruity layers beneath.
Step 4: Layer the Cake Mix
Next, sprinkle the dry yellow cake mix evenly over the cream cheese layer. It’s essential not to stir it—just let the layers sit as they are. This method allows the mix to create an airy, fluffy topping while baking. Trust me; this unique technique is what makes a traditional dump cake so special and delicious!
Step 5: Add Butter and Optional Toppings
Now it’s butter time! Drizzle the melted unsalted butter over the cake mix. It’s like giving a warm hug to all the layers. If you’re feeling adventurous, throw in your optional shredded coconut and chopped nuts. These toppings not only add flavor but also create a gorgeous texture that your family and friends will love. Just imagine the delightful crunch and chewiness bringing your dessert to life!
Step 6: Bake the Dump Cake
Pop your masterpiece into the preheated oven and bake for 45-50 minutes. You’ll know it’s done when the top has turned a beautiful golden brown and the cake is set. Let it cool for a few minutes before serving; this little patience pays off with perfectly blended flavors. Enjoy the delightful aroma wafting through your kitchen while you await a sweet treat!
Tips for Success
- Make sure to soften the cream cheese for easier blending; it contributes to that creamy texture!
- Use fresh fruit for a more vibrant flavor if you have some on hand—it elevates the taste!
- Keep an eye on baking time; each oven varies. Look for that golden top as a sign of readiness.
- Serve warm or chilled—both options are delicious!
- Don’t rush the cooling time; it helps the flavors meld beautifully!
Equipment Needed
- 9×13 inch baking dish: This is essential for baking your dump cake evenly. An alternative could be any similar-sized oven-safe dish.
- Mixing bowl: A trusty bowl for whipping up the cream cheese mixture. You could also use a stand mixer if you prefer.
- Spatula: Perfect for spreading the cream cheese and transferring the fruit. You can use a wooden spoon if you don’t have one.
- Measuring cups: Handy for ensuring your ingredients are just right. A simple kitchen scale can work too!
Variations
- Fruity Alternatives: You can switch up the fruits for a new flavor twist! Try using blueberry pie filling for a lovely berry burst. Peach slices add a deliciously sweet and juicy touch, while apple pie filling brings warmth and a hint of spice. Get creative with your favorite fruits, and let your taste buds explore!
- Dietary Adaptations: Want to enjoy this dessert while keeping dietary preferences in mind? Substitute the yellow cake mix with a gluten-free cake mix to make it safe for those with gluten sensitivities. For a vegan version, use plant-based cream cheese and a vegan cake mix. Just like that, you’ve made a delightful treat that everyone can enjoy!
Serving Suggestions for Cherry Pineapple Cheesecake Dump Cake
- Serve warm with a scoop of vanilla ice cream for a delightful contrast in temperature.
- Top with whipped cream and a sprinkle of toasted coconut for added texture and sweetness.
- Pair with a refreshing fruit salad for a light side.
- Consider a glass of sweet iced tea or a fruity sparkling drink to complement flavors.
FAQs about Cherry Pineapple Cheesecake Dump Cake
Can I make Cherry Pineapple Cheesecake Dump Cake ahead of time?
Absolutely! You can prepare this Cherry Pineapple Cheesecake Dump Cake a day in advance. Just store it covered in the refrigerator after it has cooled. Reheat individual portions in the microwave for a quick and easy dessert. It stays delicious, making it perfect for busy days or last-minute gatherings!
What should I serve with Cherry Pineapple Cheesecake Dump Cake?
Pair your Cherry Pineapple Cheesecake Dump Cake with some delightful options to enhance the experience! Consider serving it with a scoop of creamy vanilla ice cream or a dollop of whipped cream. A refreshing glass of lemonade or sweet iced tea makes a lovely accompaniment as well. Both drinks balance the dessert’s sweetness beautifully!
How can I modify the sweetness?
If you prefer a less sweet dessert, you can easily adjust the sugar levels in the recipe. Simply reduce the amount of powdered sugar in the cream cheese mixture to suit your taste. You can add a bit of lemon juice for a tangy kick, which can make the dessert taste less sweet overall, while still keeping the flavor profile intact!
Final Thoughts
Making Cherry Pineapple Cheesecake Dump Cake is not just about enjoying a dessert; it’s about creating moments of joy in the kitchen. It brings back memories of time spent with family and friends, sharing laughter and stories over a warm slice of cake. The simple process and quick preparation mean you can whip it up even on your busiest days. Plus, the combination of flavors—sweet cherries, tangy pineapple, and creamy cheesecake—offers a slice of paradise in every bite. So roll up your sleeves, embrace the mess, and let this delightful dessert bring happiness to your table!
Print
Cherry Pineapple Cheesecake Dump Cake Will Delight You!
- Prep Time: 15 minutes
- Cook Time: 50 minutes
- Total Time: 1 hour 5 minutes
- Yield: 12 servings 1x
- Category: Dessert
- Method: Baking
- Cuisine: American
- Diet: Vegetarian
Description
A delicious Cherry Pineapple Cheesecake Dump Cake that combines the flavors of cherry, pineapple, and cheesecake in a simple and satisfying dessert.
Ingredients
- 1 can (21 oz) cherry pie filling
- 1 can (20 oz) crushed pineapple, drained
- 1 package (8 oz) cream cheese, softened
- 1 cup powdered sugar
- 1 teaspoon vanilla extract
- 1 box (15.25 oz) yellow cake mix
- 1/2 cup unsalted butter, melted
- 1 cup shredded coconut (optional)
- 1 cup chopped pecans or walnuts (optional)
Instructions
- Preheat oven to 350°F (175°C).
- In a 9×13 inch baking dish, spread the cherry pie filling evenly on the bottom. Top with the drained crushed pineapple.
- In a mixing bowl, beat the softened cream cheese, powdered sugar, and vanilla extract until smooth and creamy. Drop spoonfuls of the cream cheese mixture over the fruit layer, spreading it gently with a spatula.
- Sprinkle the dry yellow cake mix evenly over the cream cheese layer. Do not stir; just spread it out evenly.
- Drizzle the melted butter over the top of the cake mix, ensuring it covers as much of the mix as possible. If desired, sprinkle shredded coconut and chopped nuts on top for added texture and flavor.
- Bake in the preheated oven for 45-50 minutes, or until the top is golden brown and the cake is set. Let it cool for a few minutes before serving.
Notes
- For a richer flavor, use fresh fruits instead of canned.
- Can be served warm or chilled.
- Customize toppings according to your preference.
Nutrition
- Serving Size: 1 piece
- Calories: 350
- Sugar: 30g
- Sodium: 250mg
- Fat: 15g
- Saturated Fat: 9g
- Unsaturated Fat: 4g
- Trans Fat: 0g
- Carbohydrates: 50g
- Fiber: 2g
- Protein: 3g
- Cholesterol: 35mg