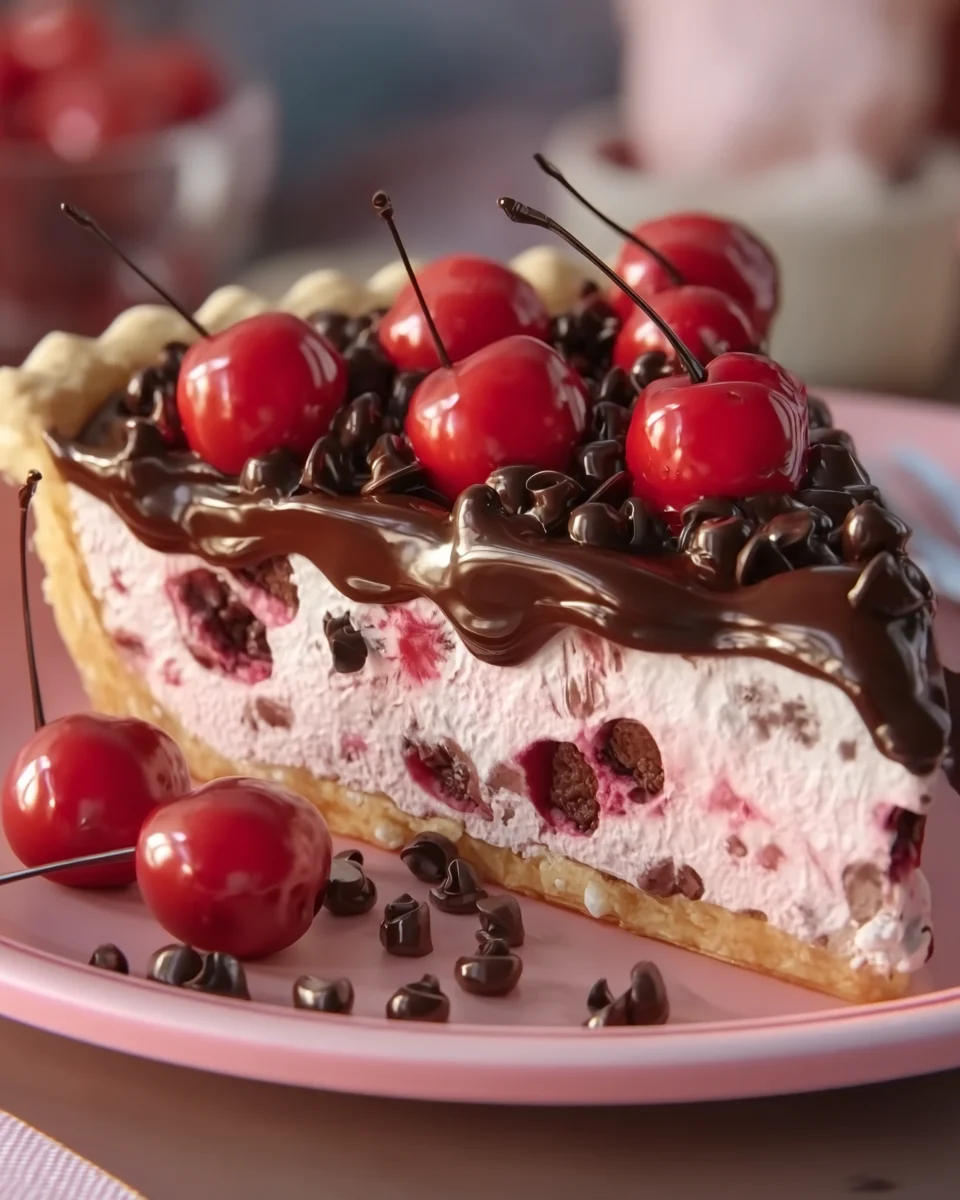
Introduction to Chocolate Cherry Pie a slice of pure dessert magic
I know the struggle of finding time to whip up something special. That’s why I’m excited to share my Chocolate Cherry Pie, a slice of pure dessert magic! This no-bake delight combines the richness of chocolate with the tartness of cherries, creating a dessert that’s not only delicious but also easy to prepare. Whether you’re looking for a sweet treat to impress guests or a quick solution to brighten a long day, this pie is sure to become a family favorite. Trust me; you’ll want to dive into every luxurious bite!
Why You’ll Love This Chocolate Cherry Pie a slice of pure dessert magic
This Chocolate Cherry Pie is a dream come true for anyone craving a delicious dessert without the fuss. It’s incredibly easy to make—perfect for busy moms on the go, like myself! With no baking required, you can whip it up in just 20 minutes. The harmonious blend of creamy chocolate, tangy cherries, and fluffy Cool Whip creates a taste explosion that will leave everyone asking for seconds. What’s not to love?
Save this recipe and cook smarter
Keep your favorite Cooking Layer recipes in one place, plan your weekly meals, and quickly find dinner ideas whenever you need them.
Free to download • Fast and easy to use
Ingredients for Chocolate Cherry Pie a slice of pure dessert magic
Gathering the right ingredients can make a world of difference in your Chocolate Cherry Pie experience. Let’s take a peek at what you’ll need to create this dreamy delight!
- 9-inch chocolate pie crust: This pre-made crust is perfect for saving time. It adds a rich chocolate flavor that compliments the cherries beautifully. If you’re feeling adventurous, you can also make your own from scratch using crushed chocolate cookies.
- 8 oz cream cheese, softened: The star of the filling! Softened cream cheese ensures a smooth and creamy texture. Be sure to let it sit out for a while before mixing to avoid any lumps.
- 1 cup powdered sugar: This adds just the right amount of sweetness to balance the tart cherries. You can adjust the amount based on your sweet tooth!
- 21 oz cherry pie filling: The tartness of the cherries contrasts perfectly with the chocolate. You can use canned for convenience or homemade if you have fresh cherries on hand.
- 8 oz Cool Whip: A fluffy, airy topping that lightens the filling. If you prefer a more natural option, you can whip your own cream instead.
- 1½ cups semi-sweet mini chocolate chips, divided: These little gems add chocolatey goodness throughout the pie. You can substitute dark chocolate or even white chocolate chips for a twist!
- Maraschino cherries (optional for garnish): These vibrant cherries can add a pop of color on top. They’re an optional touch, but they do make for a delightful garnish.
All the ingredients with their exact quantities can be found at the bottom of the article for your convenience!
How to Make Chocolate Cherry Pie a slice of pure dessert magic
Step 1: Prepare the Cream Cheese Filling
Start by grabbing your softened cream cheese and powdered sugar. In a large bowl, beat them together until fluffy and smooth. It’s crucial to let the cream cheese soften beforehand. This simple step helps avoid any annoying lumps. Trust me; you want a creamy filling that melts in your mouth.
Step 2: Combine Cherry Filling
Now, gently fold in the cherry pie filling into your cream cheese mixture. This is where the tartness begins to shine! Take your time with this step. By carefully incorporating the cherries, you ensure even distribution without deflating the mixture. You want to feel each burst of cherry goodness in every bite!
Step 3: Add the Cool Whip
Next, it’s time to fold in the Cool Whip. This magical ingredient adds a light, fluffy texture to your filling. Be gentle as you fold it in; the goal is to maintain that airy feel. A nice, silky texture will emerge, making your pie irresistibly delicious. Ah, the anticipation builds!
Step 4: Mix in Mini Chocolate Chips
Now comes the best part—let’s add those mini chocolate chips! Stir them in evenly, making sure every spoonful gets a taste of chocolate. This little addition is key to balancing the flavors of chocolate and cherries. Each bite will be a delightful adventure, and I can’t wait for you to try it!
Step 5: Fill the Pie Crust
Carefully spoon your filling into the chocolate pie crust. Use a spatula to smooth the top, creating a beautiful, even layer. This presentation is so important; it makes your pie look as good as it tastes! I always find this step rewarding, seeing that luscious filling filling the crust perfectly.
Step 6: Chill the Pie
Here comes the hardest part—waiting! Refrigerate your pie for 3 to 4 hours. This chilling time allows the filling to set properly and the flavors to meld beautifully. Patience is key! Think of it as a little moment to reflect on how delicious this slice of pure dessert magic will be.
Step 7: Garnish and Serve
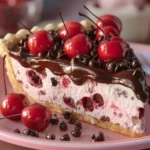
Finally, let’s add some flair! Top your pie with extra Cool Whip, a sprinkle of chocolate chips, and maraschino cherries for that pop of color. Feel free to get creative with your presentation! It’s the finishing touches that make this pie shine. You’ll be ready to serve up slices of happiness to loved ones.
Tips for Success
- Make sure your cream cheese is at room temperature for easy mixing.
- Adjust the powdered sugar to suit your sweet preference; taste as you go!
- For a richer chocolate flavor, consider using a chocolate crust with 70% cacao chocolate chips.
- Don’t rush the chilling time; it’s essential for a perfect pie texture!
- Be creative with garnishes; it adds a personal touch and makes every slice pop!
Equipment Needed
- Mixing bowls: Use medium and large bowls for easy mixing. A stand mixer works great but a hand mixer does the job too.
- Spatula: A rubber spatula is perfect for folding ingredients gently.
- Pie plate: A 9-inch pie plate is ideal, but you can use a glass dish if you prefer.
- Measuring cups and spoons: Essential for precise ingredient portions, but feel free to eyeball if you’re experienced!
Variations for Chocolate Cherry Pie a slice of pure dessert magic
- Mint Chocolate Cherry Pie: Add a teaspoon of peppermint extract to the filling for a refreshing twist on flavor.
- Gluten-Free Option: Use a gluten-free chocolate pie crust available at most grocery stores to accommodate dietary needs.
- Vegan Version: Substitute cream cheese with a dairy-free cream cheese alternative and Cool Whip with coconut whipped cream for a plant-based delight.
- Cherry Almond Delight: Mix a teaspoon of almond extract into the filling for an aromatic almond flavor that pairs beautifully with cherries.
- Cheesecake Twist: Add a layer of cheesecake mixture beneath the cherry filling by blending an additional 8 oz of cream cheese and an egg yolk before folding in the cherry mixture.
Serving Suggestions
- Serve with a dollop of freshly whipped cream for extra creaminess.
- Pair with a scoop of vanilla ice cream for a delightful contrast of temperatures.
- Consider a drizzle of chocolate sauce over the top for an indulgent touch.
- Enjoy with a cup of coffee or tea for a cozy dessert experience.
- Present on a decorative cake stand to elevate its charm at gatherings!
FAQs about Chocolate Cherry Pie a slice of pure dessert magic
Can I use fresh cherries instead of cherry pie filling?
Absolutely! If you have fresh cherries, you can make your own pie filling. Just pit and chop the cherries, then simmer them with sugar and a bit of cornstarch to thicken. This way, you’ll have a delightful homemade touch to your Chocolate Cherry Pie!
How long can I store the Chocolate Cherry Pie?
You can keep the pie in the refrigerator for up to 3 days. Just cover it securely with plastic wrap or foil to keep it fresh. After that, the flavors will begin to diminish, so it’s best enjoyed within a few days!
Can I freeze Chocolate Cherry Pie?
Yes! This pie freezes well. Just wrap it tightly in plastic wrap and aluminum foil before freezing. When you’re ready to enjoy a slice of pure dessert magic, let it thaw in the refrigerator overnight.
What if my pie doesn’t set properly?
If your pie isn’t setting to your liking, it might need a little extra chill time. Sometimes, flavors meld beautifully, and the filling gets firmer after a bit more time in the fridge. Patience is key!
Can I make this pie ahead of time?
Definitely! This Chocolate Cherry Pie is perfect for making ahead. Go ahead and prepare it the night before a gathering; it will save you time and impress your guests with its fabulous flavor. Perfect for busy days!
Final Thoughts
There’s something truly magical about creating a dessert that not only pleases the palate but also brings people together. My Chocolate Cherry Pie, a slice of pure dessert magic, is that delightful fusion of flavors and textures that’s easy to make, even on the busiest days. Each bite is a celebration of chocolate and cherry bliss, sparking joy at every gathering. Whether it’s a family dinner or a potluck party, this pie will leave you basking in compliments and the warmth of shared moments. Trust me, it’s a recipe you’ll cherish and revisit time and again!
Enjoyed this recipe?
Discover more delicious recipes, save your favorites, and plan your meals with the Cooking Layer app.
Free to download • Fast and easy to use
Chocolate Cherry Pie
- Prep Time: 20 minutes
- Cook Time: 0 minutes
- Total Time: 3-4 hours including chilling
- Yield: 8 slices 1x
- Category: Dessert
- Method: No-bake
- Cuisine: American
- Diet: Vegetarian
Description
Chocolate Cherry Pie is a delightful dessert combining the richness of chocolate and the tartness of cherries, creating a slice of pure dessert magic.
Ingredients
- 9-inch chocolate pie crust
- 8 oz cream cheese, softened
- 1 cup powdered sugar
- 21 oz cherry pie filling
- 8 oz Cool Whip, plus extra for topping
- 1½ cups semi-sweet mini chocolate chips, divided
- Maraschino cherries, optional for garnish
Instructions
- Beat the softened cream cheese with powdered sugar until fluffy and smooth.
- Gently stir in the cherry pie filling, then fold in the Cool Whip until silky and well combined.
- Fold in 1 cup of the mini chocolate chips, spreading them evenly through the filling.
- Spoon the filling into the chocolate pie crust and smooth the top beautifully.
- Refrigerate for 3–4 hours until perfectly set and sliceable.
- Finish with extra Cool Whip, remaining chocolate chips, and maraschino cherries if desired.
Notes
- Ensure the cream cheese is softened to prevent lumps in the filling.
- You can adjust the amount of powdered sugar for sweetness preference.
- This pie is best served chilled for a refreshing taste.
Nutrition
- Serving Size: 1 slice
- Calories: 300
- Sugar: 25g
- Sodium: 150mg
- Fat: 15g
- Saturated Fat: 8g
- Unsaturated Fat: 5g
- Trans Fat: 0g
- Carbohydrates: 35g
- Fiber: 1g
- Protein: 3g
- Cholesterol: 30mg