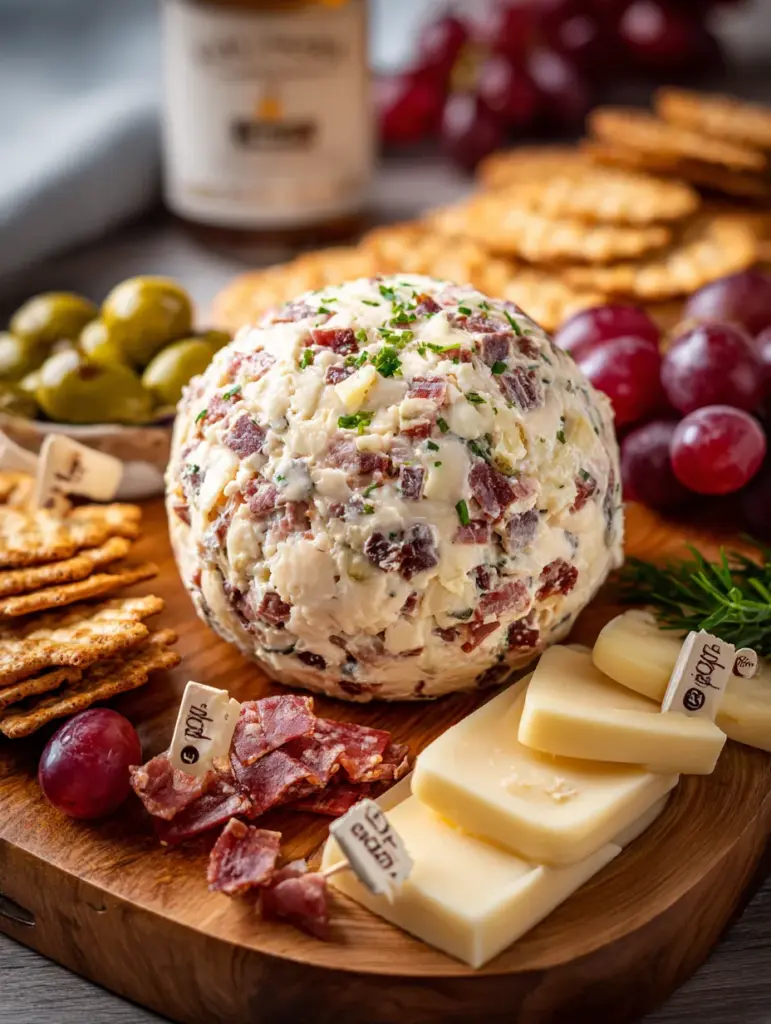
Imagine this: your friends and family walk into your house, greeted by the smell of something delicious and the sight of a beautiful cheese ball centerpiece surrounded by buttery crackers. Their eyes light up. This is no ordinary snack—it’s the Creamy Chipped Beef Cheese Ball, a retro favorite that’s still a total hit at every gathering.
There’s just something about that creamy, tangy, salty combination that makes everyone grab a cracker and dive right in. If you’re planning a holiday party, game night, potluck, or even a cozy evening snack board, this cheese ball deserves a place at the center of it all.
Why Chipped Beef Cheese Balls Are Still So Popular
It’s not just nostalgia that keeps this recipe alive. It’s how incredibly good it tastes and how easy it is to make. We’re talking about rich cream cheese blended with finely chopped dried beef, tangy Worcestershire, green onions, and the perfect balance of garlic and onion flavors. It’s a party in a bite—and it brings a lot of personality to the table.
The outer coating of chopped beef not only makes it look amazing (check the photo!) but adds a salty, savory edge that contrasts beautifully with the creamy center. It’s low-effort, high reward, and that’s what makes it legendary.
What Exactly is Chipped Beef?
Chipped beef is dried, salted, and pressed beef, usually sold in thin slices or chopped pieces. It’s most commonly found in small packets or jars and has a very distinct salty and savory flavor. That bold taste is exactly what makes it so perfect for cheese balls.
When you chop it up finely and mix it with creamy ingredients, the beef rehydrates slightly and spreads its flavor throughout every bite. And when you press it around the outside? Magic. Pure, crunchy-coated, beefy magic.
Cream Cheese: The Creamy Hero
Let’s not forget who’s doing the heavy lifting here: cream cheese. The double package of softened cream cheese in this recipe gives the cheese ball its rich, luscious base. It’s mellow and smooth, which perfectly balances the saltiness of the beef.
Here’s the trick: make sure it’s fully softened before you start mixing. Cold cream cheese will make it clumpy and hard to blend, and nobody wants that. Leave it out for 30 minutes before you begin, and you’ll thank yourself later.
Worcestershire Sauce – The Secret Flavor Weapon
A little Worcestershire sauce goes a long way—and that’s exactly what makes it a key part of this recipe. Just 1½ teaspoons adds a deep, umami flavor that blends perfectly with the beef and cream cheese. It gives the whole ball a rich, slightly tangy backbone without overpowering the other ingredients.
Think of it as the secret ingredient that makes people go, “What is that? This tastes amazing!”
Green Onions – A Fresh Finishing Touch
Let’s add some color and crunch. The green onions don’t just add a pop of fresh flavor—they also make the cheese ball look more exciting. That little touch of green on top, like you see in the photo, breaks up all the creamy white and pink tones.
Finely chop them so they blend into the mixture well, and save a few extra slices for sprinkling on top. It’s like the confetti on your party cheese ball.
Garlic and Onion Powder – Elevating the Savory Profile
These pantry staples are doing more work than you might think. Just ½ teaspoon of each brings out the deeper flavors in both the beef and cream cheese, tying everything together with that familiar savory edge.
It’s subtle, but it helps balance everything so it doesn’t taste flat. And let’s be honest—who doesn’t love that cozy, homey garlic-onion combo?
Choosing the Right Crackers for Serving
Let’s talk about delivery devices—aka crackers. The classic choice? Ritz-style buttery crackers, just like in the photo. Their crisp-yet-tender texture pairs perfectly with the soft, creamy spread, and their mild flavor doesn’t distract from the cheese ball itself.
But if you want to mix things up:
- Pretzel crisps give a salty crunch
- Crostini make it a little fancier
- Celery sticks or cucumber slices work great for a lighter option
Just don’t use flimsy chips. You’ll end up with broken chips and sad guests.
The Importance of Texture in a Cheese Ball
Texture is everything. That’s why this recipe includes both blended and coated beef. Inside the ball, the beef pieces are finely chopped so they blend in with the cream cheese smoothly. On the outside, they’re just a little chunkier, giving a satisfying salty bite and a fun visual texture.
This balance keeps every bite interesting. Soft inside, crisp coating outside—it’s like the cheese ball version of a truffle.
Step-by-Step: Making the Perfect Chipped Beef Cheese Ball
Let’s walk through the steps with some pro tips to make sure your cheese ball turns out just as beautiful (and delicious) as the one in the photo.
Make the Creamy Base
In a large mixing bowl, combine:
- 2 packages (8 oz each) softened cream cheese
- ½ of your chopped chipped beef
- 1½ teaspoons Worcestershire sauce
- ½ teaspoon garlic powder
- ½ teaspoon onion powder
- 3 finely chopped green onions
Now mix like you mean it. You want this smooth and creamy, with the beef and onions evenly distributed. Use a hand mixer for easy blending, or go old-school with a sturdy spoon and some elbow grease. About 5 minutes should do it.
Shape It Right
Scoop the mixture into the center of a large piece of plastic wrap. Gather the corners and gently press it into a ball. You don’t need it to be perfect—it’ll firm up in the fridge and be easier to shape later.
Chill for at least 20 minutes, or up to 24 hours if you’re prepping ahead. The longer it chills, the firmer (and easier to coat) it’ll be.
The Coating is the Showstopper
This is where the magic happens. Take the chilled cheese ball and unwrap it carefully. Then press the remaining chopped chipped beef all over the outside. Really press it in so it sticks—you want full coverage, just like in the image.
If the beef pieces are falling off, give the cheese ball a few minutes at room temp to soften slightly, then try again.
Garnish and Serve with Style
Place your finished cheese ball in the center of a platter. Sprinkle a few fresh green onions over the top for color and freshness. Arrange your crackers (or other dippers) around it, and voila—party time!
And don’t forget to give everyone a little spreader knife to keep things neat.
Tips for the Best Results Every Time
Want to make sure your chipped beef cheese ball comes out just right every single time? Here are some simple but game-changing tips:
- Let the cream cheese soften fully before mixing. Cold cream cheese will stay lumpy and make blending a pain.
- Use room-temperature hands when shaping the ball to avoid sticking. You can even wear disposable gloves for easy cleanup.
- Chop the beef finely for the inside, but leave it a little chunkier for the coating. It adds visual appeal and more texture.
- Chill before coating. If you try to add the beef coating when the cheese ball is too soft, it won’t stick well and the ball can lose its shape.
- Press firmly when applying the outer beef layer—but gently enough not to squash the ball.
- Use fresh green onions, not dried or pre-chopped ones. The freshness really makes a difference.
- Serve it slightly chilled, but not cold as ice. About 10 minutes at room temp before serving will bring out the flavors better.
These little tweaks can be the difference between “pretty good” and “oh my gosh, who made this?!”
Make-Ahead and Storage Advice
This recipe is actually even better when made ahead, which is perfect for busy hosts!
Make-ahead tips:
- You can mix and shape the cheese ball up to 2 days in advance.
- Keep it tightly wrapped in plastic wrap in the fridge.
- Only coat the outside in chipped beef the day you’re serving—it keeps the texture fresher and the color vibrant.
Storage:
- Leftovers can be stored in an airtight container or rewrapped in plastic wrap.
- Will stay good for 3–4 days in the fridge.
- Avoid freezing—cream cheese can get grainy when thawed.
If you’re lucky enough to have leftovers, spread it on a toasted bagel or sandwich. Trust us—it’s next-level good.
You may like also :
RUDOLPH HOLIDAY CHEDDAR CHEESE BALL: THE ULTIMATE FESTIVE SNACK
Easy cheese ball party snack
Common Mistakes to Avoid
Even a simple recipe like this has a few potential pitfalls. Let’s dodge them:
- Not softening the cream cheese
Result: A chunky, uneven mixture that’s hard to spread. - Skipping the chilling time
Result: A floppy, hard-to-handle cheese mess that won’t hold its shape. - Applying the coating too soon
If the cheese ball is too soft, the beef won’t stick well, and your coating will slide off. - Overloading it with salt
Chipped beef is salty enough—resist the urge to add extra salt or salty seasoning. - Serving without crackers or spreaders
Make sure your guests can enjoy it easily. Provide plenty of sturdy dippers and a butter knife or two.
Avoid these, and you’re golden.
Print
Creamy Chipped Beef Cheese Ball
- Prep Time: 12 minutes
- Total Time: 32 minutes
- Category: Classic Appetizer / No-Bake Party Snack
Description
✨🥨 Rich, savory, and irresistibly creamy—this classic chipped beef cheese ball brings back the magic of old-school party trays and cozy holiday gatherings. Every bite is salty, smooth, and comforting, the kind of appetizer everyone circles back to while chatting around the table 🎉❤️
Ingredients
2 packages (8 oz each) cream cheese, softened 🧀
1 package (8 oz) chipped dried beef, finely chopped and divided 🥩
1½ teaspoons Worcestershire sauce 🌶️
½ teaspoon garlic powder 🧄
½ teaspoon onion powder 🧅
3 green onions, finely chopped (plus extra for garnish) 🌿
Ritz crackers, for serving 🥨
Instructions
In a large bowl, combine softened cream cheese, half of the chopped chipped beef, Worcestershire sauce, garlic powder, onion powder, and green onions. Mix until smooth and fully blended (5 minutes) 🥣
Transfer the mixture onto plastic wrap, wrap tightly, and shape into a smooth ball. Refrigerate until firm (20 minutes) ❄️
Unwrap the chilled cheese ball and gently press the remaining chopped chipped beef all over the outside so it sticks evenly (5 minutes) ✨
Place the cheese ball on a serving platter, sprinkle with extra green onions, and serve with buttery round crackers (2 minutes) 🎉
Notes
Nutrition
- Serving Size: 10 servings
- Calories: 320 kcal
Variations and Fun Twists
Want to add a little personality to your cheese ball? Here are some fun and tasty ideas:
- Add shredded cheddar for extra cheesiness
- Mix in chopped pickles or relish for a tangy bite
- Use bacon bits instead of beef for a smoky twist
- Roll in chopped nuts (like pecans or walnuts) instead of chipped beef for crunch
- Add a splash of hot sauce for heat lovers
You can even shape it into festive designs—like a pumpkin for fall parties or a snowman for winter get-togethers. Cheese art? Yes, please.
Serving Suggestions: Not Just for Parties!
Sure, this cheese ball is perfect for holidays and potlucks, but don’t sleep on its other uses!
- Game day appetizer with pretzel bites and chips
- Movie night snack board with fruits and meats
- Holiday brunch spread next to bagels and pastries
- Picnic side dish served in a cold cooler with crackers
You can even spread it on toast or use it as a sandwich filling. It’s basically a savory spread that’s always in style.
Pairing Ideas: Drinks and More
If you’re setting up a party table, don’t forget to think about what to drink alongside this creamy dream of an appetizer.
Here are some great pairings:
- Sparkling wine or prosecco – balances the richness
- Crisp white wines like Sauvignon Blanc
- Light beers or lagers
- Iced tea or lemon water for non-alcoholic options
Want to go all-out? Pair it with:
- A meat and cheese board
- Pickles and olives
- Sliced fruits like apples or grapes
It rounds out any snack spread with ease.
Final Thoughts
There’s just something timeless about the Creamy Chipped Beef Cheese Ball. It’s like a hug in appetizer form—rich, comforting, and always a hit. Whether you’re making it for the holidays, a backyard hangout, or just because you love snacks (no judgment!), this recipe delivers big on taste and presentation.
Easy to make, fun to serve, and even better to eat, this cheese ball is your new go-to for every kind of get-together. And if you’re the one bringing it to the party, prepare to be asked for the recipe. A lot.
Similar recipes :
No-Bake Pumpkin Cheesecake Balls: A Fall Dream Come True
FAQs
1. Can I make this without chipped beef?
Sure! You can substitute it with finely chopped deli meat, bacon bits, or even vegetarian-friendly meat alternatives.
2. Can I freeze the cheese ball?
Technically, yes—but we don’t recommend it. Cream cheese can get watery and grainy after thawing. It’s best enjoyed fresh.
3. How do I make it spicier?
Add a few dashes of hot sauce or mix in some finely diced jalapeños for a kick of heat.
4. Can I double the recipe?
Absolutely. Just double all the ingredients and shape into either one giant cheese ball or two medium ones.
5. What’s the best way to transport it to a party?
Wrap it tightly in plastic wrap, then place it in an airtight container. Add the beef coating at the destination if possible to keep it fresh-looking.