What Is Easter Dirt Cake Casserole?
The Origins of Dirt Cake Desserts
If you’ve ever seen a dessert that looks like a flower pot but tastes like a dream, you’ve already met the charming concept behind dirt cake. This playful treat has been around for decades, originally gaining popularity in the United States as a fun, kid-friendly dessert that mimics the look of soil using crushed chocolate cookies. It’s one of those nostalgic recipes that feels like it belongs at every family gathering, especially during springtime celebrations.
The traditional dirt cake often included gummy worms and was served in cups or flower pots, making it both a visual and culinary experience. Over time, creative home cooks began adapting the recipe into larger formats, leading to the rise of the dirt cake casserole. This version takes everything people love about the original creamy layers, chocolate crunch, and whimsical presentation—and scales it up for sharing.
What makes this dessert truly special is its no-bake simplicity. You don’t need to worry about ovens, precise temperatures, or complicated techniques. Instead, it’s all about layering flavors and textures in a way that feels almost effortless. The combination of crushed Oreos, creamy filling, and soft pudding creates a contrast that keeps every bite interesting.
Why It’s Perfect for Easter Celebrations
Easter is all about renewal, color, and joy—and this dessert fits right in like it was made for the occasion. The Easter Dirt Cake Casserole takes the classic concept and gives it a seasonal twist with pastel candies, mini cookies, and a light, fluffy filling that feels just right for spring.
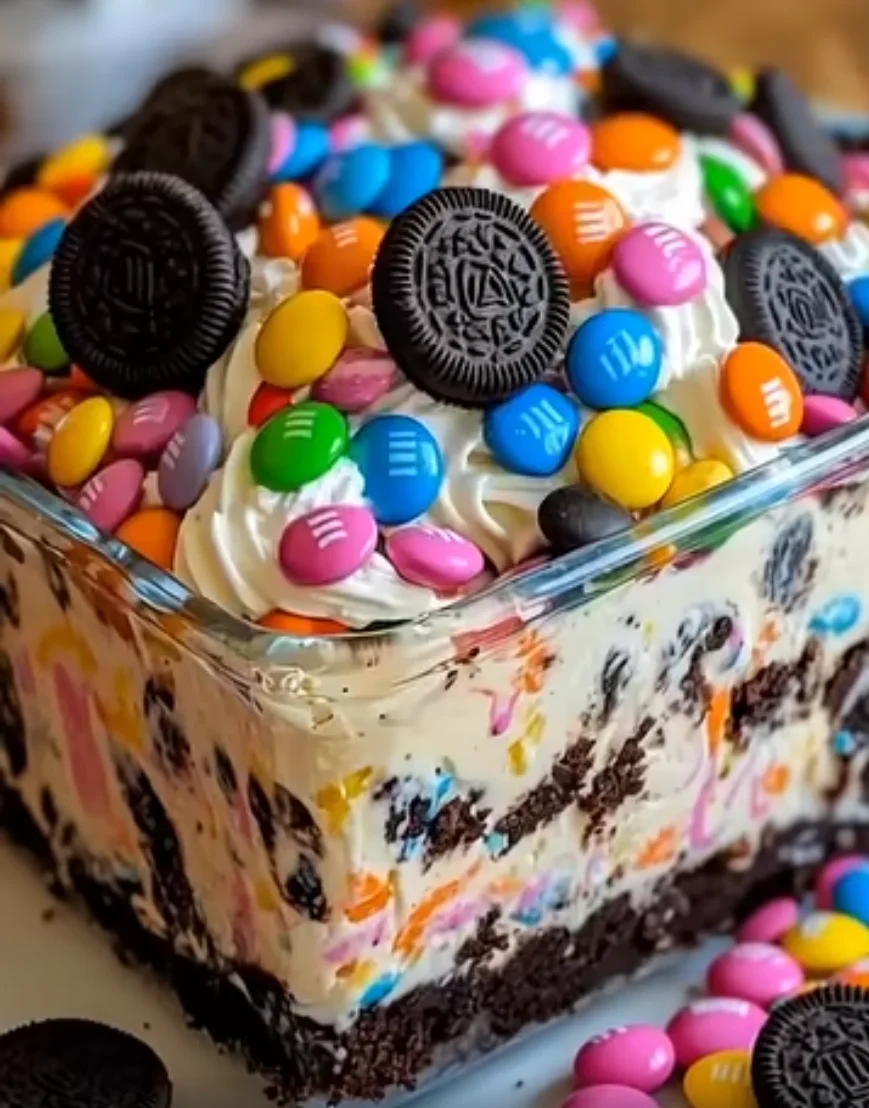
One of the biggest reasons this dessert shines during Easter is its visual appeal. The crushed Oreo topping resembles soil, while the colorful candy-coated chocolates mimic Easter eggs scattered across a garden. It’s almost like you’re serving a tiny edible spring scene. For kids, it’s exciting and playful; for adults, it’s nostalgic with a festive upgrade.
Another advantage is how easy it is to prepare ahead of time. Easter gatherings can get busy, and the last thing anyone wants is to be stuck in the kitchen while everyone else is enjoying the day. Since this casserole needs a couple of hours to chill anyway, you can make it in advance and simply pull it out when it’s time to serve.
There’s also a communal aspect to it. Served in a 9×13-inch dish, it’s perfect for sharing, making it ideal for family dinners, potlucks, or even classroom parties. Everyone can scoop out their portion, and each serving delivers the same balance of creamy, crunchy, and sweet.
Ingredients Breakdown and Their Roles
The Oreo Cookie Base Explained
At the heart of any dirt cake is the Oreo cookie base, and it’s doing much more than just sitting there looking pretty. These crushed cookies act as both the foundation and the finishing touch, giving the dessert its signature “dirt-like” appearance and a rich chocolate flavor that ties everything together.
When you crush Oreos into fine crumbs, you’re essentially creating a texture that mimics soil—but in the most delicious way possible. The slight bitterness of the chocolate cookies balances out the sweetness of the cream layers, preventing the dessert from becoming overly sugary. It’s a subtle detail, but it makes a huge difference in the overall taste.
Another reason Oreos work so well is their versatility. Whether you use classic Oreos, double-stuffed, or even flavored varieties, they consistently deliver that familiar crunch and flavor. Crushing them finely ensures a more cohesive layer, while leaving some chunks can add a bit of texture variation if that’s your style.
The bottom layer of crushed Oreos acts almost like a crust, giving structure to the dessert. Meanwhile, the top layer provides a visual and textural contrast, making each bite more interesting. It’s this dual role that makes Oreos such an essential component.
If you think about it, the Oreo layer is like the stage on which the rest of the dessert performs. Without it, the creamy filling wouldn’t have the same depth or contrast. It’s simple, yes—but absolutely irreplaceable in achieving that classic dirt cake experience.
Cream Cheese and Pudding Layer Magic
Now let’s talk about the real star of the show—the creamy filling. This layer is where all the magic happens, combining cream cheese, butter, powdered sugar, pudding mix, milk, and whipped topping into something that’s nothing short of irresistible.
The cream cheese provides a slightly tangy base that balances the sweetness of the dessert. When blended with butter and powdered sugar, it transforms into a smooth, rich mixture that feels almost like a cheesecake filling. This is what gives the dessert its luxurious texture.
Then comes the instant vanilla pudding, which adds both flavor and structure. As it thickens, it helps stabilize the filling, ensuring that each layer holds its shape when served. The pudding also introduces a subtle vanilla note that complements the chocolate cookies beautifully.
Folding in the whipped topping is the final step that brings everything together. It lightens the mixture, making it airy and easy to spread. Without it, the filling would be too dense, but with it, you get that perfect melt-in-your-mouth consistency.
The combination of these ingredients creates a layer that’s creamy, fluffy, and just the right amount of sweet. It’s the kind of texture that makes you go back for seconds without even thinking about it.
Festive Toppings That Make It Pop
The toppings are where this dessert truly becomes an Easter masterpiece. While the base and filling provide the flavor, the decorations bring the fun and personality.
Pastel-colored candy-coated chocolates are the obvious highlight. Their bright hues instantly evoke the feeling of Easter eggs scattered across a garden. They add a slight crunch and a pop of sweetness that contrasts nicely with the creamy layers below.
Mini Oreo cookies add another layer of texture and visual interest. They’re like tiny surprises sprinkled across the top, reinforcing the chocolate theme while making the dessert look even more playful.
You can also get creative here. Some people like to add edible grass, marshmallow chicks, or even small candy eggs to enhance the theme. The beauty of this dessert is that it’s incredibly customizable, allowing you to tailor it to your style or the preferences of your guests.
In many ways, decorating this casserole feels like crafting. It’s an opportunity to let your creativity shine while turning a simple dessert into something memorable and festive.
Step-by-Step Preparation Guide
Crushing the Cookies to Perfection
It might sound like the simplest step in the entire recipe—and honestly, it is—but how you crush your Oreo cookies can completely change the texture of your Easter Dirt Cake Casserole. Think of this step as laying the groundwork for everything that follows. If the base isn’t right, the whole dessert can feel off, even if the flavors are spot-on.
Using a food processor is the easiest and most efficient method. It gives you fine, even crumbs in just a few pulses, which helps create that smooth, soil-like consistency that dirt cake is known for. The finer the crumbs, the more cohesive your layers will feel when you dig in with a spoon. It almost melts into the creamy filling, creating a seamless bite every time.
If you don’t have a food processor, don’t worry—you’re not out of luck. The classic zip-top bag and rolling pin method works just as well, though it requires a bit more effort. Place the cookies in the bag, seal it tightly, and start crushing. There’s something oddly satisfying about this process, like you’re actively building the dessert from scratch. Plus, you can control the texture more easily. Want a bit of crunch? Leave some slightly larger chunks. Prefer a smoother feel? Keep going until everything is finely crushed.
One small tip that often gets overlooked: don’t remove the cream filling from the Oreos. It adds extra sweetness and helps bind the crumbs together slightly, making the base more flavorful and less dry.
As you prepare the crumbs, you’ll notice the rich chocolate aroma starting to build. It’s the first hint of what’s to come. This step might seem minor, but it sets the tone for the entire dessert—both in flavor and texture. Get it right, and you’re already halfway to something amazing.
Creating a Smooth and Creamy Filling
Now comes the part where everything starts to feel indulgent—the creamy filling. This is where the dessert transforms from simple crushed cookies into something that feels rich, fluffy, and almost luxurious.
Start by beating the softened cream cheese and butter together. This step is crucial because it determines how smooth your filling will be. If either ingredient is too cold, you’ll end up with lumps, and no one wants that in a dessert that’s supposed to be silky. When done right, the mixture should look light, creamy, and completely uniform.
Next, add the powdered sugar. As you mix it in, you’ll notice the texture becoming fluffier and slightly thicker. It’s like watching a transformation happen right in your bowl. The sweetness starts to build here, but it’s balanced by the slight tang of the cream cheese.
In a separate bowl, whisk the instant vanilla pudding mix with cold milk. This step only takes a couple of minutes, but it’s essential for achieving that classic pudding consistency. You’ll see it thicken quickly, turning into a smooth, glossy mixture that smells subtly of vanilla.
Once the pudding is ready, combine it with the cream cheese mixture. Blend until everything is fully incorporated. At this point, the filling will already taste incredible, but there’s one final step that takes it to the next level—folding in the whipped topping.
Gently folding (not mixing aggressively) keeps the filling light and airy. It’s the difference between a dense dessert and one that feels like it practically melts on your tongue. The final result should be a smooth, fluffy mixture that’s easy to spread and impossible to resist.
Assembling the Perfect Layers
This is where your dessert starts to come together visually. Layering the ingredients is like building a story—each layer adds depth, texture, and anticipation.
Start by spreading half of your crushed Oreo crumbs evenly across the bottom of a 9×13-inch casserole dish. Press them down lightly to create a stable base, but don’t pack them too tightly. You want them to hold together while still maintaining that crumbly texture.
Next comes the creamy filling. Spoon it over the Oreo layer and spread it out evenly. Take your time here—this layer is the heart of the dessert, and you want it to be smooth and consistent from edge to edge. A spatula works best for this, helping you create a clean, even surface.
Once the filling is in place, it’s time for the final cookie layer. Sprinkle the remaining crushed Oreos over the top, covering the creamy layer completely. This creates that signature “dirt” look that makes the dessert so recognizable and fun.
What’s fascinating about this step is how the layers interact. The bottom layer absorbs a bit of moisture from the filling, becoming slightly softer, while the top layer stays a bit more crumbly. This contrast adds a subtle complexity to each bite.
As you step back and look at your assembled casserole, you’ll notice how simple ingredients have come together to create something that already looks inviting—even before the decorations go on.
Decorating for That Easter Aesthetic
Here’s where things get fun and a little creative. Decorating your Easter Dirt Cake Casserole is less about precision and more about bringing a festive, playful vibe to the dessert.
Start by sprinkling pastel-colored candy-coated chocolates across the top. There’s no strict pattern to follow—just scatter them in a way that feels natural, like Easter eggs hidden in a garden. The colors instantly brighten up the dessert, making it feel cheerful and seasonal.
Next, add mini Oreo cookies. These little additions not only enhance the chocolate flavor but also give the dessert a bit of visual variety. They act like tiny accents that make the whole dish look more detailed and thoughtfully put together.
If you want to take things a step further, you can add extra decorations like edible grass, marshmallow bunnies, or even small chocolate eggs. These touches aren’t necessary, but they can elevate the presentation, especially if you’re serving this at a party or family gathering.
The beauty of decorating this dessert is that there’s no right or wrong way to do it. It’s all about creating something that feels joyful and inviting. And when you finally place it on the table, it’s not just a dessert—it’s a centerpiece.
Tips for the Best Easter Dirt Cake
Texture and Flavor Enhancements
Creating a great Easter Dirt Cake Casserole is one thing, but making an unforgettable one comes down to the little details. Texture and flavor are what separate a good dessert from one that people keep talking about long after the plates are cleared.
One simple way to enhance the texture is by experimenting with the consistency of your Oreo crumbs. A mix of fine crumbs and slightly larger chunks can create a more dynamic bite. It’s like adding layers within layers—each spoonful feels a little different, which keeps things interesting.
Another tip is to chill the dessert for longer than the minimum two hours if you can. Letting it sit for four hours or even overnight allows the flavors to meld together more deeply. The filling becomes firmer, the cookie layers soften slightly, and everything tastes more cohesive.
You can also play around with flavor by using different pudding mixes. While vanilla is classic, chocolate or even cookies-and-cream pudding can add a new twist. It’s a subtle change, but it can completely transform the overall taste.
A small pinch of salt in the cream cheese mixture can also make a big difference. It might sound surprising, but salt enhances sweetness and balances the flavors, making the dessert taste more complex and less one-dimensional.
These tweaks don’t require much extra effort, but they can elevate your dessert from something simple to something truly memorable.
Common Mistakes to Avoid
Even though this is a relatively easy dessert, there are a few common pitfalls that can affect the final result. Knowing what to avoid can save you from disappointment and ensure your casserole turns out just right.
One of the biggest mistakes is using ingredients that aren’t properly softened or chilled. Cream cheese and butter need to be soft for a smooth filling, while the pudding mixture needs cold milk to set correctly. Skipping these details can lead to a lumpy or runny texture.
Another issue is overmixing the whipped topping. Folding it in gently is key—if you mix too aggressively, you’ll lose the airiness that makes the filling light and fluffy.
It’s also important not to rush the chilling process. Serving the dessert too soon can result in layers that haven’t fully set, making it messy and less enjoyable to eat. Patience really pays off here.
Finally, be mindful of balance. Adding too many toppings can overwhelm the dessert, both visually and in flavor. Sometimes, less is more, and a simple, clean decoration can be just as effective.
Creative Variations to Try
Chocolate Lovers Version
If you’re someone who believes there’s no such thing as too much chocolate, this variation is going to feel like a dream come true. The classic Easter Dirt Cake Casserole already leans into chocolate with its Oreo base, but taking it a step further transforms the dessert into something deeper, richer, and more indulgent.
Start by swapping the vanilla pudding for chocolate pudding. This simple change intensifies the flavor profile instantly, creating a more cohesive chocolate experience from top to bottom. The creamy filling becomes darker, richer, and more dessert-like in a decadent sense—almost like a mousse layered with cookie crumbs.
You can also upgrade your Oreo selection. Instead of classic Oreos, try using double chocolate or fudge-filled varieties. These add an extra layer of intensity that chocolate lovers will immediately notice. The result? A base that doesn’t just support the dessert but actively enhances it.
For toppings, think beyond pastel candies and lean into chocolate-themed decorations. Mini chocolate chips, chocolate shavings, or even chunks of brownie can add texture and visual appeal. If you still want to keep the Easter vibe, you can use chocolate eggs or candy-coated chocolates in deeper hues.
Another fun twist is adding a drizzle of chocolate syrup between layers. It creates thin ribbons of extra flavor that surprise you with every bite. It’s like discovering hidden treasure in a dessert you already love.
What makes this version special is how it amplifies everything people already enjoy about dirt cake. It’s richer, bolder, and unapologetically indulgent—perfect for those moments when you want dessert to feel like a full-on treat rather than just a sweet ending.
Healthier Ingredient Swaps
Now, let’s be real—this dessert isn’t exactly known for being light. But that doesn’t mean you can’t make a few smart swaps to create a version that feels a bit more balanced without sacrificing flavor.
One of the easiest changes is using reduced-fat cream cheese and light whipped topping. These alternatives maintain the creamy texture while cutting down on some of the richness. You’ll still get that smooth, fluffy filling, just with a slightly lighter feel.
You can also opt for sugar-free or low-sugar pudding mix. This works surprisingly well, especially since the dessert already has sweetness from the cookies and toppings. It’s a small adjustment that can make a noticeable difference.
For the Oreo layer, consider using reduced-sugar or gluten-free chocolate cookies if dietary needs are a concern. While they might taste slightly different, they still provide that essential crunch and chocolate base.
Another creative idea is incorporating fresh fruit. Adding a thin layer of sliced strawberries or bananas between the cookie and cream layers introduces a natural sweetness and a bit of freshness. It’s not traditional, but it adds a new dimension that many people end up loving.
These swaps don’t turn the dessert into a “health food,” but they do make it more approachable for those who want to enjoy a treat without going all-in on sugar and fat. It’s all about balance—keeping the spirit of the dessert intact while making it fit your preferences a little better.
Serving and Storage Tips
How to Serve for Maximum Appeal
Serving this dessert is almost as important as making it. After all, we eat with our eyes first, and presentation can elevate the entire experience.
When you’re ready to serve, use a large spoon or spatula to scoop out portions. Because of the layered structure, each serving naturally showcases the different textures—the crumbly Oreo base, the creamy filling, and the decorative topping. It’s not a perfectly clean slice like a cake, but that’s part of its charm.
For a more polished presentation, you can serve individual portions in clear cups or jars. This allows the layers to be visible from the side, creating a visually appealing dessert that looks almost like a parfait. It’s a great option for parties or gatherings where you want something a little more elegant.
Temperature also plays a role. This dessert is best served cold, straight from the refrigerator. The chilled filling holds its shape better and provides a refreshing contrast to the rich flavors.
If you’re serving this at an Easter gathering, consider placing a few decorative elements around the dish—like pastel napkins or small spring-themed accents. It’s a small touch, but it enhances the overall presentation and makes the dessert feel even more festive.
Ultimately, serving this casserole is about embracing its playful nature. It’s not meant to be overly formal—it’s meant to be enjoyed, shared, and maybe even talked about long after the meal is over.
Storing Leftovers Properly
If you somehow end up with leftovers (which isn’t always guaranteed), storing them correctly ensures that the dessert stays just as delicious the next day.
Cover the casserole dish tightly with plastic wrap or transfer the dessert to an airtight container. This helps prevent it from absorbing any odors from the refrigerator and keeps the texture intact.
The dessert can typically be stored in the fridge for up to 3–4 days. Over time, the Oreo layers will soften slightly as they absorb moisture from the filling. Some people actually prefer this texture, as it becomes more cake-like.
Freezing is possible, but it’s not ideal. The creamy filling can change texture once thawed, becoming slightly grainy. If you do choose to freeze it, make sure it’s well-covered and consume it within a couple of weeks for the best quality.
One thing to keep in mind is that toppings like candy-coated chocolates may lose their crunch over time. If you’re planning to store the dessert, you might want to add some fresh toppings just before serving again.
Proper storage doesn’t just preserve the dessert—it gives you another chance to enjoy it without any extra effort. And sometimes, the second day tastes even better than the first.
Nutritional Overview and Portion Control
Let’s not pretend this dessert is trying to win any awards for being low-calorie—it’s indulgent, rich, and meant to be enjoyed. That said, understanding what you’re eating can help you enjoy it more mindfully.
A typical serving of Easter Dirt Cake Casserole contains a mix of carbohydrates, fats, and sugars, primarily from the cookies, cream cheese, and pudding. It’s energy-dense, which is why even a small portion can feel satisfying.
Here’s a simple breakdown:
| Component | Contribution |
|---|---|
| Oreo Cookies | Sugar and carbohydrates |
| Cream Cheese & Butter | Fat and richness |
| Pudding Mix | Flavor and texture |
| Whipped Topping | Lightness and volume |
| Candy Toppings | Extra sugar and crunch |
Portion control is key here. Because the dessert is served in a casserole dish, it’s easy to scoop out more than you intended. Sticking to a moderate portion allows you to enjoy the flavors without overdoing it.
One helpful approach is to pair this dessert with lighter meal options. If the rest of your Easter spread includes fresh vegetables, lean proteins, and lighter sides, this dessert fits in nicely as a treat rather than the main focus.
It’s also worth remembering that desserts like this are often tied to experiences—family gatherings, celebrations, and shared moments. The value isn’t just in the ingredients but in the memories created around them.
Enjoying it thoughtfully means you get the best of both worlds: the rich, satisfying taste and the joy of the occasion.
Conclusion
Easter Dirt Cake Casserole isn’t just a dessert—it’s an experience layered with flavor, texture, and a bit of playful creativity. From the crunchy Oreo base to the smooth, airy filling and colorful toppings, every element works together to create something that feels both nostalgic and fresh.
What makes it truly special is how approachable it is. You don’t need advanced baking skills or fancy equipment to pull it off. It’s the kind of recipe that invites you to get involved, experiment, and even make a bit of a mess along the way.
Whether you stick to the classic version or try one of the variations, this dessert has a way of becoming a centerpiece—not just on the table, but in the overall experience of the celebration. It’s shared, talked about, and remembered.
And maybe that’s the real magic of it. It’s not just about how it tastes, but how it brings people together in a simple, joyful way.
FAQs
1. Can I make Easter Dirt Cake Casserole ahead of time?
Yes, and it’s actually recommended. Preparing it a day in advance allows the flavors to blend better and the layers to set properly, resulting in a more cohesive and delicious dessert.
2. Can I use homemade whipped cream instead of Cool Whip?
Absolutely. Homemade whipped cream can be used as a substitute, but make sure it’s stabilized so it holds its structure when mixed into the filling.
3. What can I use instead of Oreos?
You can substitute Oreos with any chocolate sandwich cookies or even chocolate graham crackers. The flavor will vary slightly, but the texture will remain similar.
4. How long does it need to chill before serving?
At least 2 hours, but 4 hours or overnight is ideal for the best texture and flavor.
5. Can I make this dessert gluten-free?
Yes, simply use gluten-free chocolate sandwich cookies and ensure all other ingredients are certified gluten-free.
Print
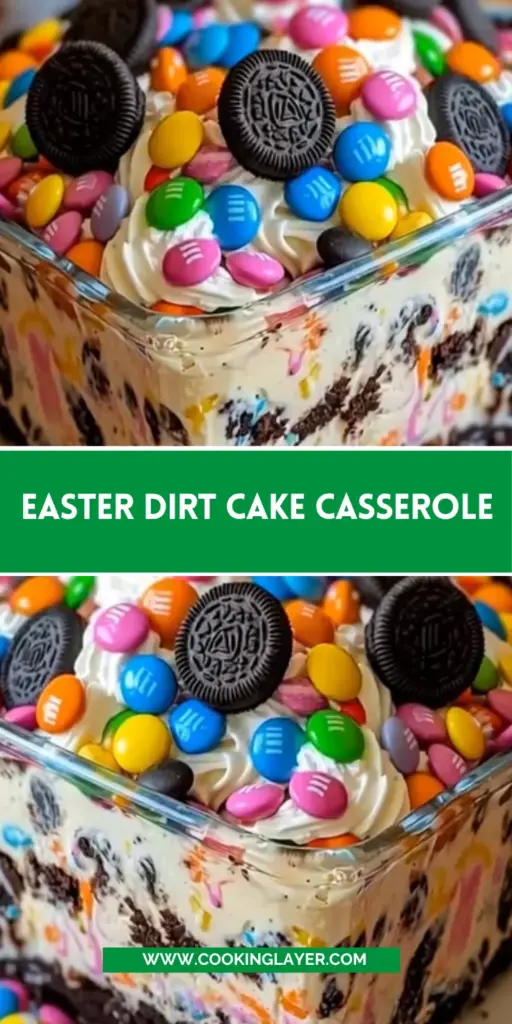
Easter Dirt Cake Casserole
Description
A fun, no-bake Easter dessert with creamy pudding layers, crushed Oreo cookies, and festive candy on top.
Ingredients
For the layers
- 1 package (14 oz) Oreo cookies, crushed
- 1 package (8 oz) cream cheese, softened
- 1/4 cup unsalted butter, softened
- 1 cup powdered sugar
- 1 package (3.4 oz) instant vanilla pudding mix
- 2 cups cold milk
- 1 container (8 oz) whipped topping, thawed
For the topping
- 1 cup pastel-colored candy-coated chocolates
- 1/2 cup mini Oreo cookies
Instructions
Place the Oreo cookies in a food processor and pulse until they turn into fine crumbs. If you do not have a food processor, place the cookies in a zip-top bag and crush them with a rolling pin.
In a large mixing bowl, beat the softened cream cheese and butter until smooth and creamy. Add the powdered sugar and mix until light and fluffy.
In a separate bowl, whisk the instant vanilla pudding mix with the cold milk for about 2 minutes, until it starts to thicken.
Add the pudding mixture to the cream cheese mixture and beat until smooth. Gently fold in the whipped topping until fully combined.
Spread half of the crushed Oreo crumbs evenly into the bottom of a 9×13-inch casserole dish. Spread the creamy pudding mixture evenly over the crumb layer.
Sprinkle the remaining crushed Oreo crumbs over the top.
Top with pastel candy-coated chocolates and mini Oreo cookies for a festive Easter finish.
Cover and refrigerate for at least 2 hours before serving so the dessert can set.
For an extra Easter look, add a few marshmallow bunnies or pastel sprinkles right before serving.