
Introduction to Easter Dirt Cake Casserole
If you’ve ever seen a dessert that looks like a flower pot but tastes like pure heaven, you’ve already met the concept behind dirt cake. This playful treat has been around for decades, originally gaining popularity in the United States as a fun, kid-friendly dessert. The idea is simple but genius—crushed chocolate cookies resemble soil, while creamy layers underneath create a rich, pudding-like experience. It’s the kind of dessert that doesn’t take itself too seriously, yet somehow always becomes the highlight of the table.
Dirt cake started as a novelty, often served in buckets or pots with gummy worms sticking out to complete the “garden” illusion. Over time, it evolved into more refined versions, including layered casseroles that are easier to serve at gatherings. That’s where the Easter Dirt Cake Casserole comes in—a seasonal twist that swaps out the worms for pastel candies and festive decorations.
Save this recipe and cook smarter
Keep your favorite Cooking Layer recipes in one place, plan your weekly meals, and quickly find dinner ideas whenever you need them.
Free to download • Fast and easy to use
What makes this dessert so enduring isn’t just the taste, although that’s definitely a big part of it. It’s the experience. There’s something nostalgic about digging into layers of creamy filling and chocolatey crumbs. It feels playful, almost like dessert and decoration combined into one.
Why You’ll Love This Easter Dirt Cake Casserole
This Easter Dirt Cake Casserole is not just easy to make; it’s downright fun! As a busy mom, I appreciate how quickly I can throw this together without any baking. The layered flavors of rich cream cheese, delicious pudding, and crunchy Oreos create a memorable dessert that looks as fabulous as it tastes. Plus, it’s perfect for celebrating Easter with loved ones, leaving you more time to enjoy the festivities!
Ingredients for Easter Dirt Cake Casserole
Gathering the right ingredients is part of the fun, and for my Easter Dirt Cake Casserole, trust me, they’re all super easy to find! Here’s what you’ll need:
- Oreo cookies: Their rich chocolate flavor creates the perfect crunch. You can use regular or any fun-flavored Oreos for a twist.
- Cream cheese: Softened cream cheese adds a rich, creamy layer that balances the sweetness beautifully.
- Unsalted butter: This gives the cream cheese mix a smooth consistency while adding richness.
- Powdered sugar: It sweetens the cream cheese mixture without any grittiness. Essential for that lovely texture!
- Instant vanilla pudding mix: This thickens the filling and imparts a delicious vanilla flavor. Make sure it’s the instant kind for quick assembly.
- Cold milk: The milk is crucial for achieving the right consistency in the pudding. I prefer whole milk, but feel free to use what you have on hand.
- Whipped topping (Cool Whip): This makes the filling light and airy, providing a lovely contrast to the dense layers of Oreos.
- Pastel candy-coated chocolates: Think cute M&M’s! They’re not just for taste; they add that festive Easter flair!
- Mini Oreo cookies: Perfect for decoration on top, these little gems add a whimsical look and extra crunch.
For exact quantities, you can find them at the bottom of the article where they’re available for printing. Enjoy the process of gathering these delightful ingredients; they help make this Easter Dirt Cake Casserole truly special!
How to Make Easter Dirt Cake Casserole
Now that you’ve gathered all your delightful ingredients, it’s time to get hands-on! Making this Easter Dirt Cake Casserole is as simple as layering flavors and textures. Each step is straightforward, and trust me, your kitchen will be filled with sweet anticipation!
Step 1: Crush the Cookies
Begin by crushing the Oreo cookies. I love using a food processor for this – it turns them into fine crumbs effortlessly. If you don’t have one, simply place the cookies in a zip-top bag. Then, take a rolling pin and smash away! Just make sure the pieces are crumbly but not dust.
Step 2: Make the Cream Cheese Mixture
Next, grab a large mixing bowl and beat the softened cream cheese and butter together. Mix them until smooth and fluffy. This step is crucial for a creamy texture. Afterward, add in the powdered sugar and blend until it’s all well combined. You want it to have a light and airy feel!
Step 3: Prepare the Pudding
Now, in a separate bowl, whisk the instant vanilla pudding mix with the cold milk. Do this for about two minutes until it starts to thicken. This is where the magic happens, and your pudding layer comes to life.
Step 4: Combine the Filling
Pour the thickened pudding mixture into the cream cheese mixture. Beat it together until it’s smooth and luscious. After that, gently fold in the whipped topping. Take your time here; you want to keep that airiness that makes your layers so delightful!
Step 5: Assemble the Casserole
It’s assembly time! Start by spreading half of the crushed Oreo crumbs evenly across the bottom of your 9×13-inch casserole dish. Then, take that creamy pudding mixture and spread it generously over the crumbs. This is where the magic of the layers truly begins.
Step 6: Add the Final Cookie Layer
For the last layer, sprinkle the remaining crushed Oreo crumbs on top of the pudding layer. This creates a delightful crunch and is what gives your Easter Dirt Cake Casserole its signature “dirt” appearance. Don’t skimp on this step; it’s essential for texture!
Step 7: Decorate
Now it’s time for the fun part! Top your casserole with pastel candy-coated chocolates and mini Oreo cookies. Get creative with your decorations! You can arrange them in patterns or simply scatter them for a more rustic look. This adds that festive touch perfect for Easter!
Step 8: Chill
Finally, cover your casserole with plastic wrap and place it in the refrigerator. Let it chill for at least two hours. This resting time allows the layers to set and the flavors to blend beautifully. Trust me; the wait will be worth it when you take that first bite!
Tips for Success
- Use room temperature cream cheese for smoother mixing.
- Thaw the whipped topping completely for the best texture.
- Feel free to prep this dessert a day in advance – it only gets better!
- Get the kids involved in decorating; it turns into a fun family activity!
- Experiment with different candy toppings for a personalized touch!
Equipment Needed
- Mixing bowls: A large bowl for mixing and a smaller one for the pudding.
- Food processor: Ideal for crushing Oreos, but a rolling pin and a zip-top bag work too!
- Whisk: Perfect for blending the pudding and cream cheese mixtures.
- Spoon or spatula: For layering and spreading the fillings.
- 9×13-inch casserole dish: Essential for assembling and presenting your Easter Dirt Cake Casserole.
Variations
- Chocolate Pudding: Swap vanilla pudding for chocolate pudding for extra choco goodness!
- Gluten-Free Option: Use gluten-free Oreos to make this dessert suitable for gluten-sensitive friends and family.
- Fruit Add-ins: Layer in chopped strawberries or raspberries for a fruity twist and vibrant color.
- Nutty Crunch: Add chopped nuts like pecans or walnuts for an extra layer of crunch and flavor.
- Dairy-Free Version: Substitute cream cheese with dairy-free variations and use coconut whipped cream instead of Cool Whip.
Serving Suggestions
- Pair with fresh fruit salad for a refreshing contrast.
- Serve alongside a light springtime tea or lemonade to balance the sweetness.
- Garnish with edible flowers to enhance the festive look during Easter brunch.
- Offer small coffee cups for a cozy complement post-dessert.
FAQs about Easter Dirt Cake Casserole
As I share my love for this delightful Easter Dirt Cake Casserole, I often hear a few common questions. Let’s jump into them to clear up any confusion and help you create the perfect dessert!
Can I make this Easter Dirt Cake Casserole ahead of time?
Absolutely! In fact, I recommend making it a day in advance. The flavors have time to meld together beautifully, making it even tastier when served the next day.
Is this dessert suitable for kids?
Yes, it’s perfect for kids! They’ll love the fun layers and the opportunity to help with decorating. Plus, this no-bake treat is a sweet way to keep them engaged during Easter preparations.
Can I substitute regular Oreos for a different flavor?
Definitely! Explore your favorite Oreo flavors, like mint or peanut butter. Each one adds a unique flavor twist to your Easter Dirt Cake Casserole!
How do I store the leftovers?
If you have any leftovers (which is rare!), simply cover the casserole dish tightly with plastic wrap and keep it in the fridge. It should stay fresh for about three to four days.
Is there a way to make this dessert healthier?
You can try using reduced-fat cream cheese and sugar substitutes. Adding fruits like berries can also amp up the nutrition without sacrificing too much sweetness!
Final Thoughts
As I take a moment to reflect on this Easter Dirt Cake Casserole, my heart fills with joy. It’s more than just a dessert; it’s a delightful centerpiece that brings smiles and laughter to the table. Each layer, from the creamy pudding to the crunchy Oreos, is a testament to simple pleasures. This no-bake treat allows us busy moms to savor moments with our loved ones, sharing sweet bites and sweet memories. This Easter, let’s celebrate with this delightful recipe, making mealtime special and filled with joy!
Enjoyed this recipe?
Discover more delicious recipes, save your favorites, and plan your meals with the Cooking Layer app.
Free to download • Fast and easy to use

Easter Dirt Cake Casserole
- Prep Time: 30 minutes
- Cook Time: 0 minutes
- Total Time: 2 hours 30 minutes
- Yield: 12 servings 1x
- Category: Dessert
- Method: No-Bake
- Cuisine: American
- Diet: Vegetarian
Description
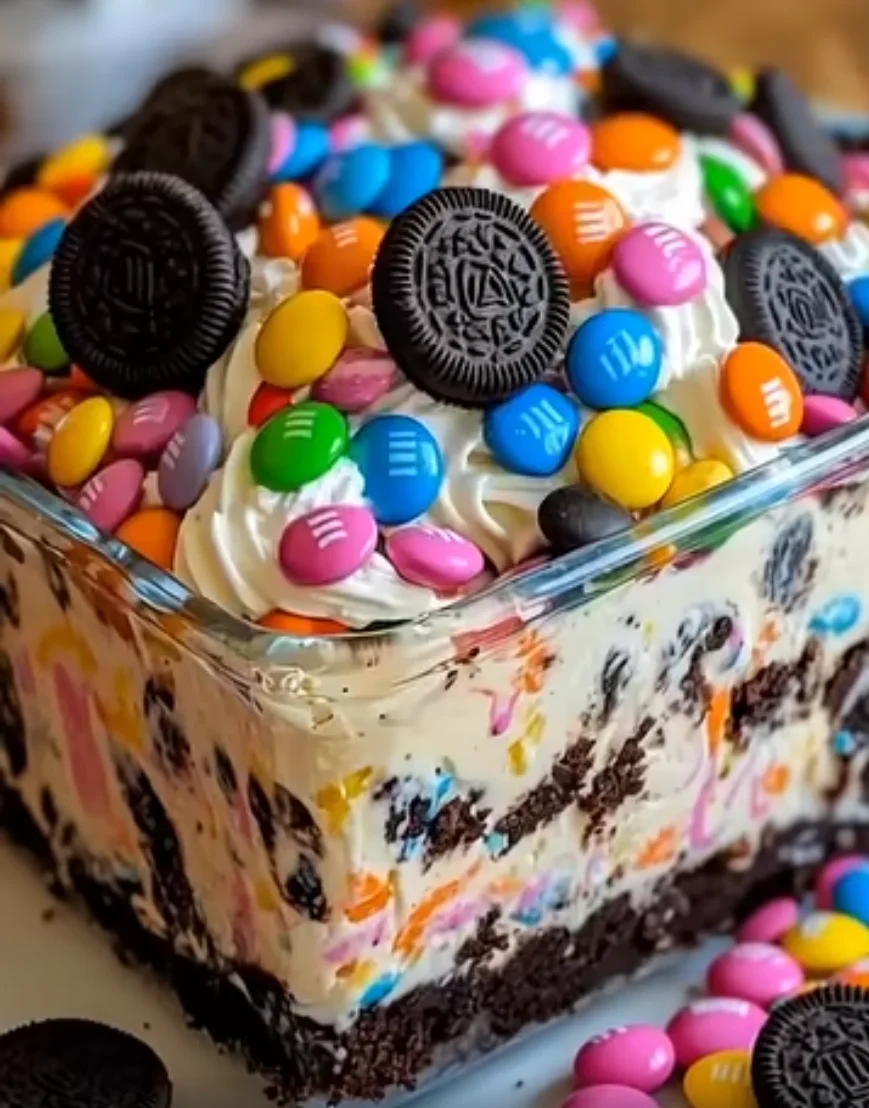
Easter Dirt Cake Casserole is a delightful no-bake treat that combines layers of creamy pudding, crushed Oreos, and festive decorations, making it perfect for Easter celebrations.
Ingredients
- 1 package (14 oz) Oreo cookies, crushed
- 1 package (8 oz) cream cheese, softened
- ¼ cup unsalted butter, softened
- 1 cup powdered sugar
- 1 package (3.4 oz) instant vanilla pudding mix
- 2 cups cold milk
- 1 container (8 oz) whipped topping (Cool Whip), thawed
- 1 cup pastel-colored candy-coated chocolates (such as M&M’s)
- ½ cup mini Oreo cookies
Instructions
- Crush the cookies: Place the Oreo cookies in a food processor and pulse until they become fine crumbs. If you don’t have a processor, place the cookies in a zip-top bag and crush them using a rolling pin.
- Make the cream cheese mixture: In a large mixing bowl, beat the softened cream cheese and butter together until smooth and creamy. Add the powdered sugar and mix until well combined and fluffy.
- Prepare the pudding: In a separate bowl, whisk the instant vanilla pudding mix with the cold milk for about 2 minutes, until the mixture begins to thicken.
- Combine the filling: Add the prepared pudding mixture to the cream cheese mixture and beat until smooth. Gently fold in the whipped topping until fully incorporated and light in texture.
- Assemble the casserole: Spread half of the crushed Oreo crumbs evenly across the bottom of a 9×13-inch casserole dish. Spread the creamy pudding mixture evenly over the crumbs.
- Add the final cookie layer: Sprinkle the remaining crushed Oreo crumbs evenly on top of the pudding layer.
- Decorate: Top with pastel candy-coated chocolates and mini Oreo cookies for a festive Easter-themed finish.
- Chill: Cover the casserole and refrigerate for at least 2 hours before serving so the layers can set and the flavors blend together.
Notes
- Ensure that the whipped topping is fully thawed before folding it into the pudding mixture for the best texture.
- This dessert can be made a day in advance, making it perfect for busy holiday preparations.
Nutrition
- Serving Size: 1 slice
- Calories: 320
- Sugar: 24g
- Sodium: 180mg
- Fat: 18g
- Saturated Fat: 9g
- Unsaturated Fat: 8g
- Trans Fat: 0g
- Carbohydrates: 36g
- Fiber: 1g
- Protein: 3g
- Cholesterol: 30mg


