Why Kentucky Butter Cake Is So Loved
Some cakes rely on layers of frosting or complicated fillings to stand out. Kentucky Butter Cake does the exact opposite. It’s simple, old-fashioned, and incredibly rich in flavor without needing anything fancy. And honestly, that’s exactly why people love it so much.
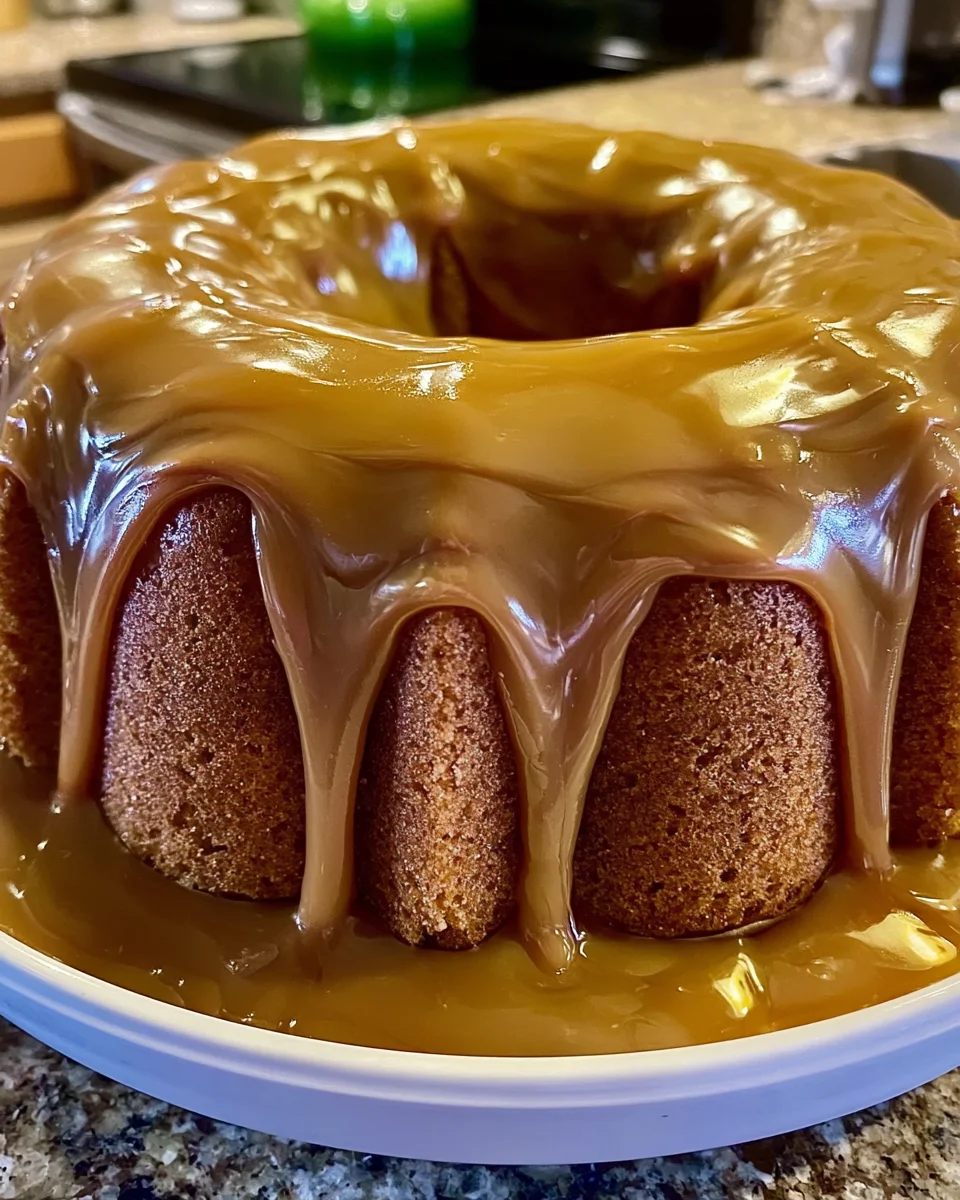
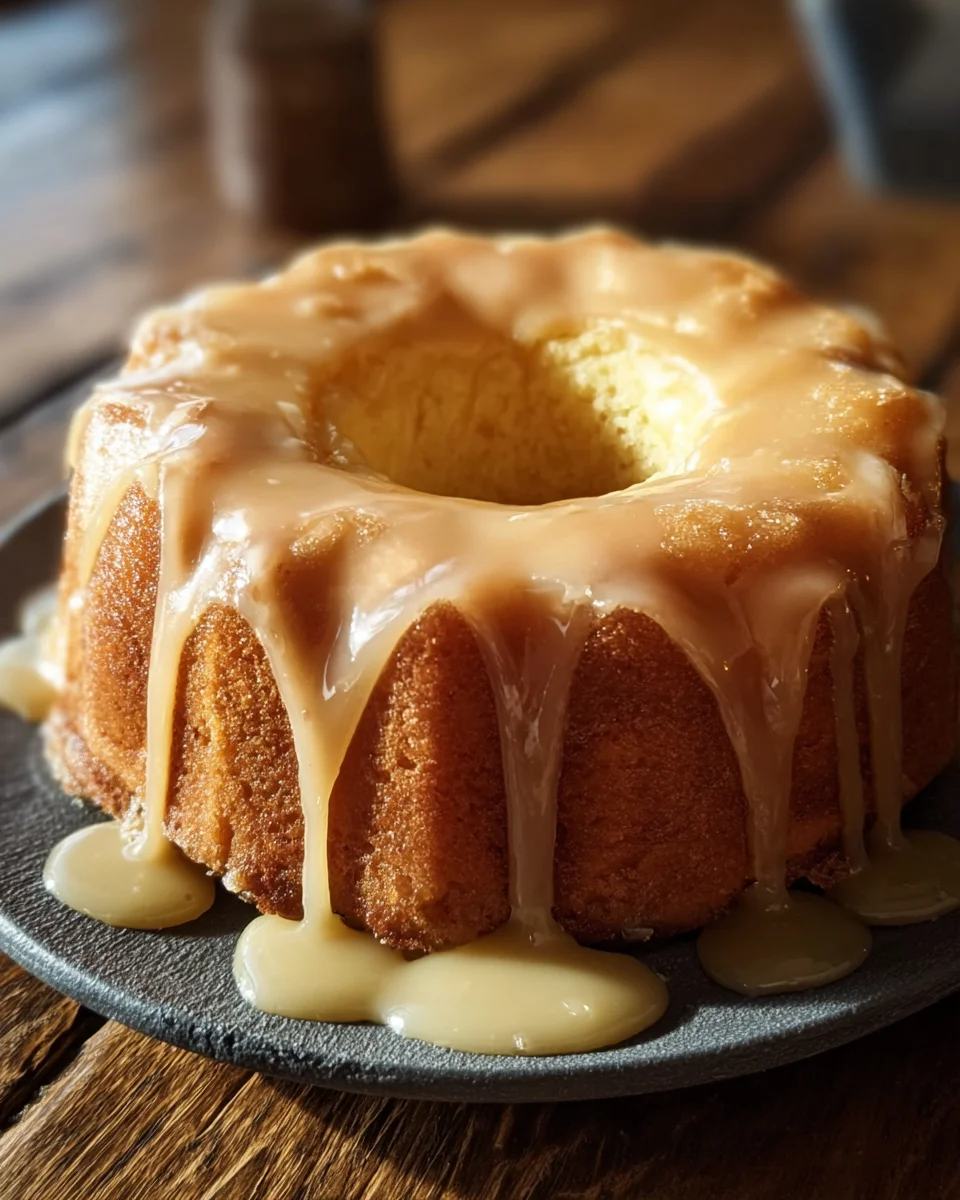
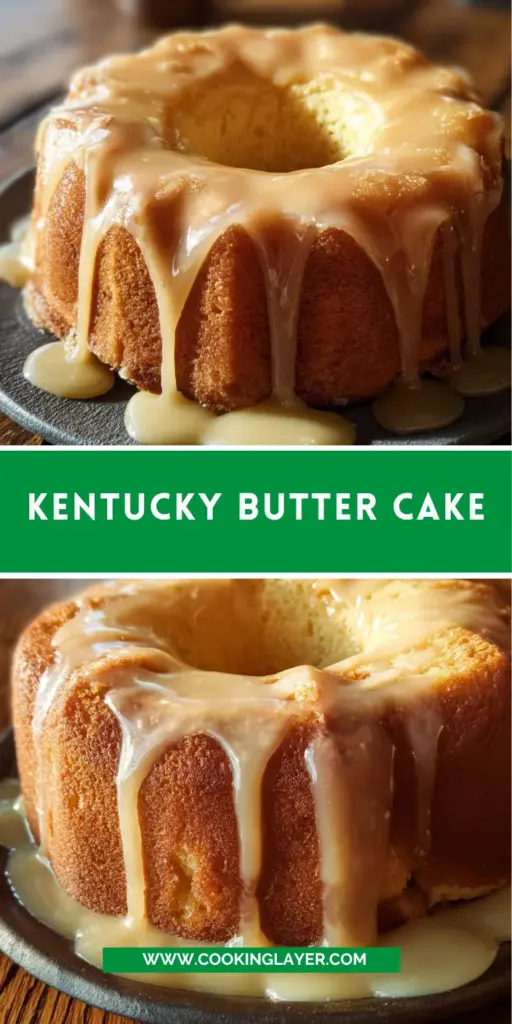
At first glance, it looks like a classic Bundt cake—golden, elegant, and understated. But once you slice into it, you realize why it has such a loyal following. The texture is unbelievably soft and moist, almost melting into the glaze-soaked crumb with every bite.
What truly makes this cake special is the buttery vanilla glaze that gets poured over the warm cake while it’s still in the pan. Instead of sitting only on top, the glaze seeps into every little hole, creating a cake that’s rich, flavorful, and moist all the way through.
The flavor itself is comforting and familiar. It tastes like vanilla, butter, sugar, and warmth in the best possible way. Nothing overly complicated—just classic baking done exceptionally well.
A Simple Cake with Incredible Flavor
The beauty of Kentucky Butter Cake is that it proves simple desserts can still feel luxurious. There’s no elaborate frosting or decoration competing for attention.
Instead, the flavor comes from quality ingredients and technique.
The Secret Behind Its Famous Moist Texture
The combination of buttermilk and butter glaze is what creates the cake’s signature texture. The buttermilk keeps the crumb tender, while the glaze soaks deep into the cake after baking.
That soaking step transforms it from a standard vanilla Bundt cake into something unforgettable.
Ingredients Breakdown and Flavor Profile
Every ingredient contributes to the cake’s rich flavor and soft texture.
The Buttery Vanilla Cake Base
The cake itself is built on pantry staples: flour, sugar, butter, eggs, and buttermilk. The butter adds richness, while the buttermilk creates tenderness and slight tang.
Vanilla ties everything together with warm sweetness.
The Salted Vanilla Butter Glaze
The glaze is where the magic happens. Made with butter, sugar, water, vanilla, and salt, it creates a syrup-like mixture that soaks into the warm cake.
The salt is important because it balances the sweetness and enhances the buttery flavor.
Optional Caramel Flavor Enhancement
Adding caramel sauce to the glaze deepens the flavor slightly and gives the cake a richer golden tone.
It’s optional, but it creates a subtle caramelized finish that works beautifully.
Essential Tools for Baking Success
Must-Have Baking Equipment
You’ll need a Bundt pan, mixing bowls, and a mixer.
Choosing the Right Bundt Pan
A well-greased nonstick Bundt pan is essential for clean release and sharp cake details.
Step-by-Step Kentucky Butter Cake Recipe
Preparing the Batter
Beat all cake ingredients until smooth, thick, and creamy.
Baking the Cake Perfectly
Bake until deep golden and a toothpick comes out clean.
Making the Butter Glaze
Heat glaze ingredients gently until smooth but not boiling.
Soaking and Finishing the Cake
Poke holes into the warm cake and slowly pour glaze over the top before inverting.
Pro Tips for the Perfect Butter Cake
Kentucky Butter Cake may look simple, but its texture and flavor depend heavily on technique. The goal is a cake that’s incredibly moist, rich with buttery flavor, and tender enough to almost melt in your mouth. Fortunately, a few key details make achieving that texture much easier.
Achieving Maximum Moisture
The signature texture of Kentucky Butter Cake comes from two things: the buttermilk in the batter and the warm butter glaze poured over the cake after baking.
The buttermilk helps tenderize the crumb, creating a soft texture without making the cake too heavy. The glaze then takes things to another level by soaking directly into the cake while it’s still warm.
One of the most important steps is poking enough holes into the cake before pouring on the glaze. Those holes act like tiny channels that allow the buttery syrup to seep deep into the crumb instead of sitting only on the surface.
Pour the glaze slowly rather than all at once. Giving the cake time to absorb it gradually helps distribute moisture evenly throughout.
Preventing the Cake from Sticking
Bundt cakes are beautiful, but they’re also notorious for sticking to the pan if not prepared properly. Because this cake is so moist, greasing the pan thoroughly is especially important.
Use softened butter or baking spray with flour and make sure every curve and crevice is coated completely. A light dusting of flour after greasing creates an extra barrier that helps the cake release cleanly.
Letting the cake rest in the pan for about 15–20 minutes after glazing is another important detail. Too little time and the glaze won’t absorb properly; too much time and the cake may stick as it cools.
Common Mistakes and How to Avoid Them
Even though Kentucky Butter Cake is relatively straightforward, a few common mistakes can affect the final texture.
Dry Cake or Overbaking
Because this cake bakes for close to an hour, overbaking is one of the easiest ways to dry it out.
Start checking the cake a few minutes before the suggested bake time ends. A toothpick should come out with a few moist crumbs, not completely dry.
Avoid opening the oven repeatedly during baking, since temperature fluctuations can affect how evenly the cake rises and bakes.
Glaze Not Absorbing Properly
If the glaze pools at the bottom instead of soaking into the cake, it’s often because the cake wasn’t poked deeply enough or the glaze was poured too quickly.
Warm glaze and warm cake work best together. If either cools too much, absorption becomes less effective.
Variations and Creative Twists
One of the reasons Kentucky Butter Cake has remained popular for generations is how easy it is to customize while still keeping its classic charm.
Bourbon Kentucky Butter Cake
For a deeper Southern-inspired flavor, add a splash of bourbon to the glaze. The alcohol cooks off slightly, leaving behind warm caramel and vanilla notes that pair beautifully with the buttery cake.
It creates a more grown-up flavor profile while still feeling comforting and classic.
Lemon or Cinnamon Variations
Adding lemon zest to the batter and glaze creates a brighter version with a subtle citrus flavor.
For something warmer and more cozy, cinnamon or nutmeg can be added to the batter for a spiced butter cake variation that’s especially good during fall and winter.
Serving and Presentation Ideas
Kentucky Butter Cake already has a naturally elegant appearance thanks to its golden Bundt shape and glossy glaze.
Creating a Bakery-Style Finish
Once inverted, let the remaining glaze drip naturally down the sides for that classic glossy finish. A light dusting of powdered sugar can add a softer bakery-style look without overwhelming the cake.
Serve slices plain, or pair them with:
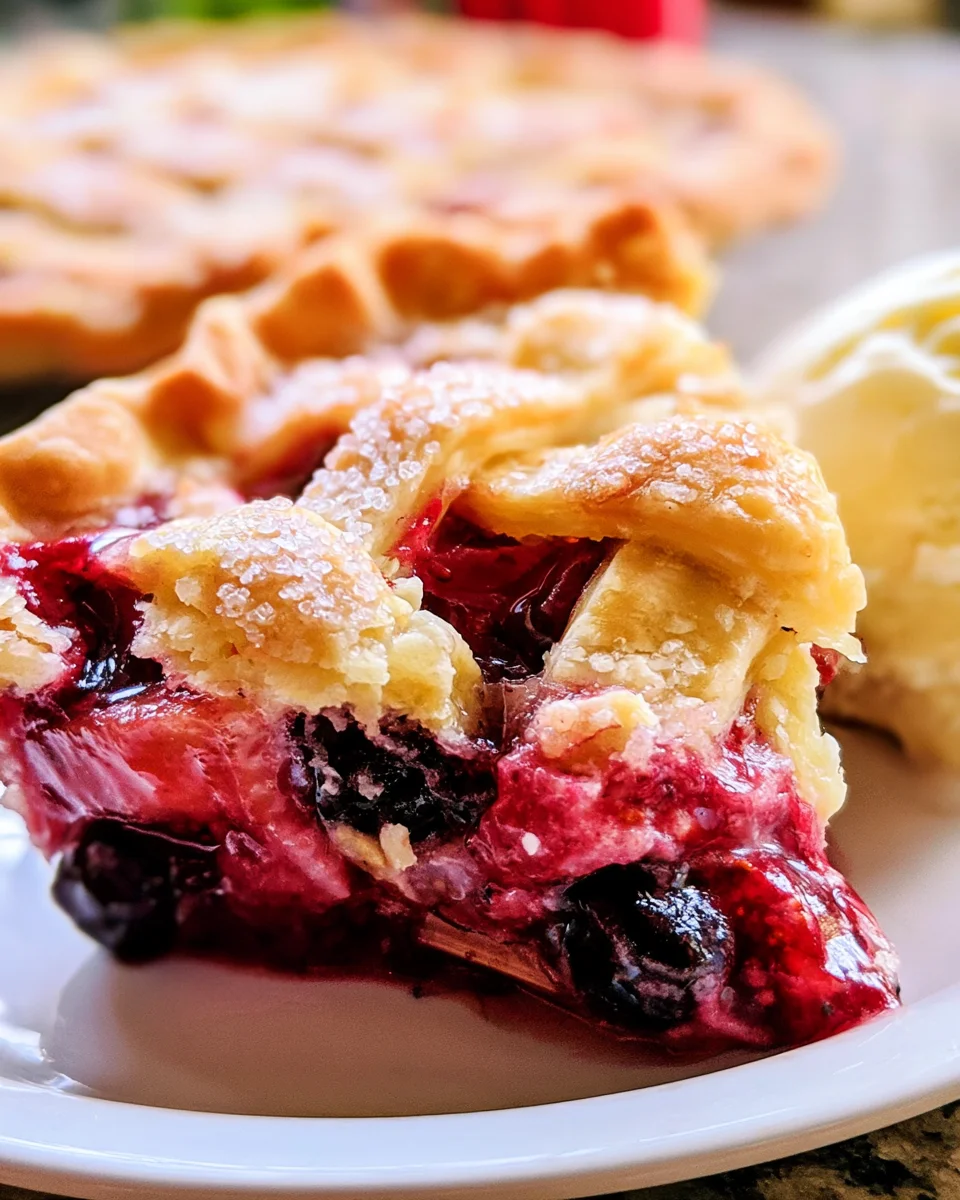
- Fresh berries
- Vanilla ice cream
- Whipped cream
- Salted caramel drizzle
The cake is rich enough to stand on its own, but simple toppings can make it feel even more special.
Storage and Make-Ahead Tips
One of the best things about Kentucky Butter Cake is that it stays moist for days.
Keeping Kentucky Butter Cake Fresh
Store the cake tightly covered at room temperature for up to 4–5 days. In fact, many people think it tastes even better the next day once the glaze fully settles into the cake.
You can also refrigerate it for longer storage, though allowing slices to come to room temperature before serving gives the best texture.
The cake freezes well too. Wrap slices tightly and freeze for up to 2 months.
Conclusion
Kentucky Butter Cake is proof that simple desserts can still feel unforgettable. With its rich buttery flavor, ultra-moist texture, and glossy vanilla glaze, it delivers comfort and elegance at the same time.
What makes this cake so special is how deeply flavorful it becomes without relying on complicated techniques or heavy frosting. Every bite feels soft, tender, and packed with warm vanilla butter flavor from the inside out.
Whether you’re making it for a holiday table, family gathering, brunch, or just because you want a truly comforting homemade dessert, Kentucky Butter Cake never disappoints. And once you taste that glaze-soaked crumb, it’s easy to understand why this classic recipe has stayed popular for generations.
FAQs
1. Why is it called Kentucky Butter Cake?
The cake is known for its rich buttery glaze and Southern-style flavor.
2. Can I make it ahead of time?
Yes, it actually tastes even better the next day.
3. Do I have to use buttermilk?
Buttermilk is strongly recommended for the best texture and flavor.
4. Can I freeze Kentucky Butter Cake?
Yes, wrap tightly and freeze for up to 2 months.
5. Why did my Bundt cake stick to the pan?
Usually from insufficient greasing or cooling too long in the pan.
Print
Kentucky Butter Cake
Ingredients
For the Cake:
3 cups all-purpose flour
2 cups granulated sugar
1 teaspoon salt
1 teaspoon baking powder
½ teaspoon baking soda
1 cup unsalted butter, softened
1 cup buttermilk
4 large eggs
2 teaspoons vanilla extract
For the Salted Vanilla Glaze:
¾ cup granulated sugar
⅓ cup unsalted butter
3 tablespoons water
1 teaspoon vanilla extract
½ teaspoon salt
(Optional) 2–3 tablespoons caramel sauce (for a slightly deeper flavor and color)
Instructions
1. Preheat & Prepare
Preheat your oven to 325°F (165°C). Generously grease a Bundt pan, making sure to coat every curve and edge. Lightly dust with flour and tap out the excess. This step ensures the cake releases cleanly after baking.
2. Make the Batter
In a large mixing bowl, combine the flour, sugar, salt, baking powder, and baking soda. Add the softened butter, buttermilk, eggs, and vanilla extract. Using a hand or stand mixer, beat the mixture for about 3–4 minutes until smooth and creamy. The batter should look thick but silky, with no visible lumps.
3. Bake
Pour the batter evenly into the prepared Bundt pan and smooth the top. Bake for 55–65 minutes, or until the cake turns a deep golden color and a toothpick inserted in the center comes out clean. Avoid opening the oven too often to maintain even baking.
4. Make the Glaze
While the cake is baking, prepare the glaze. In a saucepan over medium heat, combine the sugar, butter, and water. Stir continuously until everything melts into a smooth mixture. Do not let it boil, as this will thicken the glaze too much. Remove from heat and stir in the vanilla extract, salt, and optional caramel sauce.
5. Soak the Cake (Key Step)
Once the cake is out of the oven, keep it in the pan. Use a skewer or fork to poke holes all over the surface. Slowly pour about two-thirds of the warm glaze over the cake, allowing it to soak in gradually. Take your time so it absorbs evenly.
6. Rest & Flip
Let the cake sit for 15–20 minutes to absorb the glaze. Then carefully invert it onto a serving plate. Pour the remaining glaze over the top, letting it drip naturally down the sides to create that glossy finish.
Notes
Don’t boil the glaze: Keeping it smooth and pourable ensures it soaks into the cake instead of sitting on top.
Pour glaze while warm: This helps it absorb deeply into the crumb.
Let it rest before flipping: This prevents breaking and allows the glaze to settle.
Use real buttermilk if possible: It gives the cake its signature tenderness and slight tang.
For a thicker drip effect: Let the reserved glaze cool slightly before pouring it over the top.
Storage: Keep covered at room temperature for up to 3–4 days. The flavor actually deepens over time.