
Introduction to Red Velvet Strawberry Cheesecake
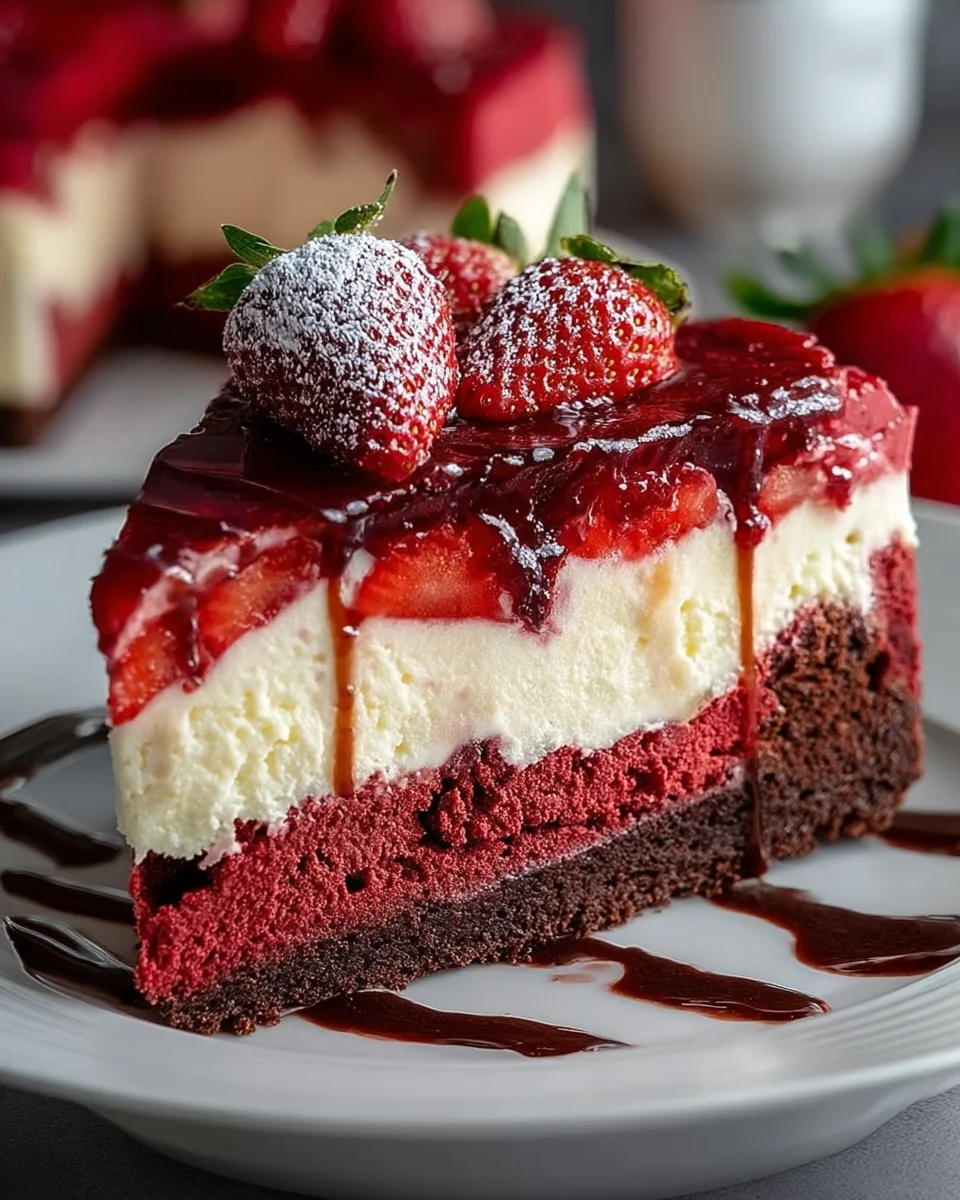
Welcome, fellow food lovers! If you’re anything like me, the hustle and bustle of daily life can sometimes cloud our desire to create something spectacular in the kitchen. That’s where this decadent Red Velvet Strawberry Cheesecake comes in! It’s the perfect treat that impresses, yet feels utterly comforting. Imagine slicing into this rich, velvety creation, revealing layers of luscious cheesecake paired with fresh strawberries. It’s a delightful way to celebrate those busy days when you still want to indulge your loved ones with something truly special.
Why You’ll Love This Red Velvet Strawberry Cheesecake
This Red Velvet Strawberry Cheesecake combines rich flavors and beautiful presentation, making it a showstopper at any gathering. It’s surprisingly easy to whip up, even on a busy day! You’ll love how the tangy cheese layer contrasts beautifully with the sweet, vibrant strawberries. The best part? It can be made ahead of time, giving you more moments to savor with loved ones while keeping that culinary magic alive in your kitchen!
Save this recipe and cook smarter
Keep your favorite Cooking Layer recipes in one place, plan your weekly meals, and quickly find dinner ideas whenever you need them.
Free to download • Fast and easy to use
Ingredients for Red Velvet Strawberry Cheesecake
The beauty of this Red Velvet Strawberry Cheesecake lies not only in its flavors but also in its ingredients. Let’s dive into what you’ll need to bring this masterpiece to life!
- Red Velvet Cake Layers: The essential foundation, this layer brings that iconic rich color and flavor.
- All-purpose flour: A staple for structure; it gives the cake its body.
- Unsweetened cocoa powder: Just a bit to deepen the flavor without overpowering that signature red hue.
- Baking soda and salt: These help with the rise and ensure balanced flavor.
- Buttermilk: Adds moisture and that lovely tang that complements the sweetness.
- White vinegar: Works with the baking soda to create that tender crumb.
- Vanilla extract: A must for its warm, inviting flavor that enhances every bite.
- Red gel food coloring: Makes the cake pop with that stunning red color; add more for a deeper hue!
- Unsalted butter: Gives richness; remember to soften it first for easy mixing.
- Granulated sugar: Sweetness is key; it helps balance flavors throughout.
- Large eggs: Essential for binding the ingredients and providing moisture.
- Cheesecake Layer: The pièce de résistance for this dessert!
- Cream cheese: The heart of the cheesecake, creating that luscious, creamy texture.
- Sour cream: Adds a delightful tang and creaminess that balances the sweetness.
- Heavy cream: Makes the cheesecake rich and luxurious.
- Strawberry Topping: Fresh strawberries bound to elevate the flavor!
- Fresh strawberries: Sweet, delicious jewels that add color and freshness.
- Granulated sugar: Helps draw out the strawberries’ natural juices, creating a delightful syrup.
- Cornstarch: A thickening agent to give your strawberry topping that perfect consistency.
- Lemon juice: Brightens the flavors and balances the sweetness.
- Water: Used to create the perfect sauce consistency.
- Optional Cream Cheese Frosting: For the ultimate decorative touch!
- Powdered sugar: Ensures a smooth and sweet frosting consistency.
Don’t worry about measuring everything just yet! You can find exact quantities at the bottom of the article, ready for printing. Let’s make that sweet magic happen!
How to Make Red Velvet Strawberry Cheesecake
Now that we’ve gathered our ingredients, it’s time to bring this indulgent Red Velvet Strawberry Cheesecake to life! Follow these simple steps, and you’ll soon have a dessert that dazzles and delights. Let’s get started!
Step 1: Bake Red Velvet Layers
First, preheat your oven to 350°F (175°C). While it warms up, grab a mixing bowl and combine the dry ingredients: flour, cocoa powder, baking soda, and salt. These will be the backbone of that luscious red velvet cake.
In a separate bowl, cream together your softened butter and sugar until light and fluffy. This step adds air and makes your cake airy!
Next, add in the eggs, one at a time, mixing well after each addition. Then, in another bowl, whisk together your buttermilk, vinegar, and vanilla extract. This sour combo will help your cake rise beautifully.
Now, alternate adding your dry mixture and the buttermilk mixture into the butter-sugar blend. Start and end with the dry ingredients. Add your red gel food coloring here to achieve that eye-catching hue. Once the batter is smooth, divide it evenly between two 8-inch pans.
Pop these in the oven and bake for 22–25 minutes. When they’re ready, a toothpick inserted into the center should come out clean. Cool them completely on a wire rack—it’s hard to resist that rich aroma!
Step 2: Make the Cheesecake Layer
Lower your oven temperature to 325°F (160°C). In a large bowl, beat the softened cream cheese and sugar until it’s super smooth. This is where the magic begins!
Then, add the vanilla extract and eggs, mixing until smooth. Don’t forget the sour cream and heavy cream; they lend that creamy texture that’s quintessential to cheesecake.
Now, pour this luscious mixture into a greased springform pan. To prevent cracking, bake it in a water bath—a simple trick is to wrap the bottom of your springform pan in foil and set it in a larger pan filled with hot water.
Bake for 55–65 minutes, until set but slightly jiggly in the center. Let it cool in the pan for an hour, then chill it in the refrigerator for at least four hours. Overnight is even better if you can wait!
Step 3: Prepare Strawberry Topping
Next, it’s time to brighten our cheesecake with a fresh strawberry topping! In a saucepan, combine the sliced strawberries, granulated sugar, cornstarch, lemon juice, and water.
Cook over medium heat, stirring gently until everything thickens up beautifully. This should take about 5–7 minutes. Once thickened, set it aside to cool completely; the freshness and brightness of the strawberries are what balance out the rich cheesecake.
Step 4: Assemble the Cheesecake
Now, the exciting part! Place one of your cooled red velvet layers onto your serving plate. Gently peel off the parchment if you used any.
Spread a generous layer of cheesecake on top, leveling it out smoothly. Place the second red velvet layer on top. Don’t worry if it’s a little wobbly; that’s all part of the charm!
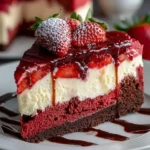
Finally, spoon the strawberry topping over the whole creation. Allow it to naturally drip down the sides; it adds a gorgeous look—just like nature intended!
Step 5: Add Finishing Touches (optional)
If you’re feeling extra fancy, let’s boost that wow factor with optional cream cheese frosting! In another bowl, beat together softened cream cheese and butter. Gradually add powdered sugar until you reach that dreamy, creamy consistency.
Pipe or spread this frosting around the edges of your cheesecake for that bakery-style finish. Garnish with fresh strawberries for a bit of elegance. Voila! Your stunning Red Velvet Strawberry Cheesecake is ready to shine!
Tips for Success
- Make sure all dairy ingredients are at room temperature for seamless mixing.
- Prepare your ingredients before you start for smooth and stress-free baking.
- Don’t skip chilling the cheesecake; it’s crucial for the best texture.
- Use gel food coloring sparingly; you can always add more for a deeper red.
- For easy slicing, use a sharp knife warmed in hot water between cuts.
Equipment Needed
- Mixing Bowls: Use glass or stainless steel for durability; plastic works too!
- Measuring Cups and Spoons: Accurate measuring is key; invest in a set for reliability.
- Springform Pan: Essential for cheesecakes; alternatively, use a regular round pan, but it might be tricky to remove.
- Whisk or Electric Mixer: A whisk is great for small batches; an electric mixer saves time.
- Spatula: For smooth spreading; a rubber spatula is ideal for folding ingredients.
Variations of Red Velvet Strawberry Cheesecake
- Gluten-Free: Substitute all-purpose flour with a gluten-free blend for a similar texture without the gluten.
- Low-Sugar: Use a sugar substitute like erythritol or stevia to reduce the sugar content in both the cake and cheesecake layers.
- Chocolate Drizzle: For chocolate lovers, drizzle melted chocolate over your finished cheesecake for an added layer of flavor.
- Vegan Option: Replace eggs with flaxseed meal and use plant-based cream cheese and butter for a dairy-free delight.
- Nutty Twist: Incorporate finely chopped pecans or walnuts into the red velvet cake batter for added crunch and flavor.
- Other Fruit Toppings: Experiment with different fruits like blueberries or raspberries for a different fruity twist.
- Sour Cream Layer: Incorporate a layer of flavored sour cream (like vanilla or lemon) between the cheesecake and cake layers for a delightful zing.
Serving Suggestions
- Pair with Coffee: The rich flavors of the cheesecake complement a nice cup of coffee or espresso.
- Fresh Mint: Garnish with fresh mint leaves for a pop of color and freshness.
- Serving Plate: Use a colorful or patterned plate to enhance presentation.
- Add Whipped Cream: A dollop of whipped cream on the side makes it extra special.
- Fruit Salad: Serve with a light fruit salad to balance the richness of the cheesecake.
FAQs about Red Velvet Strawberry Cheesecake
Can I make the cheesecake layer ahead of time?
Absolutely! Making the cheesecake layer ahead allows it to chill properly, enhancing its flavor and texture. Just store it tightly wrapped in the fridge until you’re ready to assemble your Red Velvet Strawberry Cheesecake.
How do I prevent my cheesecake from cracking?
A water bath is essential for even baking and moisture retention. Additionally, don’t overbeat the mixture; this can incorporate too much air, leading to cracks as it cools.
Can I use frozen strawberries for the topping?
Yes, you can! Just make sure to thaw them and drain any excess liquid before using. Fresh strawberries do add brightness, but frozen can still deliver great flavor in your Red Velvet Strawberry Cheesecake.
How should I store leftovers?
Store any leftover cheesecake in an airtight container in the fridge for up to 5 days. You can also freeze it for up to 2 months—just make sure it’s wrapped well!
What can I substitute for cream cheese if I want a lighter version?
You can try using Greek yogurt or ricotta cheese for a lighter take. Just remember to adjust the sweetness if needed, as they bring a different flavor profile to your Red Velvet Strawberry Cheesecake.
Final Thoughts
There’s something magical about serving a stunning Red Velvet Strawberry Cheesecake that truly captures the heart. The rich flavors blend beautifully as your loved ones enjoy each bite, their smiles a testament to your culinary efforts. Whether it’s for a special occasion or just because, this dessert is sure to create cherished memories. Embrace the joy of baking and indulge in this recipe as a celebration of love and creativity. I promise, every slice will leave you and your friends craving more and dreaming up the next baking adventure together!
Enjoyed this recipe?
Discover more delicious recipes, save your favorites, and plan your meals with the Cooking Layer app.
Free to download • Fast and easy to use
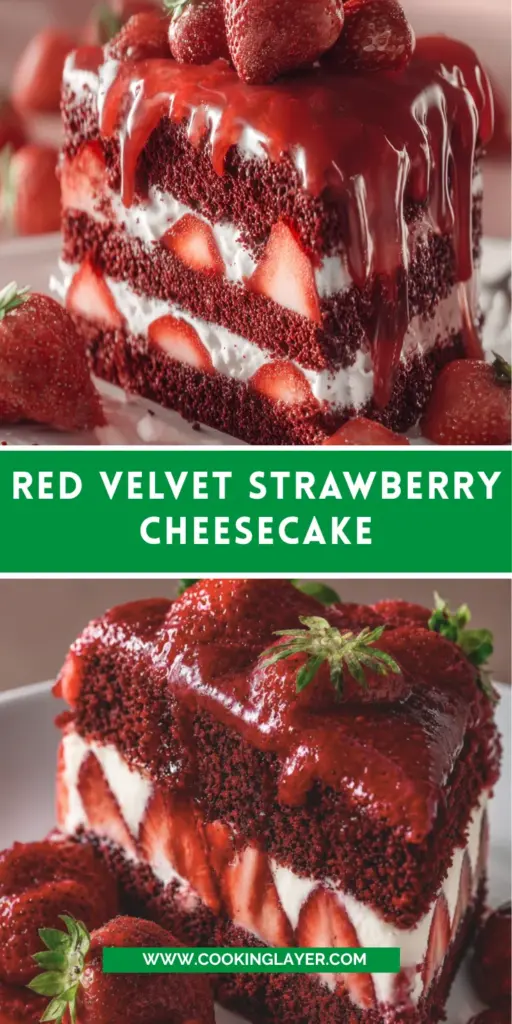
Red Velvet Strawberry Cheesecake
- Prep Time: 2.5 hours + chilling time
- Cook Time: 1 hour 15 minutes
- Total Time: Overnight (to account for chilling)
- Yield: 12 servings 1x
- Category: Dessert
- Method: Baking
- Cuisine: American
- Diet: Vegetarian
Description
Indulge in a delightful Red Velvet Strawberry Cheesecake with rich flavors and a stunning presentation.
Ingredients
- Red Velvet Cake Layers
- 1½ cups all-purpose flour
- 1 tbsp unsweetened cocoa powder
- ½ tsp baking soda
- ½ tsp salt
- ¾ cup buttermilk, room temperature
- 1 tsp white vinegar
- 1 tsp vanilla extract
- ½ tsp red gel food coloring (more if needed)
- ½ cup unsalted butter, softened
- ¾ cup granulated sugar
- 2 large eggs, room temperature
- Cheesecake Layer
- 16 oz cream cheese, softened
- ¾ cup granulated sugar
- 1 tsp vanilla extract
- 2 large eggs
- ½ cup sour cream
- 2 tbsp heavy cream
- Strawberry Topping
- 2 cups fresh strawberries, sliced
- ¼ cup granulated sugar
- 1 tbsp cornstarch
- 1 tbsp lemon juice
- ½ cup water
- Optional Cream Cheese Frosting
- 4 oz cream cheese, softened
- 2 tbsp unsalted butter, softened
- 1 tsp vanilla extract
- 1 cup powdered sugar
Instructions
- Bake red velvet layers: Preheat oven to 350°F (175°C), mix dry ingredients, cream butter and sugar, add eggs, then alternate dry mix with buttermilk mixture; bake in two 8-inch pans for 22–25 minutes and cool completely.
- Make cheesecake: Lower oven to 325°F (160°C), beat cream cheese and sugar until smooth, add vanilla, eggs, sour cream, and cream; bake in a water bath for 55–65 minutes until just set, cool, then chill at least 4 hours.
- Cook strawberry topping: Simmer strawberries, sugar, cornstarch, lemon juice, and water until thickened; cool fully.
- Assemble: Place one red velvet layer on a plate, add cheesecake layer, top with second cake layer, spoon strawberry topping over the top, letting it drip naturally.
- Decorate (optional): Pipe or spread cream cheese frosting around edges and garnish with fresh strawberries.
Notes
- For a deeper red color, adjust the amount of red gel food coloring.
- Ensure all dairy products are at room temperature for best mixing.
- Chilling the cheesecake is crucial for the best texture and flavor.
Nutrition
- Serving Size: 1 slice
- Calories: 450
- Sugar: 35g
- Sodium: 300mg
- Fat: 25g
- Saturated Fat: 15g
- Unsaturated Fat: 5g
- Trans Fat: 0g
- Carbohydrates: 50g
- Fiber: 2g
- Protein: 6g
- Cholesterol: 100mg


