
Why This Strawberry Mousse Cake Is a Showstopper Dessert
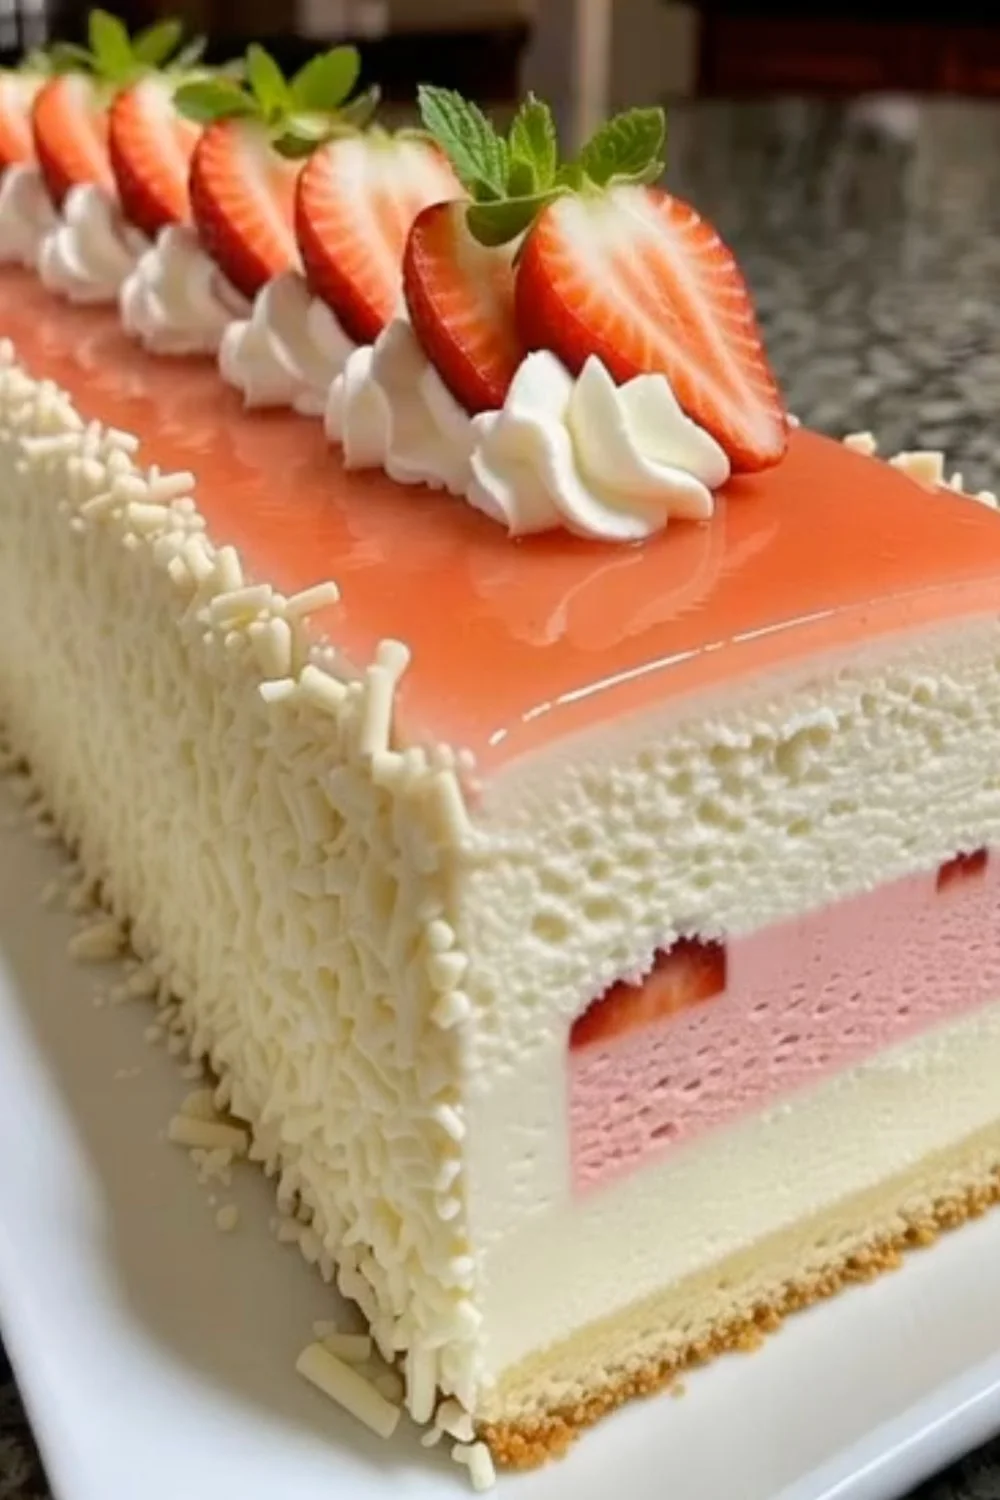
There’s something almost magical about a dessert that looks like it belongs in a high-end pastry shop but can actually be made right in your kitchen. This strawberry vanilla cream mousse cake isn’t just a cake—it’s an experience layered with textures, flavors, and visual appeal that instantly grabs attention. Imagine slicing through a glossy strawberry glaze, revealing a cloud-like vanilla mousse, followed by a vibrant strawberry insert, all resting on a soft, buttery sponge. Sounds irresistible, right?
What makes this cake stand out is how it balances richness and freshness. The vanilla mousse brings a light, creamy sweetness, while the strawberry insert cuts through with a slightly tangy, fruity punch. It’s not overwhelmingly sweet, which makes it perfect even for those who usually shy away from desserts. The combination feels refined yet comforting—like a summer picnic wrapped in a luxurious dessert.
Save this recipe and cook smarter
Keep your favorite Cooking Layer recipes in one place, plan your weekly meals, and quickly find dinner ideas whenever you need them.
Free to download • Fast and easy to use
Another reason this cake earns its “showstopper” title is its versatility. Whether you’re celebrating a birthday, hosting a dinner party, or just want to impress someone, this cake fits the bill perfectly. It photographs beautifully, making it ideal for social media moments, but more importantly, it delivers on taste. According to baking experts, desserts that combine contrasting textures—like mousse and sponge—are among the most satisfying, and this cake nails that concept effortlessly.
Even if you’re not a professional baker, the process of creating this dessert can be surprisingly enjoyable. Each step builds anticipation, and by the time you pour that glossy glaze on top, you’ll feel like an artist finishing a masterpiece. And honestly, isn’t that what great baking is all about—turning simple ingredients into something unforgettable?
Understanding the Layers of This Elegant Cake
Before diving into the actual process, it helps to understand what makes up this stunning dessert. Think of this cake as a carefully constructed story, where each layer plays a unique role in building flavor and texture. Skipping or rushing any component would be like removing a key chapter—it just wouldn’t feel complete.
At its core, this cake is all about balance and contrast. You’ve got soft and firm, sweet and tangy, creamy and fruity—all working together in harmony. The beauty lies in how these layers interact when you take a bite. Instead of blending into one note, each element reveals itself gradually, making every mouthful exciting.
The Soft Vanilla Sponge Base
The foundation of this cake is a light yet sturdy vanilla sponge. It’s not overly dense like a pound cake, nor is it too airy like a chiffon. Instead, it strikes a perfect middle ground, providing structure without overpowering the other layers. The subtle vanilla flavor acts as a neutral canvas, allowing the strawberry and cream elements to shine.
This base also plays a practical role. Since mousse cakes are typically soft and delicate, having a stable sponge layer ensures the cake holds its shape when sliced. It absorbs just enough moisture from the mousse to stay tender without becoming soggy—a detail that makes a big difference in the final texture.
The Fresh Strawberry Insert
Here’s where things get exciting. The strawberry insert is like a hidden gem tucked inside the cake. Made with fresh strawberries, sugar, and a touch of lemon juice, it delivers a burst of natural fruit flavor that feels refreshing rather than artificial.
What really elevates this layer is its slight firmness, thanks to gelatin. This allows it to hold its shape within the mousse, creating that beautiful, defined layer when you cut into the cake. It’s not just about looks, though—the contrast between the creamy mousse and the slightly firm, fruity insert creates a dynamic texture that keeps each bite interesting.
The Creamy Vanilla Mousse
If the sponge is the foundation and the insert is the surprise, then the vanilla cream mousse is the heart of the cake. Light, airy, and incredibly smooth, it wraps around the strawberry insert like a soft cushion. The whipped cream base gives it a luxurious feel, while the gelatin ensures it sets perfectly without becoming rubbery.
This layer is where indulgence meets elegance. It’s rich enough to feel satisfying but light enough that you won’t feel weighed down after a slice. The vanilla flavor ties everything together, acting as a bridge between the cake and the strawberries.
The Glossy Strawberry Glaze
Finally, the strawberry glaze is the finishing touch that transforms this dessert into a visual masterpiece. Shiny, smooth, and vibrant, it adds that professional bakery-style look that makes people stop and stare.
But it’s not just about appearance. The glaze adds an extra layer of strawberry flavor, enhancing the fruitiness of the insert while providing a slightly sweet, tangy finish. When done right, it creates a mirror-like surface that reflects light beautifully—almost too pretty to eat.
Ingredients Breakdown and Their Role
When it comes to baking something as refined as a mousse cake, every ingredient matters more than you might think. This isn’t one of those recipes where you can randomly swap things out without consequences. Each component has a specific job, and understanding that role can be the difference between a cake that looks “okay” and one that looks straight out of a pastry shop display.
Let’s start with the basics. Flour provides structure, sugar adds sweetness and moisture, and butter brings richness. That part is straightforward. But once you move into mousse and inserts, things get a bit more technical. Ingredients like gelatin, heavy cream, and fresh fruit aren’t just there for flavor—they’re responsible for texture, stability, and overall success.
Take gelatin, for example. It’s the quiet hero of this recipe. Without it, your mousse wouldn’t hold its shape, and your strawberry insert would turn into a runny mess. When used correctly, gelatin creates that perfect, sliceable consistency that defines a mousse cake. According to pastry professionals, the correct gelatin ratio is one of the most critical factors in achieving a clean, professional cut.
Then there’s the heavy whipping cream. This is what gives the mousse its signature lightness. When whipped to soft or stiff peaks, it incorporates air, creating that cloud-like texture everyone loves. But timing is everything—overwhip it, and you’ll end up with a grainy texture; underwhip it, and the mousse won’t set properly.
Fresh strawberries are another key player. Using ripe, in-season strawberries can dramatically improve the flavor. Studies show that fresh strawberries contain up to 30% more aromatic compounds compared to frozen ones, which means a more vibrant and natural taste in your dessert.
In short, every ingredient in this cake is pulling its weight. When they come together, they don’t just form a dessert—they create a layered experience that feels thoughtful, balanced, and incredibly satisfying.
Essential Tools You’ll Need for Perfect Results
Creating a dessert that looks like it belongs in a glass display case isn’t just about ingredients—it’s also about having the right tools in your kitchen. That said, you don’t need a professional pastry lab to pull this off. A handful of well-chosen tools can make the process smoother, more precise, and honestly, a lot more enjoyable. Think of these tools as your backstage crew—they quietly support the performance while you take the credit.
First up, a 9-inch round cake pan is essential for baking the sponge base evenly. If you want clean, bakery-style layers, a springform pan or cake ring is even better, especially during assembly. It helps hold the mousse in place while it sets, giving you those sharp, defined edges when you unmold the cake. Pair that with parchment paper, and you’ll avoid the heartbreak of a cake that sticks to the pan.
A stand mixer or hand mixer is another game-changer, especially when whipping cream or creaming butter and sugar. While it’s technically possible to do this by hand, achieving the right consistency becomes much harder and more time-consuming. Precision matters here—soft peaks and stiff peaks aren’t just fancy terms; they directly affect your mousse texture.
You’ll also need a small saucepan for preparing the strawberry insert and glaze. Consistent, gentle heat is key to dissolving sugar and activating gelatin without damaging its setting properties. Speaking of gelatin, having a microwave-safe bowl or double boiler helps you melt it smoothly without overheating.
Don’t overlook the importance of a spatula and offset palette knife. These tools help you spread mousse evenly and create smooth layers without deflating the mixture. For that final glossy finish, a fine mesh sieve can be used to strain the strawberry puree, removing seeds and ensuring a silky glaze.
Finally, a sharp serrated knife is crucial when slicing the cake into layers. A dull blade can tear the sponge, ruining the structure before you even start assembling. With the right tools in hand, the process becomes less stressful and more like a creative project you actually want to spend time on.
Step-by-Step Preparation Guide
Now comes the part where everything starts to come together. This isn’t a rushed, throw-it-all-in-one-bowl kind of recipe. It’s a layered process that rewards patience and attention to detail. But don’t let that intimidate you—each step is manageable on its own, and by the end, you’ll have something that feels truly special.
Preparing the Vanilla Cake Layer
The journey begins with the vanilla sponge, the foundation that supports everything else. Preheating your oven to the right temperature—350°F (175°C)—is more important than it might seem. An oven that’s too hot can cause the cake to rise too quickly and collapse, while a cooler one can leave it dense and undercooked. Accuracy here sets the tone for the entire recipe.
When creaming the butter and sugar, you’re not just mixing—you’re incorporating air. This step should take a few minutes, and the mixture should turn pale and fluffy. That’s your signal that it’s ready. Adding eggs one at a time helps maintain the structure, preventing the batter from curdling. It might feel slow, but it’s worth it.
Alternating dry ingredients with milk isn’t just a random instruction—it ensures even mixing without overworking the batter. Overmixing develops gluten, which can make your cake tough instead of tender. The goal is a smooth batter that’s just combined.
Once baked, resist the urge to rush. Letting the cake cool completely is crucial before slicing. A warm cake is fragile and can crumble easily, making it difficult to achieve clean layers. When done right, your sponge should be soft, slightly springy, and evenly golden.
Making the Strawberry Insert
This layer is where the cake gets its vibrant personality. Cooking the strawberries with sugar and lemon juice does more than soften them—it concentrates their flavor. The lemon juice adds a subtle brightness that prevents the mixture from tasting flat.
Blooming the gelatin properly is non-negotiable. Sprinkling it over cold water and letting it sit allows it to hydrate evenly. If you skip this step or rush it, you might end up with clumps that never fully dissolve. Once added to the warm strawberry mixture, it should melt seamlessly, creating a smooth consistency.
Pouring the mixture into a mold that matches your cake size ensures a perfect fit during assembly. This detail might seem minor, but it makes a big difference in presentation. After chilling, the insert should be firm yet slightly jiggly—not rubbery.
Crafting the Vanilla Cream Mousse
This is where things start to feel a bit luxurious. Whipping the cream to soft peaks first gives you control, allowing you to gradually build structure as you add sugar and vanilla. The transformation from liquid cream to a fluffy, stable mousse is almost magical.
The gelatin here acts as a stabilizer, ensuring the mousse holds its shape without becoming heavy. Timing is everything—you want the gelatin to be warm but not hot when folding it into the whipped cream. Too hot, and it can deflate the mixture; too cold, and it might form lumps.
Folding, not stirring, is the technique to remember. You’re trying to preserve the air you’ve whipped into the cream. Think of it as gently combining rather than aggressively mixing. The result should be smooth, airy, and slightly glossy.
Assembling the Cake Like a Pro
Assembly is where your patience pays off. Placing the first cake layer on a stable base sets the stage. Spreading the mousse evenly requires a light hand—press too hard, and you’ll lose that airy texture.
Positioning the strawberry insert in the center creates that signature layered look. It should sit snugly without touching the edges, allowing the mousse to fully encase it. This detail gives you that clean cross-section when slicing.
Chilling the cake after assembly isn’t optional—it’s essential. This step allows the mousse to set fully, locking everything into place. Skipping or shortening this time can result in a cake that collapses or loses its shape.
Creating the Strawberry Glaze Finish
The glaze is your final flourish. Heating the strawberry puree with sugar and lemon juice enhances both flavor and color. Straining it, if you choose to, gives you that ultra-smooth finish often seen in professional cakes.
Once the gelatin is incorporated, timing becomes crucial. The glaze should be cool enough not to melt the mousse but still fluid enough to pour smoothly. Pouring it in one steady motion helps avoid uneven layers or bubbles.
As it sets, the glaze transforms into a glossy, almost mirror-like surface. It’s the kind of finish that makes people pause before cutting into the cake—and then immediately ask for a slice.
Common Mistakes to Avoid When Making Mousse Cakes
Even experienced bakers can run into trouble with mousse cakes, and that’s because these desserts rely heavily on precision and timing. One of the most common mistakes is mishandling gelatin. It might seem like a minor ingredient, but using too much can make your mousse feel rubbery, while too little can prevent it from setting properly. The balance has to be just right, and that often comes down to careful measurement and proper blooming techniques.
Another frequent issue is overwhipping or underwhipping the cream. If you’ve ever ended up with a grainy mousse, chances are the cream was overwhipped. On the flip side, underwhipped cream won’t provide enough structure, causing the mousse to collapse. It’s a delicate balance that requires attention, not guesswork.
Temperature control is another area where things can go wrong. Adding hot gelatin directly into cold whipped cream can cause lumps or deflation. Similarly, pouring a warm glaze over an unset mousse can ruin the entire structure. These small temperature mismatches can have big consequences.
Rushing the chilling process is also a major pitfall. This cake isn’t designed for shortcuts. Each layer needs time to set properly, and skipping that time can lead to a messy, unstable dessert. Patience here isn’t just a virtue—it’s a requirement.
Pro Tips for a Bakery-Quality Finish
If you’re aiming for that polished, professional look, a few insider tricks can make all the difference. One of the simplest yet most effective tips is to use an acetate cake collar during assembly. It creates perfectly smooth sides and makes unmolding the cake incredibly easy.
Another tip is to level your cake layers before assembling. Even a slight dome can throw off the symmetry, making the final result look uneven. A flat, even base ensures every layer stacks neatly.
For the glaze, pouring it over a well-chilled cake helps it set quickly and evenly. Some bakers even chill the cake in the freezer for 15–20 minutes before glazing to get that flawless finish.
Finally, don’t underestimate the power of presentation. Adding fresh strawberries and a few mint leaves can elevate the entire dessert, turning it from homemade to high-end in seconds.
Storage and Shelf Life Tips
Once you’ve created a dessert as elegant and delicate as this strawberry vanilla cream mousse cake, the last thing you want is to compromise its texture or flavor through improper storage. Unlike dense baked goods that can sit comfortably at room temperature, mousse cakes are highly sensitive to temperature fluctuations due to their cream and gelatin components. Treating it right after preparation is just as important as the effort you put into making it.
First and foremost, this cake should always be stored in the refrigerator, ideally at a consistent temperature between 34°F to 38°F (1°C to 3°C). The mousse and gelatin layers rely on cool temperatures to maintain their structure. Leaving the cake out at room temperature for extended periods can cause the mousse to soften excessively and the glaze to lose its shine. If you’re serving it at an event, take it out about 15–20 minutes before slicing—just enough time to slightly soften for a creamier mouthfeel without compromising stability.
Covering the cake properly is another detail that often gets overlooked. Because mousse cakes can absorb odors from the fridge, it’s best to store it in an airtight cake container or loosely wrap it with plastic wrap without touching the glaze surface. This helps preserve the fresh strawberry aroma and prevents the cake from drying out.
In terms of shelf life, this cake is best enjoyed within 2 to 3 days. While it may technically last up to 4 days, the texture of the mousse and freshness of the strawberries begin to decline after the third day. Freezing is possible, but it requires care. If you plan to freeze it, do so without the glaze, as gelatin-based glazes can lose their glossy finish after thawing. Wrap the cake tightly and freeze for up to one month, then thaw it slowly in the refrigerator overnight before adding a fresh glaze.
Paying attention to these storage details ensures that every slice tastes just as good as the first—light, creamy, and bursting with strawberry flavor.
Variations and Flavor Twists You Can Try
One of the best things about this cake is how adaptable it is. Once you understand the structure—sponge, insert, mousse, and glaze—you can start experimenting with flavors to create something uniquely yours. Think of this recipe as a template rather than a fixed formula. With a few thoughtful tweaks, you can transform it into an entirely new dessert while keeping that same elegant appeal.
For a tropical twist, swap out strawberries for mango or passion fruit. A mango insert paired with coconut-infused mousse creates a dessert that feels like a mini vacation on a plate. If you prefer something slightly more tart, raspberries or blackberries work beautifully, adding a deeper, more complex flavor profile. These berries also bring a stunning color contrast that makes the cake even more visually striking.
Chocolate lovers aren’t left out either. You can incorporate a chocolate sponge base or fold melted white chocolate into the mousse for a richer taste. Pairing strawberries with chocolate is a classic combination, and this cake handles it effortlessly without becoming too heavy.
For those looking to reduce sugar, consider using natural sweeteners like honey or maple syrup in the fruit layers. While this slightly alters the flavor, it adds a more nuanced sweetness that البعض might even prefer. You can also experiment with flavored extracts—a hint of almond or lemon in the mousse can subtly elevate the overall taste.
Even the glaze can be customized. A mirror glaze with a hint of vanilla or citrus zest can add an extra layer of sophistication. The key is to maintain balance—no single flavor should overpower the others. When done right, these variations keep the dessert exciting and allow you to tailor it to different occasions and personal preferences.
Nutritional Insights of Strawberry Mousse Cake
While this cake is undeniably indulgent, understanding its nutritional profile can help you enjoy it more mindfully. It’s not about labeling foods as “good” or “bad,” but rather knowing what you’re consuming and how it fits into your overall diet. After all, desserts are meant to be enjoyed—not avoided.
A typical slice of this strawberry mousse cake (based on standard portion sizes) contains approximately 300 to 400 calories, depending on the exact ingredients and portion size. The majority of these calories come from the heavy cream, sugar, and butter, which contribute to its rich texture and flavor. The mousse layer alone is a significant source of fat due to the whipped cream, but it’s also what gives the cake its signature lightness.
On the brighter side, strawberries bring some nutritional benefits to the table. They’re rich in vitamin C, antioxidants, and fiber, which can support immune health and digestion. According to nutritional studies, one cup of strawberries provides over 100% of your daily vitamin C requirement, making this dessert slightly more than just a sweet treat.
If you’re looking to make a lighter version, there are small adjustments you can consider. Using reduced-fat cream, cutting back slightly on sugar, or incorporating more fruit layers can help lower the calorie content without drastically affecting taste. However, it’s important to strike a balance—altering too much can change the texture and overall experience of the cake.
Ultimately, this dessert is best enjoyed as an occasional indulgence. Savoring a slice slowly, appreciating the layers and flavors, can be far more satisfying than rushing through it. It’s not just about the numbers—it’s about the experience.
Serving Suggestions and Presentation Ideas
Serving this cake is where you get to let your creativity shine. After all the effort you’ve put into crafting each layer, presenting it beautifully is the final step that brings everything together. And honestly, a well-presented dessert doesn’t just look better—it actually enhances the overall eating experience.
Start by using a sharp, warm knife for slicing. Running the knife under hot water and wiping it dry before each cut helps create clean, precise slices without dragging through the mousse. This small step makes a huge difference, especially when you want to showcase those distinct layers.
When plating, simplicity often works best. A single slice placed slightly off-center on a clean white plate allows the colors of the cake to stand out. You can add a spoonful of strawberry coulis or a light dusting of powdered sugar for an extra touch of elegance. Fresh strawberries, either halved or fanned out, make a natural and visually appealing garnish.
For a more upscale presentation, consider adding a mint leaf or edible flowers. These small details can elevate the cake from homemade to restaurant-quality in seconds. If you’re serving guests, pairing the cake with a light beverage like herbal tea, coffee, or even sparkling water can balance the richness of the dessert.
Temperature also plays a role in serving. The cake should be chilled but not too cold—around slightly below room temperature is ideal for the best texture and flavor release. Too cold, and the mousse can feel firm; too warm, and it may lose structure.
Presentation isn’t about perfection—it’s about intention. With just a few thoughtful touches, you can turn this already stunning dessert into a memorable centerpiece.
Conclusion
This strawberry vanilla cream mousse cake with fresh strawberry insert and strawberry glaze is more than just a recipe—it’s a layered experience that brings together flavor, texture, and visual appeal in a way that feels both elegant and approachable. From the soft vanilla sponge to the vibrant fruit insert and the airy mousse, every component plays a role in creating something truly special.
What makes this cake particularly rewarding is the journey itself. Each step, from whipping cream to pouring glaze, adds to the anticipation of the final result. It’s the kind of dessert that invites you to slow down, pay attention, and enjoy the process as much as the outcome.
Whether you’re making it for a celebration or simply to challenge yourself in the kitchen, this cake delivers on every level. It’s visually stunning, balanced in flavor, and satisfying without being overwhelming. Once you’ve mastered it, you’ll find endless ways to adapt and personalize it.
And when you finally slice into it and see those perfect layers, you’ll realize—it wasn’t just about baking a cake. It was about creating something memorable.
FAQs
1. Can I make this mousse cake without gelatin?
Yes, but the texture will be different. Gelatin provides structure and stability, so without it, the mousse and insert may not hold their shape well. Alternatives like agar-agar can be used, but they require different handling and measurements.
2. How do I prevent lumps when adding gelatin to the mousse?
Make sure the gelatin is fully dissolved and slightly cooled before folding it into the whipped cream. Adding it too hot or too cold can cause lumps or uneven texture.
3. Can I use frozen strawberries instead of fresh ones?
Yes, frozen strawberries can work, especially for the insert and glaze. Just thaw and drain them properly to avoid excess water, which can affect the consistency.
4. Why is my mousse not setting properly?
This usually happens due to incorrect gelatin measurement, improper blooming, or insufficient chilling time. Double-check each step to ensure proper setting.
5. Can I prepare this cake in advance?
Absolutely. This cake is ideal for making a day ahead. In fact, allowing it to chill overnight can improve both texture and flavor.
Print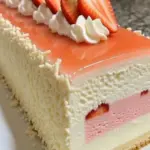
Strawberry Vanilla Cream Mousse Cake
Description
There’s something almost magical about a dessert that looks like it belongs in a high-end pastry shop but can actually be made right in your kitchen. This strawberry vanilla cream mousse cake isn’t just a cake—it’s an experience layered with textures, flavors, and visual appeal that instantly grabs attention. Imagine slicing through a glossy strawberry glaze, revealing a cloud-like vanilla mousse, followed by a vibrant strawberry insert, all resting on a soft, buttery sponge. Sounds irresistible, right?
Ingredients
For the Cake
- 1 ½ cups all-purpose flour
- 1 cup granulated sugar
- ½ cup unsalted butter, softened
- 3 large eggs
- 1 teaspoon vanilla extract
- ½ cup milk
- 1 ½ teaspoons baking powder
- ¼ teaspoon salt
For the Strawberry Insert
- 2 cups fresh strawberries, hulled and sliced
- ½ cup granulated sugar
- 1 tablespoon lemon juice
- 1 tablespoon gelatin powder
- 3 tablespoons cold water
For the Vanilla Cream Mousse
- 1 ½ cups heavy whipping cream
- ¾ cup powdered sugar
- 1 teaspoon vanilla extract
- 2 tablespoons gelatin powder
- ¼ cup cold water
For the Strawberry Glaze
- 1 cup fresh strawberries, pureed
- ½ cup granulated sugar
- 2 tablespoons gelatin powder
- ¼ cup cold water
- 1 tablespoon lemon juice
For Garnish
- Fresh strawberries
- Mint leaves (optional)
Instructions
Preheat your oven to 350°F (175°C). Grease and flour a 9-inch round cake pan.
In a large mixing bowl, cream together the softened butter and granulated sugar until light and fluffy.
Add the eggs one at a time, mixing well after each addition. Stir in the vanilla extract.
In a separate bowl, whisk together the flour, baking powder, and salt.
Gradually add the dry ingredients to the wet ingredients, alternating with the milk. Mix until just combined.
Pour the batter into the prepared cake pan and smooth the top evenly.
Bake for 25–30 minutes, or until a toothpick inserted into the center comes out clean. Allow the cake to cool completely before assembling.
In a saucepan over medium heat, combine the sliced strawberries, granulated sugar, and lemon juice.
Cook for 5–7 minutes until the strawberries soften and release their juices.
In a small bowl, sprinkle the gelatin over the cold water and let it bloom for 5 minutes.
Add the bloomed gelatin to the warm strawberry mixture and stir until fully dissolved.
Pour the mixture into a round mold or shallow pan sized slightly smaller than the cake. Refrigerate for 2–3 hours, or until fully set.
In a chilled bowl, whip the heavy cream until soft peaks form.
Gradually add the powdered sugar and vanilla extract, whipping until stiff peaks form.
In another small bowl, sprinkle the gelatin over the cold water and allow it to bloom for 5 minutes.
Gently heat the gelatin until dissolved and smooth. Let it cool slightly.
Carefully fold the dissolved gelatin into the whipped cream mixture until fully incorporated.
Once the cake has completely cooled, slice it horizontally into two even layers.
Place the first cake layer onto a serving plate or cake board.
Spread half of the vanilla cream mousse evenly over the cake layer.
Place the chilled strawberry insert on top of the mousse.
Spread the remaining mousse over the strawberry layer, then top with the second cake layer.
Refrigerate the assembled cake for at least 2 hours to allow the mousse to set.
In a saucepan, combine the strawberry puree, granulated sugar, and lemon juice.
Heat gently until the sugar dissolves completely.
In a separate bowl, bloom the gelatin in cold water for 5 minutes.
Stir the bloomed gelatin into the warm strawberry mixture until dissolved.
Allow the glaze to cool slightly, then pour evenly over the chilled cake.
Return the cake to the refrigerator until the glaze is fully set.
Decorate the top of the cake with fresh strawberries and mint leaves if desired.
Slice and serve chilled for the ultimate creamy, fruity dessert experience!
Enjoyed this recipe?
Discover more delicious recipes, save your favorites, and plan your meals with the Cooking Layer app.
Free to download • Fast and easy to use