
Why Banana Pudding Pie Is So Popular
There’s something instantly comforting about banana pudding. It’s one of those desserts that feels familiar, nostalgic, and just a little indulgent—all at the same time. Now imagine taking that classic combination of bananas, vanilla wafers, and creamy pudding and transforming it into a sliceable, bakery-style pie. That’s exactly what Banana Pudding Pie delivers.
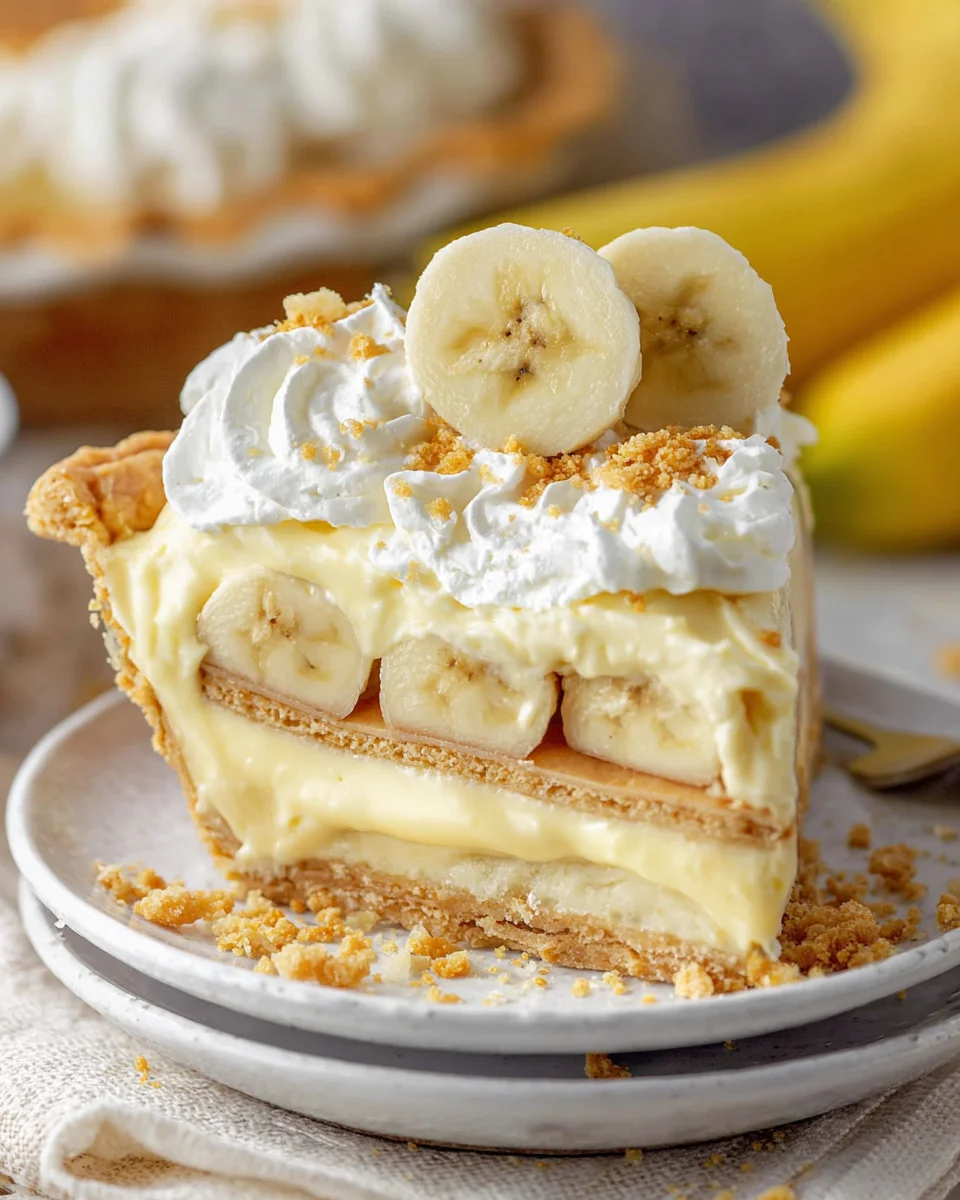
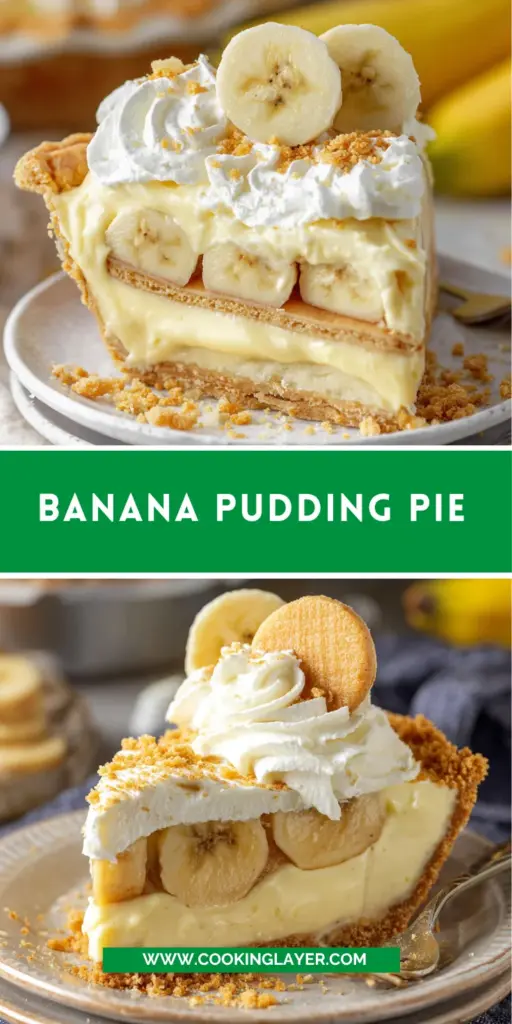
What makes this dessert so appealing is its layered texture. You’ve got a flaky, buttery crust, followed by soft bananas and slightly crisp Nilla wafers, all topped with a rich, silky custard and finished with light whipped cream. Every bite feels like a mix of textures and flavors working together instead of competing.
Save this recipe and cook smarter
Keep your favorite Cooking Layer recipes in one place, plan your weekly meals, and quickly find dinner ideas whenever you need them.
Free to download • Fast and easy to use
Another reason for its popularity is how versatile it is. It works for holidays, gatherings, or just a weekend baking project. It looks impressive, but once you break it down step by step, it’s actually very manageable.
The Nostalgia Behind Banana Pudding
Banana pudding has deep roots in classic home desserts. It’s simple, comforting, and built on ingredients that are easy to find. Turning it into a pie doesn’t take away from that nostalgia—it enhances it.
You still get those familiar flavors, just presented in a way that feels a bit more special.
Turning a Classic into a Show-Stopping Pie
The pie format adds structure and presentation. Instead of scooping pudding into a bowl, you get clean slices with visible layers—something that feels more polished and intentional.
It’s the same comforting dessert, just elevated.
Ingredients Breakdown and Flavor Profile
Each component of this pie plays a role in creating its signature taste and texture.
Flaky Homemade Pie Crust
The crust is made with flour, butter, and ice water, creating a flaky base that contrasts beautifully with the creamy filling. Keeping the butter cold is key—it creates pockets that turn into layers when baked.
Blind baking ensures the crust stays crisp and doesn’t become soggy once the filling is added.
Rich and Creamy Banana Filling
The filling is essentially a homemade custard made from milk, sweetened condensed milk, eggs, and cornstarch. It’s thick, smooth, and rich without being overly heavy.
The addition of butter and vanilla at the end gives it a silky finish and enhances the flavor.
Whipped Cream Topping and Garnishes
Freshly whipped cream adds a light, airy contrast to the dense filling. Banana slices and Nilla wafers on top not only look good but reinforce the flavors in every bite.
Essential Tools for Perfect Pie Making
Must-Have Equipment
You’ll need a mixing bowl, saucepan, whisk, rolling pin, and a 9-inch pie dish.
Optional Tools for Professional Results
A food processor makes crust preparation easier, and pie weights help ensure even baking.
Step-by-Step Banana Pudding Pie Recipe
Making and Blind-Baking the Crust
Prepare the dough, chill it, roll it out, and bake with weights before finishing uncovered until golden.
Preparing the Creamy Filling
Whisk together sugar, cornstarch, milk, eggs, and condensed milk. Cook until thickened, then stir in butter and vanilla.
Layering Bananas and Nilla Wafers
Add sliced bananas and wafers to the crust before pouring in the filling.
Assembling and Chilling the Pie
Pour the filling over layers and let it set completely in the fridge.
Adding Whipped Cream and Garnishes
Top with whipped cream, extra bananas, and wafers before serving.
Pro Tips for the Best Banana Pudding Pie
Making a truly great Banana Pudding Pie isn’t just about following steps—it’s about understanding how each layer behaves and how to keep everything balanced. From a crisp crust to a silky filling and fresh toppings, the details matter. When done right, each slice holds together beautifully while still feeling soft and creamy.
Preventing a Soggy Crust
A soggy crust can quickly take away from an otherwise perfect pie. The key here is blind baking properly and making sure the crust is fully cooked before adding any filling. When you bake the crust with pie weights first, it holds its shape and avoids bubbling. Removing the weights and baking it a bit longer ensures the base is dry and lightly golden.
Another helpful trick is letting the crust cool completely before assembling. Adding warm filling to a hot crust can trap steam, which softens it over time. If you want to go a step further, you can lightly brush the baked crust with a thin layer of egg wash and bake it for a couple more minutes—this creates a subtle barrier that helps keep moisture out.
Achieving a Smooth, Lump-Free Filling
The custard filling is the heart of this pie, and its texture should be silky and smooth, not grainy or lumpy. The most important factor here is constant whisking. As the mixture heats, the cornstarch activates and thickens the custard, but if it’s not stirred consistently, lumps can form.
Cooking over medium-low heat gives you better control. High heat might seem faster, but it can cause uneven thickening or even scramble the eggs. Once the mixture reaches a gentle boil and thickens, continue whisking for about a minute to fully cook the starch—this ensures the filling sets properly later.
Adding butter at the end not only enhances flavor but also gives the custard that glossy, smooth finish that makes each slice look and taste more refined.
Common Mistakes and How to Avoid Them
Even though this dessert is straightforward, a few common missteps can affect the final result. Knowing what to watch for helps you avoid frustration and get consistent results.
Runny Filling or Undercooked Custard
If the filling doesn’t set properly, it’s usually because it wasn’t cooked long enough. The custard needs to reach a full thickness before being removed from heat. If it still looks thin when hot, it likely won’t firm up after chilling.
Make sure it coats the back of a spoon and holds its shape slightly when stirred. That’s when you know it’s ready.
Browning Bananas Too Quickly
Bananas can brown quickly once sliced, especially when exposed to air. To keep them looking fresh, assemble the pie soon after slicing or lightly brush the slices with a bit of lemon juice.
Also, adding a layer of custard over the bananas helps seal them from air, slowing down browning.
Variations and Creative Twists
Once you’ve made the classic version, there’s plenty of room to experiment. This pie is incredibly adaptable, and small changes can create entirely new flavor profiles.
No-Bake Banana Pudding Pie
If you want to skip the oven, you can use a store-bought graham cracker crust or a no-bake cookie crust. The filling can still be cooked on the stovetop, then poured into the crust and chilled.
This version is quicker and perfect for warmer days when you don’t want to bake.
Chocolate Banana Pudding Pie
For a richer twist, add a layer of chocolate ganache to the crust before layering the bananas and wafers. You can also mix melted chocolate into part of the custard for a marbled effect.
Chocolate and banana pair naturally well, giving the pie a more indulgent feel.
Serving and Presentation Ideas
Presentation can turn this already delicious pie into something truly memorable.
Making It Bakery-Style
Pipe whipped cream in decorative swirls around the edges or across the entire top for a polished look. Add banana slices and Nilla wafers strategically rather than randomly—it creates a cleaner, more intentional design.
For clean slices, use a sharp knife dipped in warm water and wipe it between cuts. This helps maintain those beautiful layers.
Serve chilled for the best texture—firm enough to slice, but still creamy and soft.
Storage and Shelf Life
This pie stores well, but a few tips help maintain its freshness and appearance.
Keeping It Fresh
Store the pie in the refrigerator, covered, for up to 3–4 days. The custard holds up well, but bananas may soften over time.
For the best presentation, consider adding fresh banana slices just before serving rather than storing them on top.
Freezing isn’t recommended, as the custard and bananas don’t thaw well and can lose their texture.
Conclusion
Banana Pudding Pie is one of those desserts that feels both comforting and elevated at the same time. It takes simple, familiar ingredients and layers them into something that looks impressive and tastes even better.
What makes it special is the combination of textures—the crisp crust, creamy custard, soft bananas, and airy whipped cream. Each bite offers something different, but everything works together seamlessly.
It’s the kind of dessert that fits almost any occasion, from casual gatherings to special celebrations. And once you’ve made it once, it’s easy to see why it becomes a go-to favorite.
FAQs
1. Can I use store-bought crust?
Yes, it saves time and still works well.
2. How do I keep bananas from turning brown?
Add them just before serving or brush lightly with lemon juice.
3. Can I make this pie ahead of time?
Yes, it’s best when chilled for several hours or overnight.
4. Why is my filling not thickening?
It likely needs more cooking time or wasn’t heated enough.
5. Can I freeze banana pudding pie?
Freezing isn’t recommended due to texture changes.
Print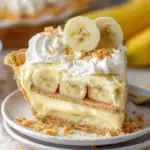
Banana Pudding Pie
Ingredients
▢1 ¼ cups (163g) all-purpose flour (divided)
▢½ teaspoon salt
▢½ cup (112g) unsalted butter (cold, cut into ½ inch cubes)
▢2-4 tablespoons ice water
Filling
▢½ cup (104g) granulated sugar
▢2 tablespoons (16g) cornstarch
▢½ teaspoon salt
▢1 ¾ cups (420ml) whole milk
▢1 ¼ cups sweetened condensed milk (one 14 oz can)
▢2 large eggs (room temperature)
▢2 large egg yolks (room temperature)
▢1 tablespoon vanilla extract
▢5 tablespoons (70g) unsalted butter (cold and cubed)
▢3-4 large bananas
▢45-50 Nilla wafers
Whipped Cream
▢1 cup (240ml) heavy whipping cream (cold)
▢4 tablespoons (29g) powdered sugar
▢¾ teaspoon vanilla extract
▢Additional Nilla wafers (optional)
▢Additional banana slices (optional)
Instructions
Make the crust
NOTE: I make the crust with a food processor because it’s quicker and easier, but you can also do it by hand by adding the cubed butter to all of the flour and salt and cutting the butter into the flour until it’s all combined and the largest pieces of butter remaining are about the size of peas. Then add the water and continue with the rest of the instructions.
Add 3/4 cup (98g) of flour and salt to a food processor and pulse together 2 to 3 times.
Scatter the cubed butter over the flour and process until a crumbly dough forms, about 15 seconds. The flour should all be coated – none of the flour should be dry.
Add the remaining 1/2 cup (65g) of flour and pulse a few times until everything is evenly distributed. The doughy pieces should break up and it should look sandy. There shouldn’t be a bunch of big pieces remaining. A few are fine, but it should be mostly evenly distributed.
Move the mixture to a medium mixing bowl and add 2 tablespoons of the ice water. Start with 2 tablespoons and add from there. Using a rubber spatula, gently fold everything together. The crumbs should begin to form larger clusters. If you pinch some of the dough and it holds together nicely, it’s ready. If the dough falls apart, add 1-2 more tablespoons of water and continue to press until dough comes together.
Work just enough for it to come together, then shape into a disc. Wrap disc in plastic wrap and refrigerate for at least an hour or up to 2 days.
When ready to bake the crust, place the pie crust onto a piece of parchment paper. Cover the crust with another piece of parchment paper and roll it out with a rolling pin.
Peel one piece of the parchment paper off and use the other piece of parchment to lift the pie crust and drape it over a 9-inch deep-dish pie plate. Carefully peel off the second piece of parchment paper, then shape your pie crust. This pie has a lot of filling and will fill your pie pan, so you want the crust to go all the way up the sides of the pan. “Dock” the crust by pricking the crust with a fork to allow steam to escape evenly. This helps the crust not bubble up and cook unevenly.
Refrigerate the crust for 2-3 hours or freeze for about 20 minutes You want to be sure the crust is very cold.
Preheat oven to 350°F (180°C) and line the pie crust with parchment paper. Be sure the parchment paper presses all the way against the crust so that it’s flush. Fill the pie crust with pie weights, dry rice or beans.
Bake for 20-25 minutes, or until the crust begins to brown on the edges. Remove the parchment paper and pie weights and bake for another 5-10 minutes, or until lightly golden brown. Remove from the oven and allow to cool completely. If you need to speed up cooling, you can place it in the fridge.
Make the filling
When the crust has cooled, slice the bananas about ¼ inch thick and add half of them to the bottom of the crust. Cover the bananas with an even layer of half of the Nilla wafers. Set aside.
Add the sugar, cornstarch and salt to a medium saucepan and whisk together until combined and there are no lumps.
Add the milk and whisk well to combine. You don’t want any lumps. Add the sweetened condensed milk, eggs and egg yolks and whisk together until well combined.
Heat mixture over medium-low heat, whisking constantly until the mixture begins to thicken and comes to a boil. Continue whisking and boil for 1 minute.
Remove from heat and add the vanilla extract and butter. Whisk until completely smooth and well combined.
Immediately add half of the filling on top of the Nilla wafer cookies and bananas added to the crust earlier and sprea
Enjoyed this recipe?
Discover more delicious recipes, save your favorites, and plan your meals with the Cooking Layer app.
Free to download • Fast and easy to use


