
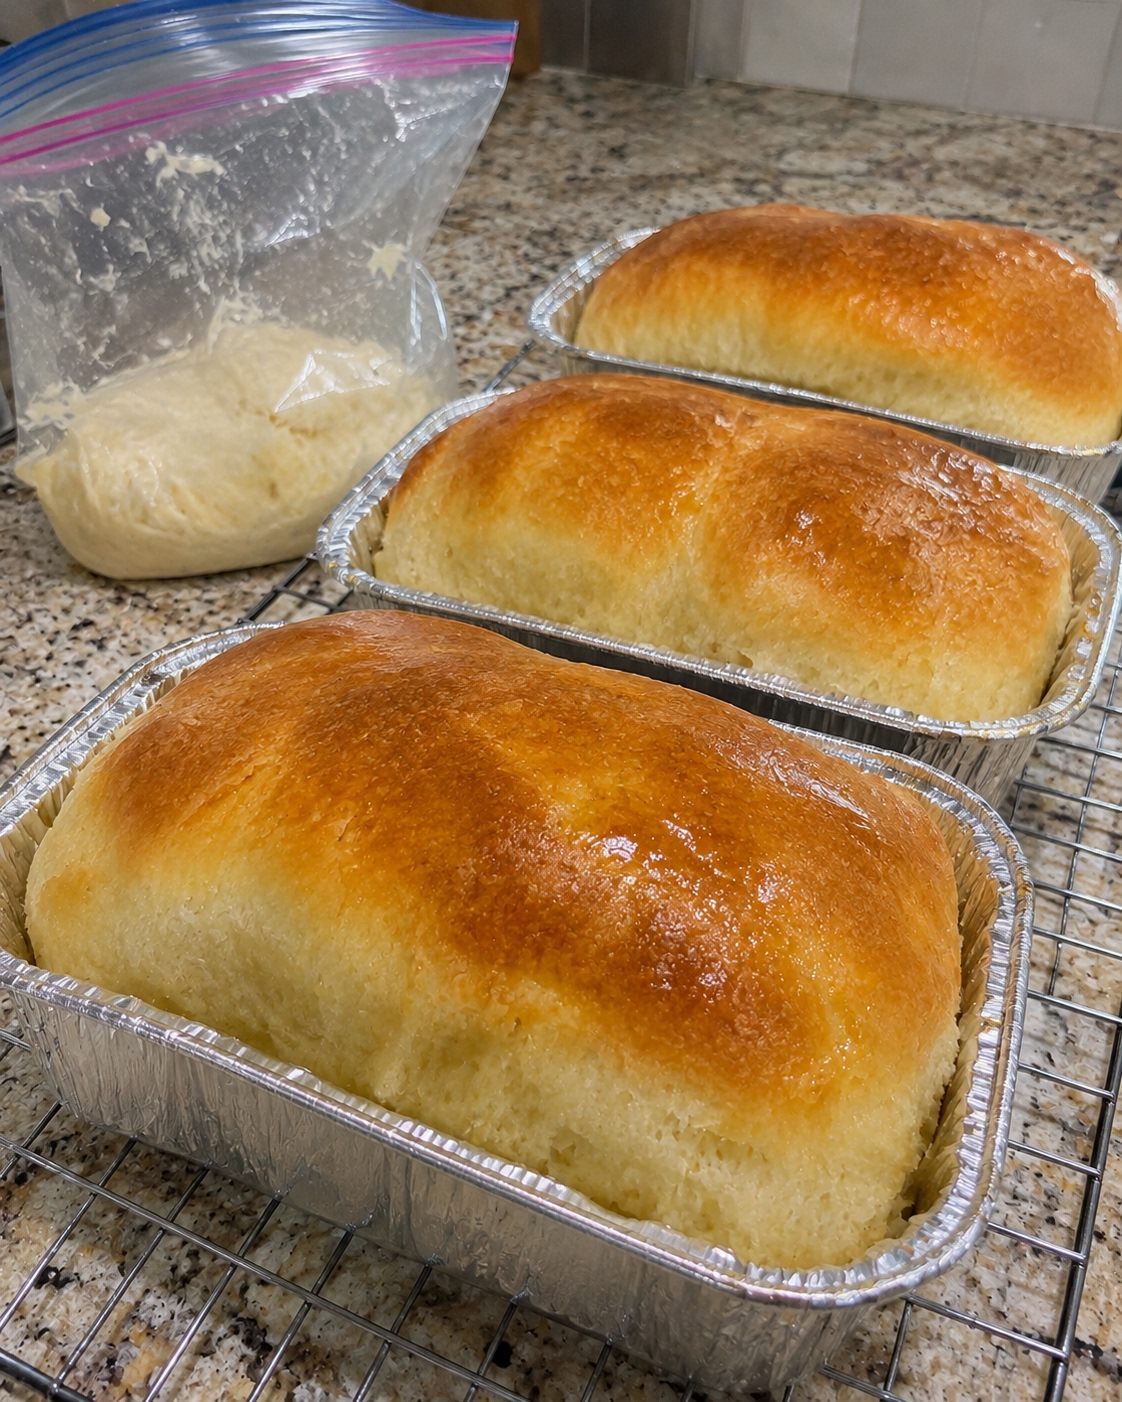
Introduction to Bread in a Bag
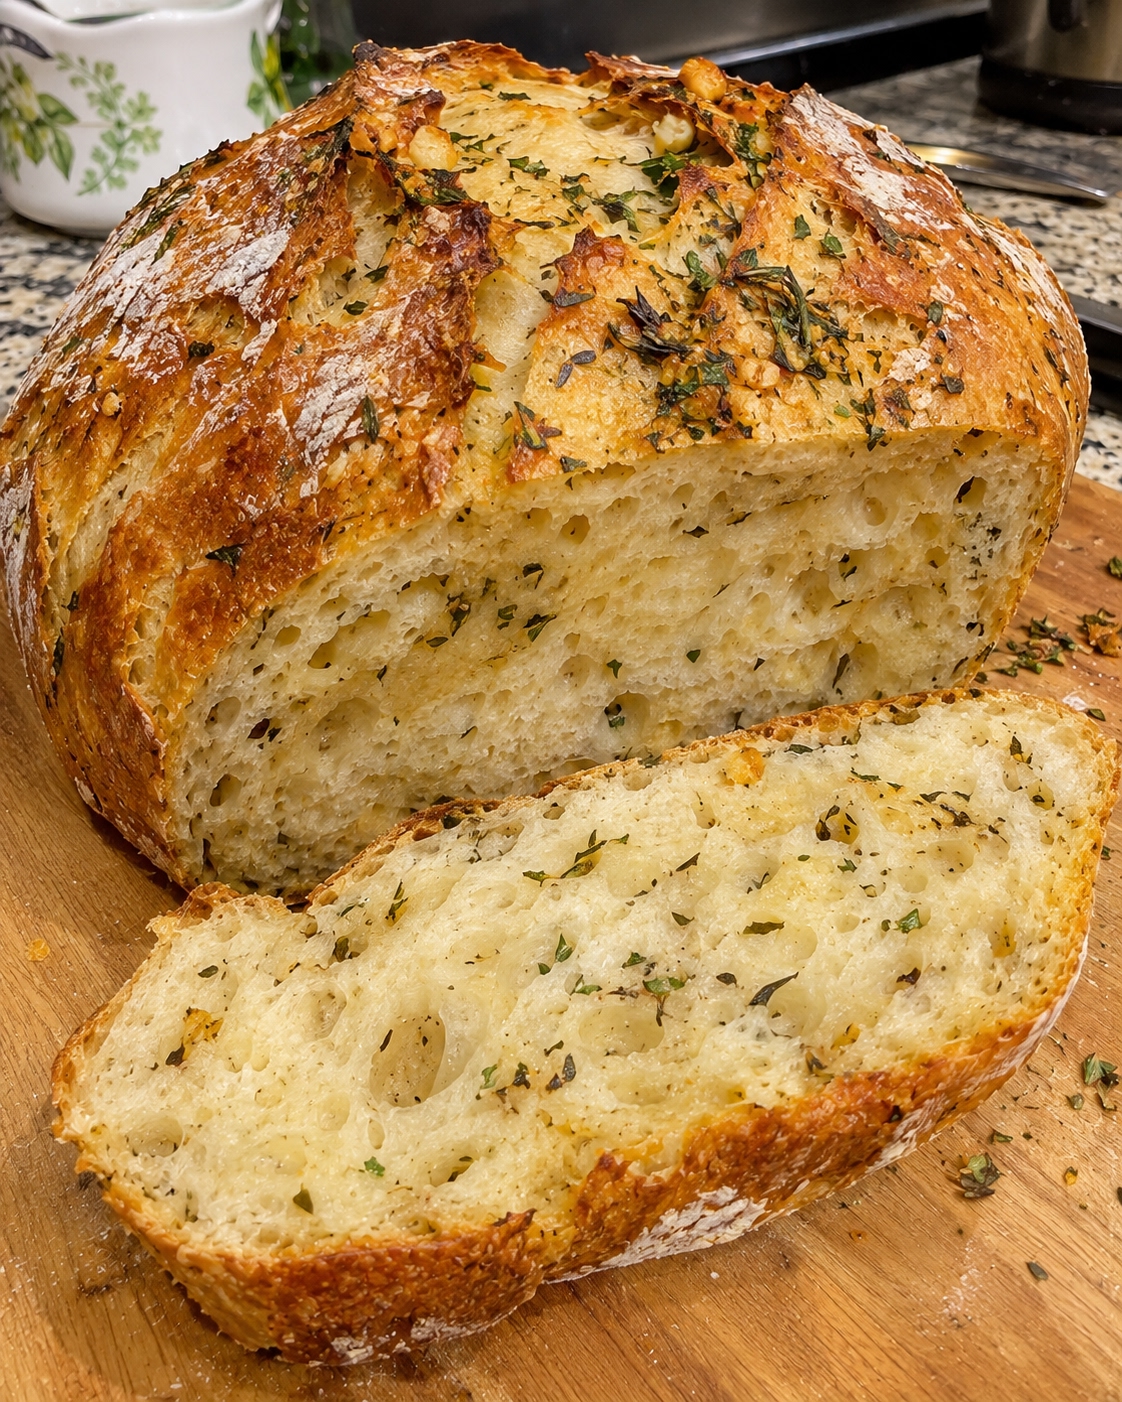
Bread in a Bag is an innovative method that transforms simple ingredients into delicious homemade loaves in just 45 minutes. This easy-to-follow technique not only simplifies the bread-making process but also eliminates the mess typically associated with traditional methods. Using just a few basic ingredients, you’ll create soft, fluffy loaves that are perfect for sandwiches, toast, or simply enjoying warm with butter. The method is forgiving and quick, making it a fantastic way to introduce fresh bread into your diet without a long wait. Gather your ingredients and get ready for a unique culinary experience that will leave your kitchen smelling heavenly.
Why You’ll Love This Recipe
This Bread in a Bag recipe is perfect for various reasons. Firstly, it takes just 45 minutes from start to finish, making it ideal for quick baking sessions. You can enjoy warm, homemade bread without the long wait associated with traditional recipes. Secondly, the bag technique minimizes mess and simplifies the kneading process, allowing even novice bakers to create delightful loaves with ease.
Additionally, the versatility of this recipe means you can shape it into mini loaves or a standard-sized loaf, catering to any occasion you may have in mind. Whether it’s a family dinner or a gathering with friends, this bread adapts seamlessly to your needs. Lastly, the rich aroma of freshly baked bread will fill your home, creating an inviting atmosphere that’s wonderful to share with loved ones. Enjoy homemade bread without the usual hassle!
Ingredients for Bread in a Bag
To create your delicious Bread in a Bag, you’ll need the following ingredients, each serving a unique role:
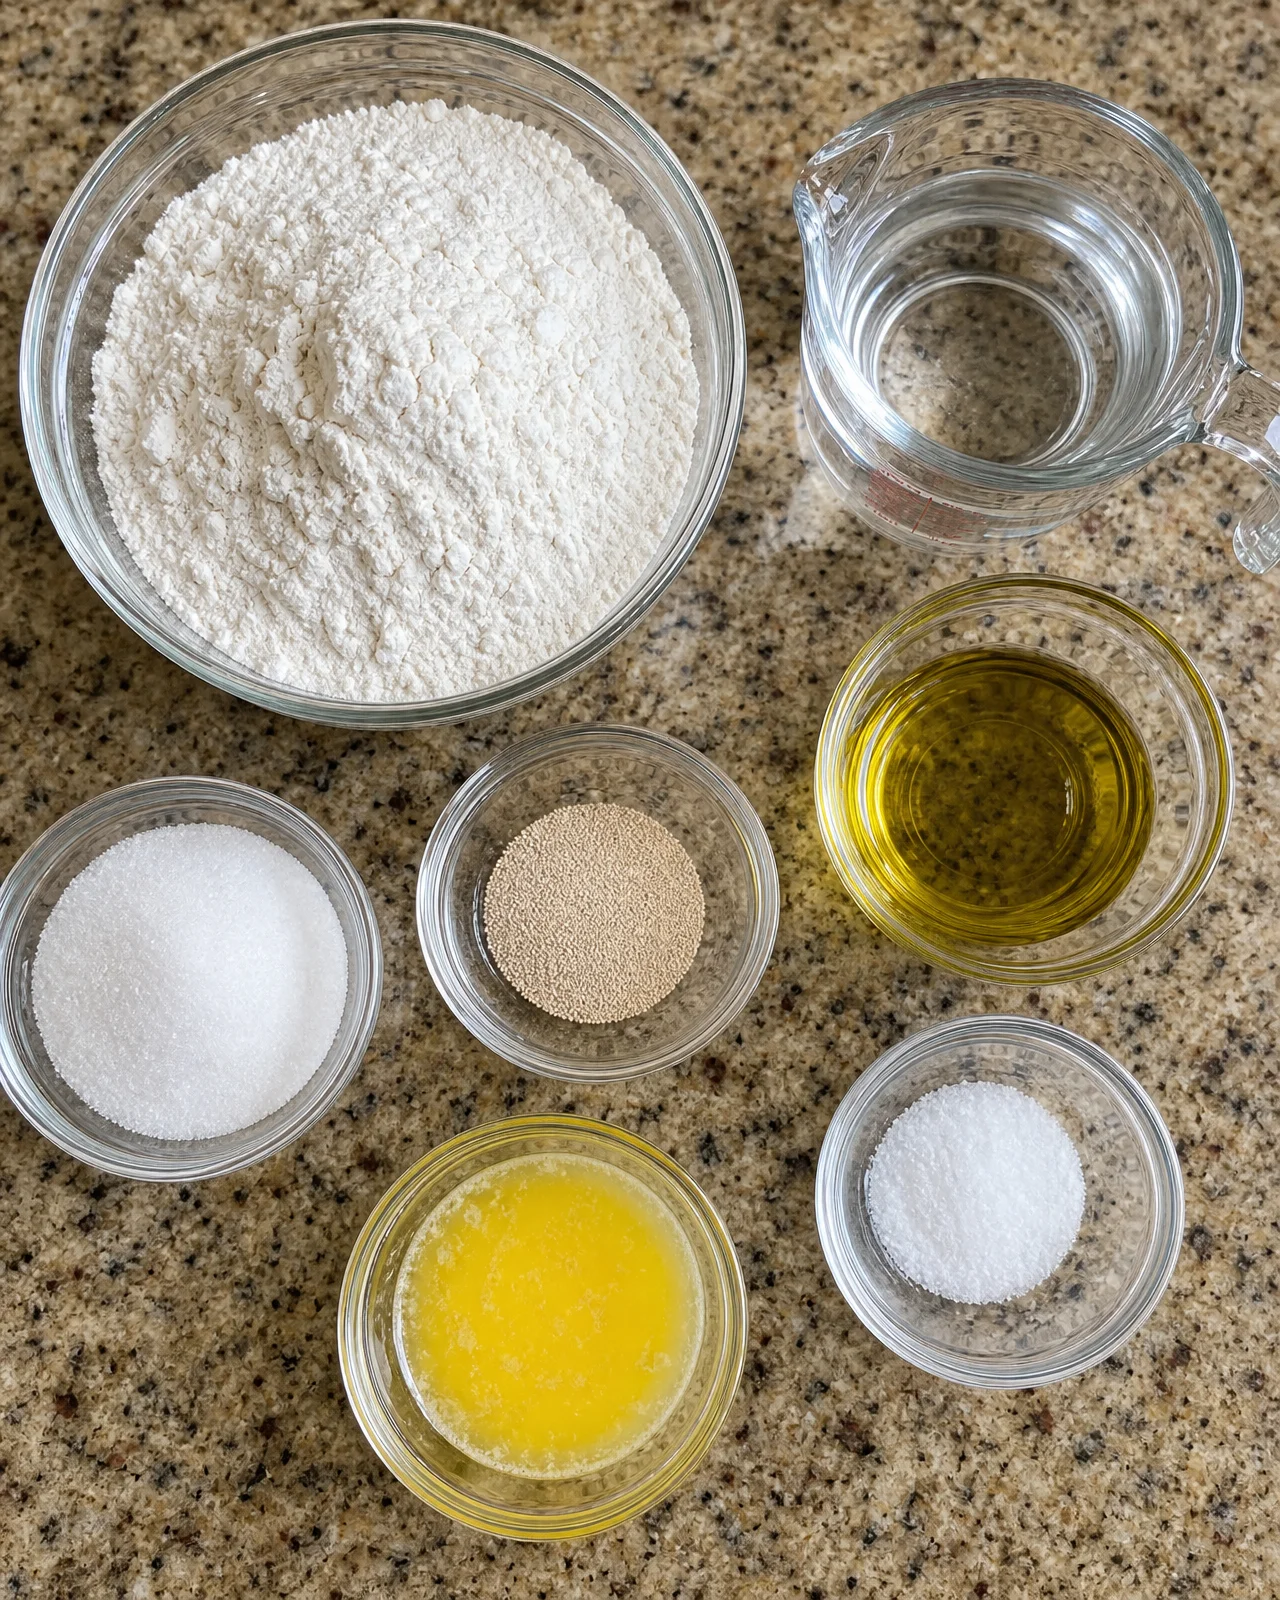
- 3 cups all-purpose flour: This forms the base of your dough and provides structure.
- 3 teaspoons granulated sugar: This helps to activate the yeast and adds a touch of sweetness.
- 1 packet rapid-rise yeast (2¼ teaspoons): This is the leavening agent that allows your bread to rise quickly.
- 3 tablespoons olive oil or vegetable oil: Adds moisture and richness to your bread.
- 1¼ teaspoons salt: Essential for flavor and strengthening the dough.
- 1 cup warm water (110°F / 43°C): Activates the yeast; ensure it’s warm, not hot, to prevent killing it.
- 1 tablespoon melted butter (optional): This is brushed on after baking for added flavor and shine.
How to Make Bread in a Bag
Preparing the Dough
Start by adding the warm water, granulated sugar, and rapid-rise yeast to a large gallon-size zip-top bag. Seal the bag tightly and squish it gently for about 30 seconds to combine the ingredients. Set the bag aside for 5–10 minutes until the mixture becomes foamy, indicating that the yeast is active. This frothy appearance is crucial as it shows that the yeast is ready to help your bread rise effectively. Next, add the olive oil and 1 cup of flour into the bag, resealing and squishing until you have a smooth mixture. This method allows you to avoid the mess typically associated with mixing dough, making this recipe exceptionally user-friendly. Make sure to incorporate the ingredients thoroughly, as any lumps of flour could result in an uneven texture in your final product.
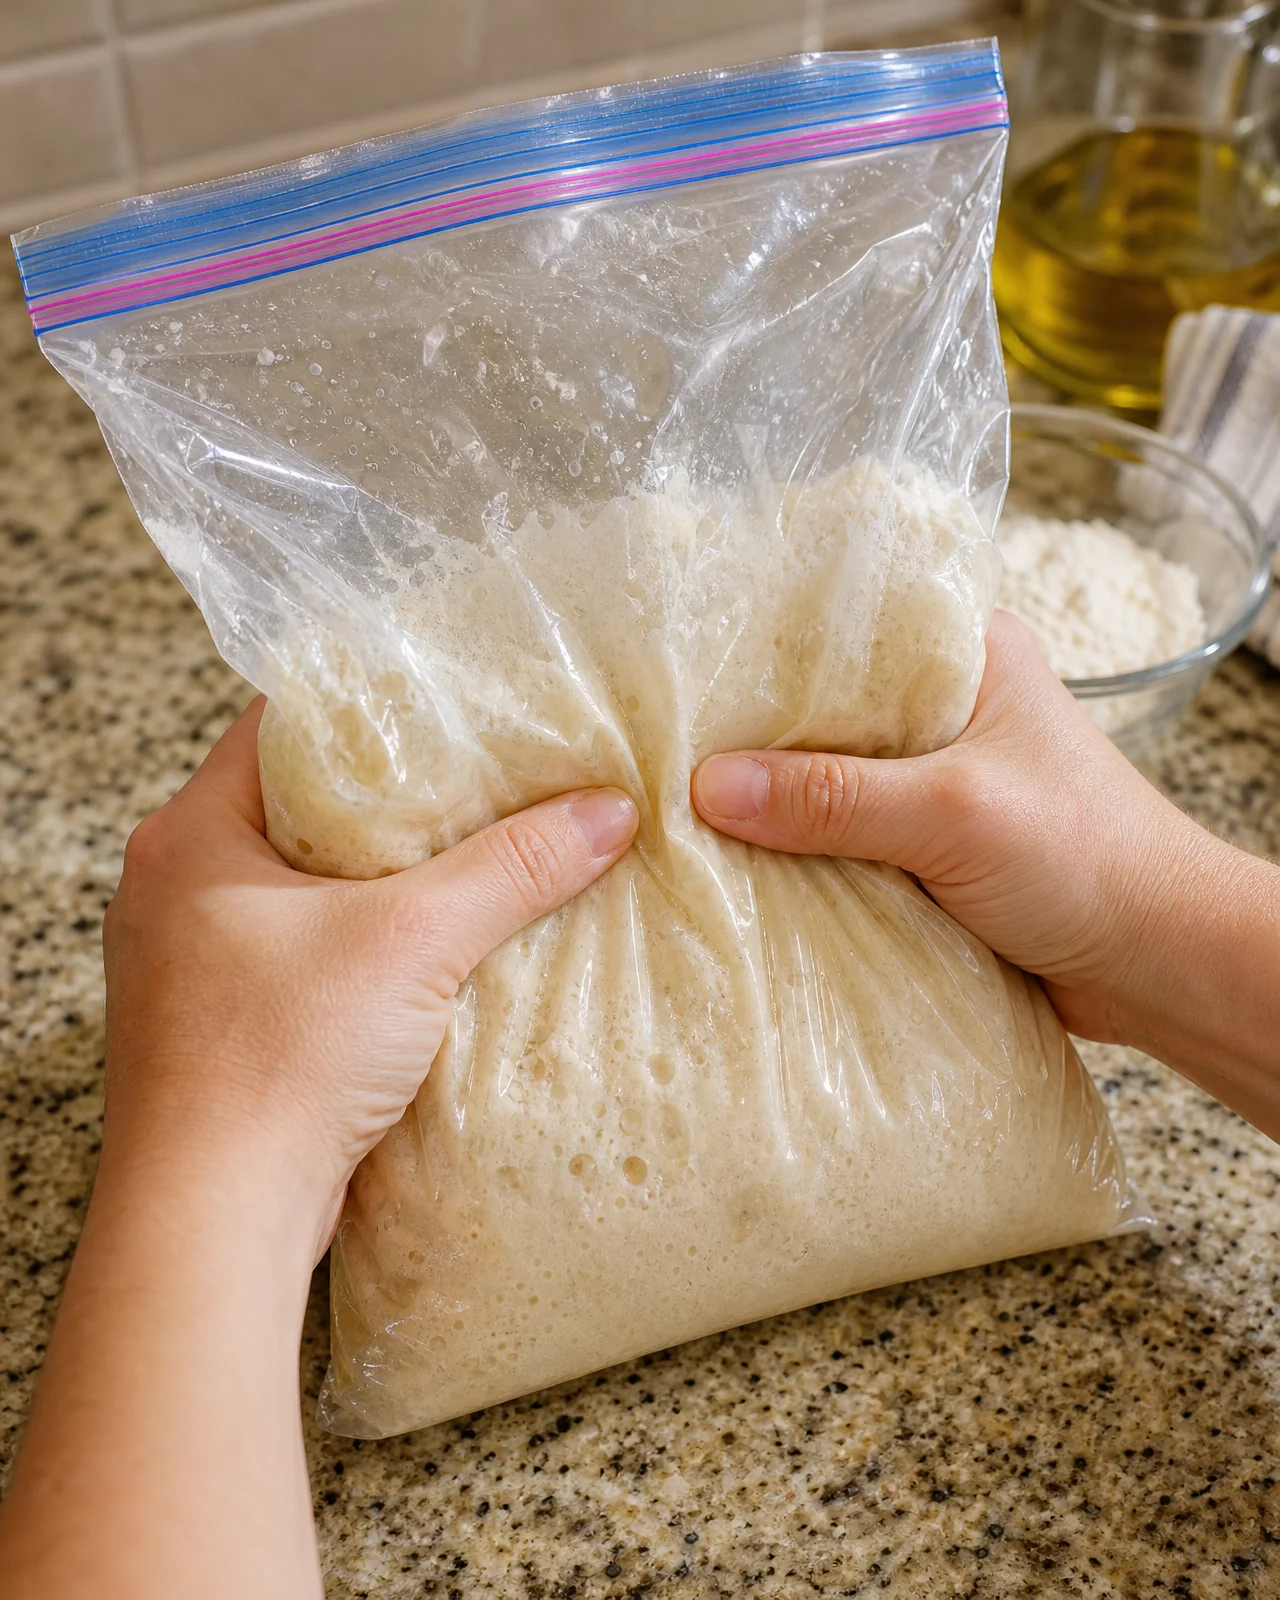
Kneading the Dough
Now it’s time to incorporate the remaining flour and salt. Open the bag and add the additional 2 cups of flour along with the salt. Reseal the bag and knead by squishing the bag for about 5–7 minutes until a soft dough forms. This method of kneading creates the gluten structure necessary for a good rise. If the dough feels excessively sticky during this process, sprinkle a little extra flour directly into the bag to help it come together. Be cautious not to add too much flour; a slightly sticky dough is preferable to ensure the bread remains soft. Once the dough looks smooth and soft, remove it from the bag and place it on a lightly floured surface. Knead the dough for 1–2 minutes until it’s smooth and elastic, ensuring you can stretch it without tearing.
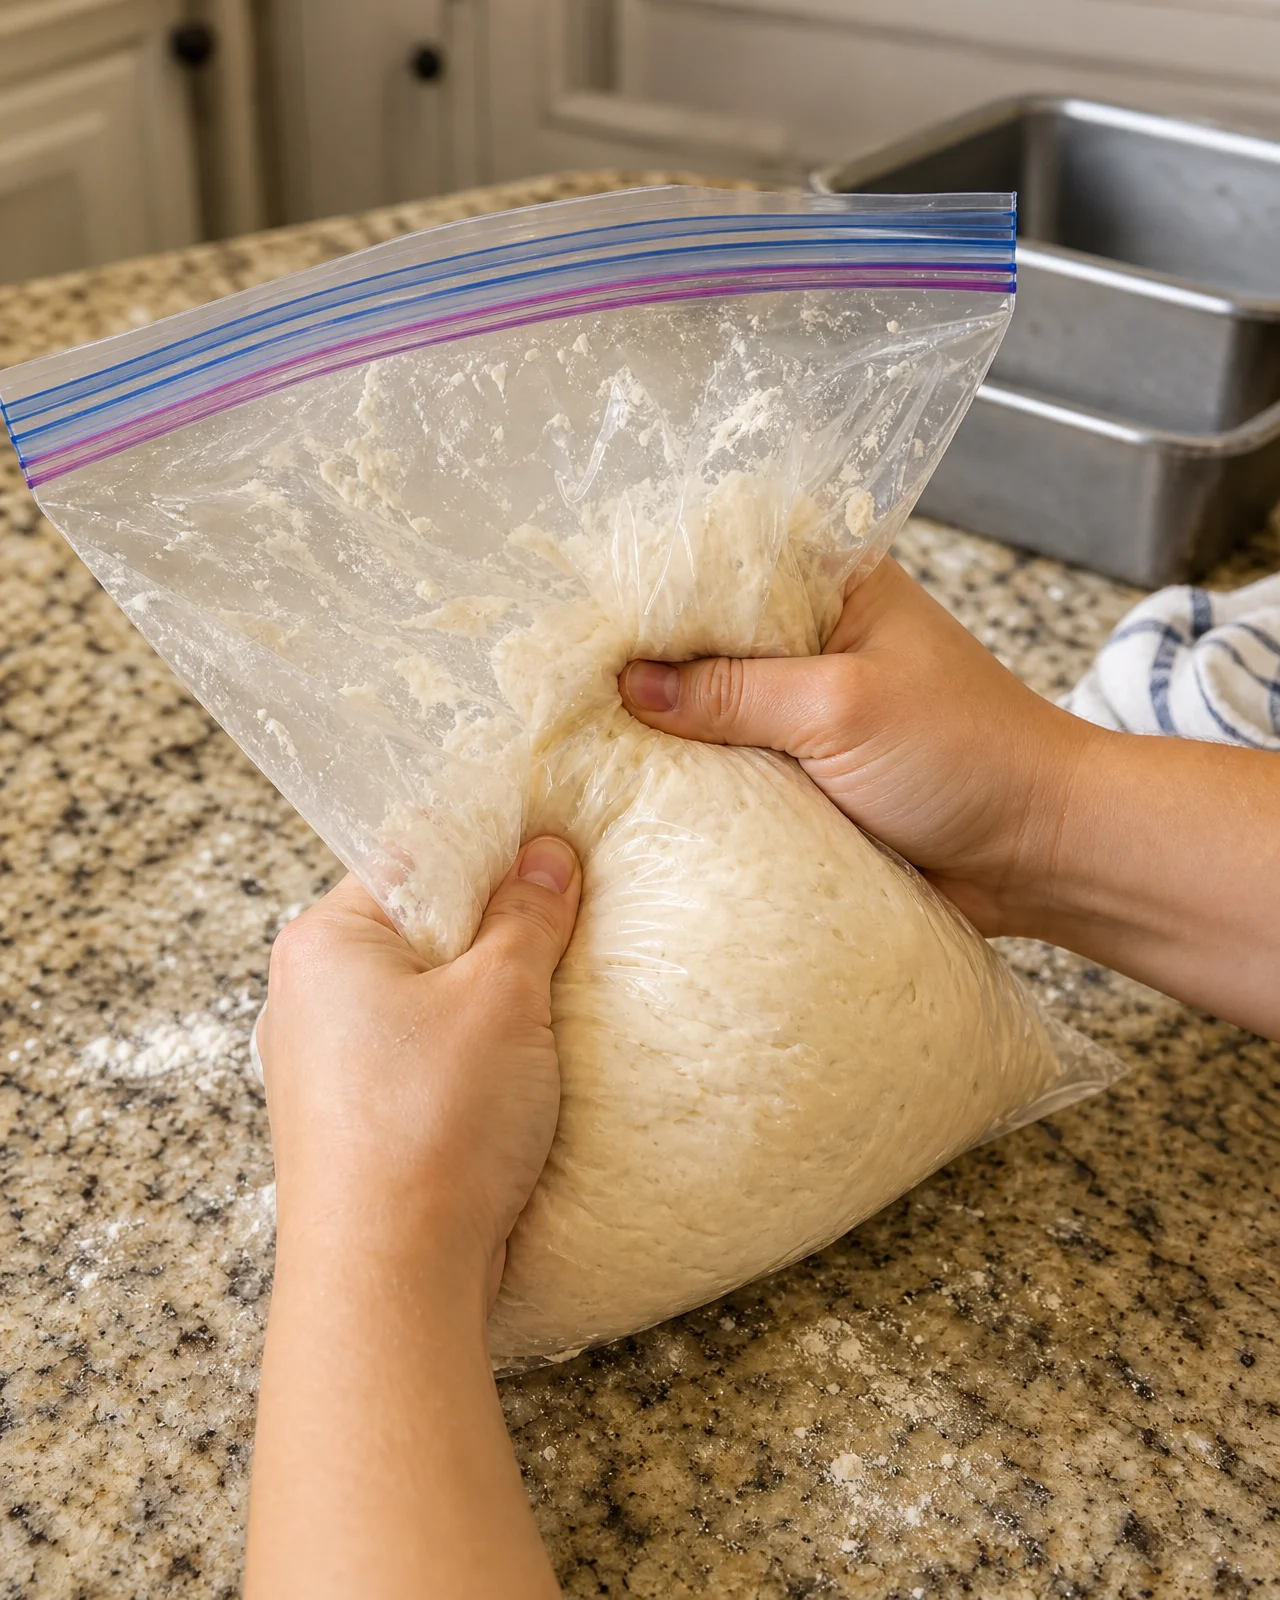
Shaping and Baking
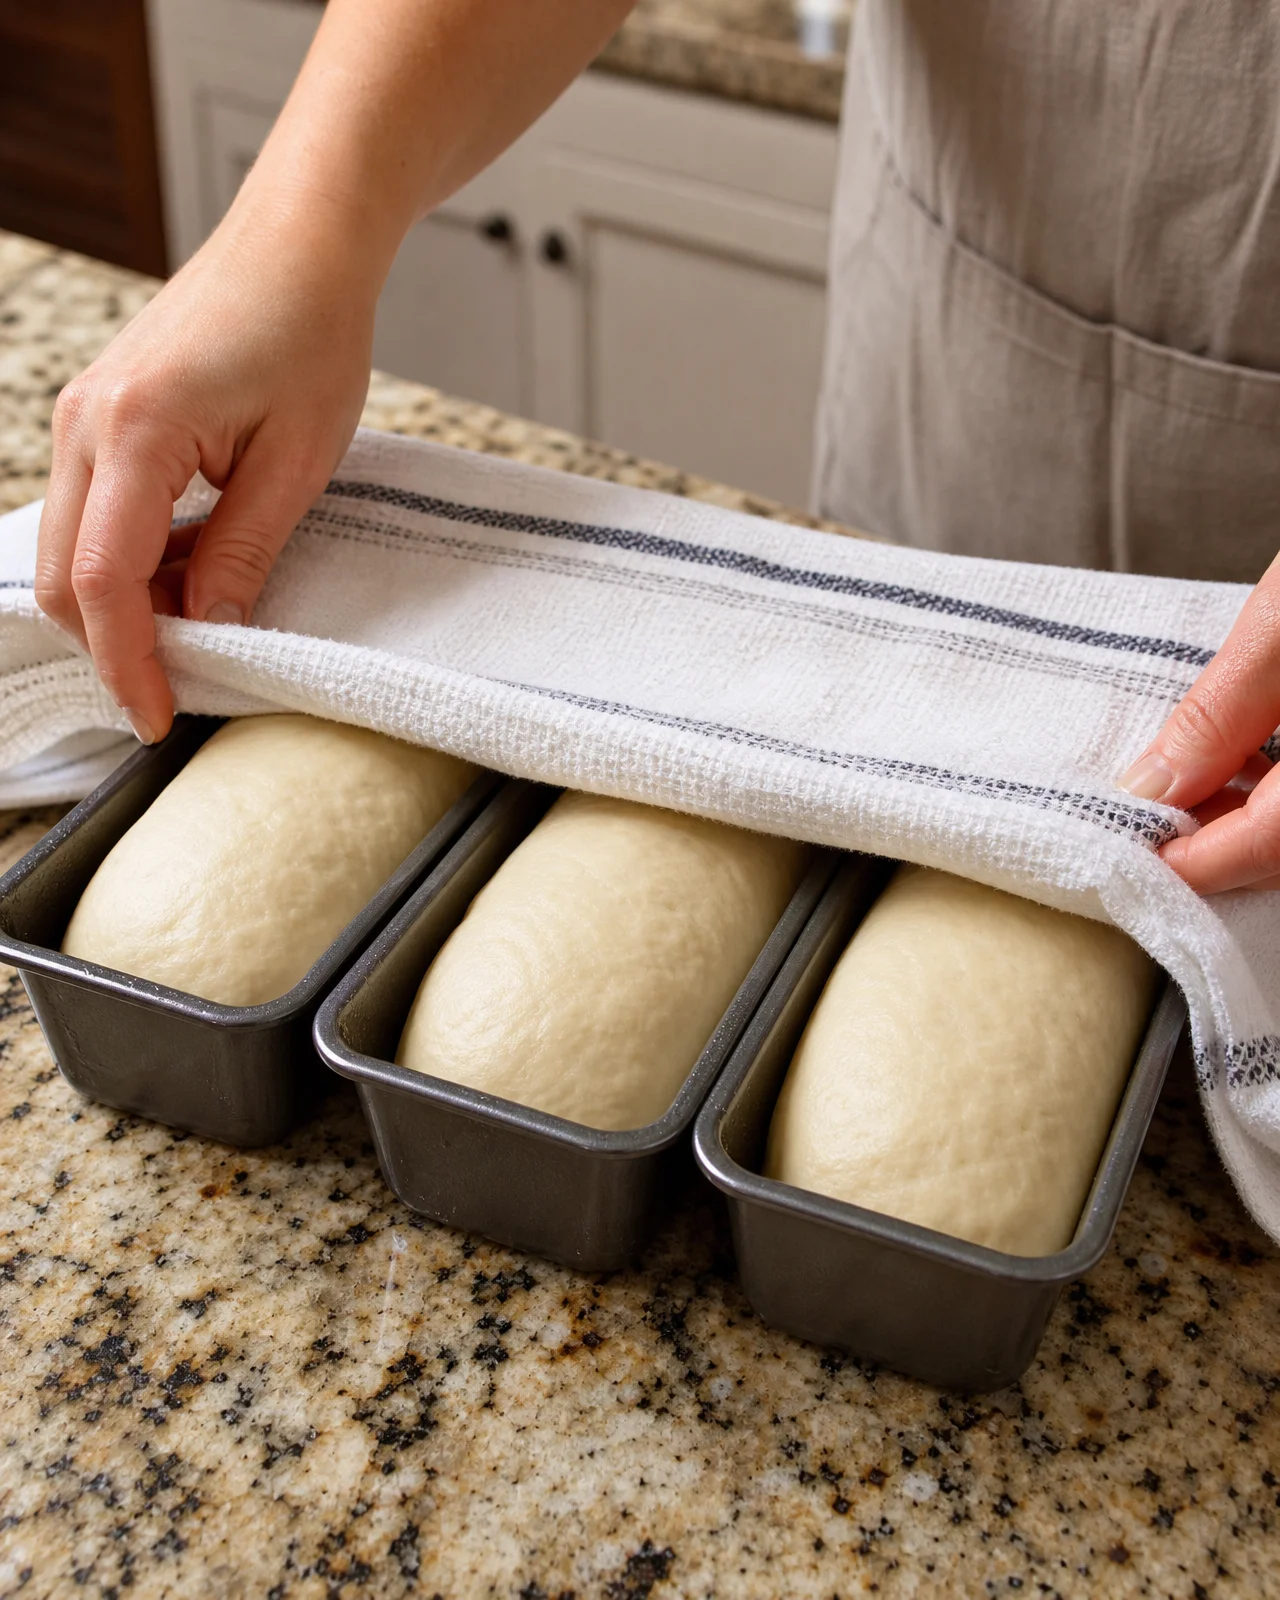
After kneading, divide your dough into three equal portions for mini loaves or leave it whole if you prefer a standard loaf. Shaping the dough tightly is key for achieving good structure and a nice rise. Pinch the seams to seal them well, ensuring no air escapes during the second rise. Place the shaped dough into greased mini loaf pans or a single standard loaf pan, depending on your choice. Cover them with a clean kitchen towel and let them rise in a warm place for 30–45 minutes, or until they’ve doubled in size. The warmth will create the ideal environment for the yeast to work. While the dough rises, preheat your oven to 375°F (190°C). Bake the mini loaves for approximately 18–22 minutes or a standard loaf for 25–30 minutes, until they are golden brown and sound hollow when tapped. This auditory cue is a great test to determine doneness. After baking, cool the loaves in their pans for about 10 minutes before transferring them to a wire rack, allowing air to circulate and prevent sogginess.
Tips for Success
To ensure your Bread in a Bag turns out perfectly, keep these essential tips in mind. First, be precise with the temperature of your warm water; it should be between 100°F and 110°F. This range activates the yeast effectively, allowing it to rise the bread to fluffy perfection. If your dough feels too sticky while kneading, don’t hesitate to add a little extra flour—a tablespoon at a time—to achieve the right consistency without drying it out.
Covering the dough during its rising period is also crucial. This simple step prevents the surface from drying out and forming a crust that can inhibit proper rising. As for knowing when your bread is done baking, an easy trick is to tap the top of the loaf; if it sounds hollow, your bread is likely fully baked and ready to come out of the oven. Adhering to these tips will enhance your baking results and your overall experience!
Equipment Needed
To get started with your Bread in a Bag, gather the following essential equipment: a large gallon-size zip-top bag for mixing the dough, mixing bowls for measuring and additional mixing if needed, and measuring cups for precise ingredient quantities. Ensure you have a clean, floured surface for kneading the dough and either greased mini loaf pans or a standard loaf pan, depending on your desired loaf size. A wire rack is necessary for cooling the bread after baking, and having a clean kitchen towel handy is also helpful for covering the dough while it rises. These tools streamline the process and enhance your baking experience.
Variations
Feel free to customize your Bread in a Bag by adding various ingredients to enhance its flavor. Incorporating fresh herbs such as rosemary, thyme, or basil can lend a fragrant touch to the dough. For a savory kick, consider adding minced garlic or shredded cheese, which melts beautifully during baking. If you prefer a sweet twist, mix in ground cinnamon and raisins to create a delightful cinnamon-raisin bread that’s perfect for breakfast or dessert.
You can also experiment with the flour blend by using half whole wheat flour, which offers a nuttier flavor and increases the fiber content. For an Italian-inspired variation, add sun-dried tomatoes and pitted olives to bring a sophisticated taste profile. These simple modifications allow you to tailor your bread to suit your personal tastes and occasions, making each batch uniquely yours.
Serving Suggestions
Serve your freshly baked bread warm with a pat of butter or a drizzle of olive oil for easy dipping. This simple serving option highlights the bread’s fluffy texture and enhances its flavor. It pairs wonderfully with a variety of dishes, including hearty soups, stews, or fresh salads, making it a versatile addition to any meal. For a delightful breakfast, consider slicing the bread thinly for sandwiches or toasting it, topped with avocado, jam, or even nut butter for a nutritious start to your day. Present your loaves on a rustic wooden board, garnished with fresh herbs, to create an inviting display that enhances the visual appeal on any dining table.
FAQs about Bread in a Bag
Can I make this recipe ahead of time?
Yes! You can prepare the dough and freeze it after the first rise. Just let it thaw and rise again before baking when you’re ready to enjoy it.
What is the best way to store the bread?
After letting the bread cool completely, store it in an airtight container or zip-top bag at room temperature for up to three days. For longer storage, consider freezing the loaves.
Can I use instant yeast instead of rapid-rise?
Yes, instant yeast can be used in place of rapid-rise yeast; however, you may need to adjust the rising times slightly as it may take a bit longer.
How do I reheat leftover bread?
To reheat bread, wrap individual slices in foil and warm them in a 350°F (175°C) oven for about 10 minutes, or toast slices in a toaster until heated through.
What if my dough doesn’t rise?
If your dough hasn’t risen, it could be due to expired yeast or water temperature being too hot or cold. Always check the yeast’s expiration date and ensure the water is warm, not hot.
Final Thoughts
Making Bread in a Bag is a delightful and satisfying baking process that allows you to create fresh, homemade bread in just 45 minutes. This straightforward recipe breaks down traditional bread-making barriers, making it accessible for bakers of all skill levels. The gentle method yields soft, airy loaves that are perfect for a variety of meals or simply enjoyed warm with butter. As you bake, the inviting aroma will fill your kitchen, turning the act of making bread into a memorable occasion.
Keep in mind that using quality ingredients and following the essential tips laid out throughout the recipe will guide you toward consistent success. Bake with confidence, share your delectable loaves with loved ones, and experience the simple joy of homemade bread made effortlessly. Each slice is a testament to your creativity and love for good food.
Print
Bread in a Bag
- Prep Time: 15 minutes
- Cook Time: 30 minutes
- Total Time: 45 minutes
- Yield: 3 mini loaves or 1 standard loaf 1x
- Category: Baking
- Method: Baking
- Cuisine: American
- Diet: Vegetarian
Description
Bread in a Bag is an easy and quick way to make homemade loaves of bread in just 45 minutes, perfect for any occasion.
Ingredients
- 3 cups all-purpose flour, plus extra for dusting
- 3 teaspoons granulated sugar
- 1 packet rapid-rise yeast (2¼ teaspoons)
- 3 tablespoons olive oil or vegetable oil
- 1¼ teaspoons salt
- 1 cup warm water (110°F / 43°C)
- 1 tablespoon melted butter, for brushing after baking (optional)
Instructions
- Add the warm water, sugar, and yeast to a large gallon-size zip-top bag. Seal and squish for 30 seconds. Set aside for 5–10 minutes until foamy.
- Add olive oil and 1 cup of flour to the bag, reseal, and squish until smooth.
- Add remaining 2 cups of flour and salt to the bag. Knead by squishing for 5–7 minutes until a soft dough forms.
- Remove dough from the bag and knead on a floured surface for 1–2 minutes until smooth.
- Divide the dough into 3 portions for mini loaves or leave whole for one standard loaf. Shape into tight loaves.
- Place shaped dough in greased mini loaf pans, cover, and let rise in a warm place for 30–45 minutes.
- Preheat oven to 375°F (190°C) and bake mini loaves for 18–22 minutes or one standard loaf for 25–30 minutes.
- Cool in pans for 10 minutes, transfer to a wire rack, and brush with melted butter.
- Slice and enjoy.
Notes
- Ensure the water is warm but not hot to avoid killing the yeast.
- Add extra flour only if the dough is very sticky during kneading.
- Cover the dough during rising to prevent it from drying out.
Nutrition
- Serving Size: 1 slice
- Calories: 150
- Sugar: 0.5g
- Sodium: 150mg
- Fat: 3g
- Saturated Fat: 0.5g
- Unsaturated Fat: 1.5g
- Trans Fat: 0g
- Carbohydrates: 28g
- Fiber: 1g
- Protein: 4g
- Cholesterol: 0mg