
Introduction to Rustic No-Knead Garlic Herb Bread
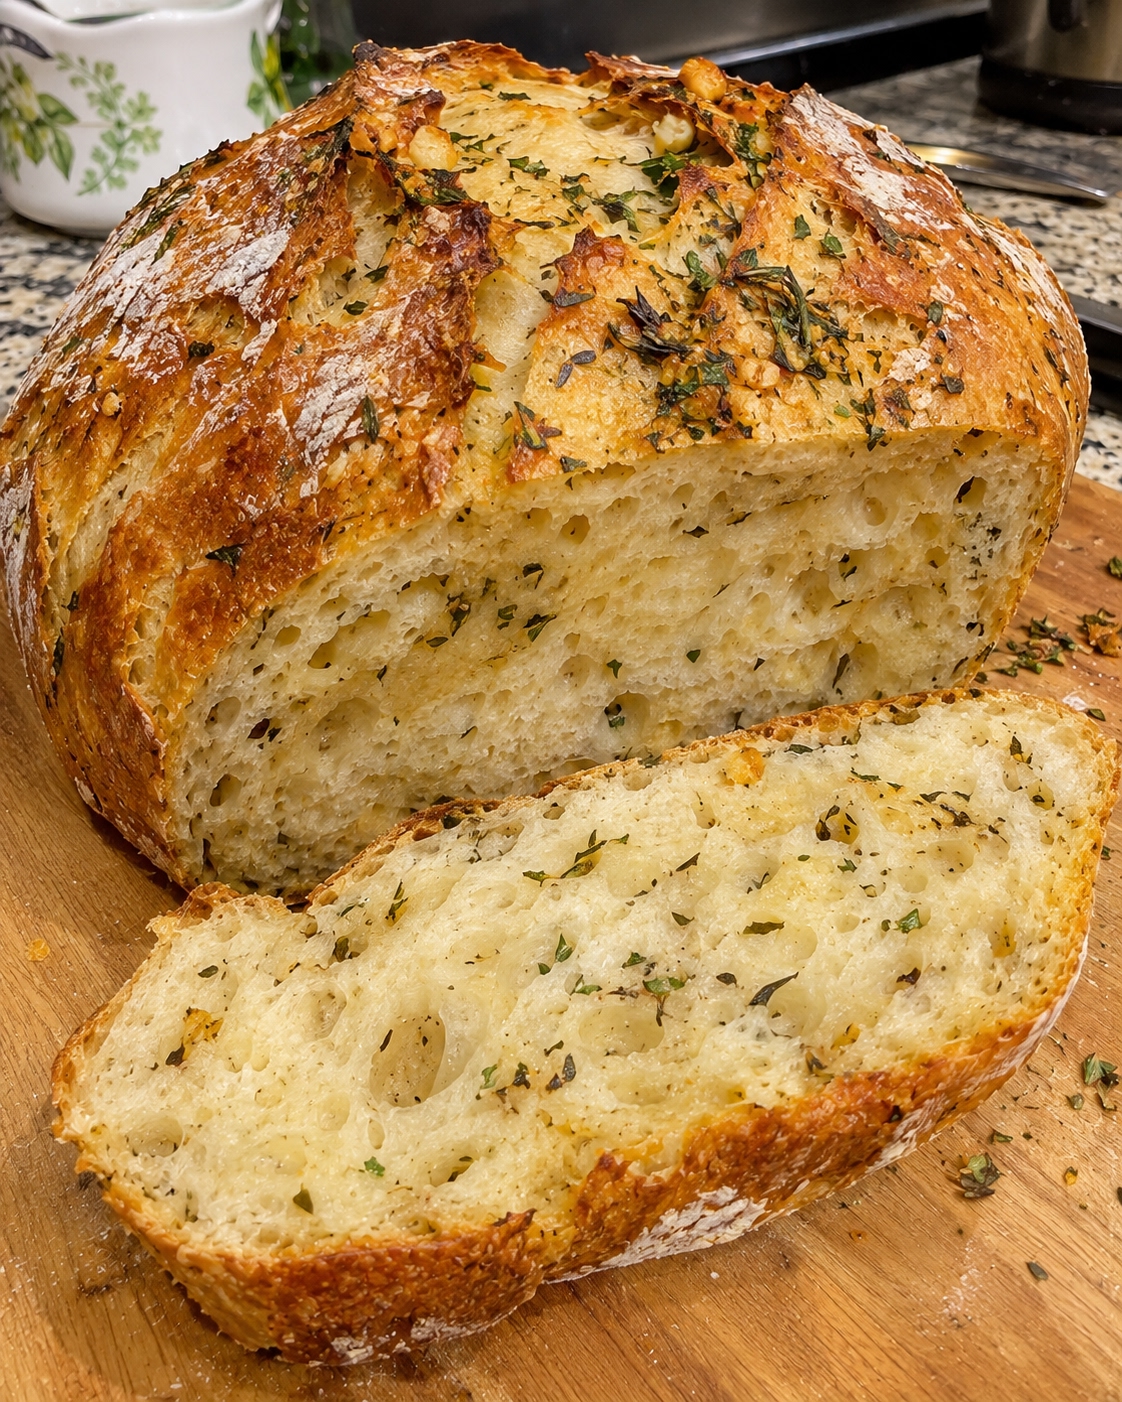
Discover the delightful flavors of Rustic No-Knead Garlic Herb Bread, a savory and aromatic delight that’s perfect for any occasion. With its crispy crust and soft, flavorful interior infused with garlic and fresh herbs, this bread elevates any meal or can stand alone as a tasty snack. What sets this recipe apart is its no-knead technique, making it accessible to bakers of all skill levels. Simply mix the ingredients, let the dough rise, and bake it in a hot Dutch oven for a perfection that is both rewarding and simple. Your kitchen will be filled with irresistible aromas, inviting everyone to gather around the table.
Why You’ll Love This Recipe
There are several reasons why Rustic No-Knead Garlic Herb Bread will become a favorite in your home. First, it’s incredibly easy to make—with no kneading required, you can enjoy homemade bread without the traditional fuss. The combination of garlic and fresh herbs enriches the flavor profile, making each bite an experience to savor. This recipe is also versatile; you can customize it with your preferred herbs or add cheese for an extra kick. Plus, the long fermentation process contributes to a complex flavor and light texture that rivals store-bought bread. It’s the perfect accompaniment to soups, salads, or as a base for savory sandwiches.
Ingredients for Rustic No-Knead Garlic Herb Bread
To create this delicious Rustic No-Knead Garlic Herb Bread, you’ll need just a few simple ingredients that work harmoniously.
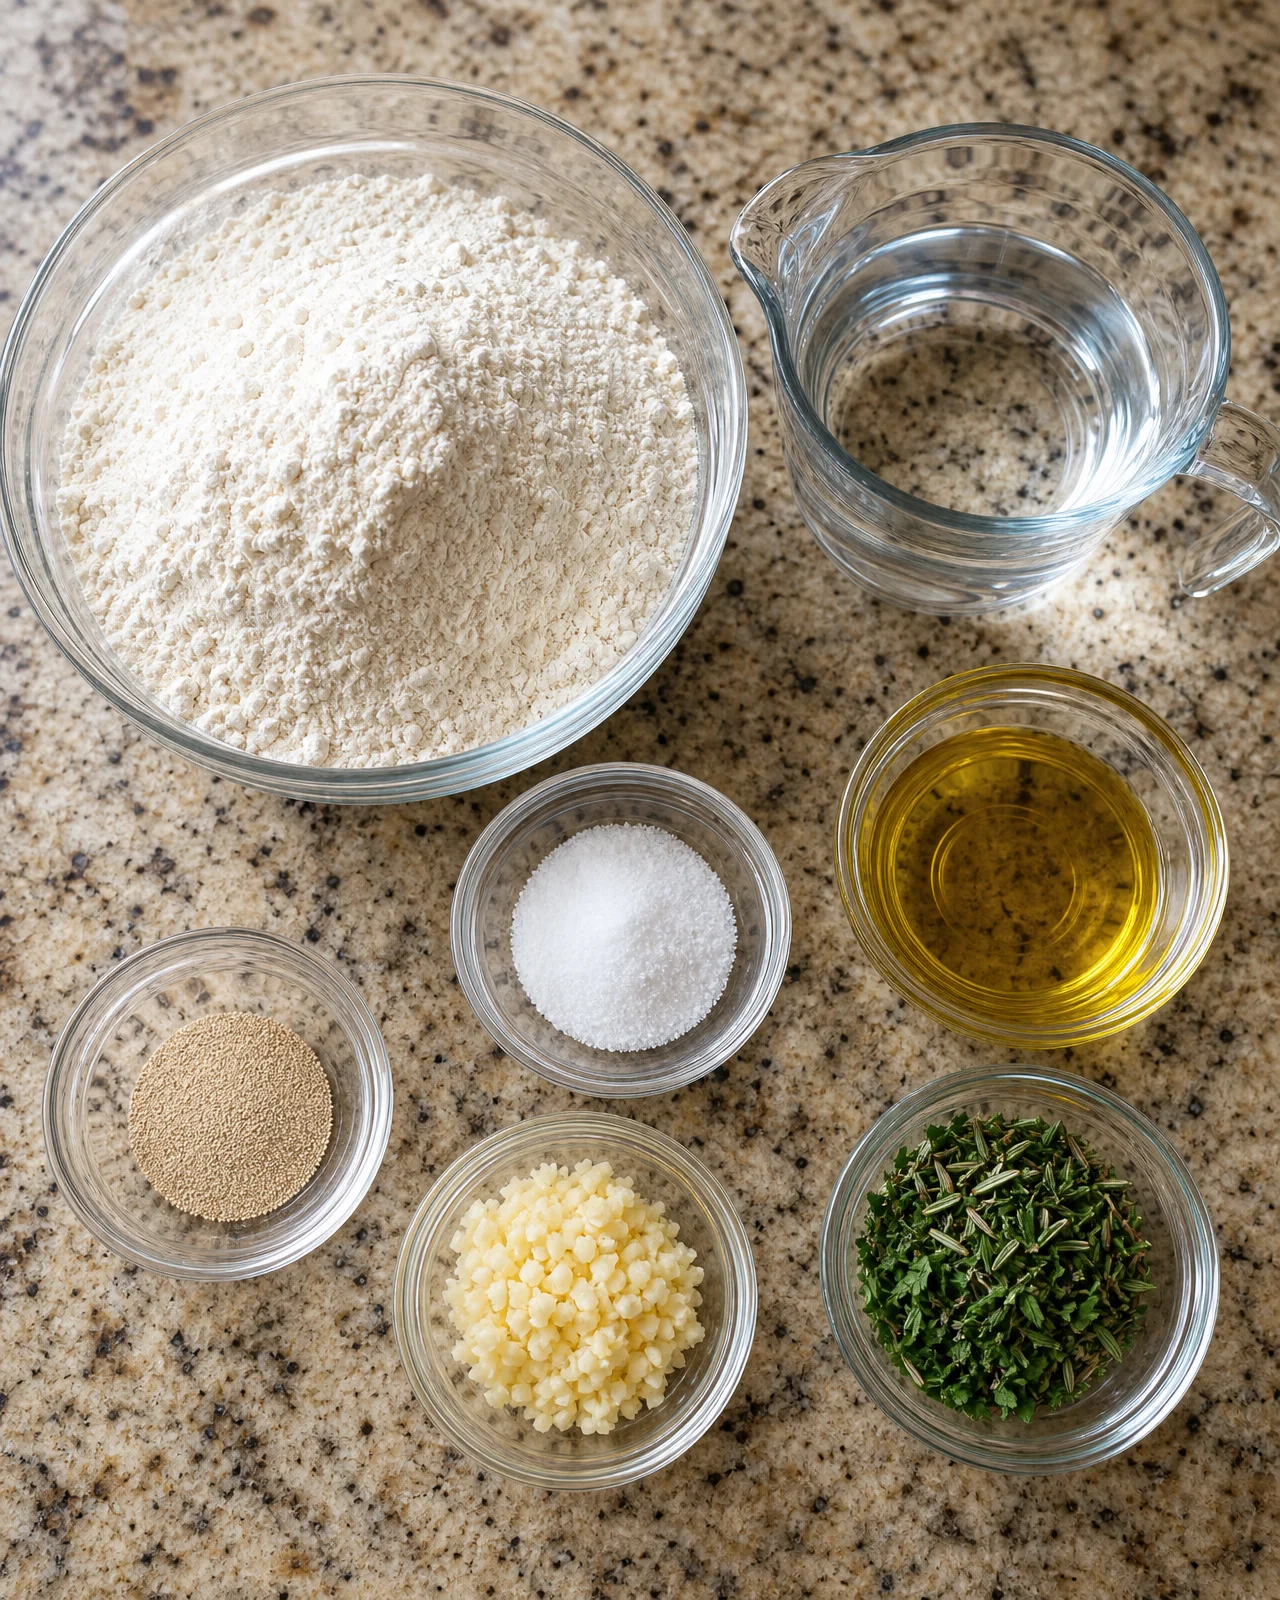
- All-purpose flour (3 cups): The base of the bread, providing structure and texture. You can substitute with whole wheat flour for a nuttier flavor, though this may alter the final texture slightly.
- Salt (1 1/2 tsp): Essential for flavor enhancement and strengthening the dough.
- Instant yeast (1/2 tsp): This quick-acting yeast helps the dough rise without the wait associated with active dry yeast—ideal for no-knead recipes.
- Warm water (1 1/2 cups): Activates the yeast and hydrates the flour for a sticky dough.
- Garlic cloves (4, minced): Adds aromatic flavor; consider using roasted garlic for a milder, sweeter note.
- Olive oil (2 tbsp): Enriches the dough and helps create a crispy crust.
- Fresh herbs (2 tbsp, such as rosemary, thyme, or parsley): Introduces freshness; mix and match to suit your taste.
How to Make Rustic No-Knead Garlic Herb Bread
Prepare the Dough
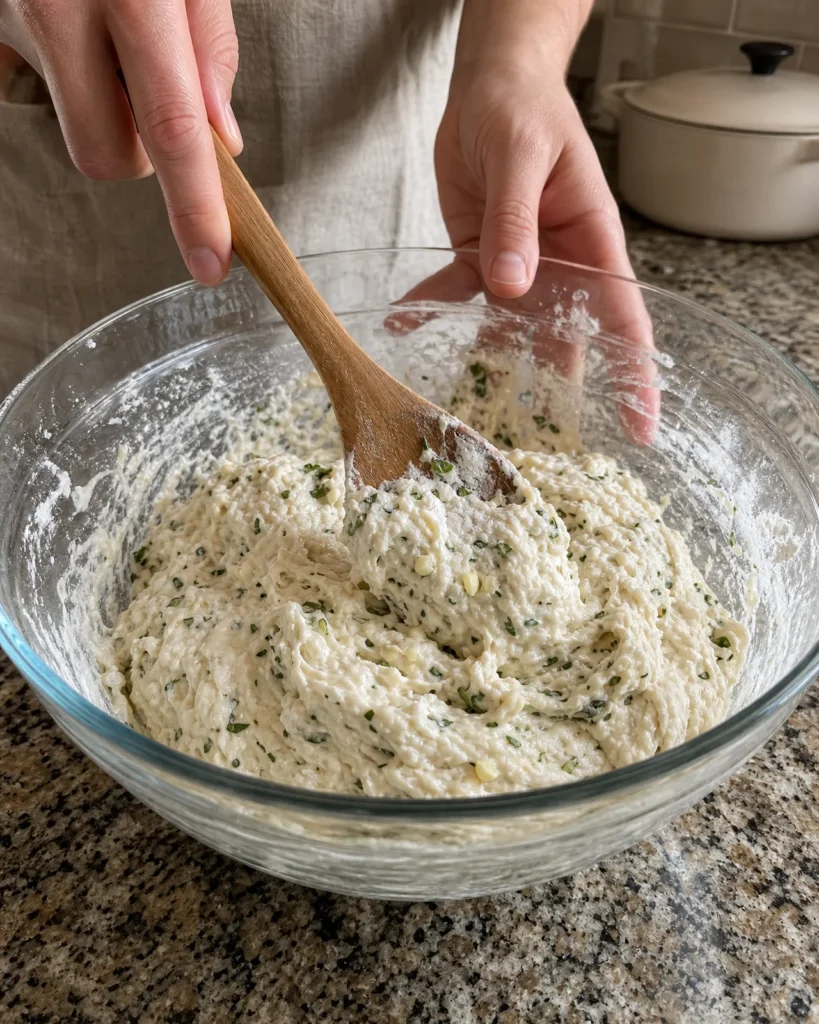
Start by combining the all-purpose flour, salt, and instant yeast in a large mixing bowl. Stir until these dry ingredients are evenly dispersed. Next, add the minced garlic and chopped fresh herbs to the bowl, ensuring they are well mixed into the dry components. Pour in the warm water and olive oil, then use a wooden spoon to stir until a sticky, shaggy dough forms. This dough will be wet and somewhat loose, which is perfectly normal for a no-knead recipe. No kneading is necessary, which makes this process quick and straightforward as the dough will develop its structure naturally during the rise.
Let It Rise
Once mixed, cover the bowl tightly with plastic wrap or a clean kitchen towel. Allow the dough to rise at room temperature for 12 to 18 hours. During this time, the dough will become bubbly and double in size. You should notice its surface dotted with bubbles, a sign that the fermentation is happening correctly. This long resting period is crucial for enhancing both the flavor and texture of the bread without any need for kneading.
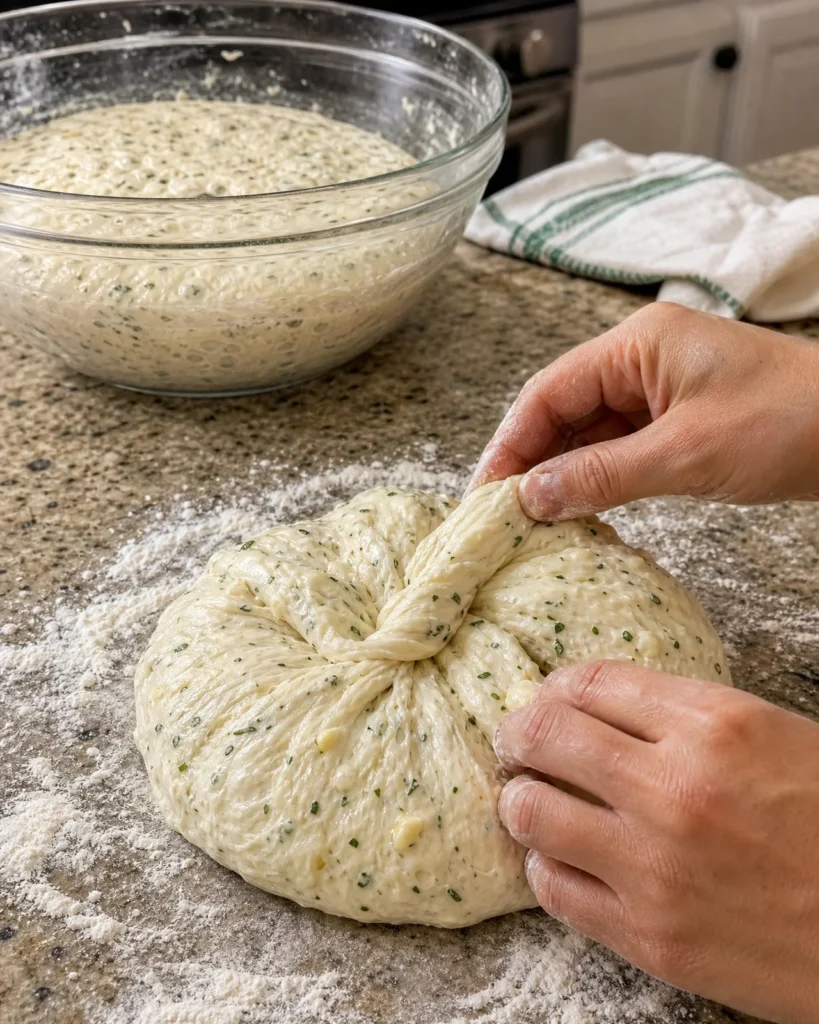
After the dough has risen, prepare a clean work surface by lightly dusting it with flour. Gently turn out the dough from the bowl, being careful to avoid deflating it. Carefully fold the edges toward the center a few times to form a loose round loaf. It’s important to handle the dough gently since the air bubbles contribute to the bread’s light texture. Cover the formed loaf loosely with a towel and let it rest for another 30 to 45 minutes while you preheat the oven.
Bake the Bread
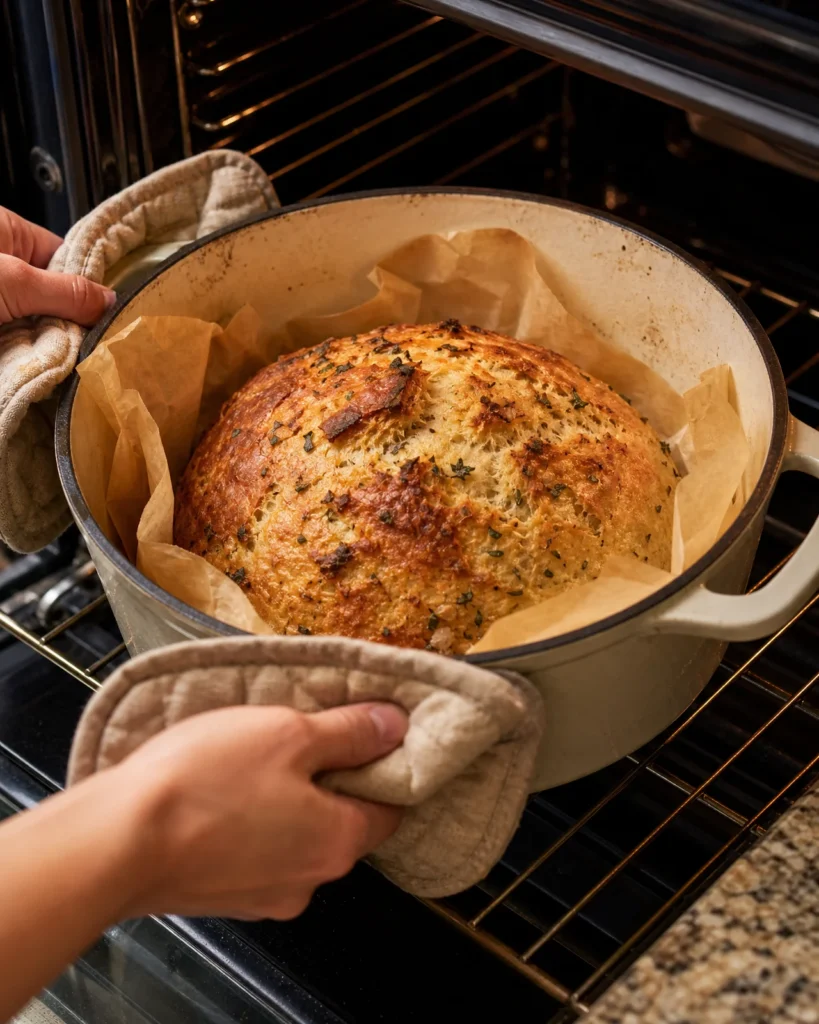
Preheat your oven to 450°F (230°C) with a Dutch oven (including its lid) inside for at least 30 minutes. This step is vital for achieving that beautifully crisp crust. Once the oven is preheated, carefully remove the hot Dutch oven and place the shaped dough, along with parchment paper, into it. Cover it with the lid and bake for 30 minutes; this will allow steam to work its magic, creating an irresistible crust on the bread.
After 30 minutes, carefully remove the lid and continue baking for an additional 10 to 15 minutes. At this point, keep an eye on the bread’s surface as it develops a deep golden-brown color, and listen for a hollow sound when you tap it. Once done, transfer the loaf to a wire rack and allow it to cool for at least 30 minutes before slicing. This cooling time is crucial as it helps the inside finish cooking while maintaining the bread’s structure, leading to a satisfying texture and flavor when served.
Tips for Success
Here are some useful tips for achieving perfect Rustic No-Knead Garlic Herb Bread every time.
- Active Yeast: Make sure your yeast is fresh. Expired yeast can lead to insufficient rising.
- Temperature Control: If your kitchen is colder, allow for a longer rise time. Likewise, in warm conditions, monitor the dough to prevent over-proofing.
- Flour Measurement: Measure flour accurately. Too much flour can lead to a dense loaf; use the spoon and level method for precise measurement.
- Cooling Time: Don’t skip the cooling time post-baking. Cutting into the bread too soon can result in a gummy interior.
- Experimentation: Feel free to adjust the herbs based on your preference, as this bread is versatile and welcomes personal touch.
Equipment Needed
To make this Rustic No-Knead Garlic Herb Bread, you will need a large mixing bowl for combining your ingredients. A sturdy wooden spoon is ideal for mixing the dough without causing any damage. Ensure you have a clean work surface to handle the dough gently throughout the process. A Dutch oven is essential for baking, as it provides the necessary heat and steam for a crisp crust. If a Dutch oven isn’t available, any oven-safe pot with a lid will suffice, though the baking times may vary slightly, so keep an eye on your bread as it bakes.
Variations
This Rustic No-Knead Garlic Herb Bread allows for various delicious variations. You might try adding grated Parmesan or Asiago cheese into the dough for a cheesy twist that enhances both flavor and texture. Alternatively, mix in sun-dried tomatoes or olives for a Mediterranean flair that brings vibrant colors and flavors. For a milder taste, consider using roasted garlic instead of raw, as it imparts a sweetness that beautifully complements the herbs. If you want a different herb experience, swap the traditional options with more aromatic herbs like tarragon or basil. Each variation not only adds a unique flavor profile but also showcases your creativity, making it easy to adapt the recipe to suit any palate or occasion.
Serving Suggestions
Rustic No-Knead Garlic Herb Bread pairs beautifully with various dishes. Serve it warm with butter or drizzle with olive oil for a simple yet satisfying treat. It’s an excellent accompaniment to hearty soups, stews, and salads, offering a delightful balance to these meals. For a more adventurous pairing, consider serving it alongside homemade dips such as hummus, pesto, or tzatziki. These combinations can elevate your dining experience and add a burst of flavor. For a beautiful presentation, slice the bread and arrange it on a rustic board, garnishing it with fresh herbs for an inviting touch that appeals visually as well as tastefully.
FAQs about Rustic No-Knead Garlic Herb Bread
- Can I use active dry yeast instead of instant yeast? Yes, but you’ll want to activate it first by dissolving it in warm water and letting it sit for about 10 minutes until frothy before mixing it into the dough.
- How should I store leftover bread? Keep the bread in an airtight container at room temperature for up to four days. For longer storage, consider freezing it.
- Can I make this recipe ahead of time? Absolutely! The dough can sit in the refrigerator for up to 3 days; just allow it to come to room temperature before baking.
- What should I do if my dough doesn’t rise? If your dough fails to rise, it may be due to inactive yeast or insufficient warmth. Ensure your yeast is fresh and try a warmer location for the rising phase.
- How can I tell if the bread is cooked through? A hollow sound when tapping the bottom of the loaf indicates it’s baked properly. The crust should also be golden brown.
Final Thoughts
Incorporating Rustic No-Knead Garlic Herb Bread into your baking repertoire promises a rewarding experience filled with delightful aromas and flavors. This easy recipe requires minimal effort, yet it yields a beautifully rustic loaf that’s perfect for any occasion. Whether enjoyed on its own, with a dip, or as an accompaniment to your favorite meal, this bread is sure to impress. You can also embrace your creativity with variations; don’t hesitate to explore different herbs and flavor combinations to suit your taste. For best results, remember to allow the bread to cool adequately before slicing. This cooling period helps ensure the perfect texture and structure of the loaf. Enjoy the process and the satisfaction that comes with creating such a delicious homemade bread. Happy baking!
Print
Rustic No-Knead Garlic Herb Bread
- Prep Time: 12-18 hours (including rising time)
- Cook Time: 40-45 minutes
- Total Time: 12-18 hours 45 minutes
- Yield: 1 loaf 1x
- Category: Bread
- Method: Baking
- Cuisine: Italian
- Diet: Vegetarian
Description
A savory and aromatic delight, this Rustic No-Knead Garlic Herb Bread is easy to make and requires no kneading.
Ingredients
- 3 cups all-purpose flour
- 1 1/2 tsp salt
- 1/2 tsp instant yeast
- 1 1/2 cups warm water (about 100°F)
- 4 garlic cloves, minced
- 2 tbsp olive oil
- 2 tbsp fresh herbs (such as rosemary, thyme, or parsley), chopped
Instructions
- In a large mixing bowl, combine the all-purpose flour, salt, and instant yeast. Stir until evenly distributed.
- Add the minced garlic and chopped fresh herbs, mixing them into the dry ingredients.
- Pour in the warm water and olive oil. Stir with a wooden spoon until a sticky, shaggy dough forms. No kneading is necessary.
- Cover the bowl tightly with plastic wrap or a clean kitchen towel and let the dough rise at room temperature for 12–18 hours, until bubbly and doubled in size.
- Lightly flour a clean work surface and gently turn out the dough. Fold the edges toward the center a few times to form a loose round loaf without kneading.
- Place the shaped dough onto a sheet of parchment paper, cover loosely, and let it rest for 30–45 minutes.
- Meanwhile, place a Dutch oven with its lid inside the oven and preheat to 450°F (230°C) for at least 30 minutes.
- Carefully remove the hot Dutch oven and lower the dough inside using the parchment paper. Cover with the lid.
- Bake for 30 minutes covered, allowing steam to create a beautifully crisp crust.
- Remove the lid and continue baking for another 10–15 minutes, until the bread develops a deep golden-brown crust and sounds hollow when tapped.
- Carefully transfer the bread to a wire rack and allow it to cool for at least 30 minutes before slicing.
- Slice and serve with butter, olive oil, soups, stews, or your favorite homemade dipping sauce.
Notes
- For a more intense flavor, use roasted garlic instead of raw minced garlic.
- Feel free to experiment with different herb combinations.
- This bread is best enjoyed fresh, but can be stored in an airtight container for a few days.
Nutrition
- Serving Size: 1 slice
- Calories: 150
- Sugar: 0g
- Sodium: 300mg
- Fat: 2g
- Saturated Fat: 0g
- Unsaturated Fat: 1g
- Trans Fat: 0g
- Carbohydrates: 30g
- Fiber: 1g
- Protein: 5g
- Cholesterol: 0mg