
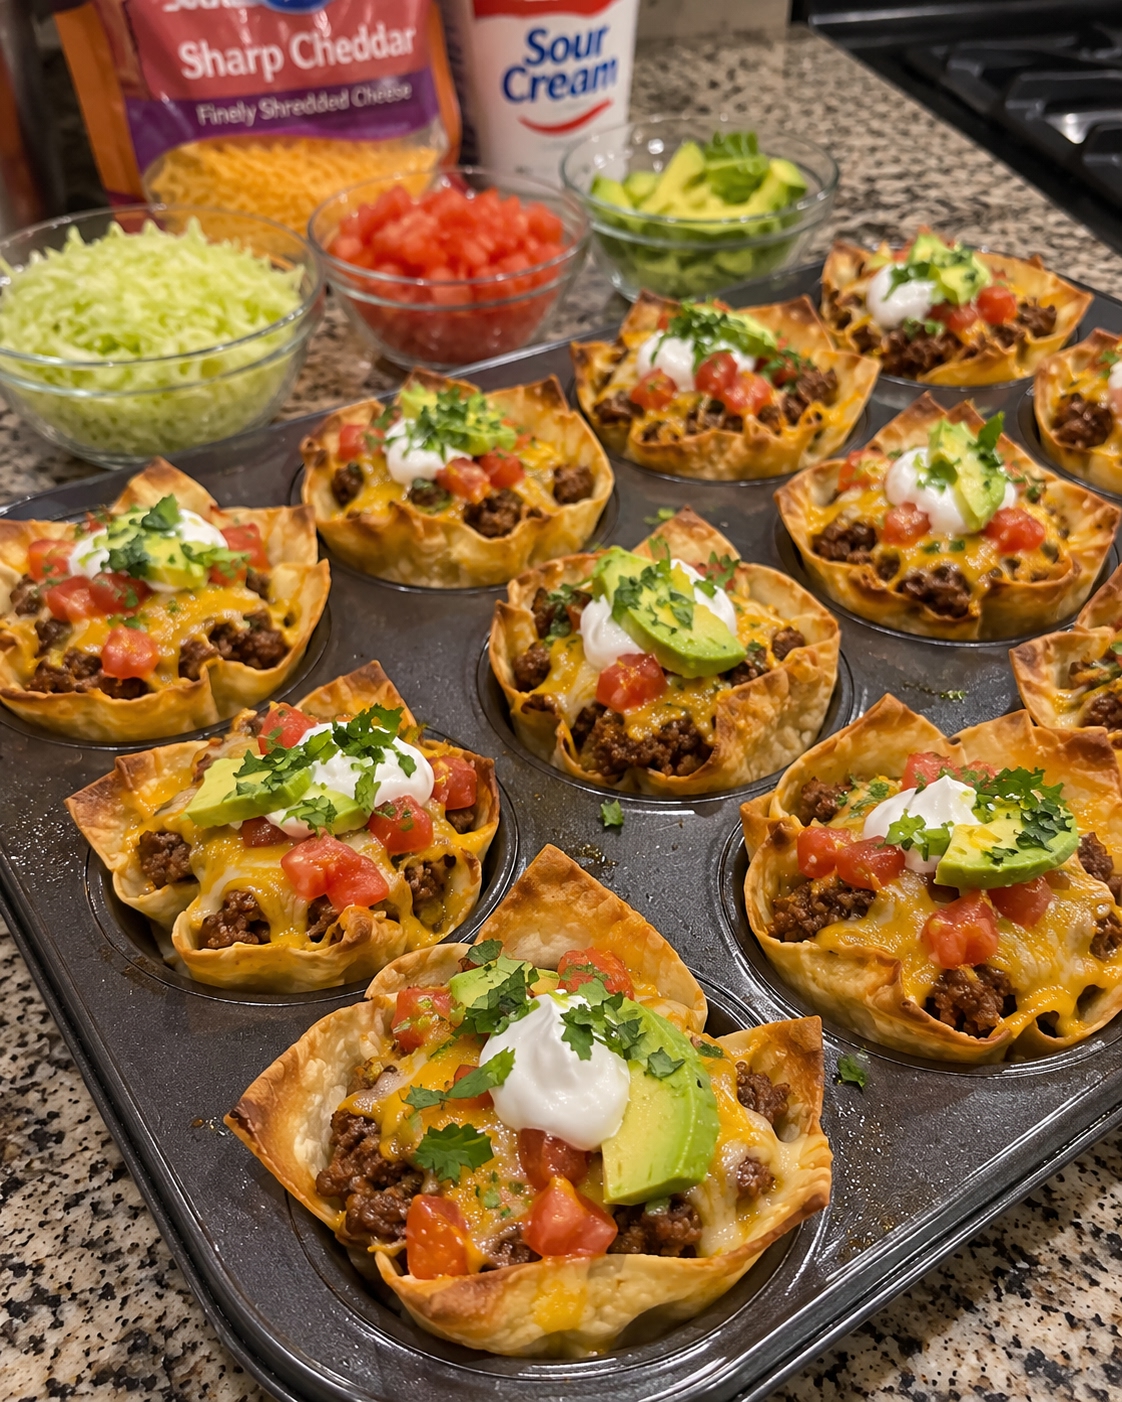
Introduction to Cheesy Beef Taco Cups
Cheesy Beef Taco Cups are the ultimate appetizer that combines crispy wonton wrappers filled with savory ground beef, cheese, and fresh toppings. These delightful cups are not just visually appealing; they burst with flavor and texture in every bite. Perfect for parties or casual gatherings, they allow guests to indulge in a fun and easy-to-eat treat. Get ready to impress with this delicious combination that’s sure to satisfy hunger and cravings alike!
Why You’ll Love This Recipe
These Cheesy Beef Taco Cups are a game-changer for any appetizer spread. With a unique blend of cheesy goodness and seasoned beef, each cup offers a delightful crunch that pairs beautifully with the creaminess of sour cream and fresh avocado. They’re quick to prepare, making them a convenient choice for last-minute gatherings, taking only about 30 minutes from start to finish.
Plus, the recipe is versatile; you can easily tailor the toppings and fillings to suit your taste preferences. Whether served at a party, game day, or family dinner, these taco cups can accommodate different flavor profiles, from spicy to mild or even vegetarian options. Enjoy a fun twist on classic tacos that everyone will love and is sure to leave a lasting impression on your guests!
Ingredients for Cheesy Beef Taco Cups
To create Cheesy Beef Taco Cups, start with 1 lb of ground beef, which serves as the protein base and provides flavor when seasoned. For added zest, a packet of taco seasoning is essential—it adds spices that evoke a classic taco experience. The 1 cup of shredded cheese, like cheddar or a Mexican blend, melts beautifully and ties the filling together, creating that gooey texture that complements the beef.
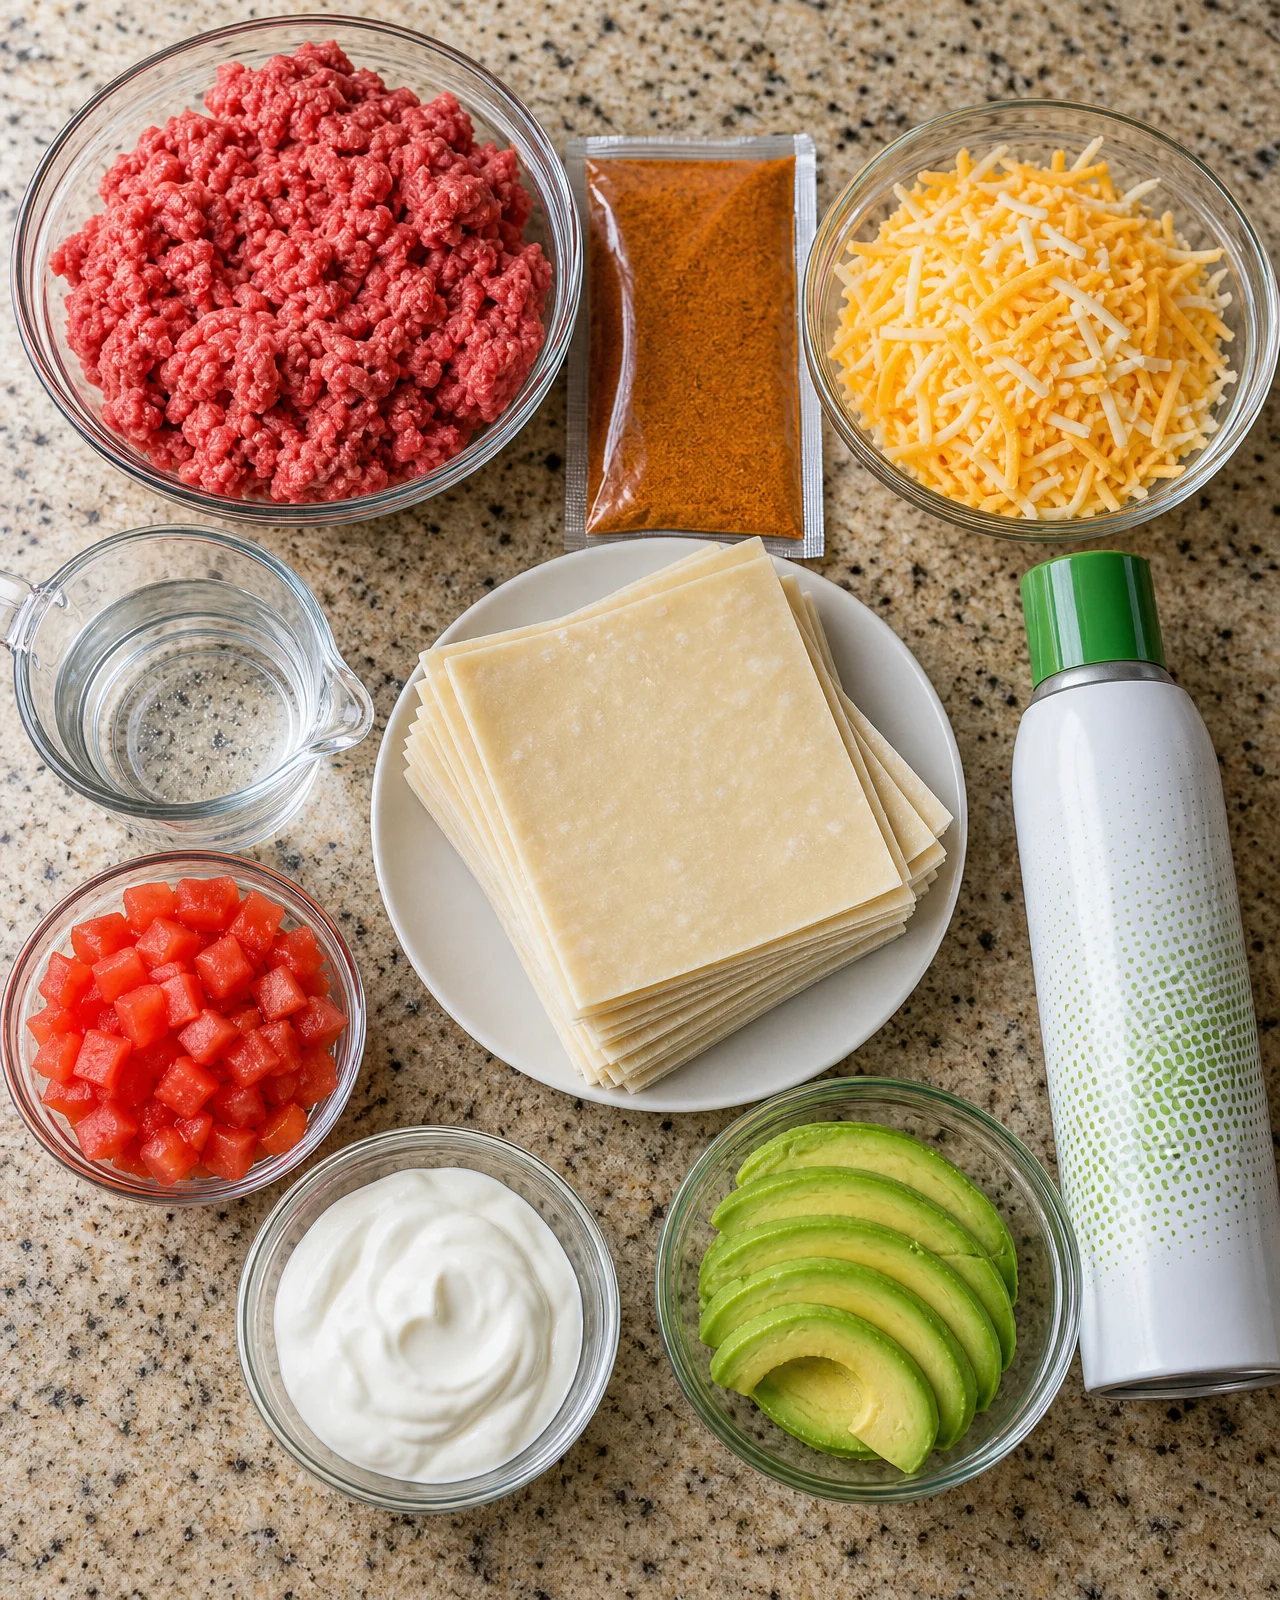
The wonton wrappers are the star of the show; they create individual cups that crisp up in the oven, offering a delightful crunch. Nonstick cooking spray is necessary to prevent sticking while baking, ensuring that your taco cups release easily from the muffin tin. Fresh tomatoes and avocado enhance the flavors with freshness and nutrition, providing a pop of color and taste that balances the richness of the beef and cheese. Sour cream rounds off the taste with creaminess, adding a cool contrast to the warm filling.
If you need substitutions, you can use ground turkey or chicken in place of beef for a lighter option that still retains flavor. For a vegetarian version, replace the meat with black beans or lentils, and consider using vegan cheese and sour cream alternatives for a plant-based option, making these taco cups accessible for various dietary preferences.
- 1 lb ground beef
- 1 packet (1 oz) taco seasoning
- 1 cup shredded cheese, such as cheddar or a Mexican cheese blend
- 12 wonton wrappers
- Nonstick cooking spray, for greasing the muffin tin
- Water, as directed on the taco seasoning packet
- 1 cup diced fresh tomatoes
- ½ cup sour cream
- 1 ripe avocado, sliced
(Image note: Arrange all ingredients in an overhead flat lay for a visually appealing photo, showcasing the fresh produce, seasonings, and wrappers neatly.)
How to Make Cheesy Beef Taco Cups
Step 1: Prepare the Muffin Tin and Cook the Beef
Begin by preheating your oven to 375°F (190°C) and positioning an oven rack in the center. Lightly coat a 12-cup muffin tin with nonstick cooking spray to ensure easy removal of the taco cups once baked. As the oven heats, place one wonton wrapper into each muffin cup, pressing the center to form a cup shape that holds the filling.
While preparing the muffin tin, heat a large skillet over medium heat. Once hot, add the ground beef, breaking it into smaller crumbles with a spatula or wooden spoon. Cook for 6–8 minutes until the beef is browned and reaches an internal temperature of 160°F (71°C). Drain any excess grease from the skillet to keep the filling from becoming greasy.
Step 2: Season the Beef and Assemble
With the cooked ground beef ready, sprinkle the taco seasoning over it. Carefully pour in the recommended amount of water as specified on the seasoning packet, and stir to coat the beef evenly. Let the mixture simmer for 2–3 minutes, allowing the liquid to reduce and the flavors to meld.
After simmering, remove the skillet from heat and let the beef mixture cool slightly. Carefully spoon the beef mixture into the wonton cups, filling them just below the rim. Then, generously sprinkle the shredded cheese over the beef in each taco cup, ensuring an even distribution of both the meat and cheese.
Before baking, ensure that the corners of the wonton wrappers are upright and not folding over, which helps achieve a crispy texture. This layering creates a delightful combination of textures once baked.
Step 3: Bake and Finish with Toppings
Carefully transfer the muffin tin filled with taco cups into the preheated oven and bake for approximately 15 minutes. During this time, keep an eye on the wonton corners to avoid over-browning. Look for the cheese to melt and the cups to turn a golden brown, indicating that they are ready.
Once baked, remove the muffin tin from the oven and allow it to cool for 2–3 minutes. This brief cooling period makes it easier to lift the taco cups from the tin without breaking them. Gently run a spoon around the edges to loosen the cups before lifting them out.
To finish, wash and dice the fresh tomatoes, creating a vibrant topping. Prepare the avocado by slicing it into thin wedges. Spoon the diced tomatoes over each taco cup, followed by a dollop of sour cream. Complete each taco cup with a slice of avocado on top for extra flavor and presentation. Serve immediately to enjoy the taco cups while they’re still warm!
Tips for Success
To ensure your Cheesy Beef Taco Cups turn out perfectly, consider these tips. First, avoid overcooking the beef; it can dry out quickly, resulting in a less enjoyable filling. Make sure to drain any excess grease before seasoning, as this enhances the flavor without making the filling soggy or greasy.
Keep a close watch on the taco cups while baking; if they start to brown too quickly, cover the top loosely with foil to prevent over-browning while allowing the inside to cook through. If you opt for homemade taco seasoning instead of a pre-packaged mix, adjust the spices based on your taste preferences, as homemade blends can vary significantly in intensity.
For an even crispier texture, try pre-baking the wonton wrappers for about 5 minutes before adding the filling. This step ensures the cups remain crispy after baking. If you notice any wrappers that are folding over, gently reshape them or use a toothpick to secure any pieces. Lastly, enjoy the taco cups fresh for the best flavor, but if you have leftovers, store them in an airtight container to keep them tasting great.
Equipment Needed
For this recipe, you will need a 12-cup muffin tin for shaping the taco cups. A large skillet is essential for cooking the ground beef while ensuring even browning. Use a spoon for filling the cups and a spatula for breaking apart the meat efficiently. If you don’t have a standard muffin tin, consider using a mini muffin tin for smaller bite-sized taco cups, or bake the filling on a tray and form the cups without the tin for a different presentation.
Variations
While the classic Cheesy Beef Taco Cups are delicious as is, there are plenty of variations to try that can cater to different tastes and dietary needs. Substitute the ground beef with ground turkey or chicken for a leaner, healthier option that still delivers flavor and satisfaction. For a vegetarian twist, consider using black beans, lentils, or a mix of chopped vegetables like bell peppers and zucchini, which add texture and nutrition.
You can also experiment with different types of cheese; for instance, pepper jack adds a spicy kick, while a mild mozzarella can provide a lovely balance to the rich flavors of the beef. Feel free to change the toppings as well; include jalapeños for an extra layer of heat or corn for a touch of sweetness. A drizzle of salsa verde or hot sauce just before serving can add a zesty finish. Each variation offers a new take on these tasty cups, making them versatile and enjoyable for every palate.
Serving Suggestions
Serve your Cheesy Beef Taco Cups alongside a fresh green salad for a balanced meal, or offer a variety of dipping sauces such as salsa, guacamole, or extra sour cream for guests to personalize their servings. These complementary options enhance the flavor experience and encourage interaction.
For a party setting, arrange the cups on a large platter, garnished with additional diced tomatoes and avocado slices for a vibrant presentation that catches the eye. This not only makes the dish more inviting but also enhances its appeal at gatherings.
Pair these delightful cups with chilled beverages like margaritas, beer, or refreshing lime-infused water to complement the flavors. The combination of tasty food and drinks creates a perfect atmosphere for fun and enjoyment. These taco cups shine as an appetizer or casual meal, making them perfect for any festive occasion and sure to impress your guests.
FAQs about Cheesy Beef Taco Cups
Q: Can I make Cheesy Beef Taco Cups ahead of time?
A: Yes, you can prepare the taco filling in advance and store it in the fridge for up to 2 days. Assemble the cups just before baking for the best texture.
Q: How do I store leftovers?
A: Store any uneaten taco cups in airtight containers in the refrigerator for up to 3–4 days. This will help maintain their flavor and texture.
Q: Can I freeze the taco cups?
A: Baked taco cups can be frozen without toppings for up to 2 months. To do this effectively, flash freeze them on a baking sheet before transferring them to a freezer-safe container for best results.
Q: How can I reheat the taco cups?
A: Reheat frozen taco cups in a preheated 350°F (175°C) oven until warmed through, which typically takes about 10–15 minutes. For refrigerated cups, reheat them until hot, which should take about 5–10 minutes.
Q: Are there gluten-free options available?
A: Yes, you can use gluten-free wonton wrappers or substitute them with corn tortillas to ensure that these taco cups remain gluten-free and suitable for those with dietary restrictions.
Final Thoughts
Cheesy Beef Taco Cups are a fantastic appetizer that will add flair to any gathering. Their crispy shells filled with seasoned beef and melted cheese offer a delightful taste experience that guests will truly appreciate. Don’t hesitate to customize the toppings and fillings to suit your preferences or dietary needs, making each batch uniquely yours.
Enjoy serving these delicious taco cups warm, and relish the joy of sharing a dish that’s as fun to eat as it is to prepare. Whether for game day, a holiday gathering, or a casual weeknight dinner, these treats are sure to impress and satisfy. Get ready to hear compliments from your guests as everyone indulges in this delicious blend of flavors—perfect for any occasion!
Print
Cheesy Beef Taco Cups: Crispy, Flavorful Appetizer Delight
- Prep Time: 15 minutes
- Cook Time: 15 minutes
- Total Time: 30 minutes
- Yield: 12 taco cups 1x
- Category: Appetizer, Snack, Party Food
- Method: Stovetop and Oven Baking
- Cuisine: Mexican-Inspired
- Diet: Gluten Free
Description
These Ultimate Cheesy Beef Taco Cups are crispy, cheesy, and loaded with delicious taco flavor, offering a fun and easy-to-eat appetizer perfect for any occasion.
Ingredients
- 1 lb ground beef
- 1 packet (1 oz) taco seasoning
- 1 cup shredded cheese, such as cheddar or a Mexican cheese blend
- 12 wonton wrappers
- Nonstick cooking spray, for greasing the muffin tin
- Water, as directed on the taco seasoning packet
- 1 cup diced fresh tomatoes
- ½ cup sour cream
- 1 ripe avocado, sliced
Instructions
- Preheat your oven to 375°F (190°C). Position an oven rack in the center.
- Lightly coat a 12-cup muffin tin with nonstick cooking spray.
- Place one wonton wrapper into each muffin cup and press the center down to form small cups.
- Heat a large skillet over medium heat.
- Add ground beef to the skillet and break it into small crumbles.
- Cook for 6–8 minutes until browned and reaches an internal temperature of 160°F (71°C).
- Drain excess grease from the skillet.
- Sprinkle taco seasoning over the ground beef.
- Pour in the recommended amount of water from the taco seasoning packet and stir until coated.
- Simmer the mixture for 2–3 minutes until liquid reduces and becomes flavorful.
- Let the beef mixture cool slightly.
- Spoon the cooked ground beef mixture into the wonton wrappers.
- Sprinkle shredded cheese over the beef filling in each cup.
- Ensure wonton corners are upright and filling is evenly distributed.
- Transfer the muffin tin to the oven and bake for approximately 15 minutes.
- Watch for doneness to prevent the wonton corners from darkening.
- Remove from oven and let cool in the muffin tin for 2–3 minutes.
- Gently lift each taco cup from the muffin tin.
- Wash and dice fresh tomatoes.
- Prepare the avocado by slicing it.
- Spoon diced tomatoes over each taco cup.
- Add a dollop of sour cream on top of each taco cup.
- Finish with a slice of avocado on each cup.
- Transfer taco cups to a serving platter and enjoy immediately.
Notes
- Store leftover taco cups in airtight containers for up to 3–4 days.
- Freeze baked taco cups without toppings for up to 2 months.
- Reheat taco cups in a 350°F (175°C) oven until heated thoroughly.
Nutrition
- Serving Size: 1 taco cup
- Calories: 150
- Sugar: 1g
- Sodium: 300mg
- Fat: 8g
- Saturated Fat: 4g
- Unsaturated Fat: 2g
- Trans Fat: 0g
- Carbohydrates: 10g
- Fiber: 1g
- Protein: 10g
- Cholesterol: 40mg