
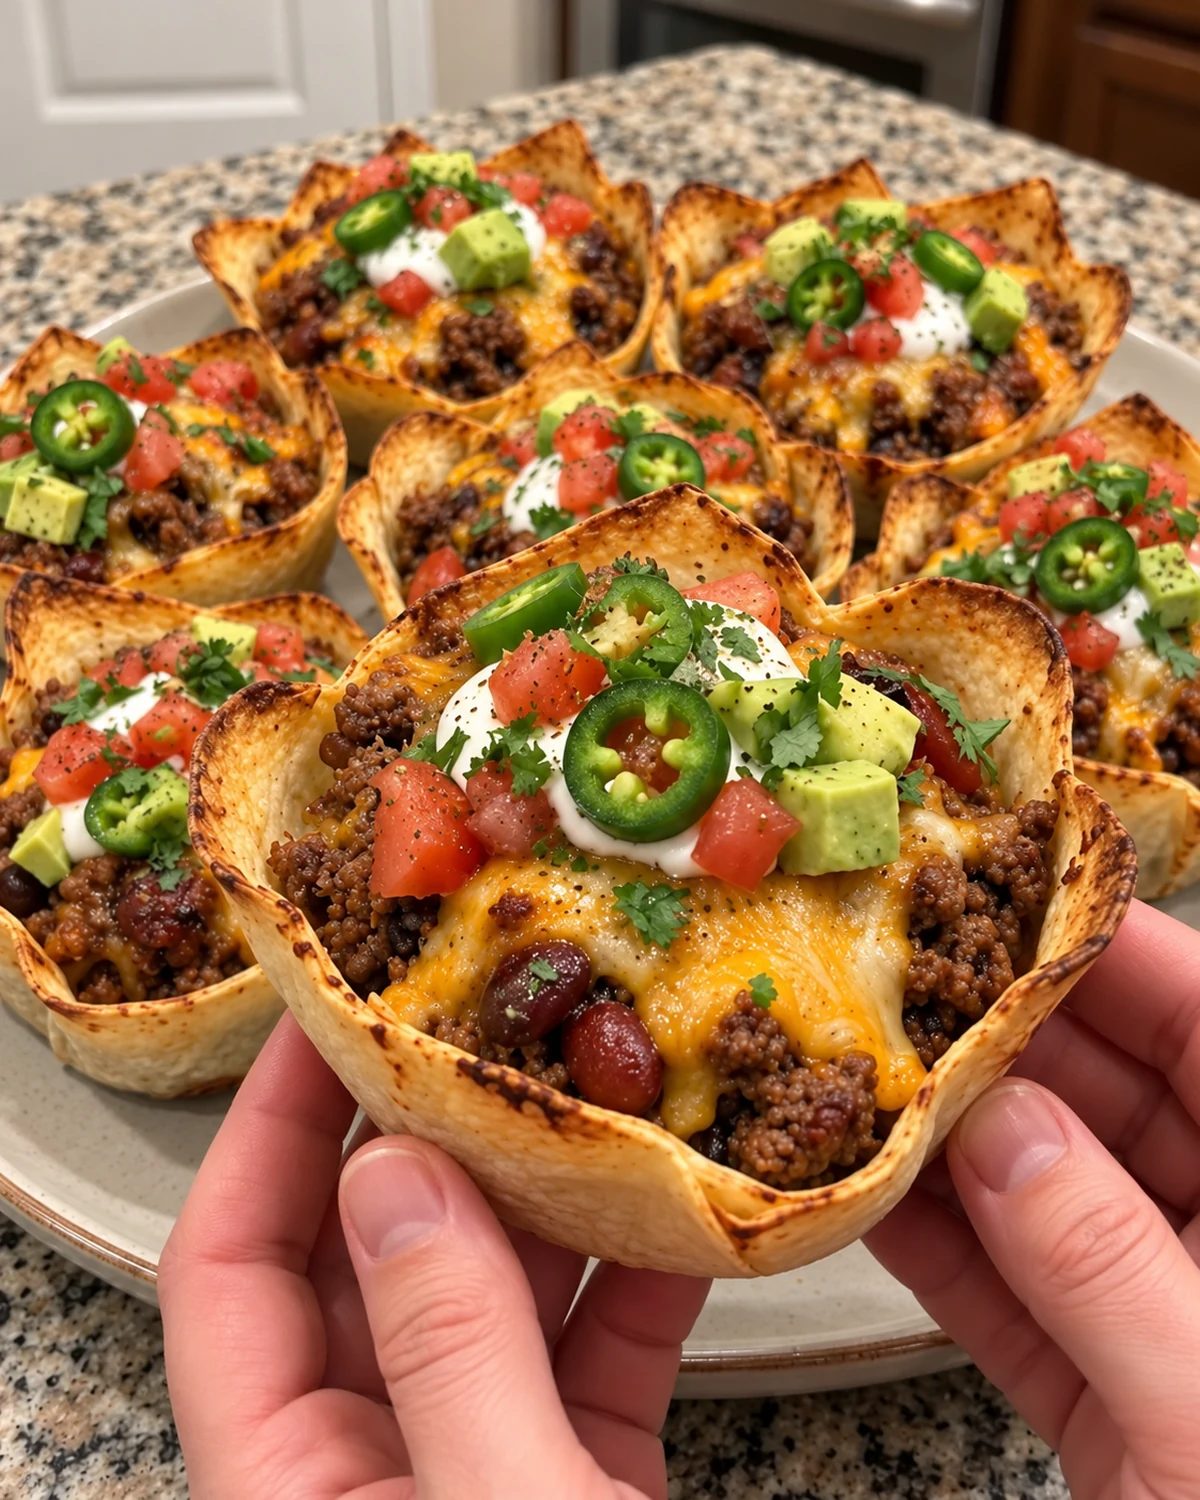
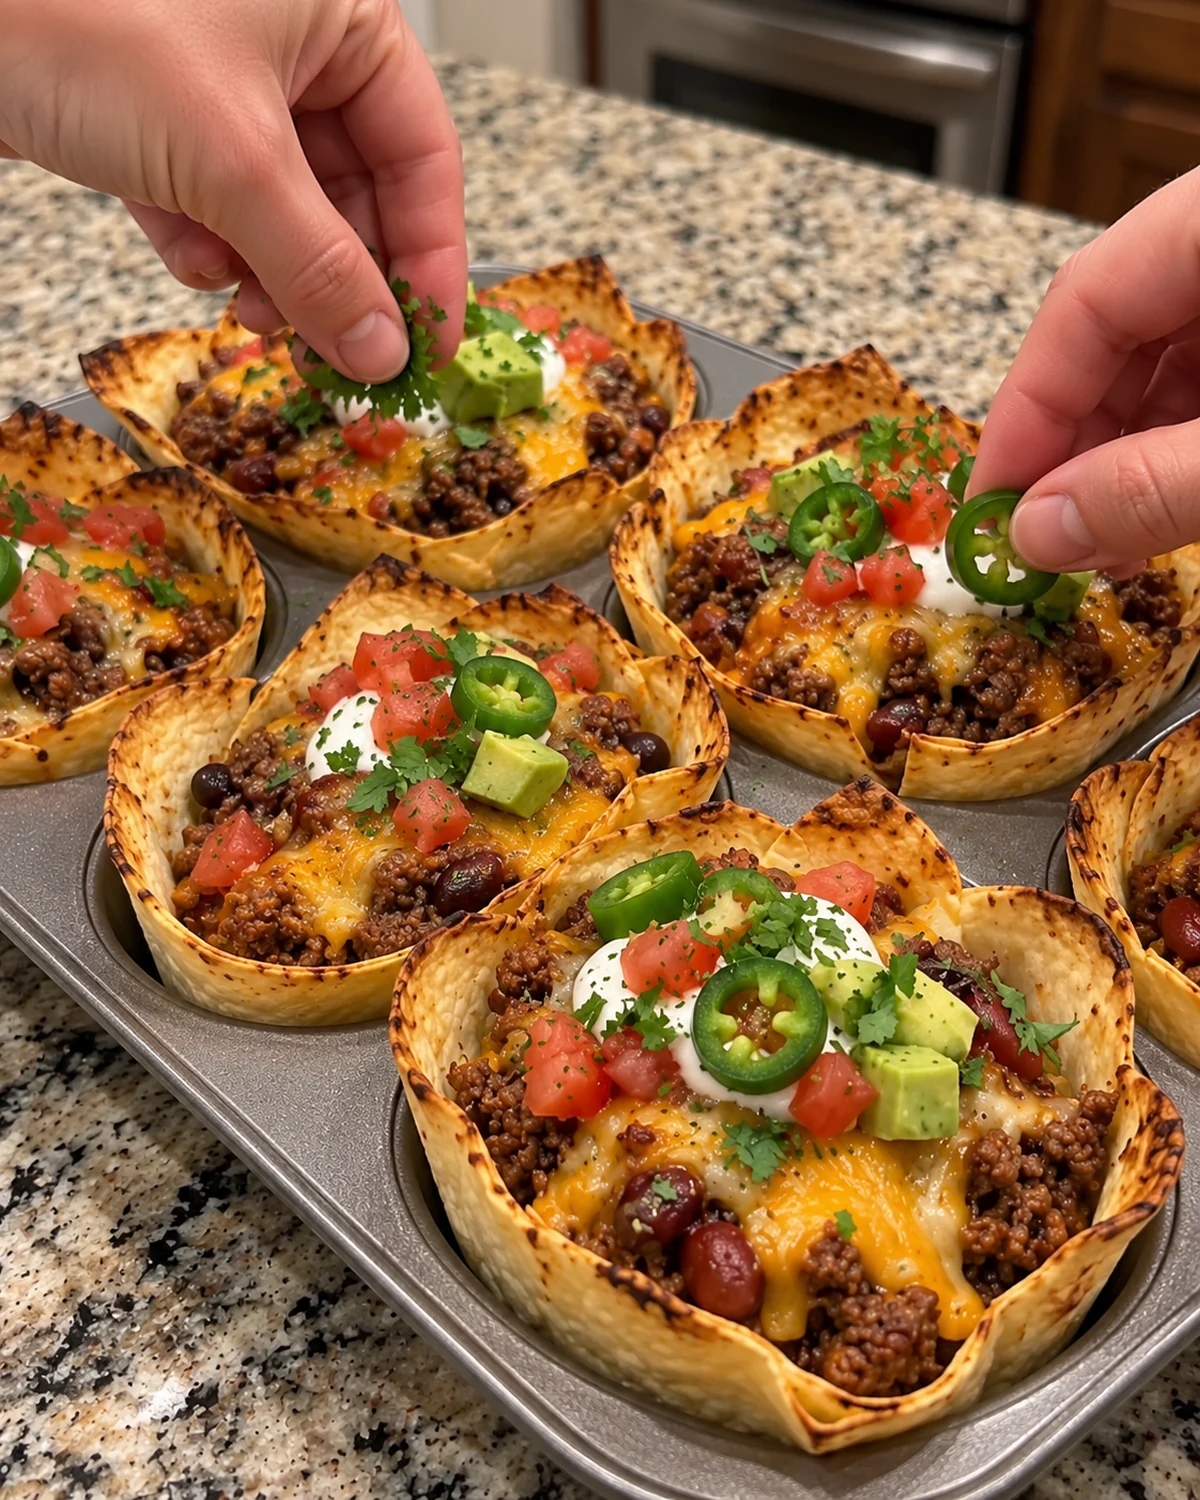
Crispy Loaded Cheesy Beef & Bean Chili Tortilla Crunch Cups turn a full bowl of Tex-Mex comfort food into a fun, handheld meal. Small flour tortillas are pressed into muffin cups and partially baked until they hold their folded, petal-like shape. Each edible bowl is filled with thick seasoned beef chili, kidney beans, black beans, tomatoes, sharp cheddar, and Monterey Jack, then baked again until the edges are deeply golden and the cheese is bubbling.
The fresh toppings make these cups especially appealing. A small dollop of sour cream, diced tomato, avocado, cilantro, and sliced jalapeño adds color and a cool contrast to the hot filling. Arrange the finished cups on a light ceramic platter and they look impressive enough for a party, yet the method is simple enough for a family dinner.
The recipe makes 12 tortilla cups and serves about six people, with the possibility of a little extra filling depending on how deeply the tortillas settle into your muffin pan. Serve that extra chili with tortilla chips, spoon it over rice, or refrigerate it for lunch. From start to finish, plan on approximately 45 to 50 minutes.
Why You’ll Love These Tortilla Crunch Cups
Every serving combines crisp tortilla edges, hearty beef, creamy beans, tangy tomato, melted cheese, and bright garnishes. Unlike flat nachos, each cup contains a balanced amount of filling and toppings, so guests can pick up an individual portion without searching for a fully loaded chip.
They are also practical for entertaining. The chili filling can be cooked ahead, garnishes can be chopped and chilled, and the tortilla cups can be shaped before guests arrive. Because the recipe uses a standard 12-cup muffin pan, every portion bakes evenly and has its own sturdy shell.
The portions are generous enough to serve two cups per person as a main dish, or one per guest as part of an appetizer spread. Their built-in shells eliminate extra plates and utensils at casual gatherings, while the colorful toppings make the platter feel festive. Kids can choose mild garnishes, and adults can add jalapeños and hot salsa.
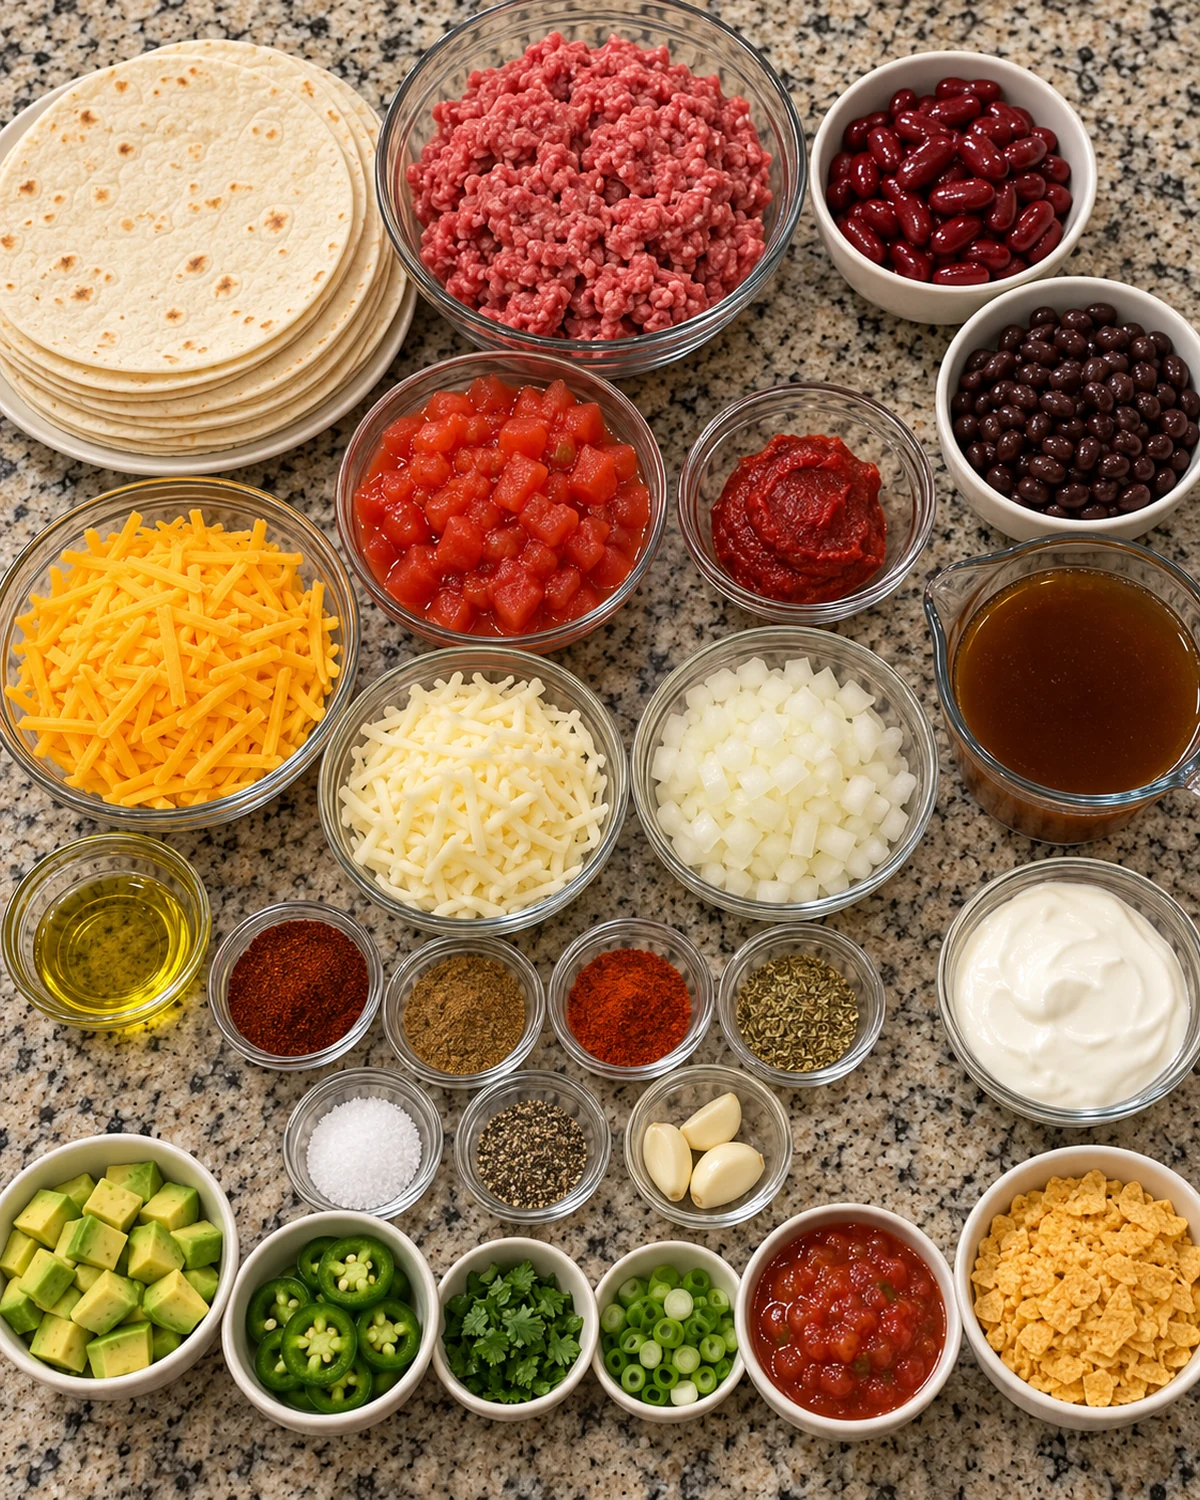
Ingredients and Ingredient Notes
Tortilla Cups
- 12 small flour tortillas (6-inch)
- 1 tablespoon olive oil
- Nonstick cooking spray
Six-inch flour tortillas fit standard muffin wells while leaving enough material above the rim to create crisp folded points. Warming makes them pliable and less likely to tear. Cooking spray helps the bottoms release, while a light coating of olive oil encourages the exposed edges to brown.
Beef and Bean Chili Filling
- 1 pound (450 g) lean ground beef
- 1 tablespoon olive oil
- 1 small yellow onion, finely diced
- 3 garlic cloves, minced
- 1 can (15 ounces) kidney beans, drained and rinsed
- 1 can (15 ounces) black beans, drained and rinsed
- 1 can (14.5 ounces) diced tomatoes, drained
- 2 tablespoons tomato paste
- 1 teaspoon ground cumin
- 1 tablespoon chili powder
- 1 teaspoon smoked paprika
- ½ teaspoon dried oregano
- ½ teaspoon salt
- ¼ teaspoon black pepper
- ¼ cup beef broth
Lean ground beef gives the filling savory flavor without leaving excessive grease. Drain the beans and tomatoes thoroughly; the mixture must be thick enough to sit inside the partially baked shells. Tomato paste binds the ingredients, and the small amount of broth helps the spices coat every bite before the liquid reduces.
Cheese and Garnishes
- 1½ cups shredded sharp cheddar cheese
- ½ cup shredded Monterey Jack cheese
- ¼ cup sliced jalapeños, optional
- 2 tablespoons chopped fresh cilantro
- Sour cream, diced tomatoes, sliced green onions, diced avocado, salsa, and crushed tortilla chips, optional
Sharp cheddar provides bold flavor and golden color; Monterey Jack adds a smooth melt. Shredding cheese from blocks usually produces the most even finish. Keep cold garnishes off the cups until after baking so tomatoes do not release water and avocado and cilantro remain fresh.
Best Tortillas for Crispy Cups
Use soft, fresh flour tortillas labeled approximately 6 inches. Larger tortillas bunch excessively in a standard muffin pan, while very small tortillas may not form sides tall enough to hold the chili. Thick handmade-style tortillas can be difficult to fold and may crack; ordinary soft taco tortillas are easier to shape.
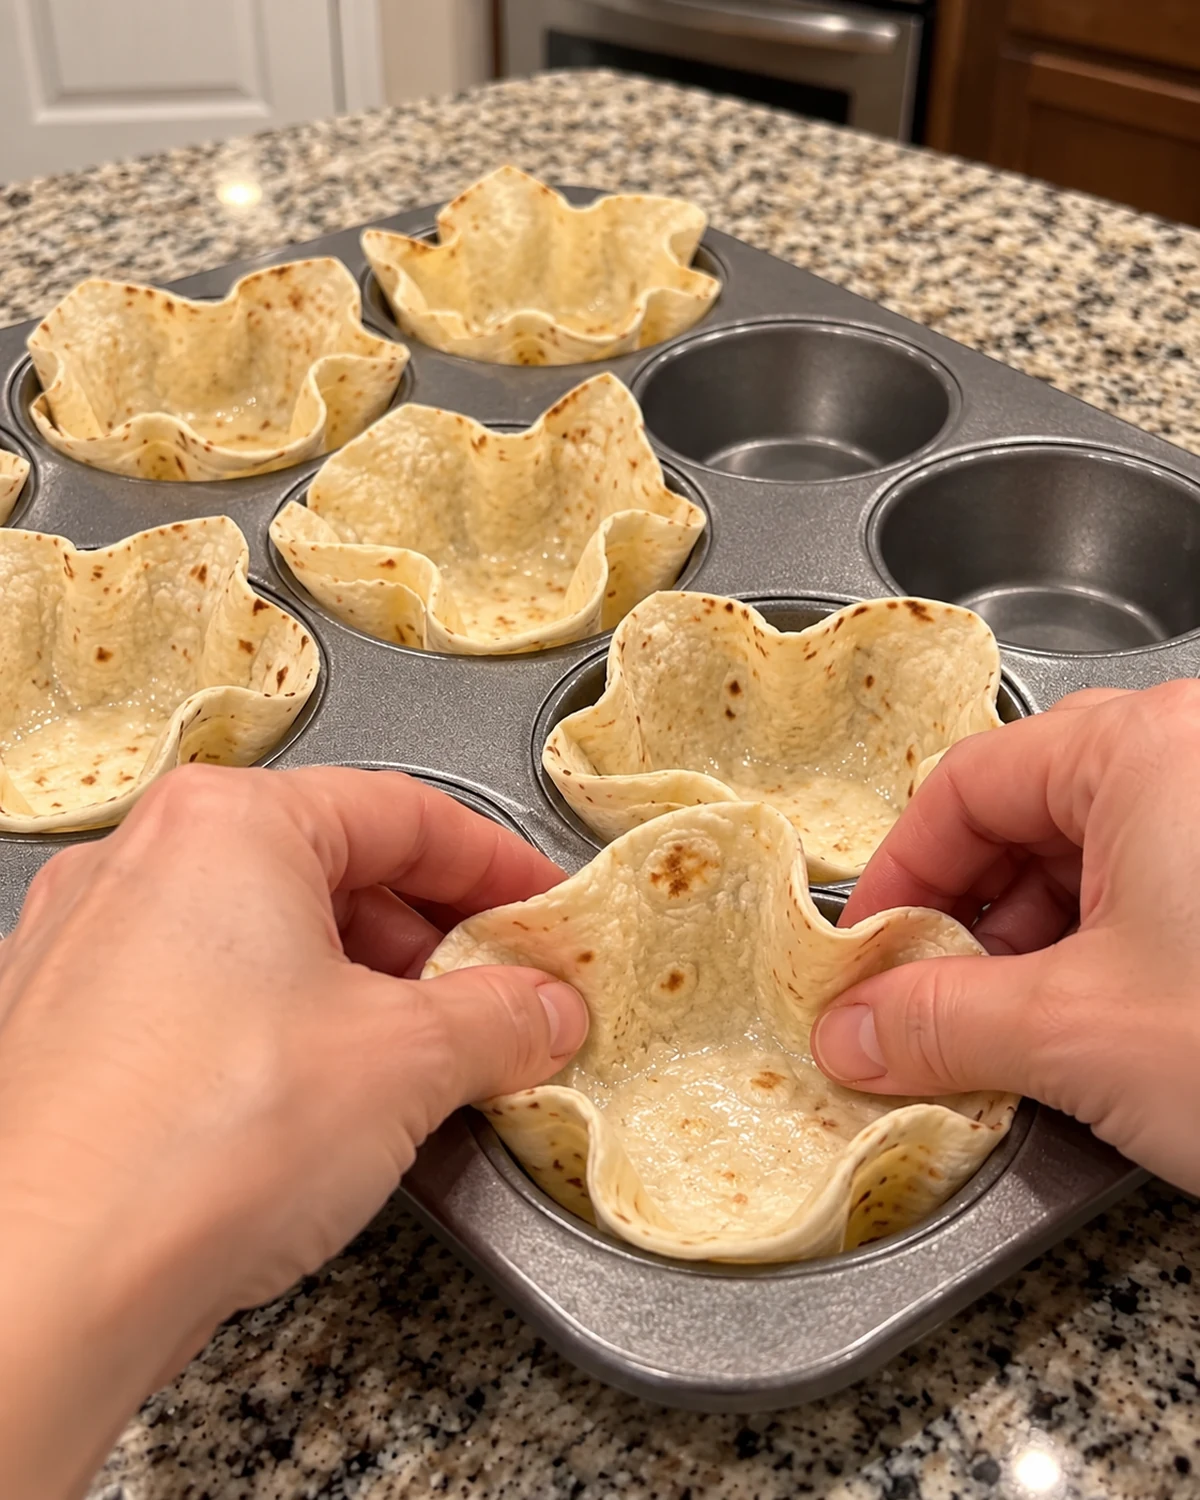
Warm tortillas in a covered stack in the microwave for 20 to 30 seconds, or heat them briefly in a dry skillet. Work while they are warm. Press the center into the bottom of the well first, then create four to five loose pleats around the sides. Slightly irregular edges are desirable and match the homemade presentation.
How to Make the Beef and Bean Chili Filling
Heat one tablespoon olive oil in a skillet over medium-high heat. Add ground beef and cook for 6 to 8 minutes, breaking it into small crumbles. Drain excess grease so it cannot soak into the tortilla cups. Add the onion and cook for 3 to 4 minutes, then stir in garlic for 30 seconds.
Add chili powder, cumin, smoked paprika, oregano, salt, and pepper. Stir for about 30 seconds so the spices coat the beef and become fragrant. Fold in kidney beans, black beans, drained diced tomatoes, tomato paste, and beef broth.
Simmer uncovered for 8 to 10 minutes, stirring occasionally, until the mixture is thick. A spoon drawn across the skillet should leave a trail for a moment. If liquid immediately pools in the gap, continue simmering. Let the filling cool for a few minutes before assembling; extremely hot filling can soften the partially baked shells.
Step-by-Step Assembly and Baking
1. Shape and Partially Bake the Tortilla Cups
Preheat the oven to 375°F and generously grease a standard 12-cup muffin pan. Warm the tortillas until flexible. Gently press one tortilla into each well, folding the sides to create a small edible bowl. Do not force the folds flat; open, irregular points create the flower-like shape.
Brush the exposed edges with one tablespoon olive oil. Bake for 7 to 9 minutes, until the cups begin turning golden and hold their shape. They should not be fully browned yet because they return to the oven after filling.
2. Fill Each Cup
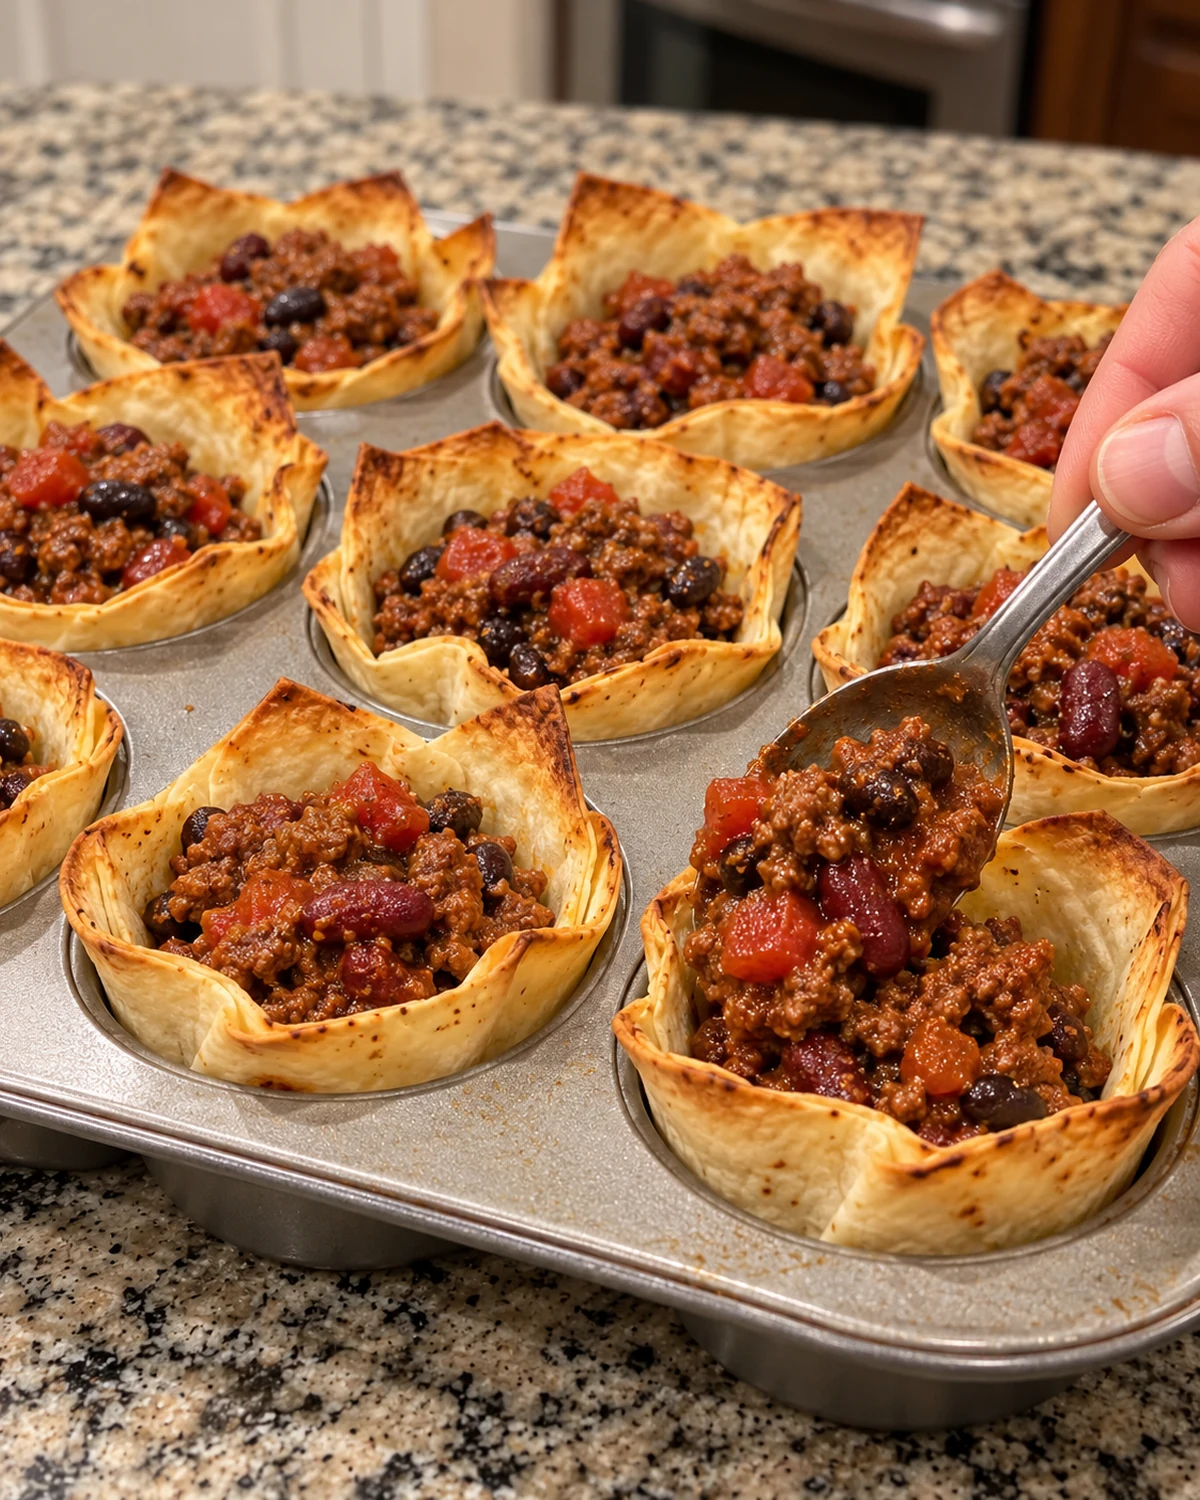
Spoon approximately two tablespoons of thick beef and bean chili into each partially baked cup. Distribute the kidney beans, black beans, tomatoes, and beef evenly. Stop below the highest tortilla points so the filling does not overflow onto the pan and glue the cups in place.
3. Add Cheese, Bake, and Garnish
Combine the cheddar and Monterey Jack, then sprinkle the mixture evenly over the filled cups. Bake for another 8 to 10 minutes, until the cheese is melted and the tortilla edges are deep golden brown. Rest in the muffin pan for 5 minutes so the cheese settles and the shells firm up.
Run a thin spatula around any stuck spots and carefully lift out each cup. Garnish with jalapeños, cilantro, tomatoes, avocado, and small sour cream dollops. Serve warm with salsa or guacamole.
Expert Tips for Extra-Crispy Tortilla Cups
- Warm before folding. Cold tortillas crack and spring out of shape.
- Grease every muffin well. Cheese and filling can make ungreased edges stick.
- Partially bake the empty shells. This creates structure before moist filling is added.
- Drain canned ingredients. Excess tomato or bean liquid softens the bottoms.
- Reduce the chili until thick. It should mound on a spoon rather than run.
- Do not overfill. Two tablespoons leaves room for cheese and garnishes.
- Rest five minutes. The shells become sturdier and release more cleanly.
Common Mistakes to Avoid
The most common mistake is skipping the partial bake. Raw tortillas filled with chili tend to stay soft and may collapse after removal. Another is using wet filling. Drain beans and tomatoes, remove excess beef grease, and simmer until the mixture is visibly thick.
Avoid using oversized tortillas, packing in too much chili, or adding fresh tomatoes and sour cream before baking. Wet garnishes belong on the finished cups. Watch the tortilla points during the final minutes because thin edges can change from golden to burned quickly.
Substitutions and Variations
Ground turkey can replace beef; cook it to 165°F and add a little oil if it is very lean. Pinto beans can replace either bean variety. Pepper Jack can stand in for Monterey Jack when you want more heat. For a milder version, omit sliced jalapeños and choose mild salsa.
For vegetarian cups, omit beef and add another can of drained beans or a plant-based ground substitute. Cook the substitute according to its package instructions, then follow the seasoning and reduction steps. For gluten-free cups, use flexible gluten-free tortillas that fit the pan and verify every seasoning, broth, sauce, and garnish label.
Mini cups can be made in a mini muffin pan using smaller tortilla rounds, but the bake time and filling quantity must be reduced. Watch closely rather than relying on the full-size timing.
Topping and Serving Ideas
Set out sour cream, diced tomato, green onions, avocado, salsa, jalapeños, cilantro, crushed tortilla chips, and guacamole so everyone can finish a cup. A cabbage slaw or green salad keeps dinner fresh, while Mexican-style rice makes the meal more substantial.
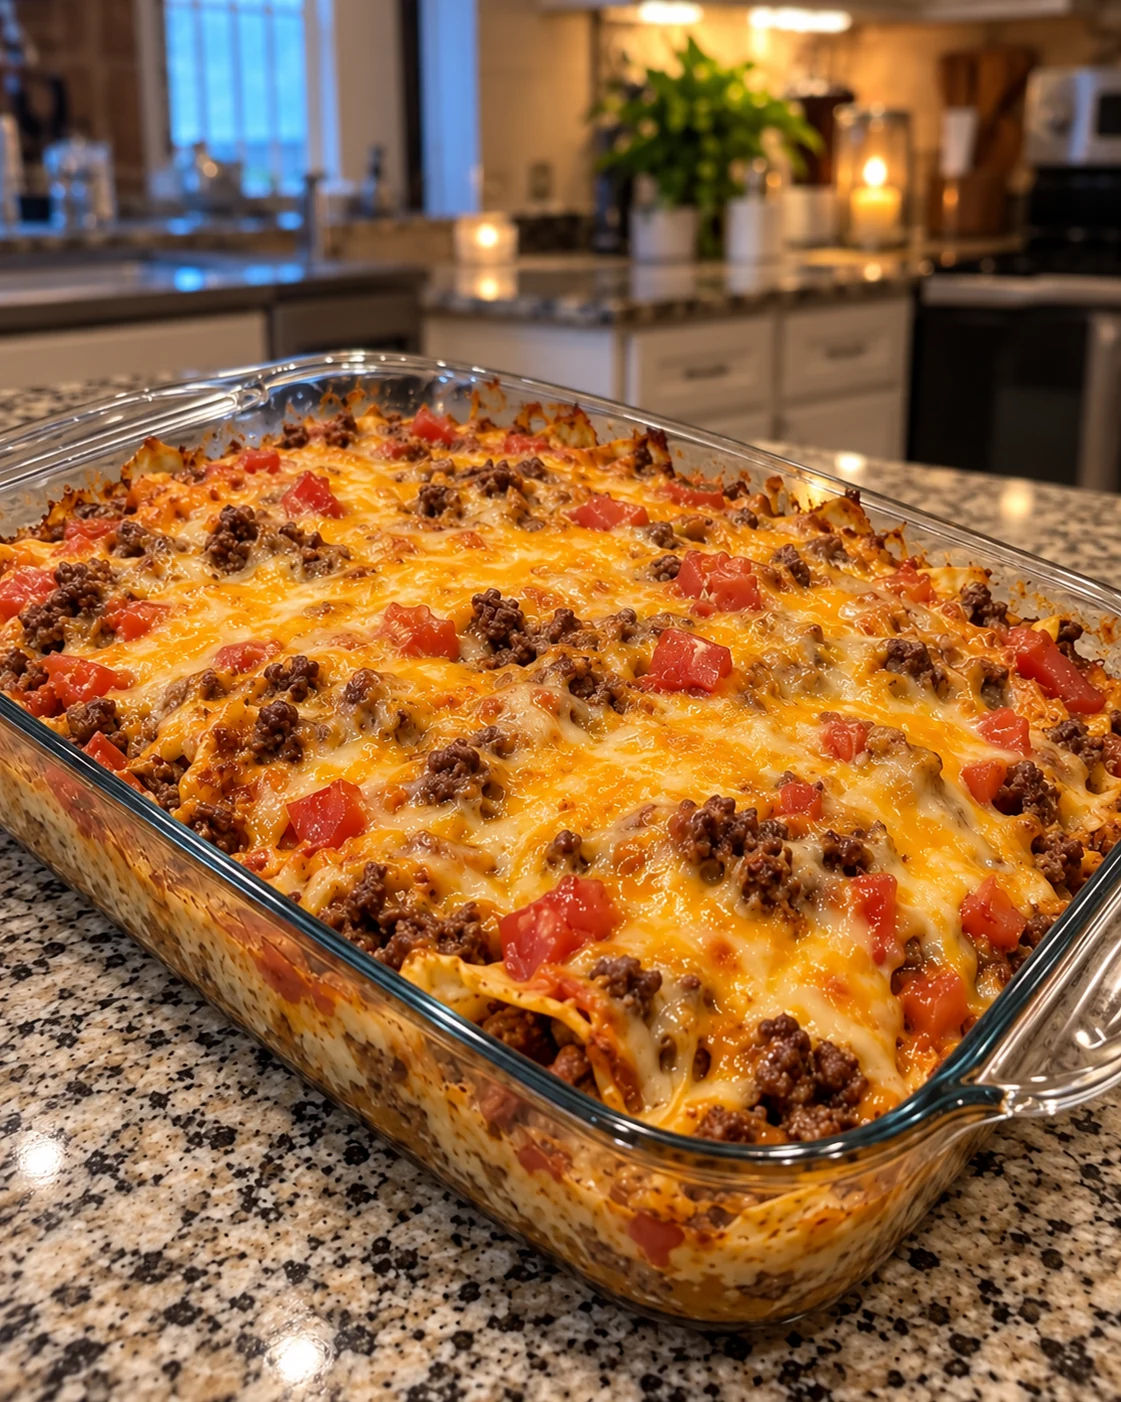
These cups fit naturally on a game-day table beside Taco Mac and Cheese. For another hearty beef dinner, save Loaded Cowboy Cheeseburger Casserole. Keep garnishes in small bowls and replenish them as needed so the platter stays neat.
Party Preparation and Make-Ahead Tips
Cook the chili filling up to three days ahead, cool it promptly, and refrigerate it in an airtight container. Reheat gently before filling the cups, but do not add extra liquid. Cheese can be shredded and garnishes prepared one day ahead, although avocado is best cut shortly before serving.
You can shape the warmed tortillas in the greased pan a few hours ahead, cover loosely, and keep at cool room temperature. For the crispest result, partially bake and fill shortly before serving. If you must bake ahead, wait to add cold toppings until after reheating.
Storage and Reheating
Remove wet garnishes when possible and refrigerate leftover cups in an airtight container within two hours. Use within 3 to 4 days. An oven or air fryer restores crispness better than a microwave: heat at 350°F until the center reaches 165°F and the shell is crisp.
The beef and bean filling freezes well for up to two months, but assembled tortilla cups can become soft after freezing. For best quality, freeze the filling alone, thaw it overnight in the refrigerator, then shape and bake fresh shells. Add cheese and garnishes as directed.
Frequently Asked Questions
Can I use corn tortillas?
The recipe is designed for flexible 6-inch flour tortillas. Corn tortillas are more likely to crack and require a different softening method, so results will not be identical.
Why are the bottoms soft?
The filling was probably too wet or the shells were not partially baked long enough. Drain canned ingredients, reduce the chili, and bake the empty cups until they hold their shape.
Can I make them without a muffin pan?
A muffin pan supports the distinctive edible-bowl shape. Oven-safe ramekins may work, but the size, bake time, and final shape will differ.
How do I prevent sticking?
Coat the muffin pan thoroughly with nonstick spray, avoid overflowing the cheese and filling, rest five minutes, and loosen the edges with a thin spatula.
Can I serve these at room temperature?
They taste best warm. For food safety, do not leave meat and dairy fillings at room temperature for more than two hours.
What should I do with extra filling?
Serve it with tortilla chips, spoon it into a baked potato, fold it into a quesadilla, or refrigerate it for up to 3 to 4 days.
Final Thoughts
Crispy Loaded Cheesy Beef & Bean Chili Tortilla Crunch Cups work because the shells and filling are prepared for each other. Warm and shape the tortillas, give the empty cups a head start in the oven, reduce the chili until thick, and keep fresh garnishes for the end. The reward is a sturdy golden tortilla bowl filled with beef, two kinds of beans, melted cheese, and bright toppings—easy to pick up, fun to serve, and satisfying enough for dinner.
Print
Crispy Loaded Cheesy Beef & Bean Chili Tortilla Crunch Cups
- Prep Time: 15 minutes
- Cook Time: 30–35 minutes
- Total Time: 45–50 minutes
- Yield: 12 tortilla cups 1x
- Category: Appetizer / Main Dish
- Method: Skillet and Baking
- Cuisine: Tex-Mex Inspired
Description
Crispy flour tortilla cups filled with thick seasoned beef, kidney beans, black beans, tomatoes, cheddar, Monterey Jack, and fresh Tex-Mex toppings.
Ingredients
Tortilla Cups
- 12 small flour tortillas (6-inch)
- 1 tablespoon olive oil
- Nonstick cooking spray
Beef & Bean Chili Filling
- 1 lb (450 g) lean ground beef
- 1 tablespoon olive oil
- 1 small yellow onion, finely diced
- 3 garlic cloves, minced
- 1 can (15 oz) kidney beans, drained and rinsed
- 1 can (15 oz) black beans, drained and rinsed
- 1 can (14.5 oz) diced tomatoes, drained
- 2 tablespoons tomato paste
- 1 teaspoon ground cumin
- 1 tablespoon chili powder
- 1 teaspoon smoked paprika
- 1/2 teaspoon dried oregano
- 1/2 teaspoon salt
- 1/4 teaspoon black pepper
- 1/4 cup beef broth
Cheesy Topping
- 1 1/2 cups shredded sharp cheddar cheese
- 1/2 cup shredded Monterey Jack cheese
- 1/4 cup sliced jalapeños, optional
- 2 tablespoons chopped fresh cilantro
Optional Garnishes
- Sour cream
- Diced tomatoes
- Sliced green onions
- Diced avocado
- Salsa
- Crushed tortilla chips
Instructions
- Preheat the oven to 375°F (190°C). Grease a standard 12-cup muffin pan.
- Warm the flour tortillas until flexible.
- Gently press one tortilla into each muffin cup, folding the edges to form small bowls.
- Brush the exposed tortilla edges with olive oil.
- Bake for 7–9 minutes until the cups begin to turn golden and hold their shape.
- Heat olive oil in a skillet over medium-high heat.
- Brown the ground beef for 6–8 minutes, breaking it into crumbles. Drain excess grease.
- Add onion and cook for 3–4 minutes.
- Add garlic and cook for 30 seconds.
- Stir in chili powder, cumin, smoked paprika, oregano, salt, and pepper.
- Add kidney beans, black beans, diced tomatoes, tomato paste, and beef broth.
- Simmer uncovered for 8–10 minutes until thick.
- Spoon approximately 2 tablespoons of filling into each partially baked tortilla cup.
- Sprinkle with shredded cheddar and Monterey Jack.
- Bake for another 8–10 minutes until the cheese melts and tortilla edges are golden brown.
- Let rest in the muffin pan for 5 minutes.
- Carefully remove the tortilla cups.
- Garnish with jalapeños, cilantro, tomatoes, avocado, and sour cream as desired.
- Serve warm with salsa or guacamole.
Notes
- Drain beans and tomatoes and simmer the filling until thick to keep the cups crisp.
- Warm tortillas before shaping to prevent cracks.
- Refrigerate within two hours and use within 3–4 days.
- Reheat in an oven or air fryer at 350°F (175°C) until crisp and thoroughly heated to 165°F.