
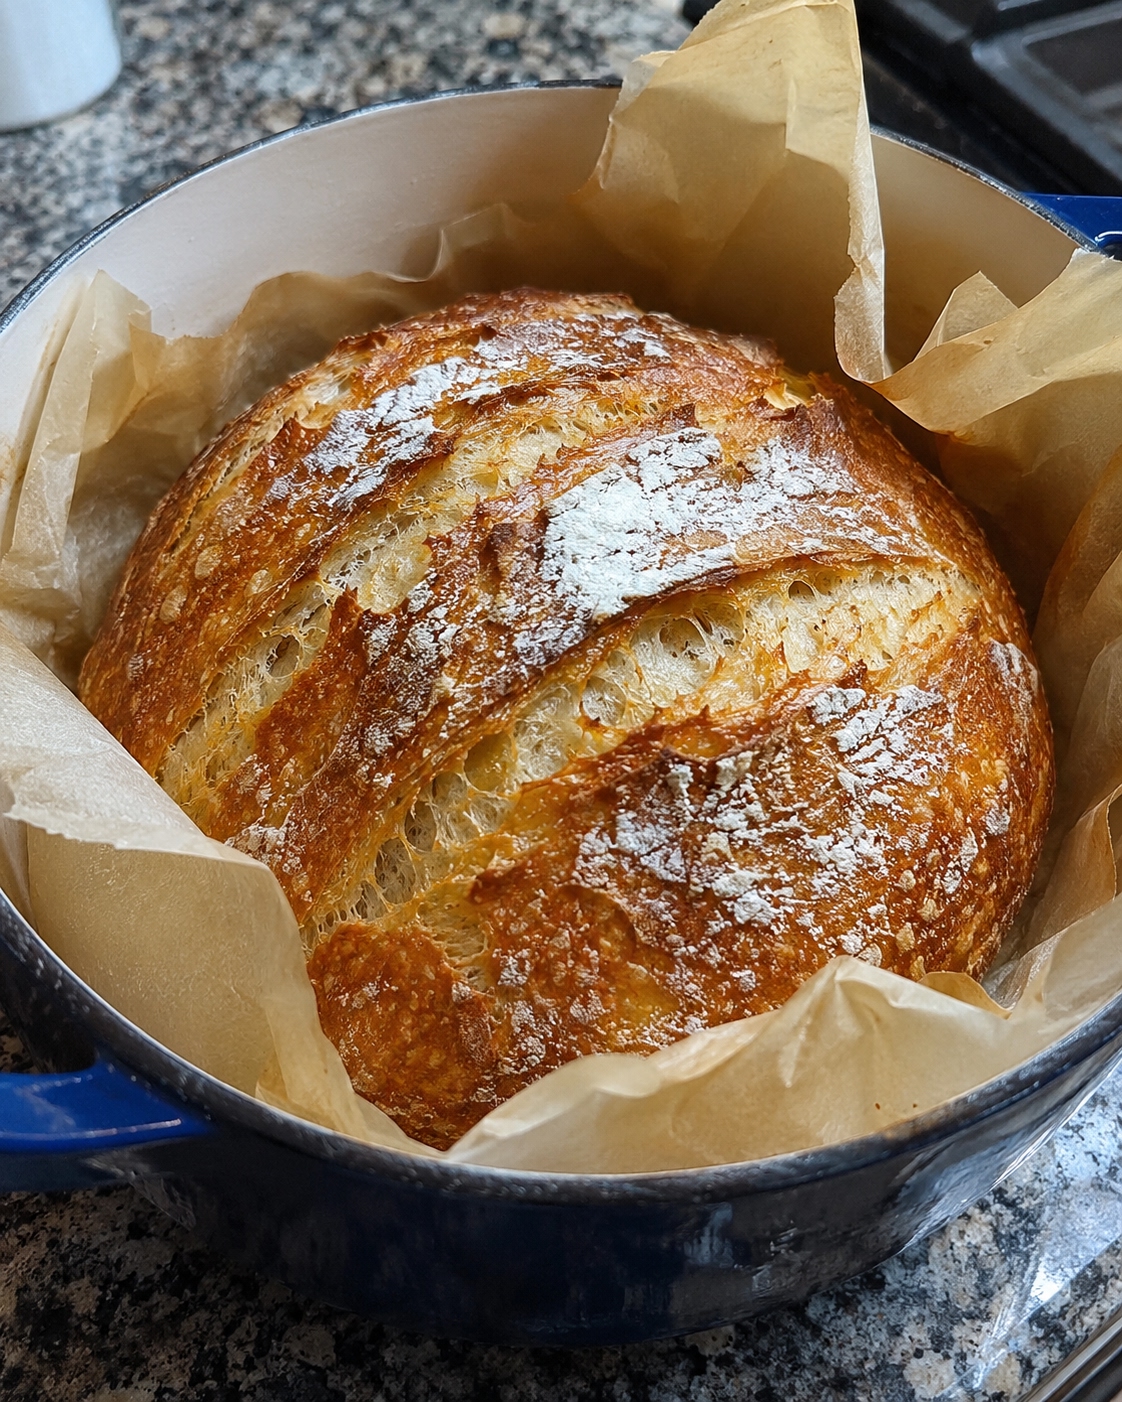
Introduction to French Bread in a Dutch Oven
Experience the delightful crunch of a crispy crust coupled with the airy inside of freshly baked French bread in a Dutch oven. This method of baking not only captures heat but also retains moisture, creating a perfect environment for bread to rise beautifully. The result is a loaf that’s satisfying to slice into and enjoy with butter, olive oil, or as the base for a delicious sandwich.
This recipe is ideal for both novice bakers looking to expand their skills and seasoned cooks aiming for that authentic French touch. With straightforward steps and accessible ingredients, you can find confidence in the kitchen while crafting this delicious bread. Armed with a Dutch oven, you’ll unlock the secrets to achieving that perfect artisan-style crust at home. Let’s dive into the steps required to create this beautiful bread.
Why You’ll Love This Recipe
This French bread recipe is cherished for its straightforward approach and the impressive results it yields. Utilizing a Dutch oven allows for a robust crust and an airy, well-developed crumb, eliminating the need for specialized equipment. Moreover, the option for overnight fermentation enriches the bread’s flavor profile, producing a nuanced taste that enhances any meal.
With just a few pantry staples, you’ll find this recipe not only accessible but also highly rewarding. The enticing aroma of baking bread fills your kitchen, making it an excellent choice for gatherings or quiet evenings at home. Additionally, this loaf boasts versatility, pairing wonderfully with a range of dishes, from comforting soups to elegant charcuterie boards, expanding your culinary repertoire effortlessly.
Ingredients for French Bread in a Dutch Oven
To create the perfect French bread in a Dutch oven, you’ll need a handful of essential ingredients. The base is 4 cups of bread flour, which provides the necessary strength and structure for the loaf. This flour has a higher protein content than all-purpose flour, resulting in a chewier texture that is characteristic of traditional French bread.
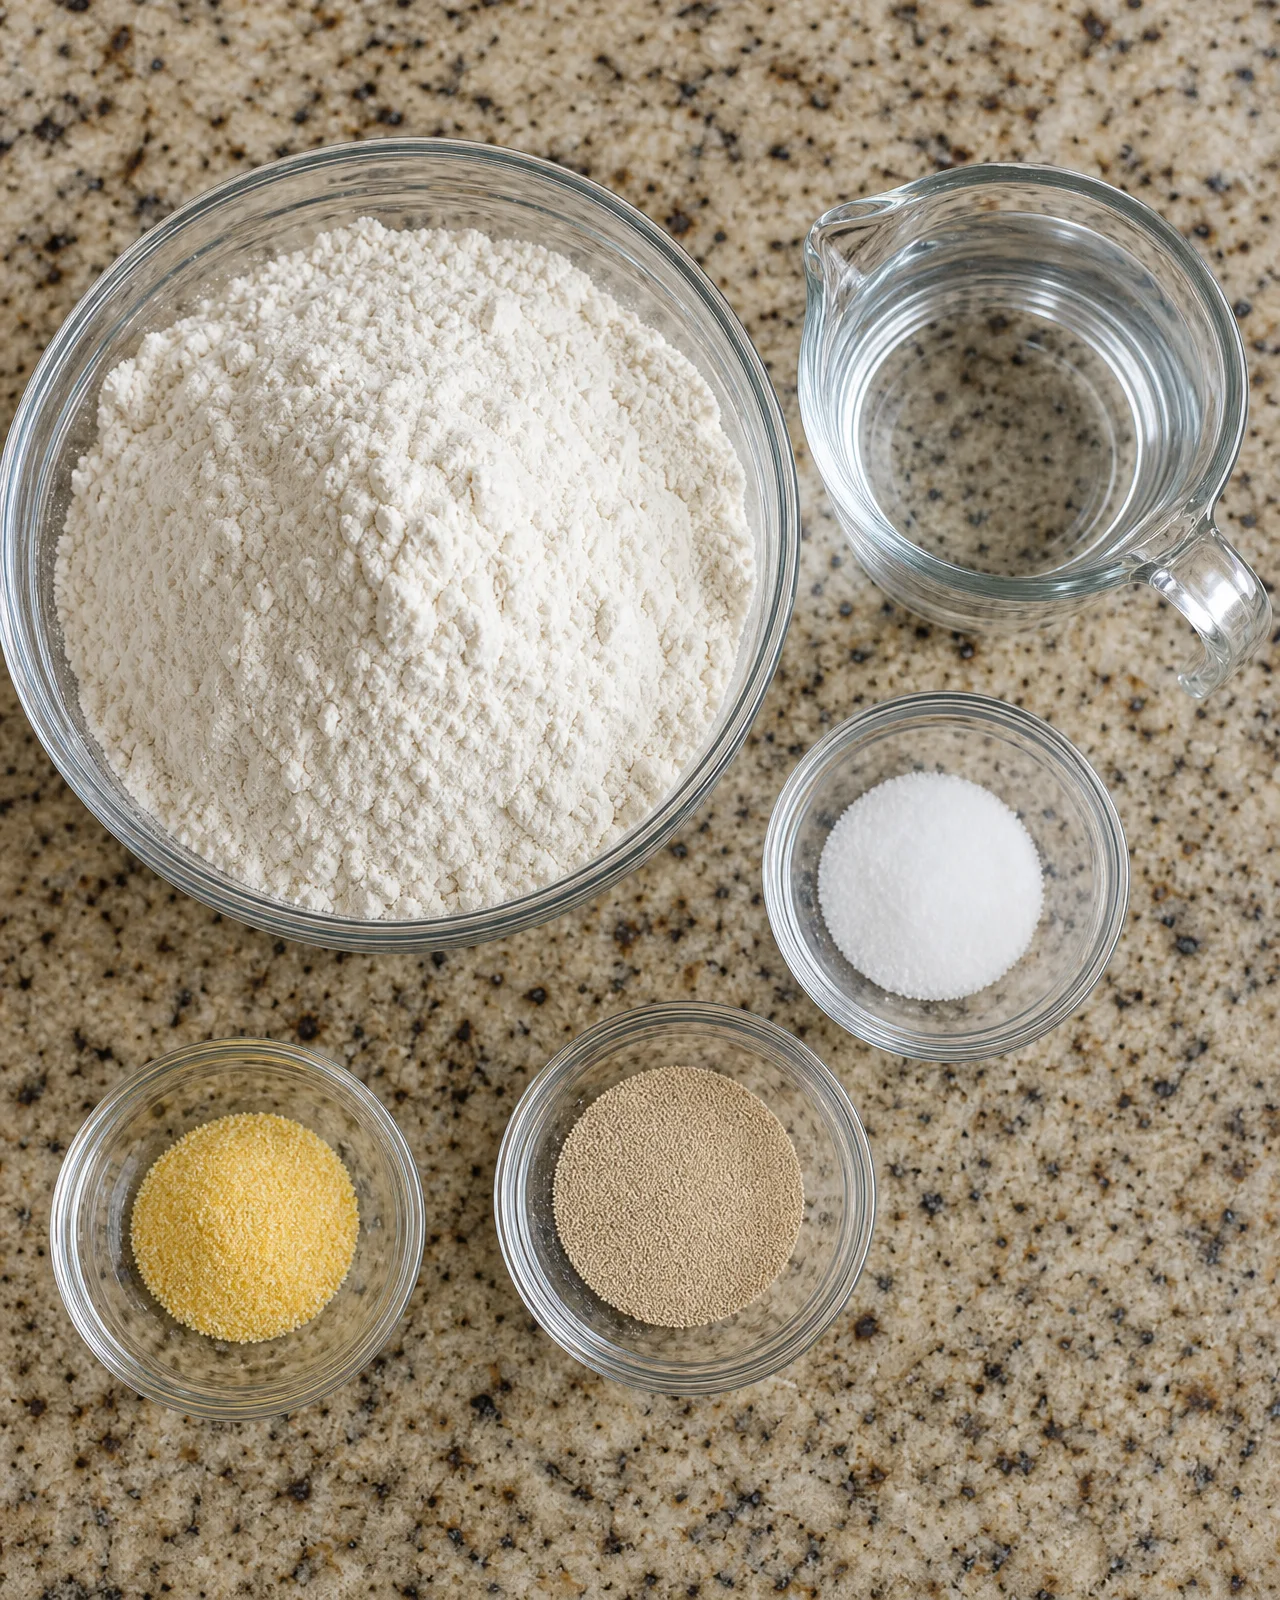
2 teaspoons of salt enhances flavor and controls yeast activity, while 2½ teaspoons of instant yeast (SAF brand recommended for its reliability) helps the dough rise effectively. The key to a good dough is hydration; you will use 1½ cups of water, which should be at room temperature to activate the yeast properly without killing it. Proper hydration contributes to the bread’s airy interior.
For the baking process, you’ll need a pinch of cornmeal, which should be sprinkled on the parchment paper to prevent sticking. If you don’t have cornmeal, semolina or flour can work as effective substitutes. All these ingredients harmonize together to produce a loaf that is both beautiful and delicious, perfect for any occasion.
How to Make French Bread in a Dutch Oven
Mix the Dough
Begin by combining the 4 cups of bread flour, 2 teaspoons of salt, and 2½ teaspoons of instant yeast in a large mixing bowl or the bowl of a stand mixer. Slowly add the 1½ cups of water while mixing. Use a spatula or your hands to incorporate the ingredients until the dough starts to clear the sides of the bowl. The dough should feel slightly sticky, indicating the correct hydration level for French bread. Once mixed, let the dough rest for about 10 minutes. Resting allows the flour to absorb the water fully, leading to a smoother and more cohesive dough.
Knead and First Rise
Next, it’s time to knead the dough. You can do this by hand, requiring about 15–20 minutes of focused effort, or use a stand mixer on low speed for 5–10 minutes until it becomes smooth and elastic. The texture should be slightly tacky but not overly sticky. Once the kneading is complete, shape the dough into a ball and place it in a lightly oiled bowl. Cover this bowl with a clean kitchen towel or plastic wrap and let it rise in a warm spot for about 60 minutes, or until it has doubled in size.
During this first rise, the yeast ferments the dough, creating carbon dioxide that makes it expand. The dough will become light and airy, so check on it periodically; it should show significant volume increase and exhibit a slightly domed top, indicating it’s ready for the next step.
Shape, Second Rise, and Bake
After the first rise, turn the dough out onto a lightly floured surface. Gently deflate it by pressing down with your fingers, then shape it into a round loaf by tucking the edges under to create surface tension on the top. Once formed, place it seam-side down on a sheet of parchment paper.
Cover the loaf and let it rise again for 45–60 minutes as you preheat your oven to 450°F during the last 15 minutes of this rising time. This second rise allows the loaf to gain additional volume and develop its structure. Just before baking, dust the top with flour and use a sharp knife or lame to make three or four shallow slashes across the top of the loaf, which helps control the expansion as it bakes.
Carefully place your Dutch oven (with the lid) into the preheated oven and bake the bread for 20 minutes with the lid on. This covered environment traps steam, helping to create a crusty exterior. After 20 minutes, remove the lid and continue to bake for another 15–20 minutes until the bread is golden brown and registers an internal temperature of at least 190°F. Let it cool on a wire rack for a while before slicing to ensure the best texture.
Tips for Success
For the best results when making French bread in a Dutch oven, consider the following tips. Firstly, ensure your dough rises in a warm, draft-free space to encourage fermentation. An ideal location might be a preheated oven that has been turned off or a sunny windowsill. This warmth promotes optimal yeast activity, resulting in a better rise.
Additionally, maintaining the right internal temperature is crucial for determining doneness; using a kitchen thermometer will help ensure your bread is perfectly baked. It should reach an internal temperature of at least 190°F for a fully cooked loaf.
If your bread appears too dense, it could be due to insufficient kneading or inadequate rising. Ensuring a smooth, elastic dough and allowing for full fermentation time will greatly enhance the bread’s texture. Lastly, to store leftover bread, wrap it in a paper bag or place it in a bread box for optimal freshness. Avoid plastic wraps, as they can trap moisture and lead to a soggy crust.
Equipment Needed
To successfully create this French bread, you will need standard baking equipment: a large mixing bowl or the bowl of a stand mixer, a wooden spoon or spatula for combining ingredients, and a sturdy kitchen towel to cover the dough during rising. Additionally, a parchment paper sheet is necessary for baking to prevent sticking in the Dutch oven. Of course, you’ll need a Dutch oven to achieve that ideal cooking environment. If you don’t have a Dutch oven, an oven-safe pot with a lid can serve as an effective alternative, providing similar steaming conditions for the bread.
Variations
While this French bread recipe is classic, there are several variations you can try to suit your tastes or dietary preferences. For a more enriched dough, consider adding 2 tablespoons of sugar or honey, which will provide a hint of sweetness and create a softer crumb that is delightful to eat. You can also incorporate herbs or spices such as rosemary or garlic powder for an aromatic flavor twist that complements many meals.
If you prefer a more wholesome option, substitute half of the bread flour with whole wheat flour. This adjustment can enrich the loaf with a nuttier flavor, but do be prepared for a slightly denser outcome. Additionally, another delightful variation involves adding seeds or nuts, such as sunflower seeds or walnuts, to the dough before the first rise. This not only introduces a pleasant crunch but also elevates the overall taste of your bread.
Serving Suggestions
French bread is incredibly versatile and can be served in many delightful ways. Slice it fresh and enjoy it warm with butter or a drizzle of olive oil as a simple appetizer. It pairs beautifully with soups or stews, like rustic tomato soup or a hearty beef stew, making for a comforting meal.
Consider using your French bread to create scrumptious sandwiches filled with your favorite deli meats and cheeses for lunch. For breakfast, toast a slice and top it with smashed avocado, seasoned with a sprinkle of salt and pepper, for a nutritious and satisfying start to the day. Serving it alongside a charcuterie board can elevate any gathering, allowing guests to enjoy it with various cheeses, olives, and spreads for a delightful culinary experience.
FAQs about French Bread in a Dutch Oven
Q1: Can I use all-purpose flour instead of bread flour?
A1: Yes, you can, but the texture of the bread might differ slightly. Bread flour provides a chewiness that all-purpose flour may lack, resulting in a less traditional loaf.
Q2: How can I store leftover bread?
A2: It’s best to store leftover bread in a paper bag or a bread box to help keep the crust crisp. Avoid using plastic wrap, as it can trap moisture and lead to a soggy crust.
Q3: Can I freeze the bread?
A3: Absolutely! You can slice the bread and wrap it tightly in plastic wrap, then place it in a freezer bag. Frozen bread can last for up to three months, maintaining its flavor and texture when properly wrapped.
Q4: How do I reheat the bread?
A4: To retain the crispy crust when reheating, heat the bread in the oven at 350°F for about 10 minutes. This will help rejuvenate the crust and refresh the interior.
Q5: Can I make this the night before?
A5: Yes! You can prepare the dough and let it rise in the refrigerator overnight for a more developed flavor. Just allow it to come to room temperature before shaping and baking, ensuring an enjoyable end result.
Final Thoughts
Baking French bread in a Dutch oven not only results in a stunning loaf but also creates an inviting atmosphere in your kitchen with its warm aroma. The combination of a crispy crust and a tender, airy inside perfectly complements any dish you serve it with, making it a versatile addition to your meals. Be sure to adhere to the instructions to achieve the best results, and allow the bread to cool completely before slicing to fully appreciate its texture and flavor.
Whether you enjoy it fresh from the oven alongside your favorite soup or as part of a lovely charcuterie board, this homemade French bread is sure to impress those you share it with. Relish the joy of baking this delectable bread and savor each moment while creating lasting memories around the table.
Print
French Bread in a Dutch Oven
- Prep Time: 15 minutes
- Cook Time: 40 minutes
- Total Time: 1 hour 55 minutes
- Yield: 1 loaf 1x
- Category: Bread
- Method: Baking
- Cuisine: French
- Diet: Vegetarian
Description
A simple and delicious recipe for making crispy crust French bread using a Dutch oven, resulting in an airy inside.
Ingredients
- 4 cups bread flour
- 2 teaspoons salt
- 2½ teaspoons instant yeast (SAF brand recommended)
- 1½ cups water
- pinch cornmeal (for sprinkling on the parchment)
Instructions
- Mix the dough. Combine the flour, salt, yeast, and water in a large mixing bowl or the bowl of a stand mixer. Mix until the dough clears the sides of the bowl but remains slightly sticky.
- Knead the dough. Knead by hand (15–20 minutes) or with a stand mixer (5–10 minutes) until the dough is smooth and elastic.
- First rise. Place the dough in a lightly oiled bowl, cover, and let it rise in a warm place for 60 minutes or until doubled in size.
- Shape the loaf. Turn the risen dough onto a floured surface, shape it into a round loaf, and place it seam-side down on parchment paper in the Dutch oven.
- Second rise. Cover the loaf and let it rise for 45–60 minutes while preheating the oven to 450°F during the last 15 minutes.
- Slash and flour. Dust the top with flour and make three or four shallow slashes across it.
- Bake. Place the Dutch oven in the oven, baking first 20 minutes with the lid on, then 15–20 minutes with the lid off until golden brown and has an internal temperature of at least 190°F.
- Cool and serve. Remove the bread, cool on a wire rack for at least 20 minutes before slicing, and serve warm or at room temperature.
Notes
- Using a warm oven or sunny window for rising can be effective.
- For best results, maintain the recommended internal temperature for doneness.
- The bread can be stored in a bread box or paper bag for freshness.
Nutrition
- Serving Size: 1 slice
- Calories: 120
- Sugar: 0g
- Sodium: 230mg
- Fat: 0.5g
- Saturated Fat: 0g
- Unsaturated Fat: 0g
- Trans Fat: 0g
- Carbohydrates: 24g
- Fiber: 1g
- Protein: 4g
- Cholesterol: 0mg