Introduction to Pickled Brussels Sprouts
Welcome, fellow food lovers! Today, I’m thrilled to share my recipe for Pickled Brussels Sprouts, a crunchy, tangy delight that’s perfect for busy moms and professionals alike. If you’re anything like me, you know how hectic life can get, and finding quick, tasty solutions is essential. These pickled gems add a zesty touch to any meal, transforming your ordinary dinner into something special. Imagine opening your fridge and finding a jar of vibrant Brussels sprouts ready to elevate sandwiches, salads, or charcuterie boards. Let’s dive into the fun, shall we?
Why You’ll Love This Pickled Brussels Sprouts
These Pickled Brussels Sprouts are a game-changer in my kitchen! They’re incredibly easy to make and ready in just over half an hour. The pro tip? They get even tastier as they sit in the fridge, offering a delightful crunch that brightens up any meal. Plus, they’re versatile! Whether served alongside grilled meats or tossed in a salad, these pickled sprouts bring a refreshing zing that everyone will love.
Ingredients for Pickled Brussels Sprouts
Gathering the right ingredients is crucial to create the perfect Pickled Brussels Sprouts. Let’s take a look at what you’ll need:
- Brussels sprouts: Fresh, vibrant, and tightly packed buds. They will be your main star, so choose ones that feel firm and look bright green.
- White vinegar: This will give your pickles that signature tangy flavor. You could try apple cider vinegar for a milder taste.
- Water: Used to dilute the vinegar and create the brine, giving your sprouts the right balance.
- Pickling salt: Unlike regular salt, it dissolves easily and won’t leave cloudy residue in your jars. Kosher salt could work as a substitute if that’s what you have on hand.
- Sugar: Just a touch to balance the tartness of the vinegar. Feel free to use honey or agave syrup if you prefer a natural sweetener.
- Garlic: Fresh cloves add depth and flavor to your brine. You can also experiment with roasted garlic for a sweeter texture.
- Dill seeds: These tiny seeds infuse the sprouts with a refreshing herby flavor. If you’re not a fan, you could try mustard seeds instead!
- Red pepper flakes: Perfect for adding a bit of heat! Adjust the amount to suit your spice preference; more flakes mean more kick.
For exact quantities, check out the bottom of the article where I’ve included everything you’ll need for printing. Now, let’s get ready to pickle those sprouts!
How to Make Pickled Brussels Sprouts
Step 1: Prepare the Brussels Sprouts
To kick off your pickling adventure, rinse the Brussels sprouts under cool running water. This helps to remove any dirt or debris. Next, trim the stem ends carefully with a sharp knife. Don’t rush this process! Carefully removing any loose outer leaves will ensure your sprouts stay tasty and inviting. As you prep, take a moment to admire their tight form and that vibrant green color. Freshness is key! Once you’ve tackled the rinsing and trimming, you’re ready to move to the next step. Trust me; the effort will pay off with each crunchy bite.
Step 2: Blanch the Brussels Sprouts
Now, grab a large pot and fill it with water, bringing it to a rolling boil. Adding the Brussels sprouts to boiling water, you’ll want to blanch them for about 3 to 4 minutes. This quick cooking method softens their tough texture while preserving that delightful crunch. After the timer dings, drain them thoroughly and give them a gentle shake to remove excess water. Blanching not only brightens their beautiful color, but it also preps them to absorb the pickling solution perfectly. Plus, this step helps to enhance their flavor, turning simple sprouts into something spectacular!
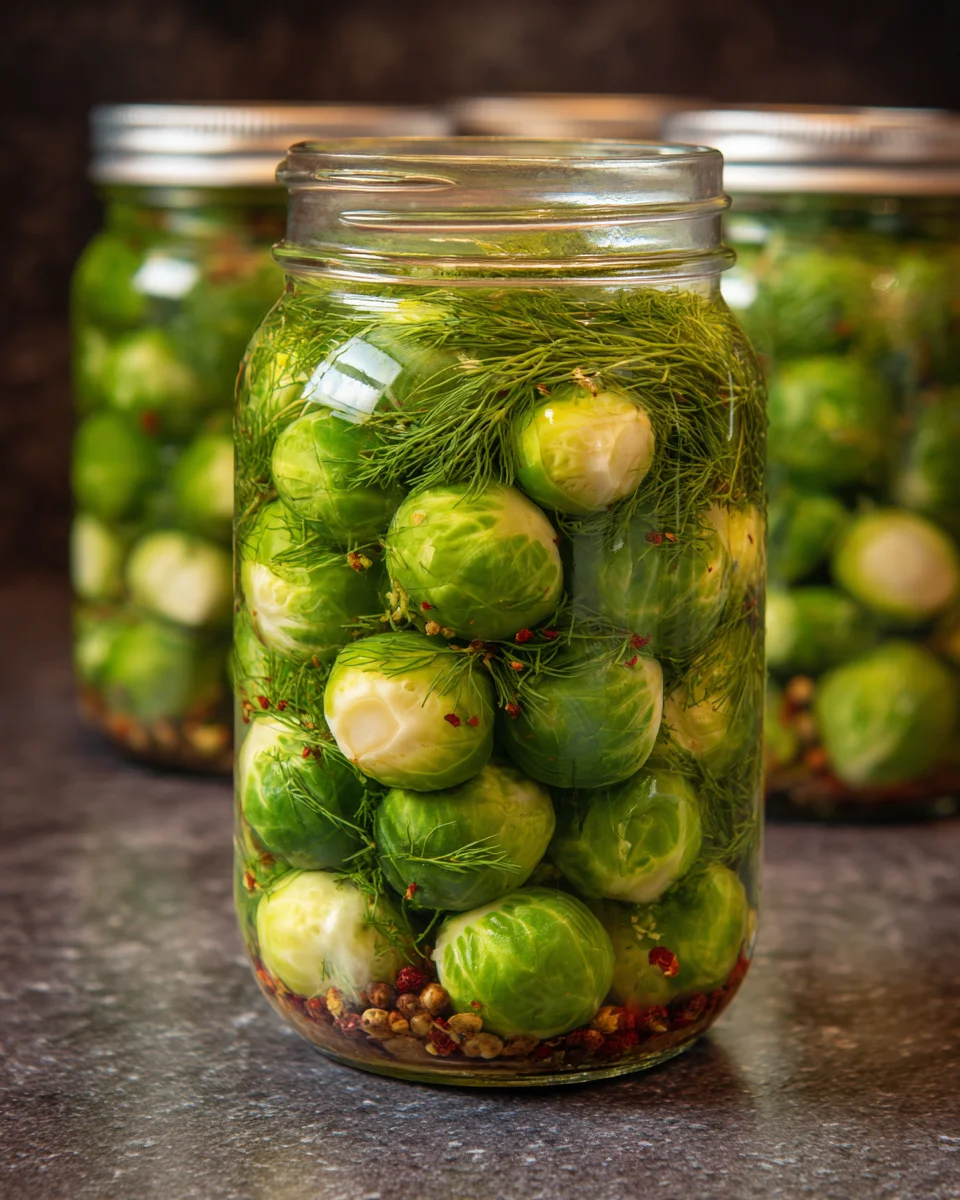
Step 3: Pack the Jars
Time to pack those jars! Choose clean, sterilized jars for this step—nothing but the best for your Pickled Brussels Sprouts. Start by dropping in the garlic cloves, dill seeds, and red pepper flakes into each jar. These ingredients will enhance the flavor profile wonderfully! Then, carefully pack the blanched sprouts into the jars, squeezing them tightly but not too tightly. A little wiggle room is good. Make sure you fill them to the top, keeping a bit of space for the brine. This packing process is both an art and a science, ensuring every bite is packed with flavor.
Step 4: Make the Brine
Let’s whip up that tangy brine! In a saucepan, combine white vinegar, water, pickling salt, and sugar. Bring this delightful mixture to a boil; the aromas will be heavenly! Once boiling, reduce the heat and let it simmer for about 5 minutes. This is when the flavors meld together, creating the perfect balance for your Pickled Brussels Sprouts. Stir occasionally to dissolve the salt and sugar completely. Just imagine the vibrant scent wafting from the pot! You’ll soon see how this brine plays a crucial role in bringing everything together in a perfect union of flavors.
Step 5: Pour the Brine and Seal
Now for the fun part! Once your brine is ready, carefully pour it over the packed Brussels sprouts in each jar. Make sure the sprouts are fully submerged, leaving about 1/2 inch of headspace at the top. This little gap is important for the fermentation process. After pouring, don’t forget to gently tap the jars to release any trapped air bubbles. Once they’re sealed tight, it’s time to cool them. Allow the jars to sit undisturbed at room temperature. Your kitchen will smell utterly divine as you watch this process unfold!
Step 6: Refrigerate and Enjoy
The moment of truth is almost here! After sealing the jars, let them cool completely at room temperature—this typically takes a couple of hours. Once cool, pop them in the refrigerator. Here’s the catch: patience is key! Wait for about 24 to 48 hours to allow the flavors to develop. While you might be tempted to dig in right away, I promise it’s worth the wait! They’ll stay good in your fridge for up to two months if you manage to resist them that long. Each bite of your pickled Brussels sprouts is going to be a crunchy, tangy delight that you won’t soon forget!
Tips for Success
- Choose firm Brussels sprouts; they hold up better during pickling.
- Ensure jars are clean to prevent spoilage.
- Adjust spice levels to suit your taste; more red pepper flakes for heat!
- Let the jars sit for longer for an even more flavorful experience.
- Experiment with herbs and spices; it’s a fun way to customize your pickles!
Equipment Needed
- Large pot: For blanching, any sturdy pot will do the trick.
- Saucepan: Use any medium-sized saucepan to prepare the brine.
- Clean jars: Mason jars work best but any glass jars with tight seals can be used.
- Measuring cups and spoons: Precision helps, but eyeballing can work for seasoned cooks!
- Mixing spoon: A wooden or silicone spoon is ideal for stirring the brine.
Variations of Pickled Brussels Sprouts
- Curried Pickled Brussels Sprouts: Add curry powder or turmeric to your brine for a warm, exotic flavor.
- Sweet and Spicy: Incorporate sliced jalapeños and a bit of honey for an exciting sweet-heat combination.
- Citrus Twist: Add lemon or orange zest to the brine for a bright, zesty kick.
- Herbaceous Delight: Toss in fresh dill or thyme in addition to the dill seeds for a fresh herby profile.
- Smoky Flavor: Mix in smoked paprika for a hint of smokiness that pairs wonderfully with grilled dishes.
Serving Suggestions for Pickled Brussels Sprouts
- Pair with grilled meats: These pickled sprouts complement burgers and chicken beautifully.
- Top salads: Add a few sprigs to your favorite salad for a tangy crunch.
- Charcuterie boards: Arrange them alongside cheeses and cured meats for a vibrant touch.
- Enjoy with cocktails: Use them as a garnish for Bloody Marys or other savory drinks.
- Present in jars: Serve them directly from the jars for a rustic, homemade charm.
FAQs about Pickled Brussels Sprouts
Can I use frozen Brussels sprouts for pickling?
While fresh Brussels sprouts are the best choice for maximum crunch, you can use frozen ones in a pinch. Just be mindful they may not retain the same texture.
How long do pickled Brussels sprouts last?
When stored properly in the refrigerator, these tasty Pickled Brussels Sprouts can last up to two months. Just remember to check for any signs of spoilage, like unusual odors or changes in color.
Can I adjust the spice level in my pickled sprouts?
Absolutely! The beauty of pickling is that it allows for personal customization. Feel free to add more or less red pepper flakes to achieve your desired heat level.
What should I serve with pickled Brussels sprouts?
These pickled beauties can elevate numerous dishes! Pair them with grilled meats, toss into salads, or serve as a bright addition to charcuterie boards for a delightful contrast.
Can I reuse the brine for another batch?
Most definitely! If the brine is still clear and smells fresh, you can reuse it for another batch of pickled Brussels sprouts. Just remember to adjust the ingredients if needed, as flavor may fade.
Final Thoughts
Creating your own Pickled Brussels Sprouts is not just about adding a zesty touch to your meals; it’s a simple yet satisfying culinary adventure. Each bite offers a delightful crunch and a burst of flavor, transforming humble sprouts into a star ingredient. Plus, the joy that comes from making something so unique in your kitchen is truly rewarding. I hope this recipe becomes a go-to in your home, cherished by family and friends alike. So grab those sprouts, and let’s pickle our way to deliciousness together!
Print
Pickled Brussels Sprouts
- Prep Time: 20 minutes
- Cook Time: 15 minutes
- Total Time: 35 minutes
- Yield: Approximately 4 jars 1x
- Category: Side Dish
- Method: Pickling
- Cuisine: American
- Diet: Vegetarian
Description
Crunchy and tangy pickled Brussels sprouts that add a zesty touch to your meals.
Ingredients
- 2 lbs Brussels sprouts
- 2 1/2 cups white vinegar
- 2 cups water
- 2 tbsp pickling salt
- 1 tbsp sugar
- 4 cloves garlic, peeled
- 1 tsp dill seeds
- 1 tsp red pepper flakes
Instructions
- Rinse Brussels sprouts under cool water. Trim stem ends and remove any loose outer leaves.
- Bring a large pot of water to a boil. Add Brussels sprouts and blanch for 3–4 minutes. Drain thoroughly.
- Place garlic, dill seeds, and red pepper flakes into clean jars. Pack blanched sprouts tightly into jars.
- In a saucepan, combine vinegar, water, pickling salt, and sugar. Bring to a boil, then simmer for 5 minutes.
- Pour hot brine over sprouts, leaving 1/2 inch headspace. Ensure sprouts are fully submerged and remove air bubbles.
- Seal jars, cool completely at room temperature, then refrigerate for 24–48 hours before serving.
Notes
- Feel free to adjust the spice level by varying the amount of red pepper flakes.
- Store pickled Brussels sprouts in the refrigerator for up to 2 months.
Nutrition
- Serving Size: 1/2 cup
- Calories: 50
- Sugar: 1g
- Sodium: 500mg
- Fat: 0g
- Saturated Fat: 0g
- Unsaturated Fat: 0g
- Trans Fat: 0g
- Carbohydrates: 11g
- Fiber: 4g
- Protein: 2g
- Cholesterol: 0mg