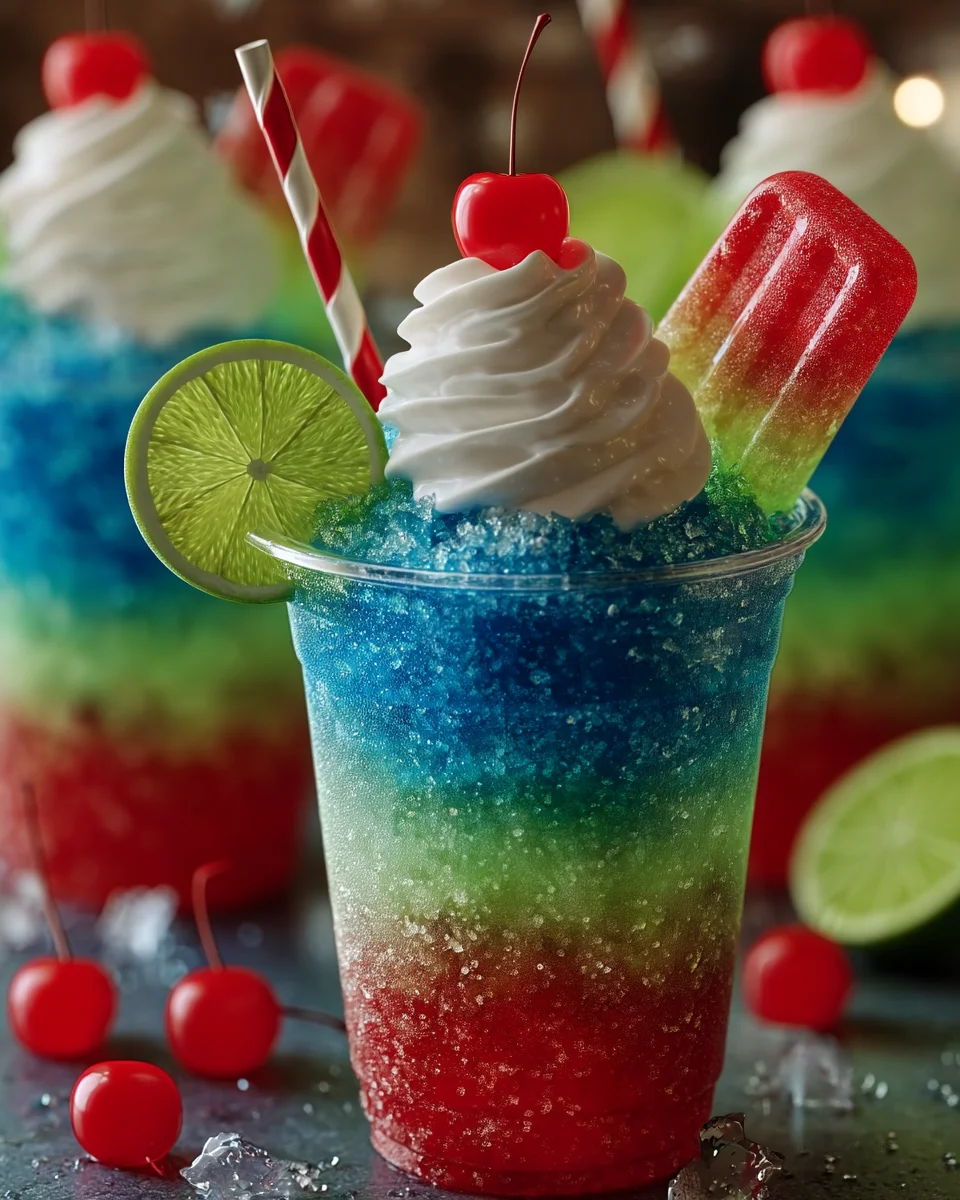
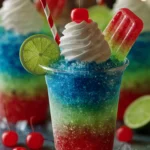
Nothing says summer quite like a cold, colorful frozen treat, and these Berry Blast Cherry Limeade Shaved Ice Cups are the ultimate way to cool off on a hot day. Made with fluffy shaved ice, sweet cherry drink, tangy limeade, a bright blue berry layer, whipped cream, juicy maraschino cherries, and a mini Bomb Pop-style popsicle, these festive cups are guaranteed to be the highlight of any summer celebration.
This easy no-bake dessert combines the fun of a snow cone with the flavors of a refreshing berry limeade. Each cup features vibrant red, white, and blue layers, making it a perfect addition to Fourth of July parties, Memorial Day cookouts, Labor Day picnics, birthday celebrations, and backyard barbecues.
One of the best things about this recipe is how incredibly easy it is to make. There is no baking, no complicated prep work, and no special decorating skills required. Simply prepare fluffy shaved ice, pour the colorful drinks over the top, finish with whipped cream and fun toppings, and serve immediately.
Kids love building their own shaved ice cups, choosing their favorite toppings, and watching the colorful layers slowly blend into a delicious fruity slush. Adults appreciate how refreshing they are on hot summer afternoons. Every spoonful is icy, sweet, fruity, and bursting with bright cherry and lime flavors.
Because these shaved ice cups come together in just minutes, they’re perfect when you need a quick dessert for a crowd. They look impressive enough for a party but are simple enough to make any afternoon when you’re craving something cool and refreshing.
Whether you’re hosting a patriotic celebration or simply looking for a fun frozen treat, these Berry Blast Cherry Limeade Shaved Ice Cups are sure to become one of your favorite summer recipes.
Why You’ll Love These Berry Blast Cherry Limeade Shaved Ice Cups
There are countless frozen desserts to enjoy during the summer, but these shaved ice cups offer something extra special.
Quick and Easy
This recipe takes only about 20 minutes from start to finish. Since there’s no baking or cooking involved, it’s perfect for busy summer days when you want a homemade dessert without spending hours in the kitchen.
Beautiful Patriotic Colors
The red cherry drink, white whipped cream, and blue berry layer naturally create a festive red, white, and blue dessert that’s ideal for Independence Day celebrations.
Serve them in clear cups so everyone can admire the colorful layers before digging in.
Light and Refreshing
Unlike rich cakes or heavy desserts, shaved ice feels cool and refreshing. The fluffy texture melts in your mouth while the fruity flavors make every bite incredibly satisfying.
Kid-Friendly
Children love helping make these colorful treats. They can:
- Fill the cups with shaved ice
- Pour the colorful drinks
- Add whipped cream
- Place the cherry on top
- Insert the mini popsicle
It’s a fun kitchen activity that everyone can enjoy together.
Perfect for Entertaining
Because each serving is prepared individually, these shaved ice cups are ideal for parties.
Guests can easily grab their own dessert without slicing cakes or serving scoops of ice cream.
Ingredients You’ll Need
The ingredient list is short, simple, and easy to find at almost any grocery store.
Fluffy Shaved Ice
The shaved ice is the foundation of this dessert.
For the best texture, use a shaved ice machine whenever possible. It creates light, snow-like ice that absorbs the flavored drinks beautifully.
If you don’t own a shaved ice machine, finely crushed ice made in a high-powered blender or food processor works well too.
Cherry-Flavored Drink
A cherry fruit punch, Hawaiian Punch, or another cherry-flavored beverage creates the bright red layer.
Its sweet berry flavor pairs perfectly with the tangy lime layer and adds vibrant color to the dessert.
Limeade or Lemon-Lime Soda
Limeade provides a refreshing citrus flavor that balances the sweetness of the cherry drink.
If you prefer a lighter, fizzy dessert, lemon-lime soda is a delicious substitute that adds a little sparkle.
Blue Gatorade or Blue Raspberry Drink
The bright blue layer completes the patriotic color theme while adding a refreshing berry flavor.
Blue raspberry sports drinks or fruit drinks both work well.
Whipped Cream
A generous swirl of whipped cream adds richness while creating the classic white layer that ties the red and blue colors together.
Fresh homemade whipped cream offers the best flavor, but canned whipped cream is a quick and convenient option for parties.
Maraschino Cherries
Each cup is topped with a bright red maraschino cherry for a classic ice cream parlor look.
The cherry also adds a sweet burst of flavor with every bite.
Mini Bomb Pop-Style Popsicles
A mini cherry or Bomb Pop-style popsicle transforms these shaved ice cups into an unforgettable summer dessert.
As the popsicle slowly melts into the shaved ice, it adds even more fruity flavor and keeps the treat extra cold.
Why Clear Cups Work Best
Although any serving cup can be used, clear plastic cups are highly recommended.
They allow the beautiful red, white, and blue layers to show through, making the dessert look even more festive.
The colorful presentation is one of the reasons these shaved ice cups are so popular on social media, especially during the summer holidays. They’re eye-catching, fun to photograph, and guaranteed to stand out on any dessert table.
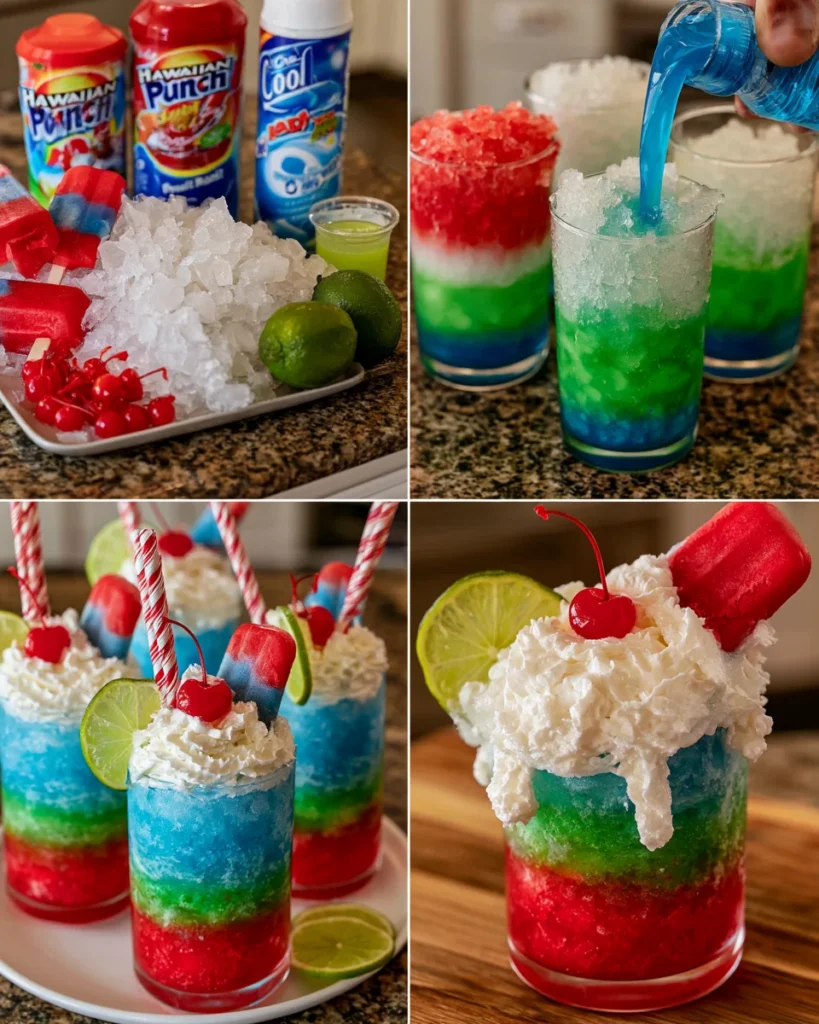
How to Make Berry Blast Cherry Limeade Shaved Ice Cups
One of the best things about these Berry Blast Cherry Limeade Shaved Ice Cups is how quickly they come together. With just a handful of ingredients and a few easy steps, you’ll have a colorful frozen dessert that’s perfect for cooling off on a hot summer day.
Step 1: Prepare the Shaved Ice
Start by making the shaved ice.
If you’re using a shaved ice machine, follow the manufacturer’s instructions to create soft, fluffy ice with a snow-like texture.
If you don’t have a shaved ice machine, place ice cubes in a high-powered blender or food processor and pulse until they become very fine. Avoid blending too long, as the ice can begin to melt.
The lighter and fluffier the ice, the better it will absorb the flavored drinks.
Step 2: Chill Your Serving Cups
For the longest-lasting frozen dessert, place your clear serving cups in the freezer for about 10 to 15 minutes before assembling.
Cold cups help slow down melting, especially during outdoor parties on warm days.
Step 3: Fill the Cups
Arrange the chilled cups on your work surface.
Fill each cup nearly to the top with fluffy shaved ice.
Gently press the ice with the back of a spoon so it stays in place, but avoid packing it too tightly. Loose ice absorbs the colorful syrups much better and keeps the texture light and airy.
Step 4: Create the Red Layer
Slowly pour the cherry-flavored drink onto one side of each cup.
Let the liquid soak naturally into the shaved ice.
Pouring slowly helps keep the colors more defined instead of blending together immediately.
Step 5: Add the Lime Layer
Next, carefully pour the limeade or lemon-lime soda down the center of each cup.
The citrus flavor balances the sweetness of the cherry drink while creating another colorful layer.
If you’re using lemon-lime soda, the bubbles add a fun sparkle and make the dessert even more refreshing.
Step 6: Finish with the Blue Layer
Pour the blue raspberry drink or blue sports drink over the remaining side of the shaved ice.
At this point you’ll have vibrant red, white, and blue sections that look festive and inviting.
Don’t worry if a little of the color blends together—that’s part of the fun and gives every cup its own unique appearance.
Decorating the Shaved Ice Cups
Now it’s time to add the finishing touches.
Pipe the Whipped Cream
Top each cup with a generous swirl of whipped cream.
If you’re using homemade whipped cream, transfer it to a piping bag fitted with a large star tip for a bakery-style presentation.
For a quicker option, canned whipped cream works perfectly.
Add the Cherry
Place one maraschino cherry right in the center of the whipped cream.
Besides looking beautiful, the cherry adds a classic ice cream shop touch that everyone loves.
Insert the Mini Popsicle
Finish each cup by placing a mini Bomb Pop-style popsicle into the shaved ice at a slight angle.
The popsicle acts as both a garnish and an extra frozen treat.
As it slowly melts, it blends into the shaved ice, creating even more fruity flavor.
Serve Immediately
These shaved ice cups are best enjoyed right after assembling.
The shaved ice will gradually melt, blending all three flavors together into a refreshing berry-lime slush.
Provide colorful spoons or straws so guests can stir the layers together if they prefer.
Expert Tips for the Best Shaved Ice Cups
A few simple tricks will help you create perfect shaved ice every time.
Use Finely Shaved Ice
The closer the texture is to fresh snow, the better the dessert will taste.
Large ice chunks don’t absorb the drinks evenly and melt more quickly.
Chill Everything
Cold drinks, cold whipped cream, and chilled serving cups all help keep the shaved ice frozen longer.
This is especially helpful for outdoor summer parties.
Pour Slowly
Adding each drink slowly helps create distinct color sections instead of one blended color.
A measuring cup with a spout makes pouring much easier.
Assemble Just Before Serving
Shaved ice melts quickly, especially in warm weather.
Prepare all the ingredients ahead of time, then assemble the cups immediately before serving.
Use Clear Cups
Transparent cups show off the colorful patriotic layers and make the dessert look extra festive.
They’re also perfect for summer parties and social media photos.
Common Mistakes to Avoid
Even though this recipe is simple, avoiding a few common mistakes will give you the best results.
Packing the Ice Too Firmly
Compressing the shaved ice too much makes it difficult for the flavored drinks to soak through.
Keep the ice fluffy for the best texture.
Using Warm Drinks
Always chill the drinks before assembling the cups.
Cold liquids help maintain the frozen texture much longer.
Adding Too Much Liquid
Pour only enough flavored drink to lightly soak the shaved ice.
Too much liquid can cause the ice to melt quickly and create a watery dessert.
Decorating Too Early
Wait until the last minute to add the whipped cream, cherry, and popsicle.
This keeps the toppings looking fresh and prevents the whipped cream from softening.
Serving in Direct Sunlight
If possible, keep the shaved ice cups in the shade until it’s time to serve.
Even a few minutes of direct summer sun can cause them to melt much faster.
With these simple tips, you’ll create colorful shaved ice cups that are refreshing, picture-perfect, and packed with delicious berry and lime flavor every single time.
Fun Variations to Try
One of the best things about Berry Blast Cherry Limeade Shaved Ice Cups is how easy they are to customize. You can switch up the flavors, colors, and toppings to create a new frozen treat for every occasion.
Tropical Berry Shaved Ice
Replace the cherry drink with fruit punch and use pineapple juice instead of limeade. Top with fresh pineapple chunks and toasted coconut for a tropical twist.
Strawberry Lemonade Version
Swap the cherry drink for strawberry lemonade and garnish with fresh strawberries and lemon slices. The sweet and tangy combination is perfect for warm summer afternoons.
Watermelon Blast
Use watermelon juice for the red layer and garnish with mini watermelon wedges. This refreshing version is a favorite at pool parties and picnics.
Blue Raspberry Freeze
Make the entire dessert blue by using blue raspberry drinks and topping it with blue raspberry candy pieces for a fun kid-friendly treat.
Adult Party Version
For an adults-only dessert, replace part of the cherry drink with cherry vodka or add a splash of coconut rum to the lime layer. Always label alcoholic versions clearly and keep them separate from the kid-friendly cups.
Make-Ahead Tips
Although shaved ice is best served immediately, you can prepare nearly everything ahead of time.
Prepare the Drinks
Measure each flavored drink into separate pitchers or squeeze bottles.
Refrigerate until ready to assemble.
Cold drinks help keep the shaved ice frozen longer.
Freeze the Serving Cups
Place the serving cups in the freezer 15 to 20 minutes before serving.
Frozen cups slow melting and keep the dessert icy for a longer time.
Organize a Shaved Ice Bar
For parties, create a DIY shaved ice station.
Arrange:
- Fluffy shaved ice
- Cherry drink
- Limeade
- Blue raspberry drink
- Whipped cream
- Maraschino cherries
- Mini Bomb Pop-style popsicles
- Patriotic sprinkles
- Colorful straws
Guests can build their own shaved ice cups just the way they like them.
Storage
Because shaved ice melts quickly, these treats are designed to be enjoyed immediately after assembling.
If you have leftover flavored drinks, simply refrigerate them in sealed containers for up to 5 days.
Whipped cream can also be prepared several hours in advance and kept refrigerated until needed.
Once assembled, however, the shaved ice will begin melting within minutes, so it’s best not to store completed cups.
Serving Suggestions
These colorful shaved ice cups pair perfectly with nearly every summer meal.
Serve them after:
- Cheeseburgers
- Hot dogs
- BBQ ribs
- Pulled pork sandwiches
- Grilled chicken
- Corn on the cob
- Pasta salad
- Potato salad
- Watermelon slices
- Fresh fruit salad
For drinks, they pair well with:
- Fresh lemonade
- Cherry limeade
- Sparkling water
- Sweet iced tea
- Fruit punch
They’re also a refreshing treat between swimming, lawn games, and fireworks during holiday celebrations.
Perfect Occasions
These festive shaved ice cups are ideal for almost any warm-weather event.
They’re especially popular for:
- Fourth of July parties
- Memorial Day cookouts
- Labor Day celebrations
- Summer birthdays
- Backyard barbecues
- Pool parties
- Family reunions
- Neighborhood block parties
- School field days
- Church picnics
- Carnival-themed parties
- Outdoor movie nights
Their bright colors instantly add a festive touch to any dessert table.
Frequently Asked Questions
Can I use crushed ice instead of shaved ice?
Yes.
Finely crushed ice works well if you don’t own a shaved ice machine. For the fluffiest texture, pulse the ice in short bursts until it resembles fresh snow.
Can I use homemade fruit syrup?
Absolutely.
Homemade cherry syrup, fresh lime syrup, or blue raspberry syrup all work beautifully and allow you to control the sweetness.
Can I make these sugar-free?
Yes.
Use sugar-free flavored drinks, sugar-free whipped topping, and sugar-free popsicles to create a lighter version.
How do I keep the layers from mixing?
Pour each drink slowly onto a different side of the shaved ice.
Using chilled drinks and fluffy shaved ice helps keep the colors more defined.
Can kids help make these?
Definitely.
Children enjoy filling the cups, adding the colorful drinks, topping them with whipped cream, placing the cherry on top, and inserting the mini popsicle.
It’s an easy recipe that makes summer memories in the kitchen.
What if I don’t have clear cups?
Any serving cups will work, but clear cups showcase the beautiful red, white, and blue layers, making the dessert even more eye-catching.
Final Thoughts
These Berry Blast Cherry Limeade Shaved Ice Cups are everything a summer dessert should be—bright, colorful, refreshing, and incredibly easy to make. The fluffy shaved ice, fruity cherry and berry flavors, tangy limeade, and creamy whipped topping come together to create a frozen treat that’s both fun and delicious.
They’re perfect for serving at Fourth of July celebrations, family cookouts, pool parties, or any gathering where you want a dessert that’s quick to prepare and guaranteed to impress. Because they’re made in individual cups, they’re easy to serve, easy to customize, and ideal for guests of all ages.
Whether you’re making a few cups for your family or preparing a full shaved ice bar for a crowd, this recipe is sure to become one of your favorite summer traditions. Keep the ingredients on hand all season long, and you’ll always be just minutes away from a cool, festive dessert that’s as beautiful as it is refreshing.
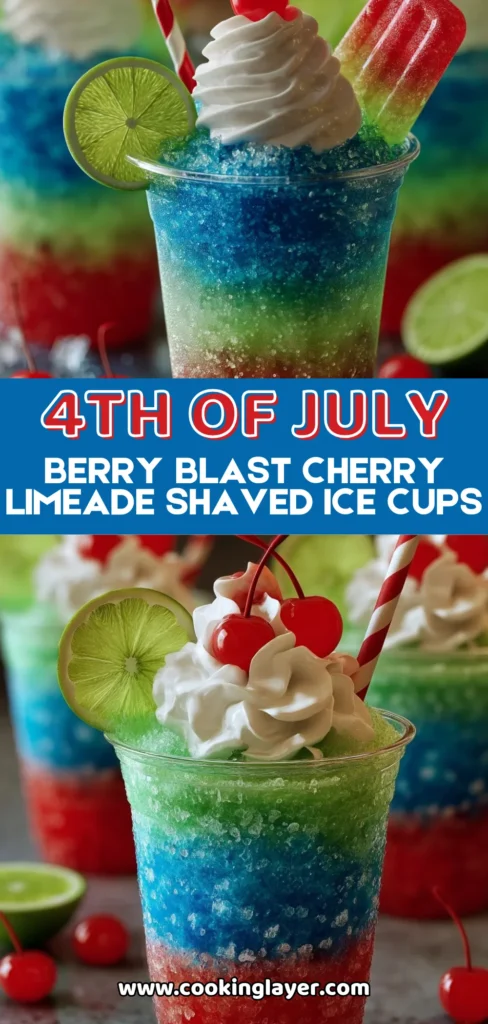
Berry Blast Cherry Limeade Shaved Ice Cups
Description
Nothing says summer quite like a cold, colorful frozen treat, and these Berry Blast Cherry Limeade Shaved Ice Cups are the ultimate way to cool off on a hot day. Made with fluffy shaved ice, sweet cherry drink, tangy limeade, a bright blue berry layer, whipped cream, juicy maraschino cherries, and a mini Bomb Pop-style popsicle, these festive cups are guaranteed to be the highlight of any summer celebration.
Ingredients
Shaved Ice
- 4 cups fluffy shaved ice
Drinks
- 1 cup cherry-flavored drink (such as Hawaiian Punch)
- 1 cup limeade or lemon-lime soda
- 1 cup blue Gatorade or blue raspberry drink
Toppings
- 2 cups whipped cream
- 12 maraschino cherries
- 12 mini cherry or Bomb Pop-style popsicles
Instructions
Using a shaved ice machine or finely crushed ice, prepare 4 cups of fluffy shaved ice. The ice should have a light, snow-like texture for the best results.
Arrange 12 clear serving cups on a work surface.
Fill each cup almost to the top with shaved ice, packing it lightly without compressing it too much. Keeping the ice fluffy allows it to absorb the colorful flavors while maintaining its soft texture.
Slowly pour the cherry-flavored drink over one side of each cup, allowing it to soak naturally into the shaved ice.
Carefully pour the limeade or lemon-lime soda down the center of each cup to create a bright green layer.
Pour the blue Gatorade or blue raspberry drink over the remaining side of the shaved ice to complete the colorful red, white, and blue effect.
Top each shaved ice cup with a generous swirl of whipped cream.
Place one maraschino cherry on top of the whipped cream.
Insert one mini cherry or Bomb Pop-style popsicle into each cup just before serving.
Serve immediately while the shaved ice is cold and fluffy.
As the colorful layers begin to melt together, stir everything with a spoon to create a delicious berry-lime slush.
Notes
- Use a shaved ice machine for the lightest, fluffiest texture.
- Clear cups beautifully showcase the colorful layers.
- Add the whipped cream and popsicle just before serving so they stay fresh.
- Freeze the serving cups for 10–15 minutes before filling to help keep the shaved ice cold longer.
- Try different flavored drinks to create your own colorful combinations.