
What Makes Chocolate Tiramisu Mousse Cake Irresistible
There’s something undeniably luxurious about a dessert that combines tiramisu and chocolate mousse into one layered creation. It takes everything people love about classic tiramisu—the espresso-soaked ladyfingers, the creamy mascarpone—and elevates it with rich, velvety chocolate. The result? A dessert that feels indulgent, elegant, and surprisingly approachable all at once.
This cake stands out because it doesn’t rely on baking to impress. Instead, it focuses on layering textures and flavors: soft coffee-infused base, airy chocolate mousse, and a smooth mascarpone cream layer. Each bite delivers contrast—bitterness from espresso, sweetness from cream, and depth from chocolate—all working together without overpowering each other.
Save this recipe and cook smarter
Keep your favorite Cooking Layer recipes in one place, plan your weekly meals, and quickly find dinner ideas whenever you need them.
Free to download • Fast and easy to use
It’s also the kind of dessert that feels special. Whether you’re making it for a celebration or just want something that looks like it came straight from a high-end bakery, this cake delivers that “wow” factor without requiring complicated techniques.
The Classic Tiramisu Inspiration
Traditional tiramisu is known for its simplicity and balance. It’s not overly sweet, and it leans heavily on the combination of espresso and mascarpone to create its signature flavor. This mousse cake keeps that foundation but builds on it, adding more structure and richness.
The ladyfingers still serve as the base, absorbing coffee and providing that soft, cake-like texture. But instead of repeating layers, this version introduces mousse and cream layers that give it a more modern, refined feel.

A Rich Chocolate Twist on Tradition
Adding chocolate transforms the entire experience. It deepens the flavor, making the dessert feel more indulgent while still keeping the original tiramisu identity intact. The chocolate mousse layer brings a silky, melt-in-your-mouth quality that contrasts beautifully with the mascarpone cream.
It’s like taking a familiar dessert and giving it a bold upgrade—one that chocolate lovers will appreciate immediately.
Ingredients Breakdown and Flavor Harmony
Each ingredient in this recipe plays a specific role, and understanding how they interact helps you create a perfectly balanced dessert.
Ladyfingers and Espresso Base Explained
The base is built from ladyfingers (savoiardi) dipped in sweetened espresso. These sponge-like cookies absorb liquid quickly, creating a soft yet structured foundation.
The key is a quick dip—just enough to soak in flavor without becoming soggy. The added sugar in the espresso balances the bitterness, ensuring the base complements rather than dominates the other layers.
Smooth and Airy Chocolate Mousse Layer
The chocolate mousse is where richness comes in. Made with semi-sweet chocolate and whipped cream, it strikes a balance between deep cocoa flavor and light texture.
Folding is crucial here. You want to combine the melted chocolate with whipped cream gently to maintain that airy consistency. Done right, the mousse feels light but still delivers a strong chocolate presence.
Creamy Mascarpone Layer Essentials
The mascarpone layer adds a creamy, slightly tangy contrast to the chocolate. Mascarpone cheese, powdered sugar, and whipped cream create a smooth, luxurious texture that balances the richness of the mousse.
It’s softer than cheesecake but more structured than whipped cream alone, making it perfect for layering.
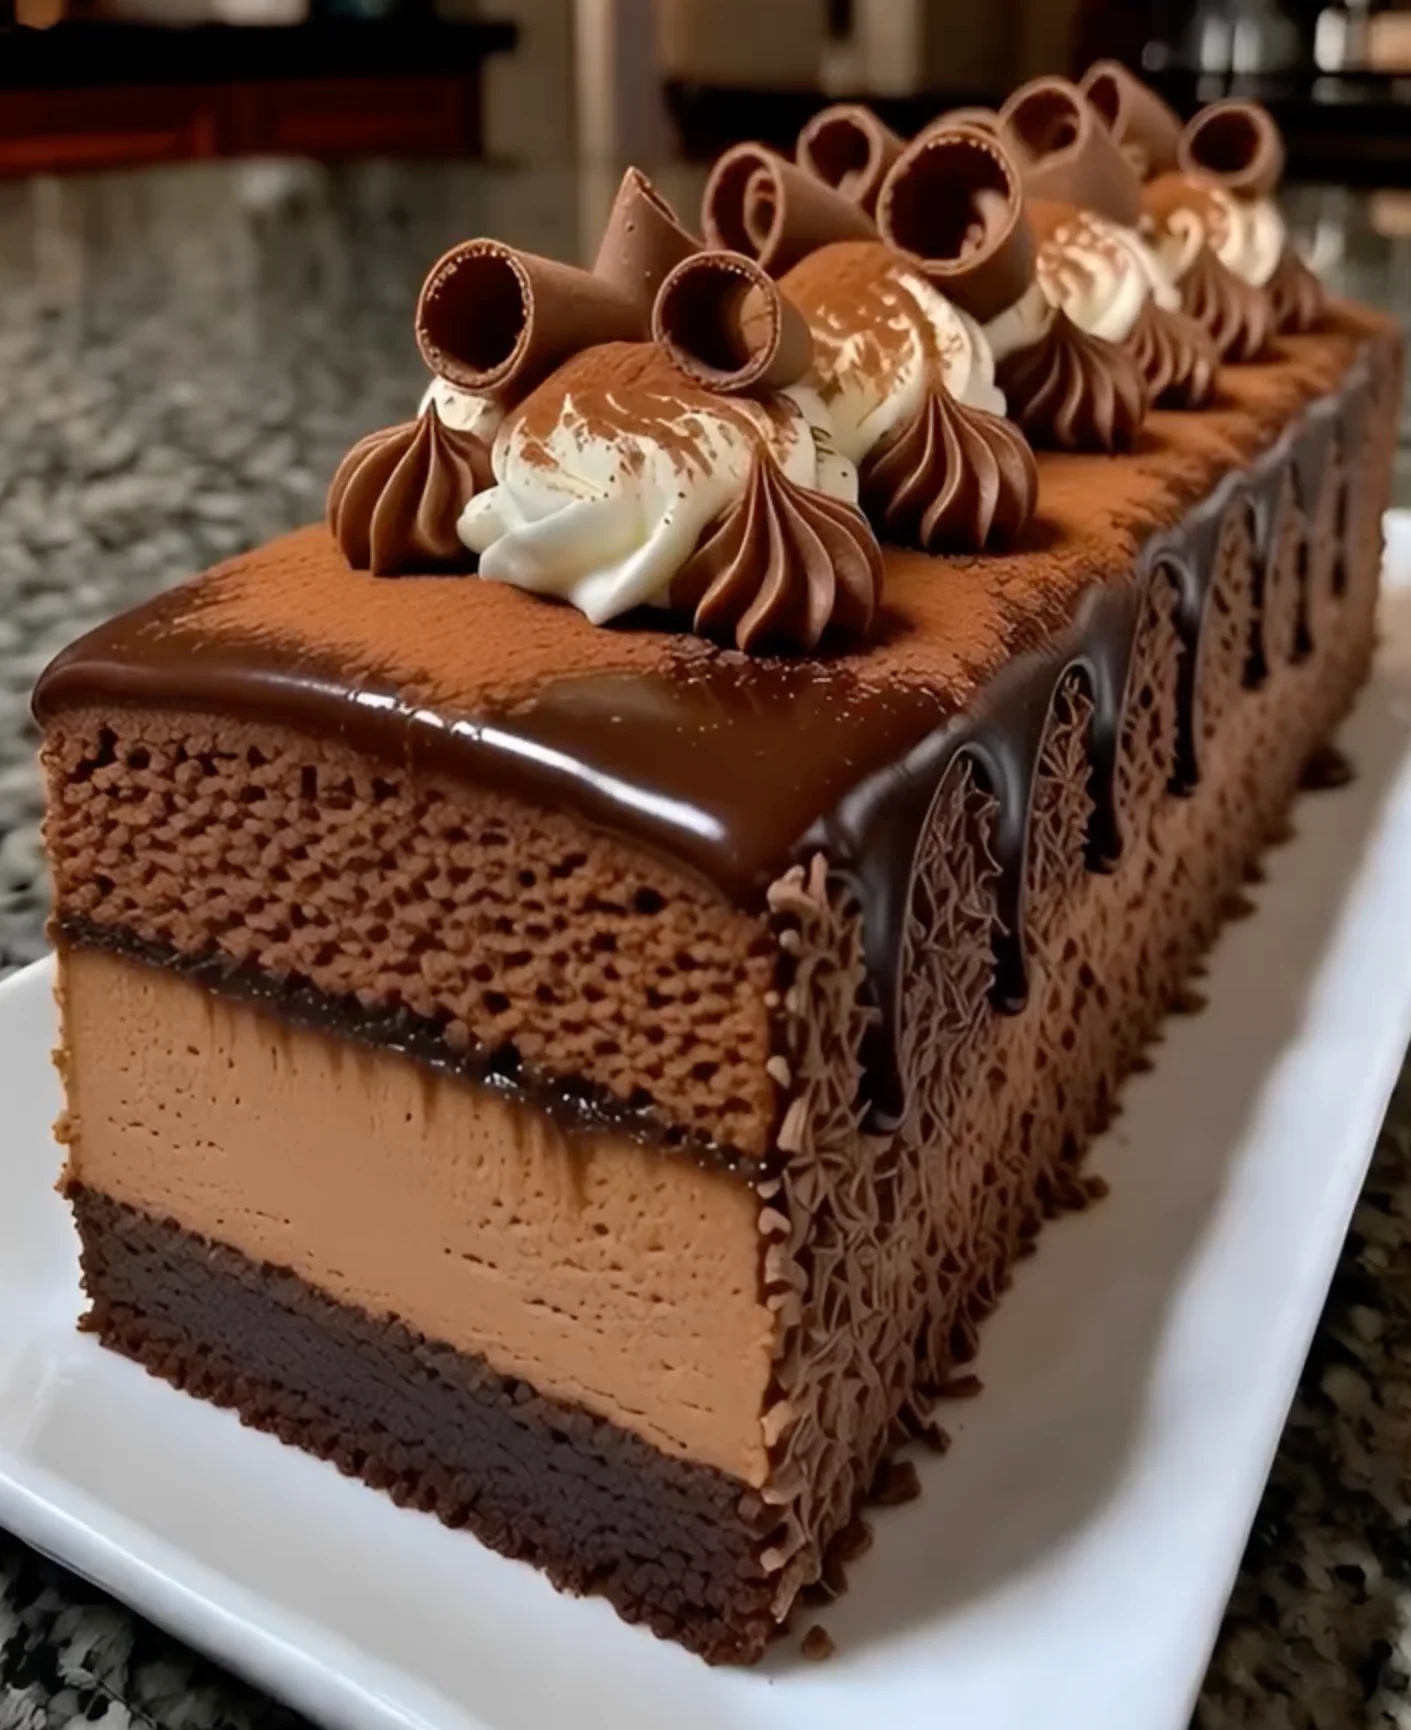
Cocoa Dust and Chocolate Curls Finish
The topping might seem simple, but it’s essential. A dusting of unsweetened cocoa powder adds a slightly bitter edge that cuts through the sweetness, while chocolate curls provide both texture and visual appeal.
Essential Tools for a Perfect Mousse Cake
Must-Have Equipment
A springform pan is essential for clean layering and easy removal. You’ll also need mixing bowls, a hand or stand mixer, and a spatula for folding.
Optional Tools for a Professional Finish
A fine mesh sieve for cocoa dusting and a vegetable peeler for chocolate curls can elevate the presentation significantly.
Step-by-Step Chocolate Tiramisu Mousse Cake Recipe
Preparing the Espresso-Soaked Base
Mix espresso with sugar and dip each ladyfinger briefly. Arrange them tightly in the pan to form a solid base.
Making the Chocolate Mousse
Whip cream to soft peaks, then gently fold in melted chocolate, sugar, and vanilla. Keep the mixture light and airy.
Creating the Mascarpone Cream Layer
Beat mascarpone until smooth, add sugar and vanilla, then fold in whipped cream. The result should be fluffy and spreadable.
Assembling and Chilling the Cake
Layer the chocolate mousse over the base, followed by the mascarpone cream. Smooth the top and chill until fully set.
Decorating with Cocoa Dust and Chocolate Curls
Finish with a generous dusting of cocoa powder and top with chocolate curls for an elegant touch.
Pro Tips for the Best Texture and Flavor
Getting this Chocolate Tiramisu Mousse Cake just right isn’t about complicated techniques—it’s about precision and restraint. Each layer has its own personality, and the goal is to let them shine without overpowering one another. When done correctly, the final result feels light yet indulgent, rich yet balanced.
Balancing Coffee and Chocolate Notes
One of the biggest challenges in this dessert is making sure the espresso and chocolate complement each other rather than compete. Espresso has a naturally bold, slightly bitter profile, while chocolate—especially semi-sweet—adds depth and richness. If either one dominates, the dessert can feel off-balance.
The trick is in the soaking process. When dipping the ladyfingers, think quick dip, not soak. A second or two is enough to infuse flavor without making them overly wet. Over-soaked ladyfingers can turn mushy and overpower the texture of the cake.
Also, taste your espresso before using it. If it’s too bitter, add a touch more sugar. If it’s too weak, brew it stronger. This small adjustment can completely change how the base interacts with the mousse and mascarpone layers.
Keeping Layers Light and Stable
The beauty of this cake lies in its airy texture. Both the chocolate mousse and mascarpone cream rely on whipped cream to achieve that lightness. But here’s the catch—overmixing can ruin it instantly.
When folding whipped cream into either mixture, use slow, gentle motions. Think of it like folding a delicate fabric rather than stirring a batter. This preserves the air bubbles that give the mousse its signature lightness.
Temperature also plays a role. Make sure your melted chocolate is slightly cooled before folding it in. If it’s too hot, it will deflate the whipped cream, resulting in a dense, heavy mousse.
Chilling time is your best friend here. Letting the cake set properly ensures clean layers and a stable structure. It might be tempting to cut into it early, but patience pays off with a much better texture.
Common Mistakes and How to Avoid Them
Even though this is a no-bake dessert, there are still a few common mistakes that can affect the final outcome. The good news? They’re all easy to fix once you know what to look for.
Soggy Ladyfingers or Runny Layers
Soggy ladyfingers are probably the most common issue. This happens when they’re soaked too long in espresso. Instead of forming a soft base, they break down and create a mushy layer.
To avoid this, dip quickly and place them immediately in the pan. If you’re unsure, it’s better to under-soak than over-soak—you can always brush a little extra coffee on top if needed.
Runny layers usually come from under-whipped cream or overmixing. Make sure your cream reaches soft peaks before folding, and stop mixing as soon as everything is combined.
Overmixing and Dense Texture
Overmixing is the silent killer of mousse desserts. It flattens the whipped cream and removes the air that gives the cake its light texture.
If your mousse or mascarpone layer feels heavy instead of fluffy, overmixing is likely the cause. The solution is simple: mix less, and fold gently.
Variations and Creative Twists
Once you’ve mastered the classic version, there’s plenty of room to experiment. This dessert is incredibly flexible, and small changes can create entirely new flavor profiles.
Alcohol-Infused Tiramisu Version
For a more traditional tiramisu flavor, you can add a splash of coffee liqueur, rum, or amaretto to the espresso. It enhances the depth and gives the dessert a more complex, slightly grown-up flavor.
Just be careful not to overdo it—a little goes a long way.
Dark Chocolate or White Chocolate Variations
Switching the type of chocolate can completely change the character of the cake. Dark chocolate creates a more intense, slightly bitter profile, while white chocolate results in a sweeter, creamier version.
You can even do a combination—layering different types of chocolate for a more dynamic flavor experience.
Serving and Presentation Ideas
Presentation is where this cake truly shines. With its smooth layers and rich topping, it already looks elegant—but a few small touches can elevate it even more.
Elegant Plating and Garnishing Tips
Use a fine sieve to dust cocoa powder evenly across the top. This creates that classic tiramisu look while adding a subtle bitterness that balances the sweetness.
For chocolate curls, use a vegetable peeler on a bar of dark chocolate. The curls don’t have to be perfect—in fact, slightly irregular shapes often look more natural and appealing.
When slicing, use a warm knife and wipe it clean between cuts. This keeps the layers neat and prevents smudging.
Storage, Shelf Life, and Make-Ahead Tips
This dessert is perfect for making ahead, which makes it ideal for gatherings or special occasions.
Refrigeration and Freezing Guidelines
Store the cake in the refrigerator, covered, for up to 3–4 days. The flavors actually deepen over time, making it even more delicious the next day.
If you need to freeze it, wrap it tightly and store for up to a month. Thaw in the refrigerator overnight before serving. For best results, add cocoa dust and chocolate curls after thawing.
Conclusion
Chocolate Tiramisu Mousse Cake is the kind of dessert that feels both classic and modern at the same time. It takes the familiar flavors of tiramisu and elevates them with rich chocolate and a lighter, mousse-like texture that feels indulgent without being overwhelming.
What makes it truly special is how each layer contributes something unique—coffee-soaked base, airy chocolate mousse, and creamy mascarpone—all coming together in perfect balance. It’s a dessert that looks impressive, tastes incredible, and doesn’t require complicated baking techniques to pull off.
Once you make it, it’s the kind of recipe that sticks with you—one you’ll come back to whenever you want something that feels a little extra special.
FAQs
1. Can I make this cake without coffee?
Yes, you can substitute espresso with hot chocolate or milk for a milder flavor.
2. How long should I chill the cake?
At least 4 hours, but overnight is best for structure and flavor.
3. Can I use cream cheese instead of mascarpone?
Yes, but the flavor will be slightly tangier and less rich.
4. Why is my mousse too dense?
This usually happens from overmixing or using chocolate that’s too hot when folding.
5. Can I make this in advance for a party?
Absolutely—it’s one of the best make-ahead desserts.
Print
Chocolate Tiramisu Mousse Cake with Cocoa Dust & Chocolate Curls
Description
This Chocolate Tiramisu Mousse Cake is a dreamy twist on the classic Italian dessert! Layers of espresso-soaked goodness, silky chocolate mousse, and airy mascarpone cream come together in one elegant, no-bake-style masterpiece. Finished with a dusting of cocoa and delicate chocolate curls, it’s rich yet light, bold yet creamy—perfect for chocolate lovers and coffee fans alike!
Ingredients
🍰 Base Layer:
- 24 ladyfingers (savoiardi)
- 1 cup strong brewed espresso (cooled)
- 2 tablespoons sugar
🍫 Chocolate Mousse:
- 1 ½ cups heavy cream
- 8 oz semi-sweet chocolate, melted and slightly cooled
- 2 tablespoons powdered sugar
- ½ teaspoon vanilla extract
🧁 Mascarpone Cream Layer:
- 8 oz mascarpone cheese
- ½ cup powdered sugar
- 1 teaspoon vanilla extract
- 1 cup heavy cream (whipped)
🍫 Topping:
- Unsweetened cocoa powder (for dusting)
- Dark chocolate curls or shavings
Instructions
1️⃣ Prepare the Base
Mix espresso with sugar.
Quickly dip each ladyfinger into the coffee (don’t soak too long).
Arrange them tightly in the bottom of a springform pan.
2️⃣ Make the Chocolate Mousse
Whip heavy cream with powdered sugar and vanilla to soft peaks.
Gently fold in melted chocolate until smooth and airy.
3️⃣ Prepare the Mascarpone Layer
Beat mascarpone with powdered sugar and vanilla until creamy.
Fold in whipped cream to create a light, fluffy texture.
4️⃣ Assemble the Cake
- Spread chocolate mousse over the ladyfinger base
- Add mascarpone cream layer on top and smooth evenly
Chill for 3–4 hours until set.
5️⃣ Final Touch
Dust the top generously with cocoa powder.
Add chocolate curls for an elegant finish.
Enjoyed this recipe?
Discover more delicious recipes, save your favorites, and plan your meals with the Cooking Layer app.
Free to download • Fast and easy to use


