Some desserts don’t come from glossy cookbooks or fancy kitchens. They come from small tables, worn baking dishes, and families making the best of what they had. Hillbilly Pie—often called Old-Fashioned Poor Man’s Cherry Pie—is exactly that kind of dessert. It’s humble, practical, and deeply comforting, yet somehow manages to taste rich and indulgent every single time.
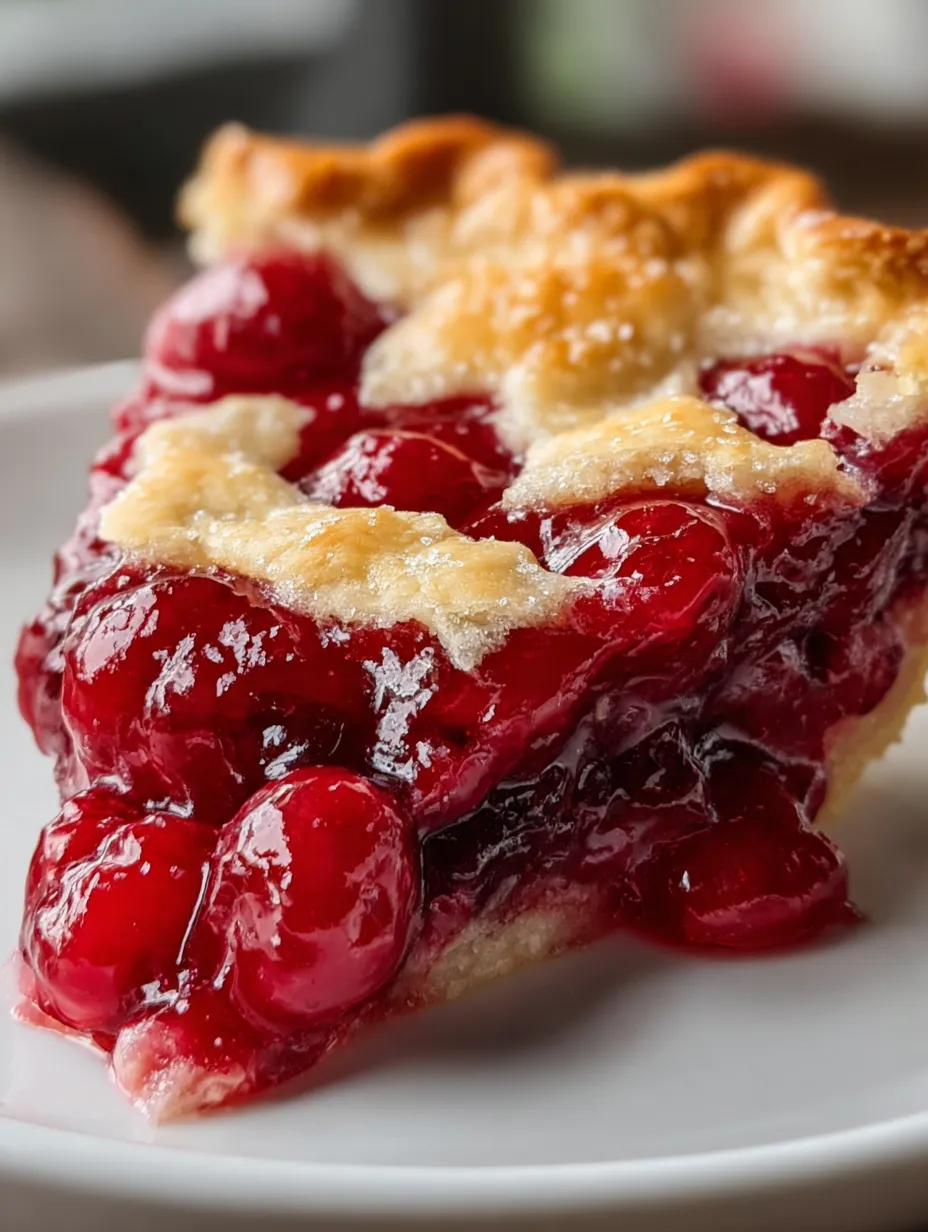
This isn’t a towering double-crust pie with elaborate lattice work. It’s a simple, rustic cherry pie baked in a square dish, with a flaky bottom crust, a thick layer of jammy cherries, and a golden topping that looks like it melted gently over the fruit. One look at the finished slice—like the image you shared—with cherries glistening and slightly spilling at the edges, and you already know what it’s going to taste like: warm, sweet, buttery, and familiar.
Save this recipe and cook smarter
Keep your favorite Cooking Layer recipes in one place, plan your weekly meals, and quickly find dinner ideas whenever you need them.
Free to download • Fast and easy to use
This article walks you through everything about this pie—where it comes from, why it works so well, how to make it perfectly, and how to ensure your final result looks and slices exactly like the photo.
A Dessert Born From Hard Times and Full Hearts
Hillbilly Pie didn’t come from a test kitchen. It came from necessity. In times when money was tight, ingredients were stretched, and nothing went to waste, home cooks learned how to turn simple pantry staples into something special. Flour, butter, canned fruit, sugar, and milk were affordable and dependable, and that’s exactly what this pie is built on.
Instead of making two full pastry crusts—which requires more butter, more time, and more effort—this recipe uses one traditional bottom crust and a simple batter-style topping. That topping bakes into a soft, golden layer that sits right on top of the cherries, soaking up their juices while still developing a lightly crisp surface.
The result feels generous without being expensive. It feeds a crowd, cuts cleanly into neat squares, and tastes like something passed down rather than invented. That’s why so many people remember a version of this pie from childhood kitchens, church suppers, or handwritten recipe cards tucked into old cookbooks.
Why This Pie Still Matters Today
In a world full of elaborate desserts, Hillbilly Pie still earns its place. Why? Because it delivers comfort without complication. You don’t need special equipment. You don’t need rare ingredients. And you don’t need to worry about perfection.
This pie fits modern life just as well as it fit kitchens decades ago. It’s:
- Easy to make after a long day
- Affordable when grocery prices feel overwhelming
- Perfect for casual gatherings and holidays alike
- Familiar enough to feel nostalgic, but good enough to impress
And maybe most importantly, it reminds us that food doesn’t have to be fancy to be meaningful. Sometimes the best desserts are the ones that feel like home.
Looking Closely at the Finished Pie (Matching the Image)
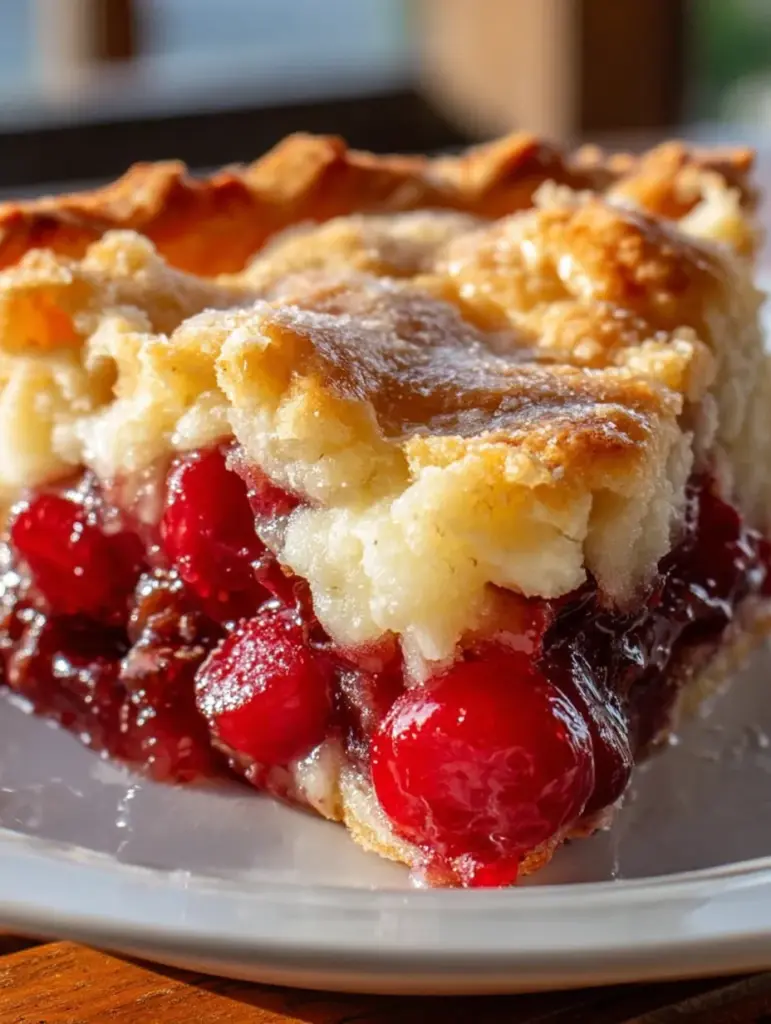
The image you shared tells us exactly what this pie should look like when done right. The bottom crust is pale golden and sturdy, not soggy. The cherry filling is thick, glossy, and packed with whole cherries that hold their shape. The top layer is golden with slightly darker peaks, where the batter puffed and caramelized.
You’ll notice something important in the photo: the topping isn’t spread smooth. It settled naturally, creating soft waves and pockets where the cherries peek through. That’s a hallmark of this pie. Trying to smooth the topping too much would actually work against the rustic look you want.
When sliced, the layers are clearly defined:
- A firm but tender bottom crust
- A jammy cherry center that doesn’t run everywhere
- A soft, buttery top that lightly cracks under a fork
This recipe and method are adjusted specifically to achieve that exact result.
What Makes Hillbilly Pie Different From Classic Cherry Pie
At first glance, you might think this is just a shortcut cherry pie—but it’s more than that. Traditional cherry pie uses a full pastry top crust, which can sometimes overpower the fruit or require careful venting and sealing.
Hillbilly Pie does things differently:
- Only one rolled crust on the bottom
- A batter-style topping instead of pastry
- Baked in a square dish, not a pie plate
- Thicker, more stable filling
The topping behaves almost like a soft cobbler meets cake, but it stays thinner and denser than a typical cobbler. It absorbs just enough cherry juice to stay moist without becoming gummy. That balance is what makes each bite so satisfying.
Simple Ingredients, Big Comfort
One of the best things about this pie is how accessible the ingredients are. Everything used here is familiar and easy to find.
Pantry Staples Explained
- All-purpose flour forms both the crust and the topping
- Butter brings richness and flavor—cold for the crust, melted for the topping
- Sugar sweetens the topping and balances the tart cherries
- Milk creates a pourable batter
- Cherry pie filling keeps things easy and consistent
- Cornstarch ensures the filling sets properly
There’s nothing fancy here, and that’s exactly the point. The magic comes from how these simple ingredients work together in layers.
The Bottom Crust: Old-Fashioned, Flaky, and Practical
The bottom crust is a classic butter crust, pressed directly into an 8×8-inch baking dish. No rolling pin required if you don’t want one. Pressing the dough evenly gives you a sturdy base that holds up under the cherries.
Cold butter is key. As it melts in the oven, it creates steam pockets that make the crust flaky. The small amount of ice water brings the dough together without making it tough.
Why Blind Baking Matters
Blind baking the crust for 10 minutes before adding the filling is non-negotiable if you want a result like the image. This step:
- Sets the crust structure
- Prevents sogginess
- Helps the bottom stay light golden
Skipping this step almost guarantees a soft, underbaked base.
The Cherry Filling: Jammy, Glossy, and Sliceable
Canned cherry pie filling may seem simple, but a small adjustment makes all the difference. Stirring in one tablespoon of cornstarch thickens the filling just enough so it sets beautifully as it cools.
This is why the slices in the image hold their shape instead of spilling everywhere. The cherries remain whole, suspended in a thick, glossy sauce that looks as good as it tastes.
When spooning the filling onto the crust, spread it evenly, but don’t press it down. Let it sit naturally so the topping can settle into it later.
The Signature Top Layer: Not Quite a Crust, Not Quite a Cake
This topping is what truly defines Hillbilly Pie. Made from flour, sugar, baking powder, milk, and melted butter, it pours easily over the cherries.
It’s important that the batter is thick but pourable. If it’s too thin, it will sink completely. If it’s too thick, it won’t spread naturally. When done right, it gently floats and settles, creating that rustic look seen in the photo.
As it bakes, the top turns golden, the edges caramelize, and the cherries bubble up in places, creating those irresistible pockets of red against gold.
How This Pie Bakes Into That Golden, Rustic Look
Baking uncovered at 350°F allows moisture to escape while the topping browns. Around the 30-minute mark, you’ll see the cherries bubbling at the edges. By 40–45 minutes, the top should be deeply golden with a slight sheen from butter and sugar.
If your oven runs hot, you can loosely tent with foil during the last 10 minutes, but most ovens handle this just fine uncovered.
Step-by-Step Recipe Walkthrough (With Helpful Tips)
Ingredients
For the Bottom Crust
- 1 ½ cups all-purpose flour
- ½ teaspoon salt
- ½ cup unsalted butter, cold and cubed
- 3–4 tablespoons ice water
For the Filling
- 1 can (21 oz) cherry pie filling
- 1 tablespoon cornstarch
For the Top Crust
- 1 cup all-purpose flour
- ½ cup granulated sugar
- ½ teaspoon baking powder
- ½ cup milk
- ½ cup unsalted butter, melted
Instructions
- Mix flour and salt, cut in cold butter until crumbly.
- Add ice water gradually until dough just comes together.
- Press into an 8×8-inch baking dish and chill 15 minutes.
- Preheat oven to 350°F (175°C).
- Blind bake crust for 10 minutes.
- Stir cornstarch into cherry pie filling and spoon over crust.
- Whisk topping ingredients until smooth and pourable.
- Gently pour topping over cherries without spreading.
- Bake 40–45 minutes until golden and bubbling.
- Cool at least 30 minutes before slicing.
Common Mistakes and How to Avoid Them
- Skipping the blind bake → soggy crust
- Overmixing the topping → dense texture
- Cutting too soon → filling won’t set
- Spreading the topping → unnatural, flat look
Letting the pie rest is just as important as baking it.
Serving This Pie the Old-Time Way
Serve warm or at room temperature. A scoop of vanilla ice cream or a spoonful of whipped cream is classic, but honestly, this pie holds its own without anything extra.
It’s the kind of dessert you set on the table and let people help themselves—no fuss, no ceremony.
Storage, Make-Ahead, and Freezing Tips
- Store covered at room temperature for 24 hours
- Refrigerate up to 4 days
- Freeze baked and cooled pie up to 2 months
Reheat gently to bring back that fresh-baked feel.
Print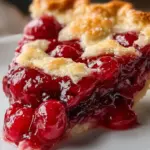
Hillbilly Pie (Old-Fashioned Poor Man’s Cherry Pie)
- Prep Time: 25 minutes
- Cook Time: 55 minutes
- Total Time: 1 hour 50 minutes
- Category: Desserts • Pies & Cobblers • Old-Fashioned Baking
Description
🥧🍒 This humble, old-fashioned cherry pie comes straight from generations of home kitchens where love mattered more than fancy ingredients. With a flaky bottom crust, jammy cherries, and a soft golden topping, it’s the kind of dessert that feels like a warm memory baked into every bite ✨🤍
Ingredients
1½ cups all-purpose flour
½ teaspoon salt
½ cup unsalted butter, cold and cubed
3–4 tablespoons ice water
1 can (21 oz) cherry pie filling (with whole cherries)
1 tablespoon cornstarch
1 cup all-purpose flour
½ cup granulated sugar
½ teaspoon baking powder
½ cup milk
½ cup unsalted butter, melted
Instructions
In a bowl, mix 1½ cups flour with salt. Cut in the cold butter until crumbly, then add ice water one tablespoon at a time until the dough just comes together. Press evenly into an 8×8-inch baking dish and chill. (15 minutes ⏱️)
Preheat the oven to 350°F (175°C) while the crust chills. (5 minutes ⏱️)
Bake the chilled crust just until set but not browned, keeping it sturdy and flake-filled. (10 minutes ⏱️)
Stir the cornstarch into the cherry pie filling until smooth and glossy, then spoon evenly over the warm crust. (5 minutes ⏱️)
In a bowl, whisk together 1 cup flour, sugar, and baking powder. Stir in the milk, then the melted butter, creating a thick but pourable batter. (5 minutes ⏱️)
Gently pour the batter over the cherries, letting it settle naturally into rustic waves without spreading too much. (3 minutes ⏱️)
Bake uncovered until the topping is deeply golden and the cherries are bubbling around the edges. (40–45 minutes ⏱️)
Let the pie rest so it finishes setting and slices cleanly, revealing those beautiful layers. (30 minutes ⏱️)
Notes
Let the pie cool before slicing so the cherry filling sets beautifully 🍒
This dessert tastes even better the next day as the flavors deepen
Serve warm with vanilla ice cream or whipped cream for extra comfort 🥧
Store covered at room temperature for 1 day or refrigerate up to 4 days
Perfect for potlucks, holidays, and nostalgic family gatherings ✨
Nutrition
- Serving Size: 9 servings
- Calories: ~390 kcal
Variations That Still Respect the Original
- Swap cherry filling for apple or blueberry
- Add a pinch of cinnamon to the topping
- Use half-and-half instead of milk for richness
Keep it simple, and it stays true to its roots.
You may like as well :
Cherry Cheesecake Crescent Muffins – A Bakery-Style Dream
Maraschino Cherry Sugar Cookies 🍒 – A Buttery Holiday Classic That Steals Hearts!
Why This Pie Always Disappears First at Gatherings
Because it feels familiar. Because it’s easy to eat. Because it tastes like something someone’s grandmother used to make. People don’t just eat this pie—they connect to it.
Conclusion
Hillbilly Pie proves that simplicity can be powerful. With a flaky bottom crust, jammy cherry filling, and golden topping, it delivers everything a good dessert should. It looks like the image, slices beautifully, and tastes even better the next day. This is the kind of recipe you keep, share, and make again and again.
Similar recipes :
Christmas Cherry Bombs – A Festive No-Bake Delight
Cherries in the Snow
FAQs
1. Can I use homemade cherry filling?
Yes, just make sure it’s thick enough to set.
2. Why is my topping sinking?
The batter may be too thin or overmixed.
3. Can I use a different pan size?
An 8×8-inch dish works best for proper layering.
4. Should I refrigerate leftovers?
Yes, after the first day.
5. Can I double this recipe?
Absolutely—use a 9×13-inch pan.
Enjoyed this recipe?
Discover more delicious recipes, save your favorites, and plan your meals with the Cooking Layer app.
Free to download • Fast and easy to use