
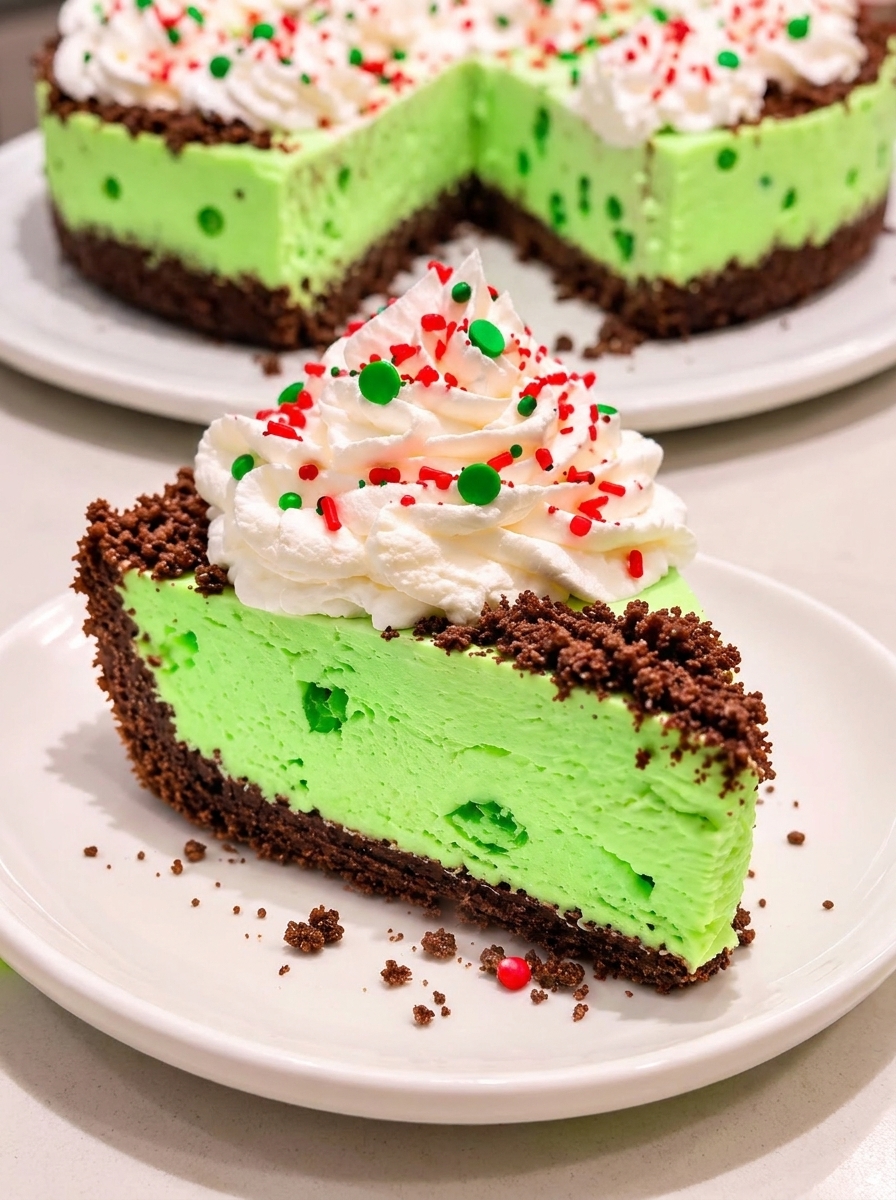
Introduction to No-Bake Grinch Christmas Cheesecake
This No-Bake Grinch Christmas Cheesecake is a delightful holiday treat that brings cheer to any gathering. Its vibrant green color will make your dessert table pop, making it impossible to resist. As a busy mom myself, I know how precious time is during the holiday season. This cheesecake is not only easy to whip up, but it also saves precious oven space for other dishes. Whether you’re hosting a party or just celebrating with family, this fun and festive cheesecake is sure to be a hit. Trust me, it’s a true crowd-pleaser!
Why You’ll Love This No-Bake Grinch Christmas Cheesecake
This No-Bake Grinch Christmas Cheesecake is a gift that keeps on giving! Its cheerful, vibrant green hue brings the holiday spirit right into your home, instantly brightening the room. Plus, being a no-bake dessert means there’s no heat involved, saving you time and energy. With its light, creamy texture, this cheesecake feels indulgent without the fuss, making it the perfect solution for busy moms seeking festive yet simple dessert ideas!
Ingredients for No-Bake Grinch Christmas Cheesecake
Gathering the right ingredients is key to crafting this holiday masterpiece. For the base, you’ll need finely crushed Oreo cookies, adding that classic chocolate flavor and crunch. Mix in some melted unsalted butter for richness, helping to bind the crust together.
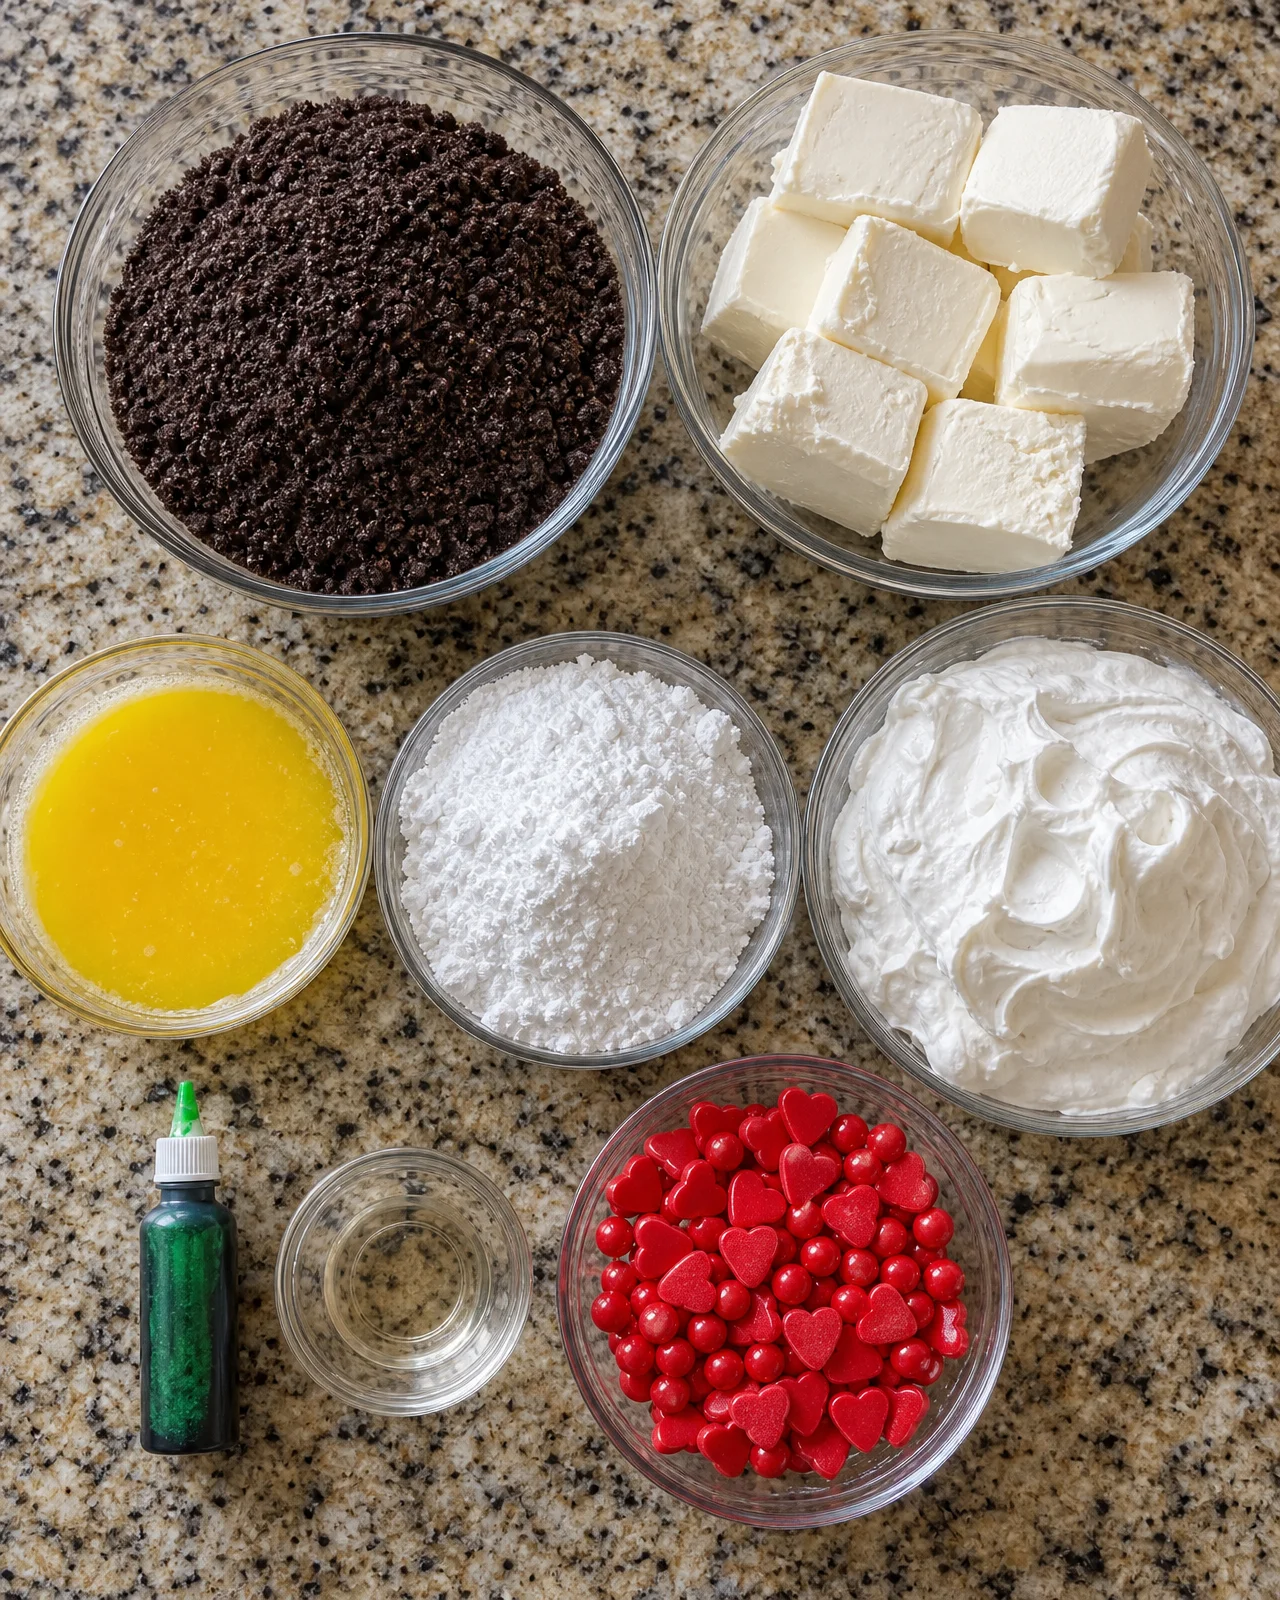
The creamy filling comes to life with softened cream cheese, which creates a luscious texture, balanced by the sweetness of powdered sugar. For a fluffy finish, don’t forget Cool Whip, which adds airiness to the cheesecake.
To transform it into a Grinch-inspired delight, a few drops of neon green gel food coloring are essential. If you enjoy a hint of mint, consider adding mint extract for a festive touch. Finally, sprinkle on some red heart decorations or candies for that special Grinch touch!
How to Make No-Bake Grinch Christmas Cheesecake
Creating this delightful No-Bake Grinch Christmas Cheesecake is an effortless journey filled with fun and flavor. I’m excited to share each step with you, ensuring that your dessert not only looks festive but tastes amazing too! Remember, this cheesecake is all about ease and celebration, so gather your ingredients and let’s get started.
Step 1: Prepare the Crust
First things first, let’s get that crust ready! In a large mixing bowl, combine your finely crushed Oreo cookies with the melted unsalted butter. I find that crushing the Oreos in a zip-top bag works wonders. Just grab a rolling pin and have at it. The idea is to break them down into fine crumbs, which create a rich, chocolaty base for the cheesecake.
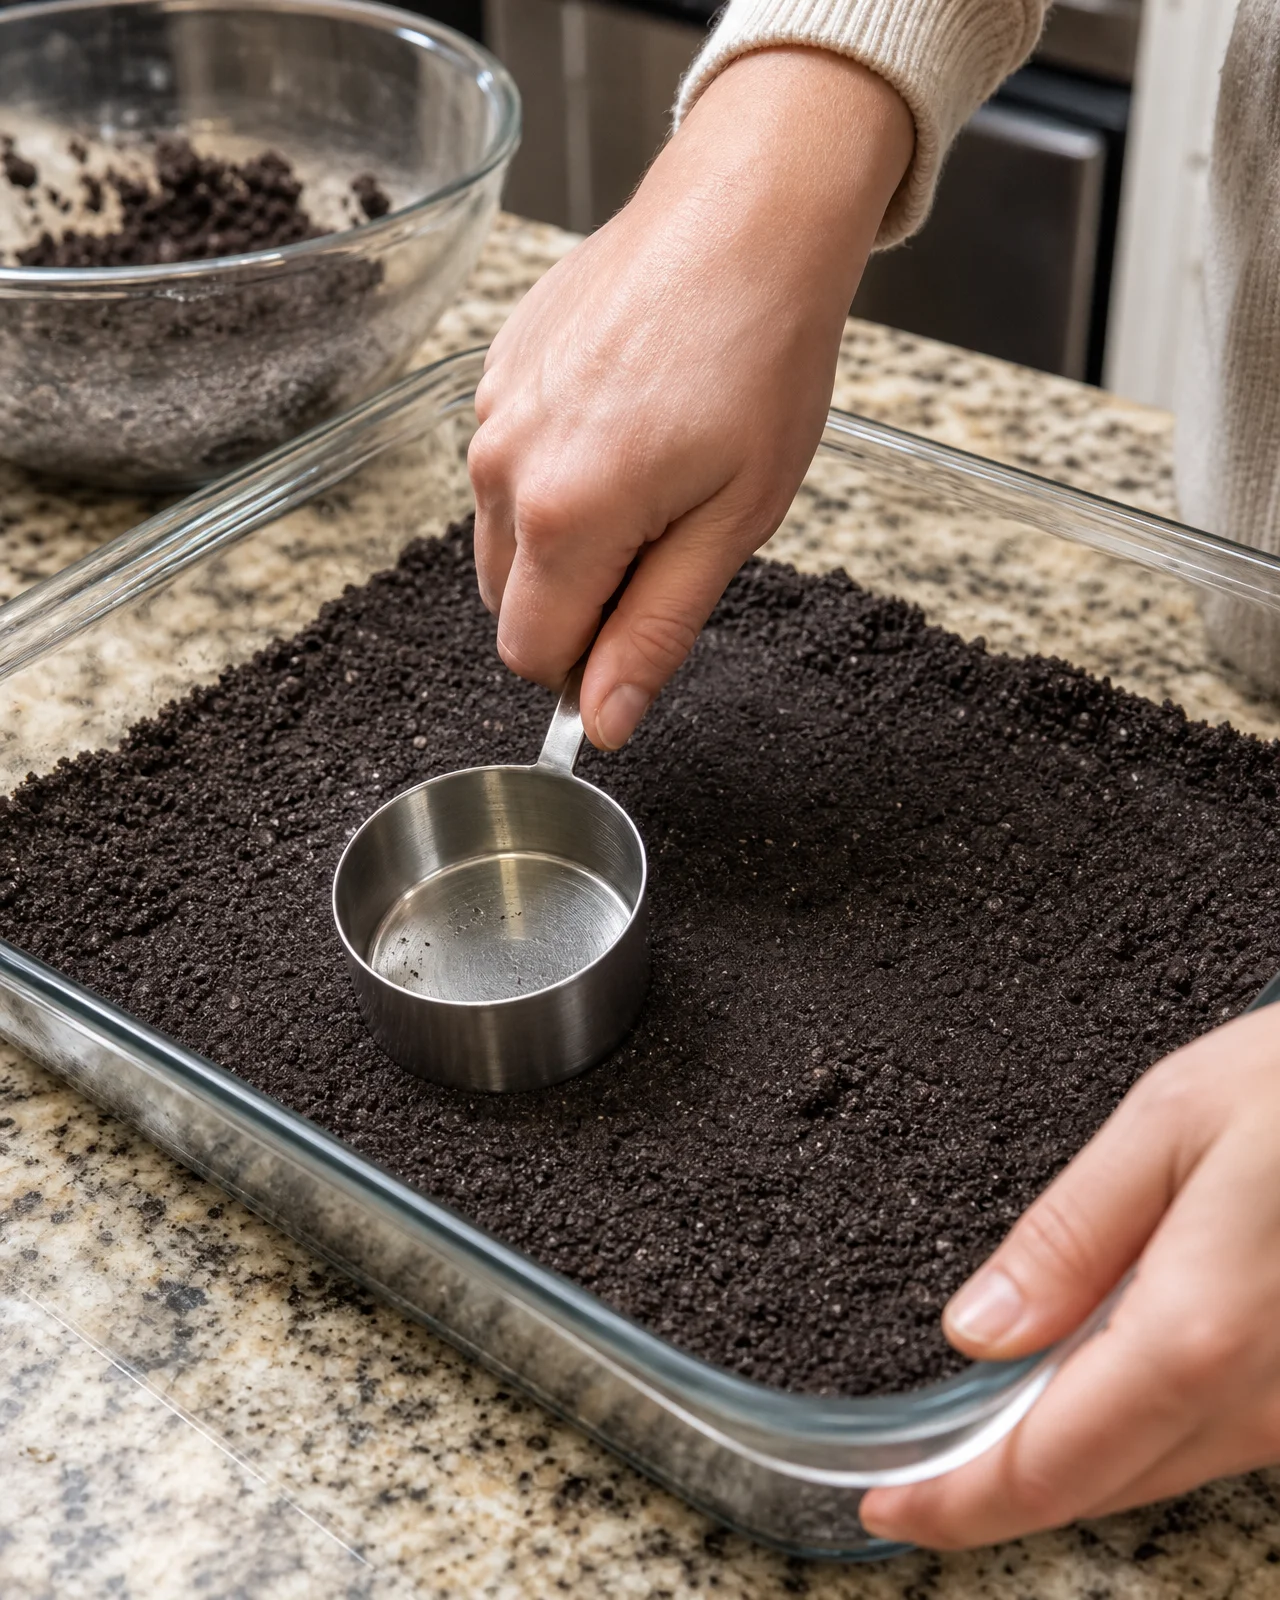
Once your cookies and butter are combined, it’s time to form the crust. Grab a 9×13-inch pan and press the mixture firmly into the bottom. I like to use a flat measuring cup to press it down evenly. This gives a nice, solid foundation for our creamy filling.
After it’s well-packed, pop the pan into the fridge for at least 30 minutes. This allows the butter to set, ensuring your crust doesn’t crumble when you serve. Plus, having a chilled base makes for a refreshing cheesecake experience!
Step 2: Make the Cheesecake Filling
Let’s dive into the rich and creamy filling that gives this cheesecake its charm! Start by beating the softened cream cheese in a stand mixer on medium-high speed. You want the cream cheese to be smooth and free of lumps, so take your time here. I always let mine sit at room temperature for about 30 minutes before mixing. It makes a world of difference.
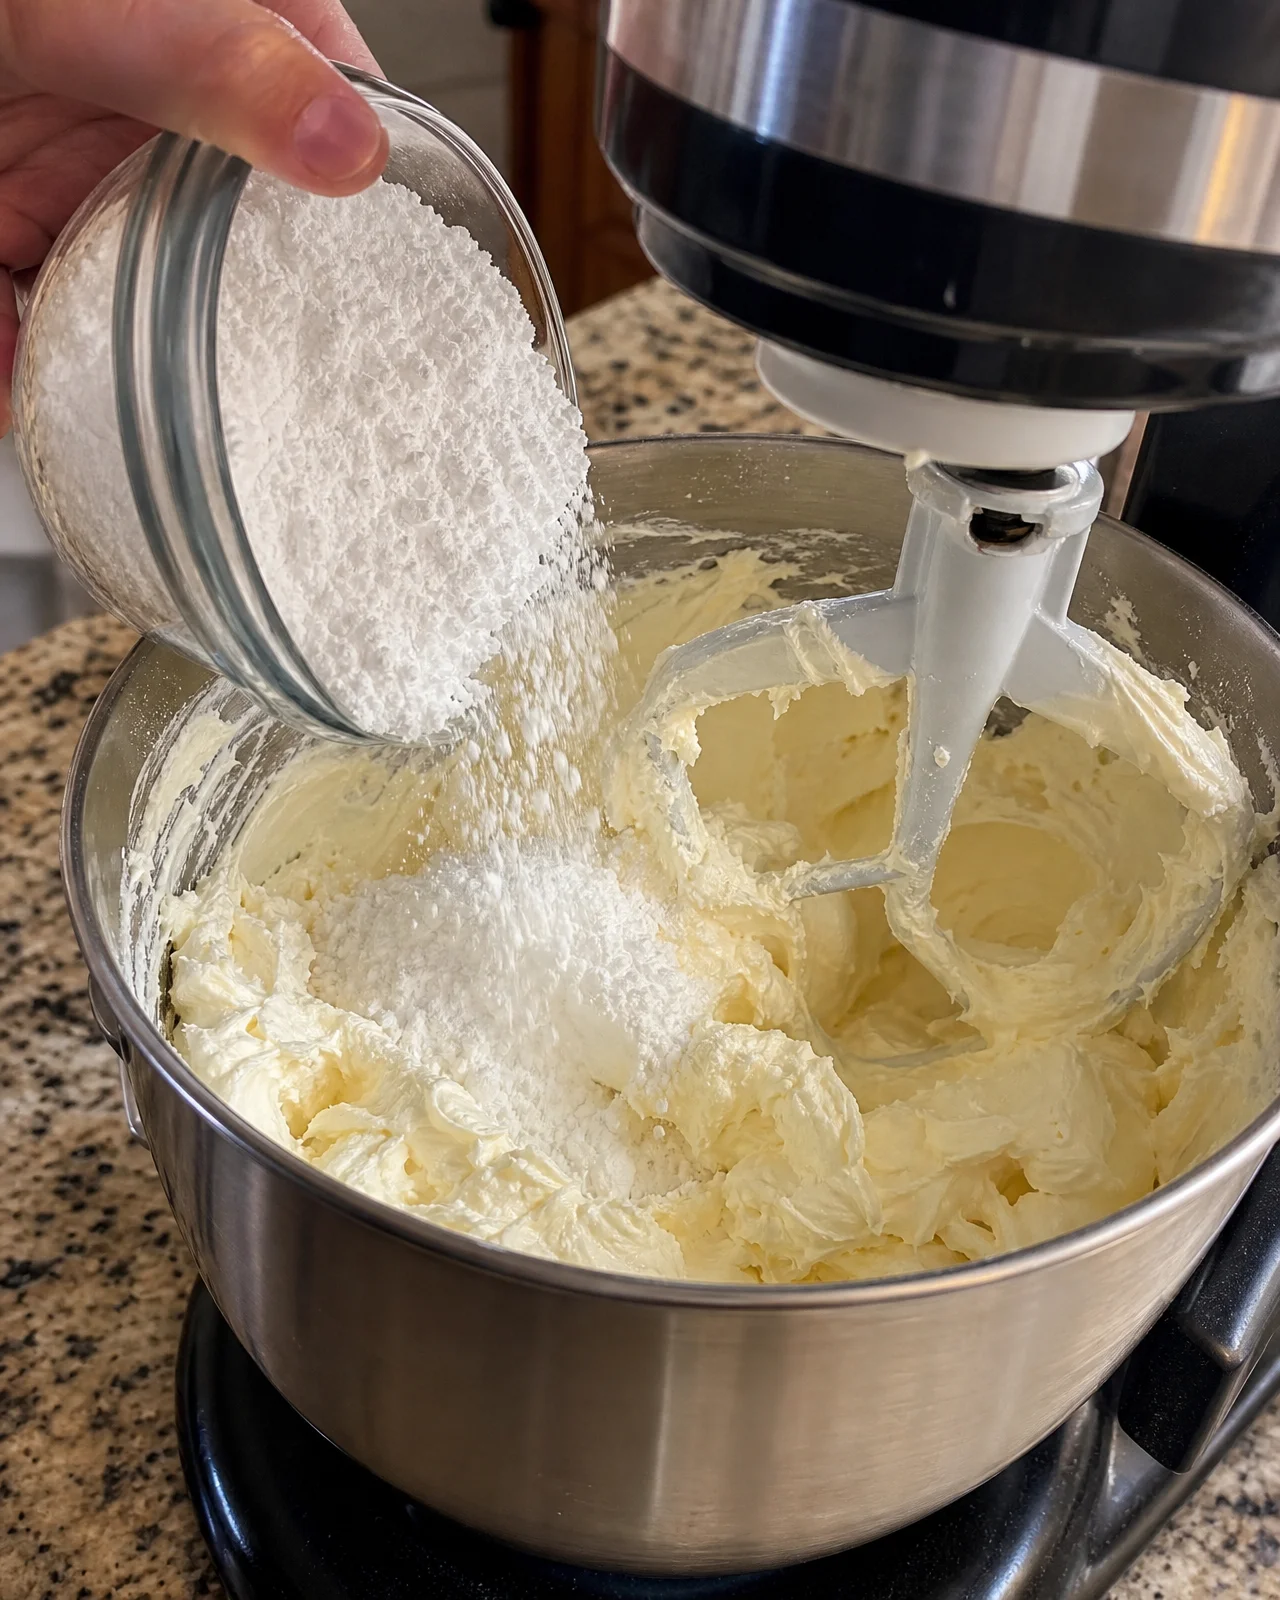
Now, gradually add in the powdered sugar. Continuing to mix will yield a fluffy and sweet filling. Make sure to scrape down the sides of the bowl to incorporate all that deliciousness. You’ll notice the texture shifting to something beautifully light. Don’t rush this part!
Next, gently fold in the Cool Whip. Folding is crucial here—we want to maintain all that airy fluffiness. I pretend I’m cradling a delicate meringue each time. Remember, a light touch goes a long way. Once it’s combined, you’ll have a luscious filling that tastes divine.
Step 3: Finish and Set the Cheesecake
Now, let’s add that whimsical green color that makes this cheesecake so festive! To your fluffy mixture, add a few drops of neon green gel food coloring along with your optional mint extract. Fold gently until the mixture transforms into a perfectly smooth, Grinch-worthy green. It’s truly satisfying to see it come together!
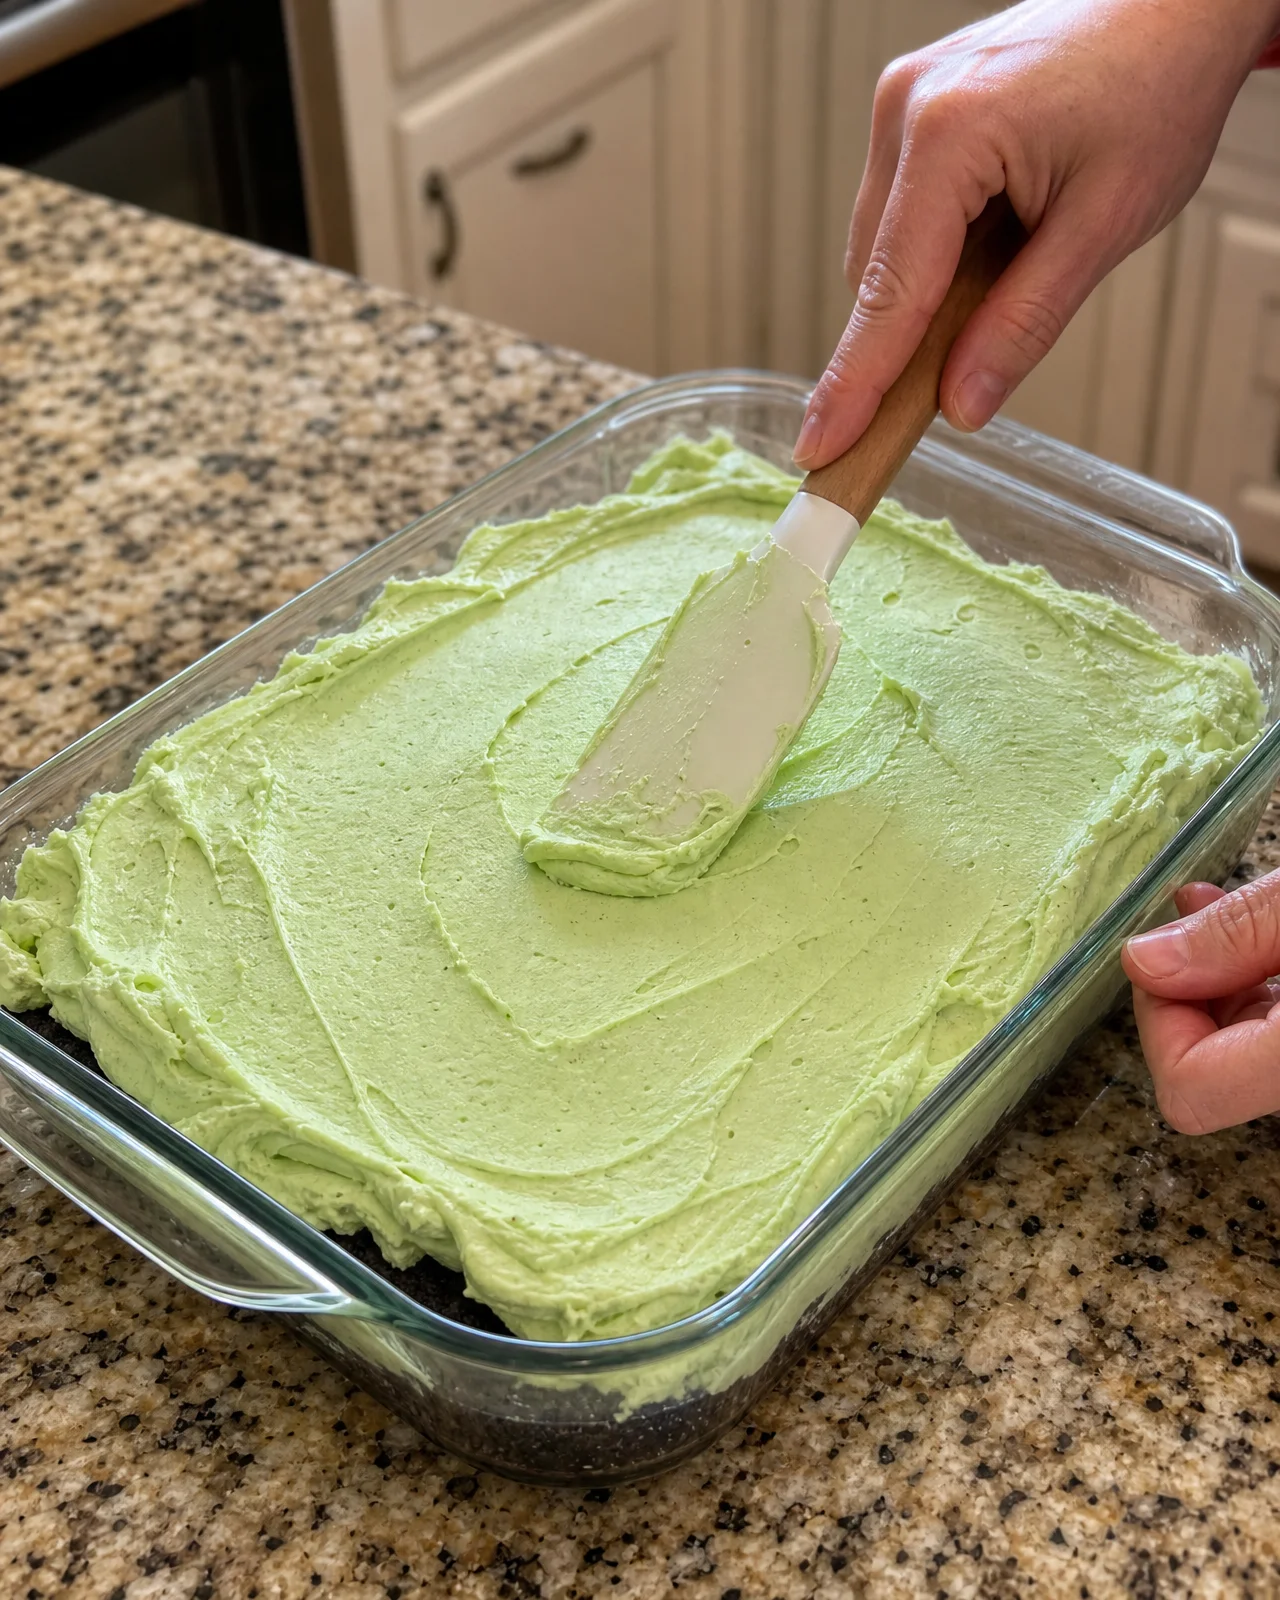
With your crust ready and the filling beautifully colored, it’s time to spread it evenly over the crust. I use a spatula to create a smooth surface, spreading it to the edges for a clean look. Once you’ve got it all tucked in, cover the pan tightly with plastic wrap.
This cheesecake needs to chill for at least 4 hours, but if you can, let it rest overnight. This allows the flavors to marry beautifully and enhances the overall texture. Trust me—patience is a virtue here!
Tips for Success
- Ensure all ingredients, especially cream cheese, are at room temperature for a smoother consistency.
- Chill the cheesecake for a minimum of 4 hours, but overnight is ideal for the best flavor.
- Use a hot, dry knife to cut slices neatly; dip it in hot water and wipe it off between cuts.
- For a festive touch, arrange red heart sprinkles or candies just before serving.
Equipment Needed
- Mixing bowls (any size will do, just ensure they’re large enough to hold the ingredients)
- Stand mixer or hand mixer (a whisk can work, but it will take longer)
- Measuring cups and spoons
- 9×13-inch pan (a similar-sized dish can also work)
Variations
- Get creative with different food colorings! A bright red or snowy white cheesecake would be a festive twist.
- Try adding peppermint extract instead of mint for that classic holiday flavor.
- If you love chocolate, mix in some cocoa powder for a rich chocolate cheesecake.
- For a dairy-free version, use dairy-free cream cheese and whipped topping—still delicious!
- Add fun toppings like crushed peppermint candies or even a drizzle of chocolate sauce for extra flair.
Serving Suggestions
- Pair the cheesecake with a steaming cup of coffee or a cozy peppermint tea for a comforting holiday treat.
- Serve alongside festive desserts like gingerbread cookies or mini yule logs to create a delightful dessert platter.
- For a decorative touch, garnish each slice with fresh mint leaves and a sprinkle of powdered sugar.
FAQs about No-Bake Grinch Christmas Cheesecake
As we dive deeper into the world of this No-Bake Grinch Christmas Cheesecake, you might have a few questions bubbling up. Let’s tackle some of the most common ones!
How do I store leftovers? Simply cover the cheesecake with plastic wrap and keep it in the refrigerator. It will stay fresh for up to 5 days. The flavors can actually deepen as it sits!
Can I make this cheesecake ahead of time? Absolutely! I often make it the night before a gathering, allowing it to enjoy a full night in the fridge to set. This not only saves you time but lets the flavors meld beautifully.
What’s the best way to cut neat slices? For clean cuts, use a hot, dry knife. Dip the knife in hot water, wipe it, and slice through the cheesecake. This little trick helps to maintain the beautiful layers without smushing them!
Can I freeze the cheesecake? Yes, you can! Just be sure to wrap it tightly in plastic wrap and foil. Thaw in the refrigerator overnight before serving. It’s a perfect make-ahead dessert for the holidays!
Final Thoughts
The joy that this No-Bake Grinch Christmas Cheesecake brings to holiday celebrations is simply priceless. It’s not just a dessert; it’s a delightful experience to create with family, filling your kitchen with laughter and cheer. Watching the smiles on loved ones’ faces as they dig in is what the season is all about. I encourage you to gather your kids or friends, whip up this easy recipe, and share in the fun. Trust me, you’ll be creating sweet holiday memories that will last a lifetime. Embrace the festive spirit with this delicious treat!
Print
No-Bake Grinch Christmas Cheesecake
- Prep Time: 30 minutes
- Cook Time: 0 minutes
- Total Time: 4 hours 30 minutes
- Yield: 12 servings 1x
- Category: Dessert
- Method: No-Bake
- Cuisine: American
- Diet: Vegetarian
Description
Delightful No-Bake Grinch Christmas Cheesecake, perfect for holiday celebrations.
Ingredients
- 72 Oreo Cookies (about 2 standard packages), finely crushed
- 1 cup (2 sticks) Unsalted Butter, melted
- 4 (8 oz) packages Cream Cheese, softened
- 4 cups Powdered Sugar
- 32 oz Cool Whip, thawed
- Neon Green Gel Food Coloring
- ½ teaspoon Mint Extract (optional)
- Red Heart Sprinkles or Red Sixlet Candies (for decoration)
Instructions
- In a large bowl, combine finely crushed Oreos and melted butter. Mix until the crumbs are moistened. Press into a 9×13-inch pan and chill in the fridge to set.
- In a stand mixer, beat softened cream cheese on medium-high speed until smooth. Gradually add powdered sugar and continue to mix until fluffy.
- Fold in Cool Whip gently to maintain the light and airy texture.
- Add neon green food coloring and mint extract (if using). Fold until the mixture is smooth and the perfect Grinch green color is achieved.
- Spread the cheesecake mixture evenly over the chilled crust. Smooth the top with a spatula.
- Cover with plastic wrap and refrigerate for at least 4 hours, or preferably overnight, to allow the cheesecake to set.
- Before serving, top with red heart sprinkles or candies to represent the Grinch’s heart growing three sizes.
Notes
- Ensure all ingredients are at room temperature for best results.
- Let the cheesecake set overnight for the best flavor and texture.
Nutrition
- Serving Size: 1 slice
- Calories: 450
- Sugar: 35g
- Sodium: 320mg
- Fat: 28g
- Saturated Fat: 16g
- Unsaturated Fat: 10g
- Trans Fat: 0g
- Carbohydrates: 50g
- Fiber: 2g
- Protein: 4g
- Cholesterol: 70mg