
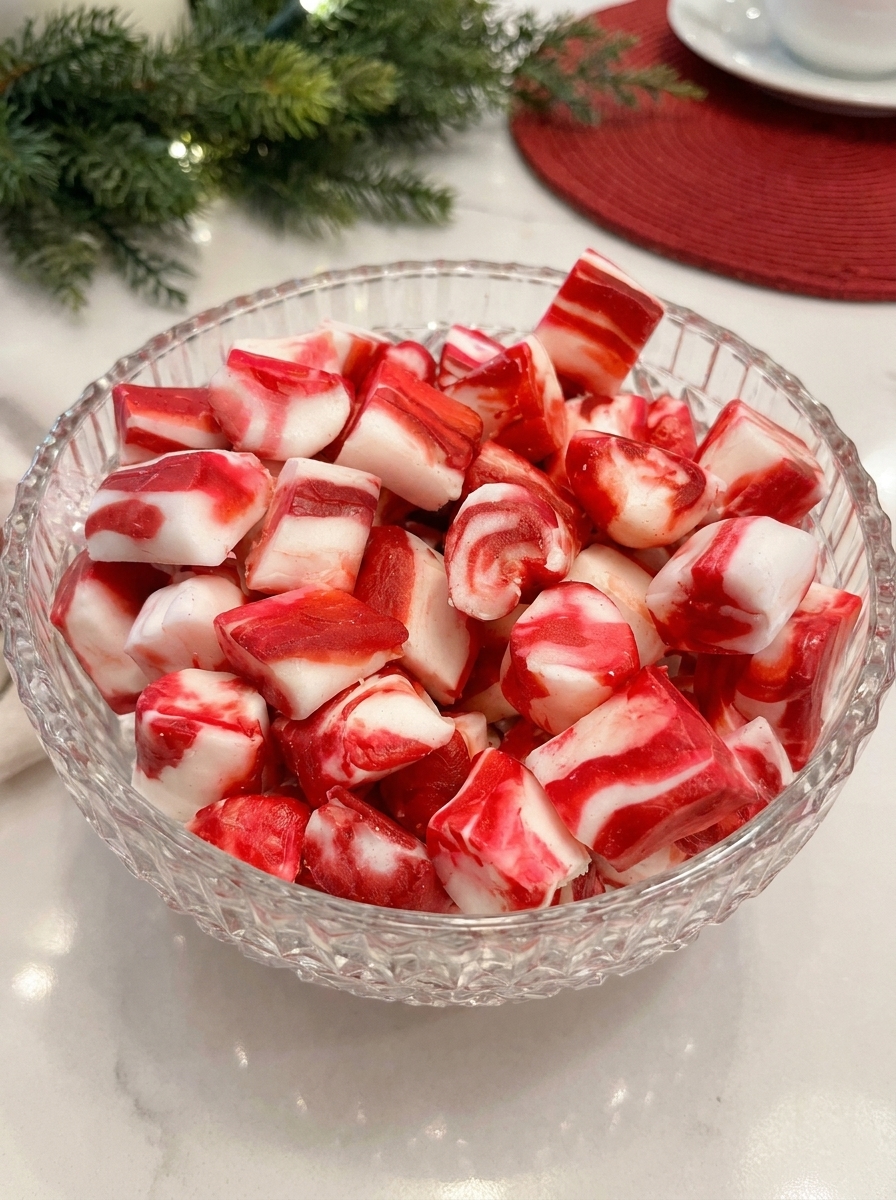
Introduction to Old-Fashioned Butter Mints
Old-Fashioned Butter Mints are easy, creamy peppermint treats that bring a nostalgic feel to any gathering. These delightful candies melt in your mouth, delivering a refreshing burst of peppermint flavor. The smooth texture comes from the combination of rich butter and powdered sugar, creating a perfectly sweet balance. Whether served at holiday parties or as a homemade gift, these treats are a timeless favorite for those who appreciate the classic flavors of a bygone era. Prepare to make these simple yet delightful mints that will surely impress your family and friends.
Why You’ll Love This Recipe
This Old-Fashioned Butter Mints recipe is simple to follow and delivers impressive results that everyone will enjoy. The creamy texture, combined with the cool peppermint flavor, creates a delightful treat that’s hard to resist. One of the best aspects of this recipe is its adaptability; you can customize the intensity of the peppermint extract, making it perfect for every preference. Additionally, these mints are easy to store in an airtight container, so you can prepare them ahead of special occasions or as thoughtful gifts. With no cooking required, they become a fun, hands-on activity suitable for all ages. Once they’re dry, their beautiful colors and sweet flavors will undoubtedly make them a standout feature on any dessert tray.
Ingredients for Old-Fashioned Butter Mints
To create delicious Old-Fashioned Butter Mints, you will need these simple ingredients:
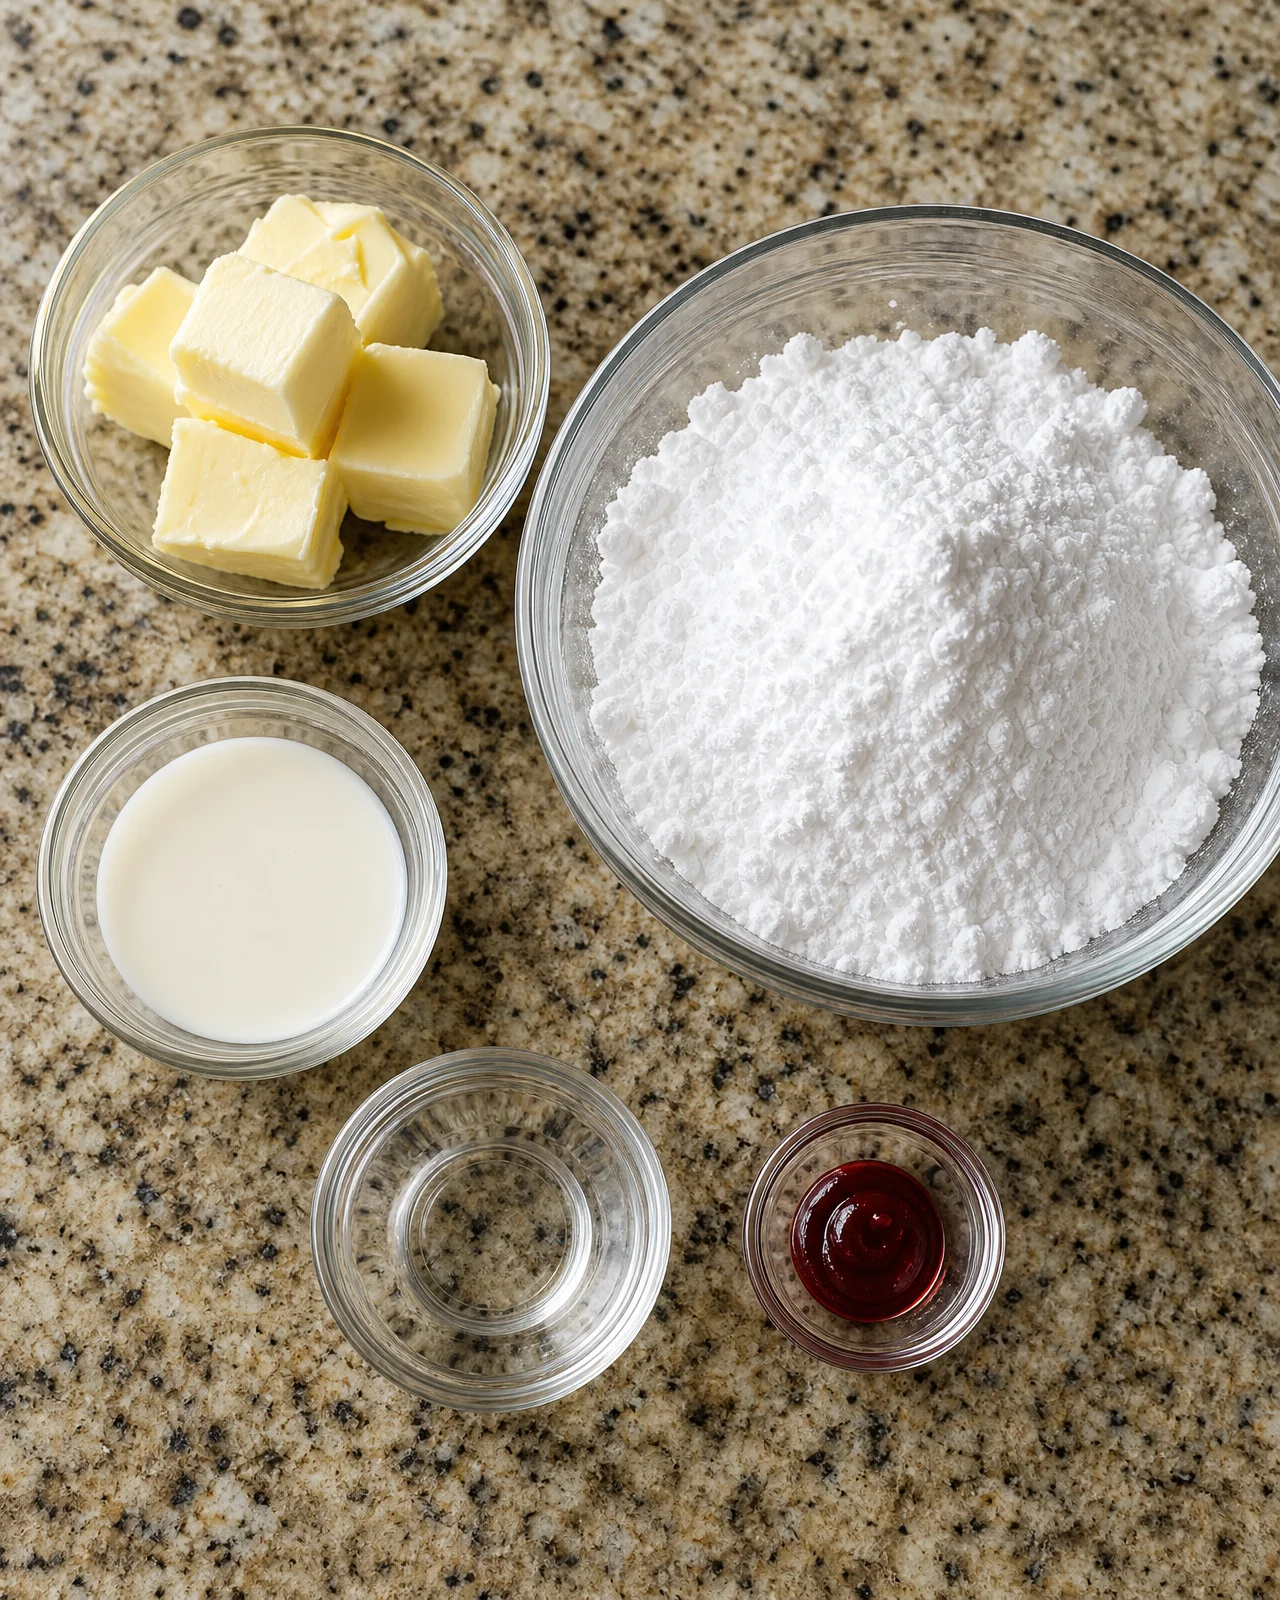
- 1/2 cup butter, softened to room temperature: This provides the creamy texture and rich flavor that is essential to the mints.
- 4 cups powdered sugar: The main ingredient, it lends sweetness and structure to the mints.
- 2 tablespoons heavy whipping cream: This ingredient adds moisture to create a smooth and pliable dough.
- 1/4 teaspoon peppermint extract: This gives the mints their refreshing flavor. Feel free to adjust the quantity to suit your taste.
- Red gel food coloring: Used to add a festive touch, complementing the classic peppermint look.
Tip: For those avoiding dairy, you can experiment with vegan butter substitutes to create a dairy-free version. Make sure to use a vegan cream as well for consistency. Also, granulated sugar can be used for a crunchier texture, but powdered sugar is preferred for smoothness.
How to Make Old-Fashioned Butter Mints
Step 1: Prepare Your Work Surface and Make Dough
Begin by preparing a clean work surface lined with parchment paper, wax paper, or a silicone baking mat. Keep some extra powdered sugar nearby for rolling the mints. In a large mixing bowl, add the softened butter. Using a hand mixer on low speed, beat the butter until it becomes light and fluffy, which usually takes about 1-2 minutes. It’s important that the butter is softened to ensure the mixture combines well and achieves a light texture.
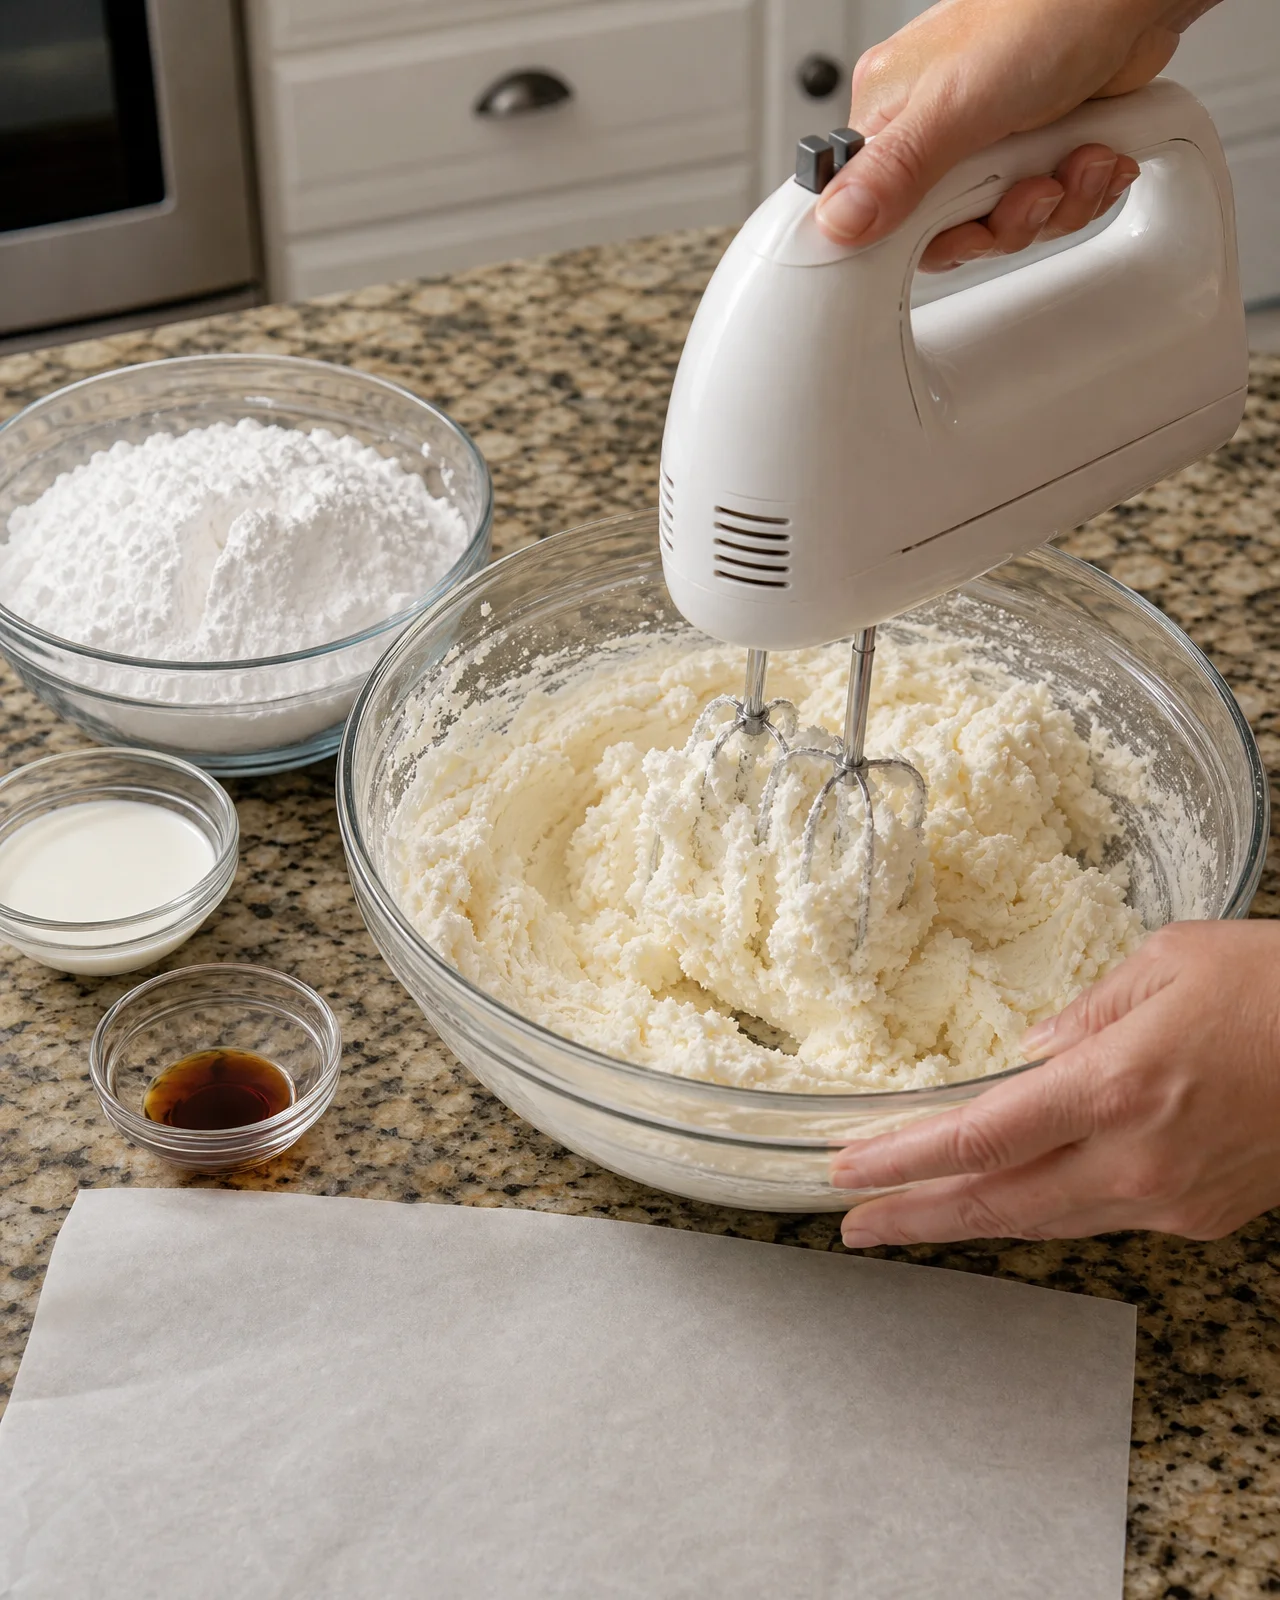
Next, sift in the 4 cups of powdered sugar gradually while mixing. This will help prevent clumps from forming. Add the heavy whipping cream and peppermint extract, mixing until the ingredients are uniformly combined. The result should be a firm yet smooth dough that can be easily molded.
Step 2: Color and Shape the Dough
Once your dough is ready, divide it into two portions—keeping approximately three-quarters of the dough for the white mints and one-quarter for coloring. Add the red gel food coloring to the smaller portion, and knead the dough gently until the color is evenly distributed. This should take a couple of minutes, and you may need to add more coloring for a bolder hue.
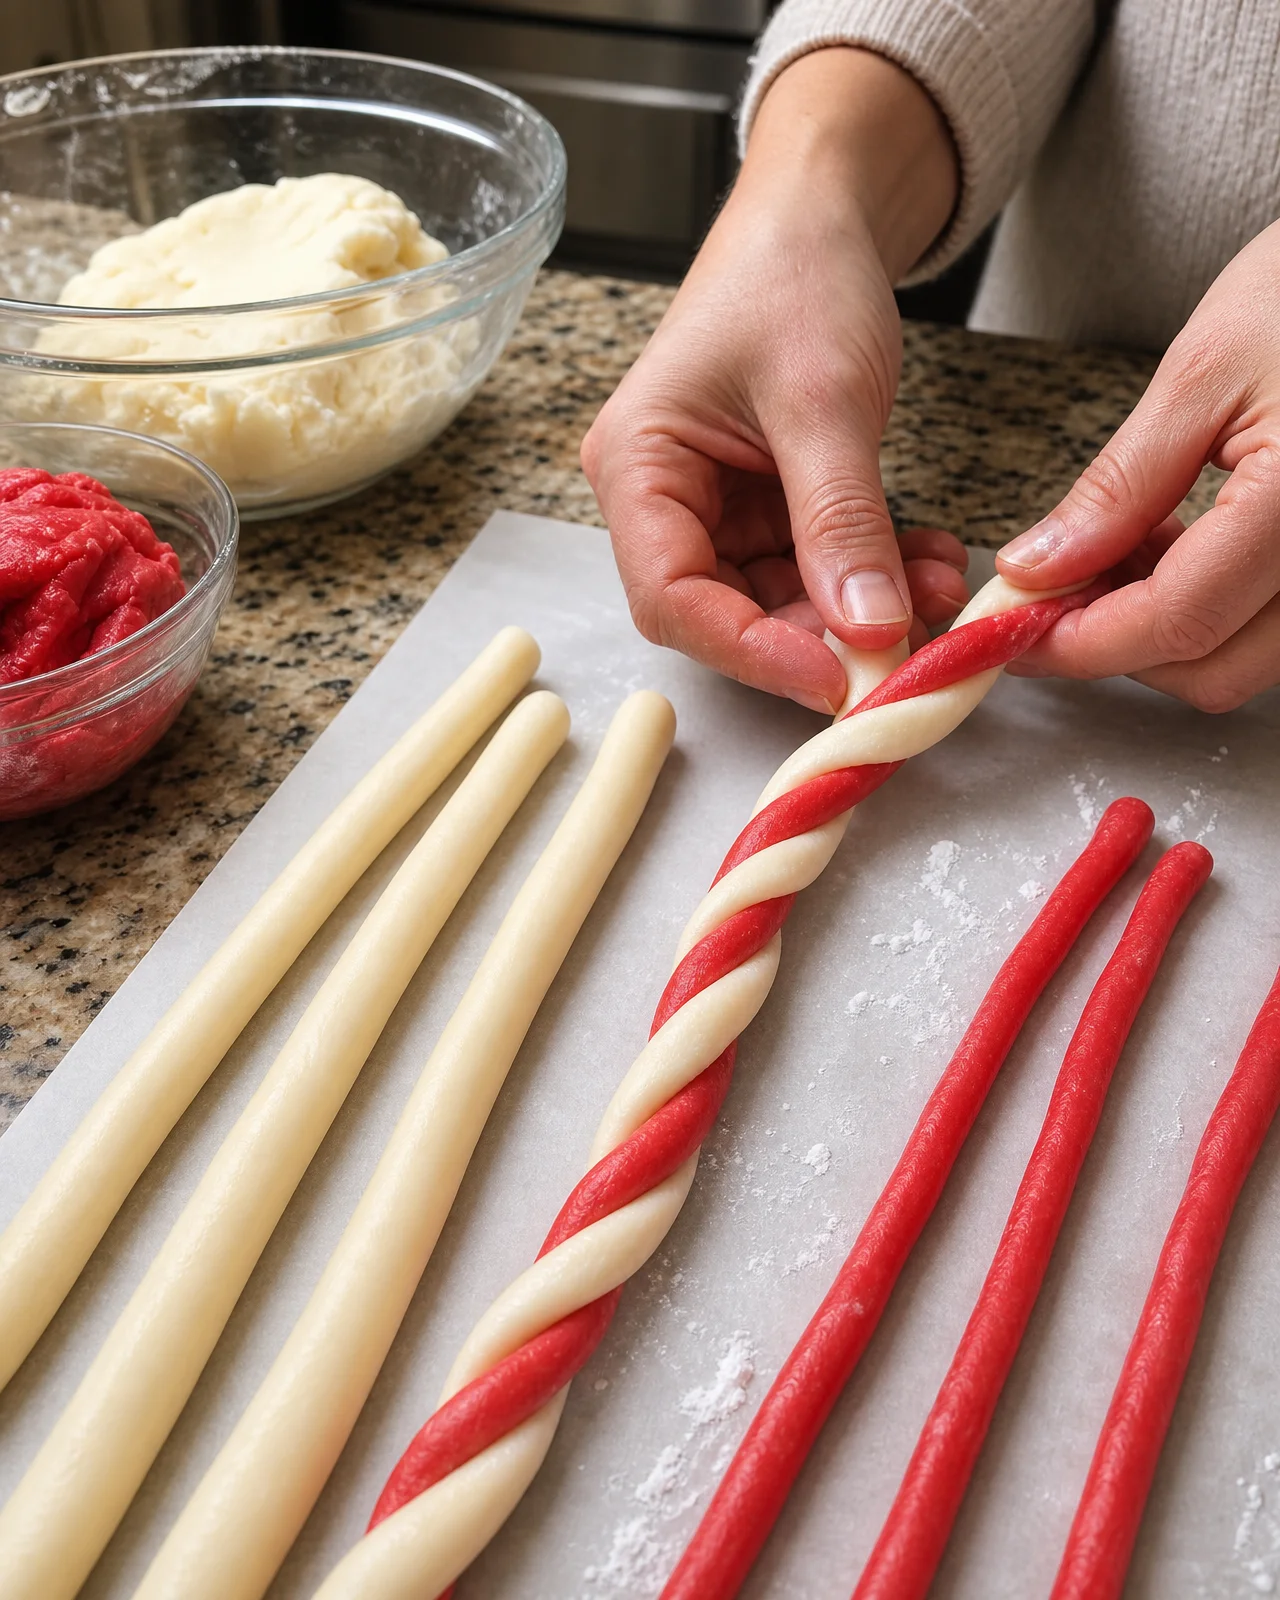
Now, take small portions of the white dough and roll them into ropes about 1/2 inch thick. Simultaneously, roll smaller portions of the red dough into thinner ropes. Place the red ropes alongside the white ones, then gently twist them together to create a festive candy cane-like pattern. Make sure to keep the ropes uniform in thickness for even cutting later.
Step 3: Final Touches and Drying
After twisting the red and white dough together, pinch off smaller sections (about a half-inch) and gently roll each twisted piece between your palms to smooth it out. Place the candy ropes side by side on the prepared parchment paper. Allow them to rest for approximately 1 to 2 hours at room temperature until the outside loses its stickiness, which is crucial for the final texture.
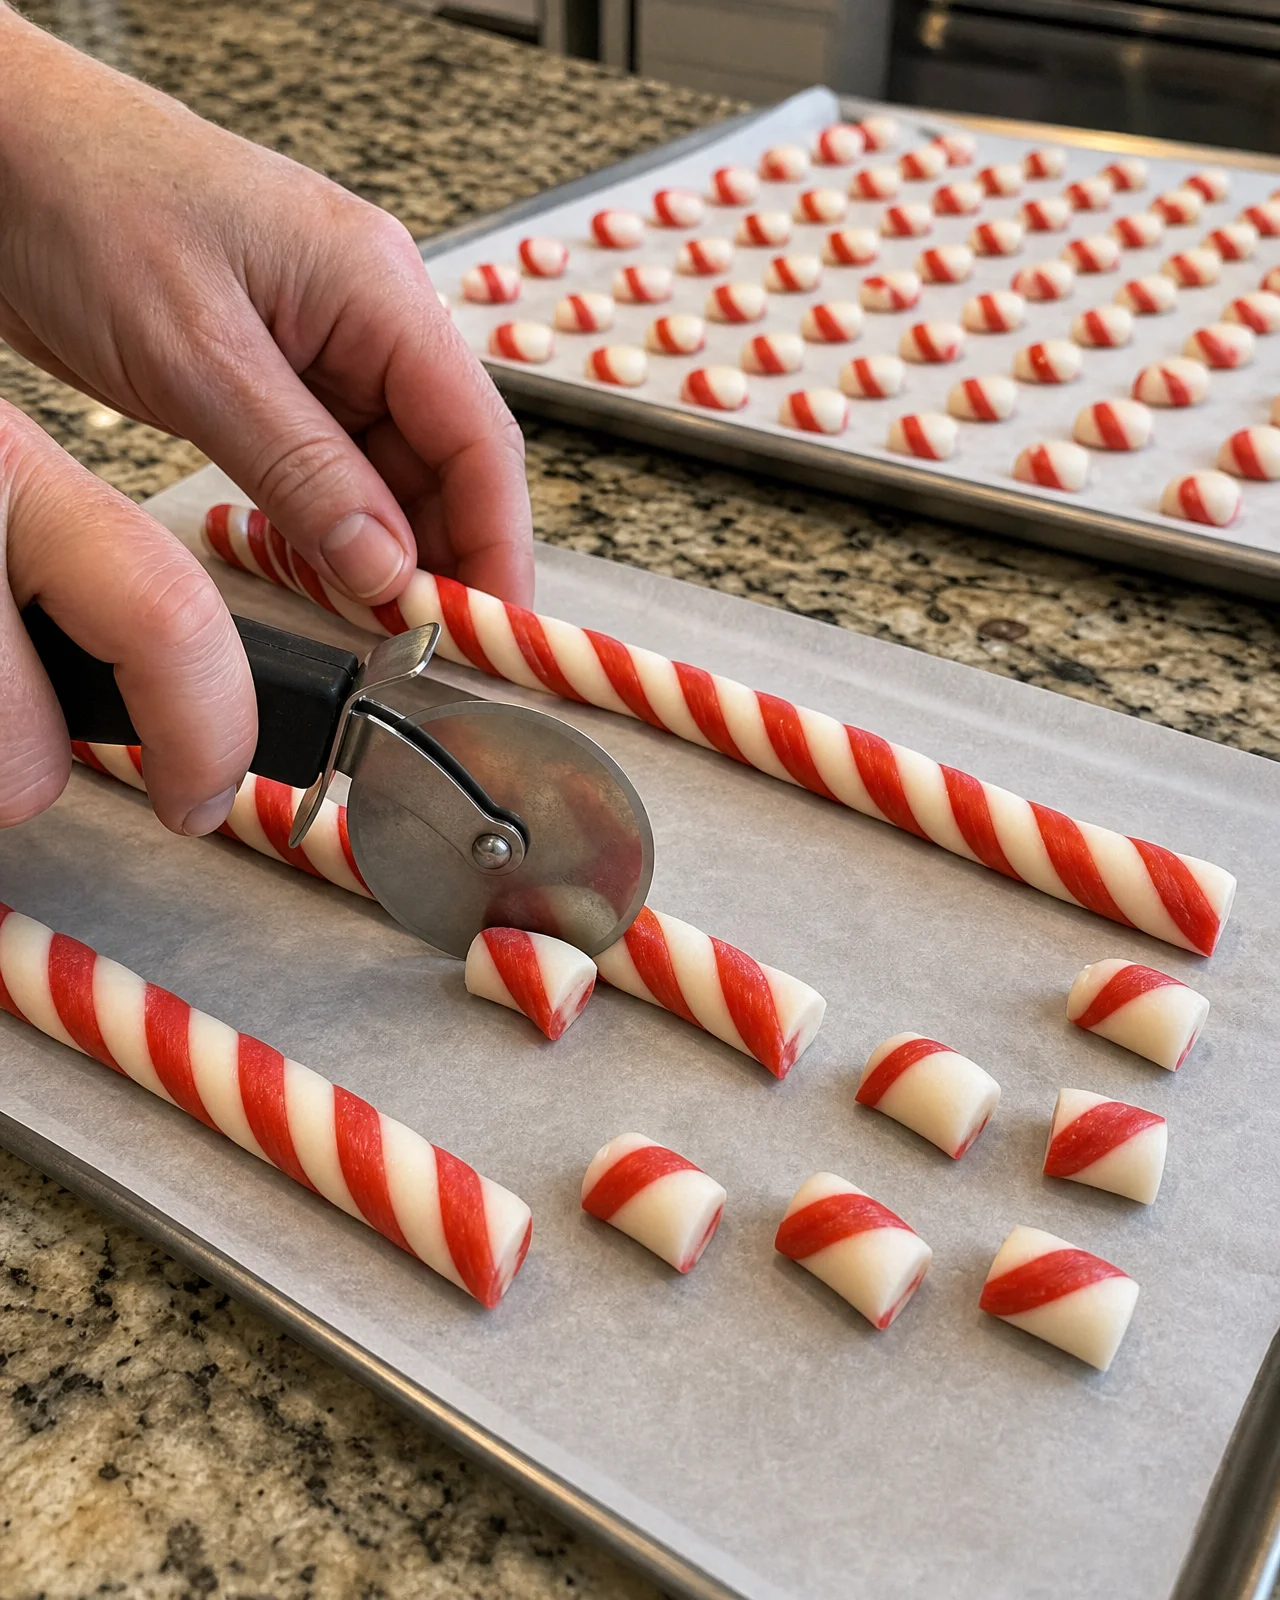
Once they are ready, use a sharp knife or pizza cutter to slice the ropes into bite-sized pieces, about 1 inch long. Arrange the cut pieces in a single layer and leave them uncovered for about 24 hours to dry completely. This drying phase is vital for achieving the desired melt-in-your-mouth texture. After drying, gently loosen the candies from the parchment paper and transfer them to an airtight container for storage. Refrigerate until you are ready to share these delightful treats.
Tips for Success
For the best results when making Old-Fashioned Butter Mints, consider these helpful tips:
- If the dough is too sticky to work with, gradually add more powdered sugar until you achieve the right consistency.
- Be gentle while rolling and shaping; overworking the dough can make it tough and lose its delicate texture.
- To ensure consistent coloring, knead the gel food coloring thoroughly until no streaks remain, achieving a uniform appearance.
- It’s essential to allow the mints to dry completely; this will enhance both flavor and texture. If humidity is prevalent, consider using a fan or placing the mints in a low-heat oven (turned off) to hasten the drying process.
- Make sure to taste test your peppermint extract. Adjust it according to personal preferences—you could prefer a more pronounced flavor or a subtle touch.
Equipment Needed
For this recipe, you’ll need a large mixing bowl and a hand mixer for combining the ingredients. Additional tools include measuring cups and spoons, a sharp knife or pizza cutter for slicing the completed mints, and while a rolling pin isn’t required, it can help with achieving the right dough consistency. A clean workspace with parchment paper or a silicone mat will facilitate the process and make cleanup easier.
Variations
You can customize Old-Fashioned Butter Mints in several ways to suit your flavor preferences or special occasions. Experiment with different extracts such as spearmint, wintergreen, or even lemon for a refreshing twist that stands out. For festive gatherings, consider rolling the mints in colored sugar, adding a glittering touch that enhances their visual appeal. If you’d like to create energetic holiday colors, try incorporating green or blue gel food coloring instead of red for a fun variation. Additionally, incorporating a bit of cocoa powder can transform the mints into rich chocolate-flavored treats, pleasing chocolate lovers. Lastly, crumbled candy canes folded into the dough can create a more textured mint with a delightful crunch, enhancing the overall peppermint flavor and bringing an extra festive flair to your creations.
Serving Suggestions
Old-Fashioned Butter Mints are versatile and can be served in many delightful ways. Present these charming candies in a decorative bowl on a dessert table at holiday gatherings, weddings, or birthdays to capture the eye of your guests. Packaging them in clear bags tied with colorful ribbons makes for thoughtful gifts, perfect for sharing with friends and family.
For a delightful treat, pair the mints with a steaming cup of hot cocoa or freshly brewed coffee, creating a refreshing post-meal experience. You can also serve them alongside other candies on a dessert platter to enhance the variety of flavors. Their crisp minty taste is excellent for cleansing the palate after enjoying a rich meal, making these mints an ideal finishing touch for any dining occasion.
FAQs about Old-Fashioned Butter Mints
Q1: How should I store the Old-Fashioned Butter Mints?
A: Store the mints in an airtight container at room temperature. Make sure they are completely dry before storage to maintain texture.
Q2: Can I make these mints in advance?
A: Yes! These mints can be made ahead of time and stored for several weeks, provided they are kept in an airtight container.
Q3: What can I use instead of peppermint extract?
A: You can experiment with other extracts like spearmint or vanilla, but this will change the overall flavor profile. Adjust the amount based on your taste.
Q4: Why are my mints too sticky?
A: If your dough is sticky, it may need more powdered sugar added. Adding it gradually will help achieve the right consistency.
Q5: How long do the mints need to sit before they are ready?
A: Allow the mints to dry for about 24 hours to ensure they set correctly and achieve the desired texture.
Final Thoughts
Creating Old-Fashioned Butter Mints is a joyful way to savor a beloved classic candy. With a handful of uncomplicated ingredients, you can craft creamy mints that impress at any gathering. Prioritize allowing sufficient drying time for optimal texture and flavor—this step is crucial for achieving that melt-in-your-mouth experience. These delightful mints are versatile enough for festive occasions or simply as a thoughtful homemade treat to share. Their smooth sweetness and invigorating mint flavor will surely leave a lasting impression on your guests. Feel free to explore variations to personalize these mints, making them reflect your own unique touch. Whether a seasoned cook or a beginner, these mints are a delightful project that will bring smiles to everyone around you!
Print
Old-Fashioned Butter Mints: Easy, Creamy Peppermint Treats
- Prep Time: 20 minutes
- Cook Time: 0 minutes
- Total Time: 24 hours 20 minutes
- Yield: Approximately 48 mints 1x
- Category: Candy
- Method: Mixing and Rolling
- Cuisine: American
- Diet: Vegetarian
Description
Old-Fashioned Butter Mints are easy, creamy peppermint treats that are perfect for any occasion.
Ingredients
- 1/2 cup butter, softened to room temperature
- 4 cups powdered sugar, plus extra as needed for rolling
- 2 tablespoons heavy whipping cream
- 1/4 teaspoon peppermint extract, more or less to taste
- Red gel food coloring, as needed
Instructions
- Prepare a clean work surface with parchment paper, wax paper, or a silicone baking mat. Keep extra powdered sugar nearby for rolling.
- Place the softened butter in a large mixing bowl and beat with a hand mixer on low speed until light and fluffy.
- Add the powdered sugar, heavy whipping cream, and peppermint extract. Mix until everything is combined and a firm, smooth dough forms.
- Divide the dough into two portions, keeping approximately three-quarters white and one-quarter for coloring.
- Add red gel food coloring to the smaller portion and gently knead until the color is evenly distributed.
- Roll small portions of white dough into ropes. Roll smaller portions of red dough into thinner ropes and place them alongside the white ropes.
- Gently twist the red and white ropes together to create a candy cane-style pattern.
- Pinch off smaller sections and gently roll each twisted rope between your palms to smooth it out.
- Place the twisted candy ropes on parchment paper and allow them to rest for approximately 1 to 2 hours until the outside is less sticky.
- Use a sharp knife or pizza cutter to cut the ropes into small, bite-sized peppermint pieces.
- Arrange the cut mints in a single layer and leave uncovered for approximately 24 hours to dry completely.
- Once dry, gently loosen the candies from the parchment paper and transfer them to an airtight container. Refrigerate until ready to serve.
Notes
- Make sure to keep extra powdered sugar on hand for rolling the mints.
- The amount of peppermint extract can be adjusted to suit your taste preference.
- Let the mints dry out completely for the best texture.
Nutrition
- Serving Size: 1 mint
- Calories: 40
- Sugar: 10g
- Sodium: 5mg
- Fat: 1.5g
- Saturated Fat: 1g
- Unsaturated Fat: 0.5g
- Trans Fat: 0g
- Carbohydrates: 9g
- Fiber: 0g
- Protein: 0g
- Cholesterol: 5mg