
Introduction to Vintage Christmas Cake Dip Cups
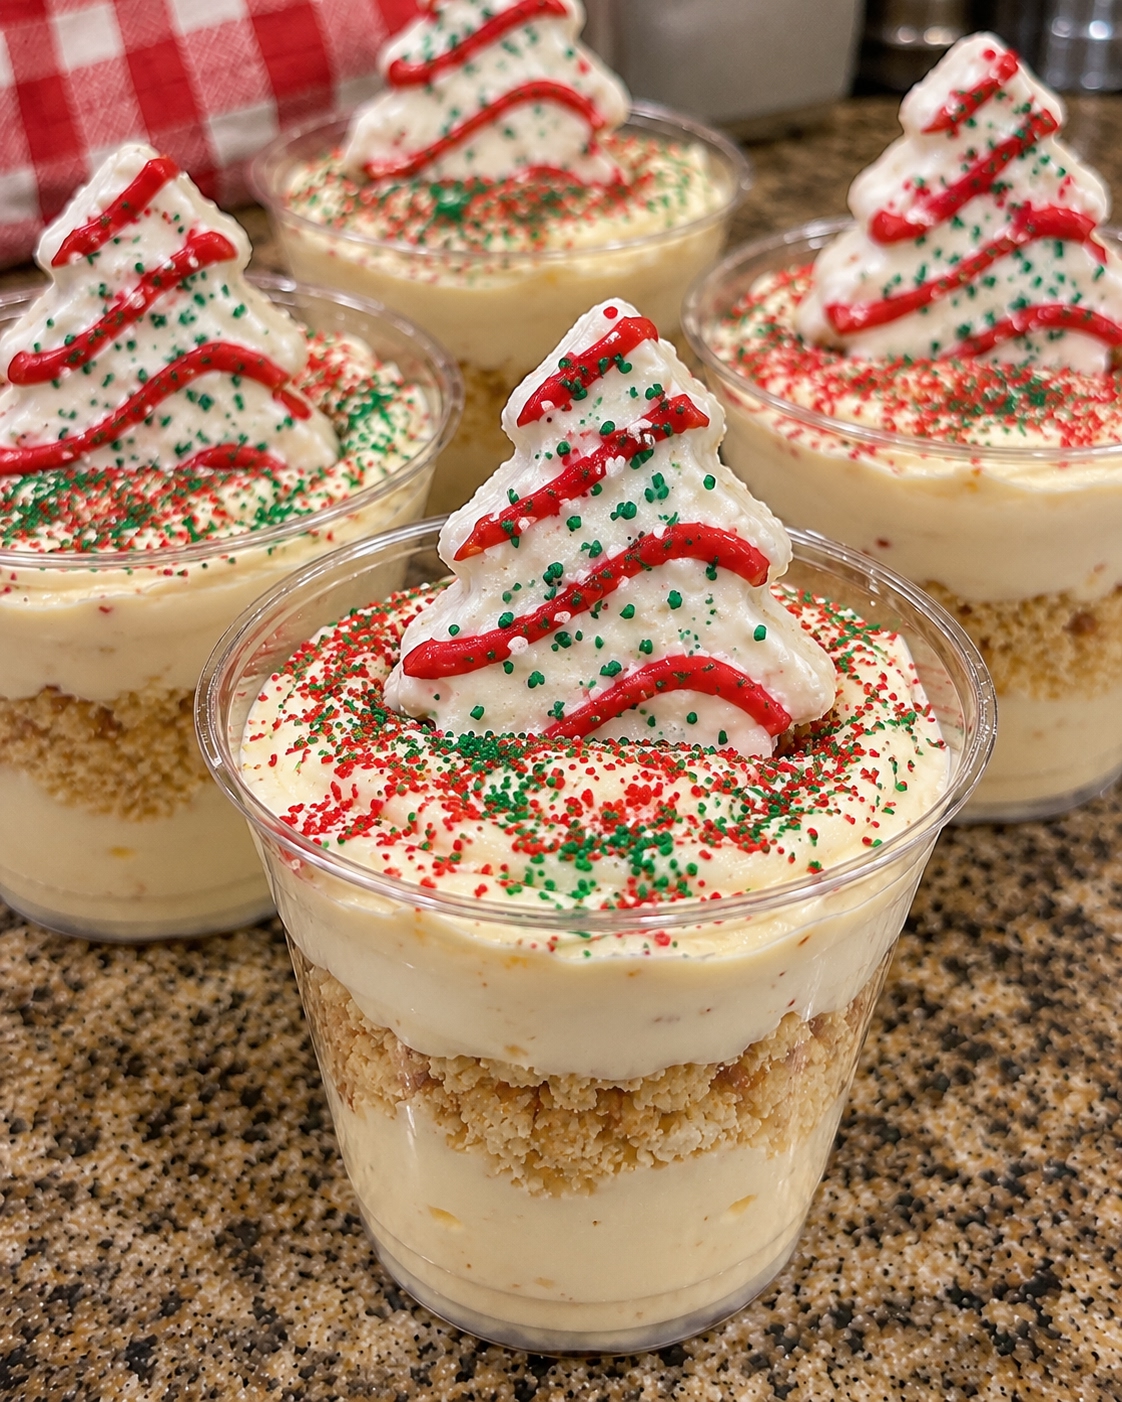
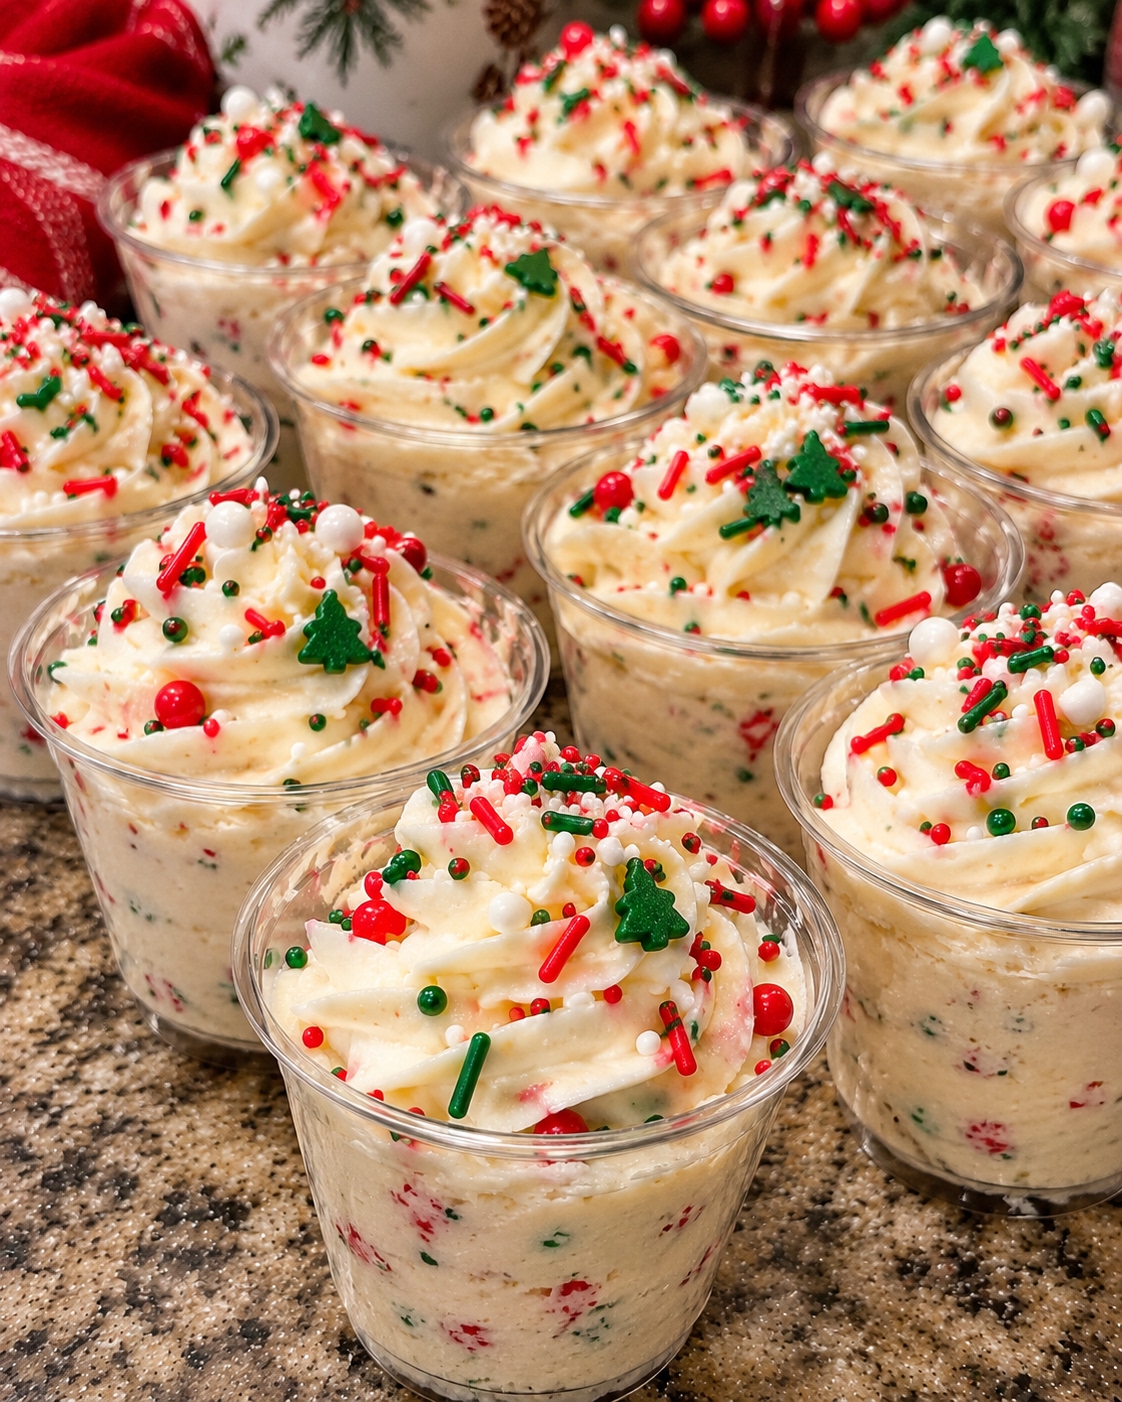
Vintage Christmas Cake Dip Cups are a delightful and festive treat that combines nostalgic flavors with modern elegance. By blending the rich notes of vanilla cake and the creamy textures of cream cheese and whipped topping, these dip cups create a delicious contrast that captures the essence of holiday celebrations. The vibrant red and green Christmas sprinkles add a joyful touch, making them an eye-catching centerpiece for any festive dessert table. Not only are they visually appealing, but the no-bake preparation method also ensures that you can whip them up quickly and easily. Perfect for sharing, these delightful cups are sure to evoke warm feelings and joyful memories during your Christmas gatherings, making them a must-have treat for the season.
Why You’ll Love This Recipe
This Vintage Christmas Cake Dip Cups recipe is a fantastic addition to any festive celebration. Firstly, they are incredibly easy to make, requiring minimal time and effort. You can have these delightful treats ready in under an hour, making them perfect for spontaneous holiday gatherings. Secondly, the combination of creamy cheese and fluffy whipped topping brings a delightful texture that melts in your mouth with every bite.
The vibrant red and green sprinkles not only add a cheerful touch but also make these cups visually appealing, certain to impress your guests. Lastly, the versatility of this recipe allows for personalized touches—consider using your favorite sprinkles, flavorings, or even alternative cake mixes to cater to different tastes. These dip cups not only bring joy and flavor to your festivities but also serve as a charming centerpiece for your holiday dessert table, making them a must-have treat during the season.
Ingredients for Vintage Christmas Cake Dip Cups
To create Vintage Christmas Cake Dip Cups, you’ll need a selection of ingredients that come together to form a festive and delicious treat. Start with a box of vanilla cake mix, which provides the foundational flavor, but remember to heat-treat it first to ensure safety for consumption. Cream cheese adds a rich creaminess that complements the overall texture of the dip, while powdered sugar brings in just the right amount of sweetness to balance the flavors. A teaspoon of vanilla extract enhances the flavor profile and beautifully complements the cake mix’s sweetness.
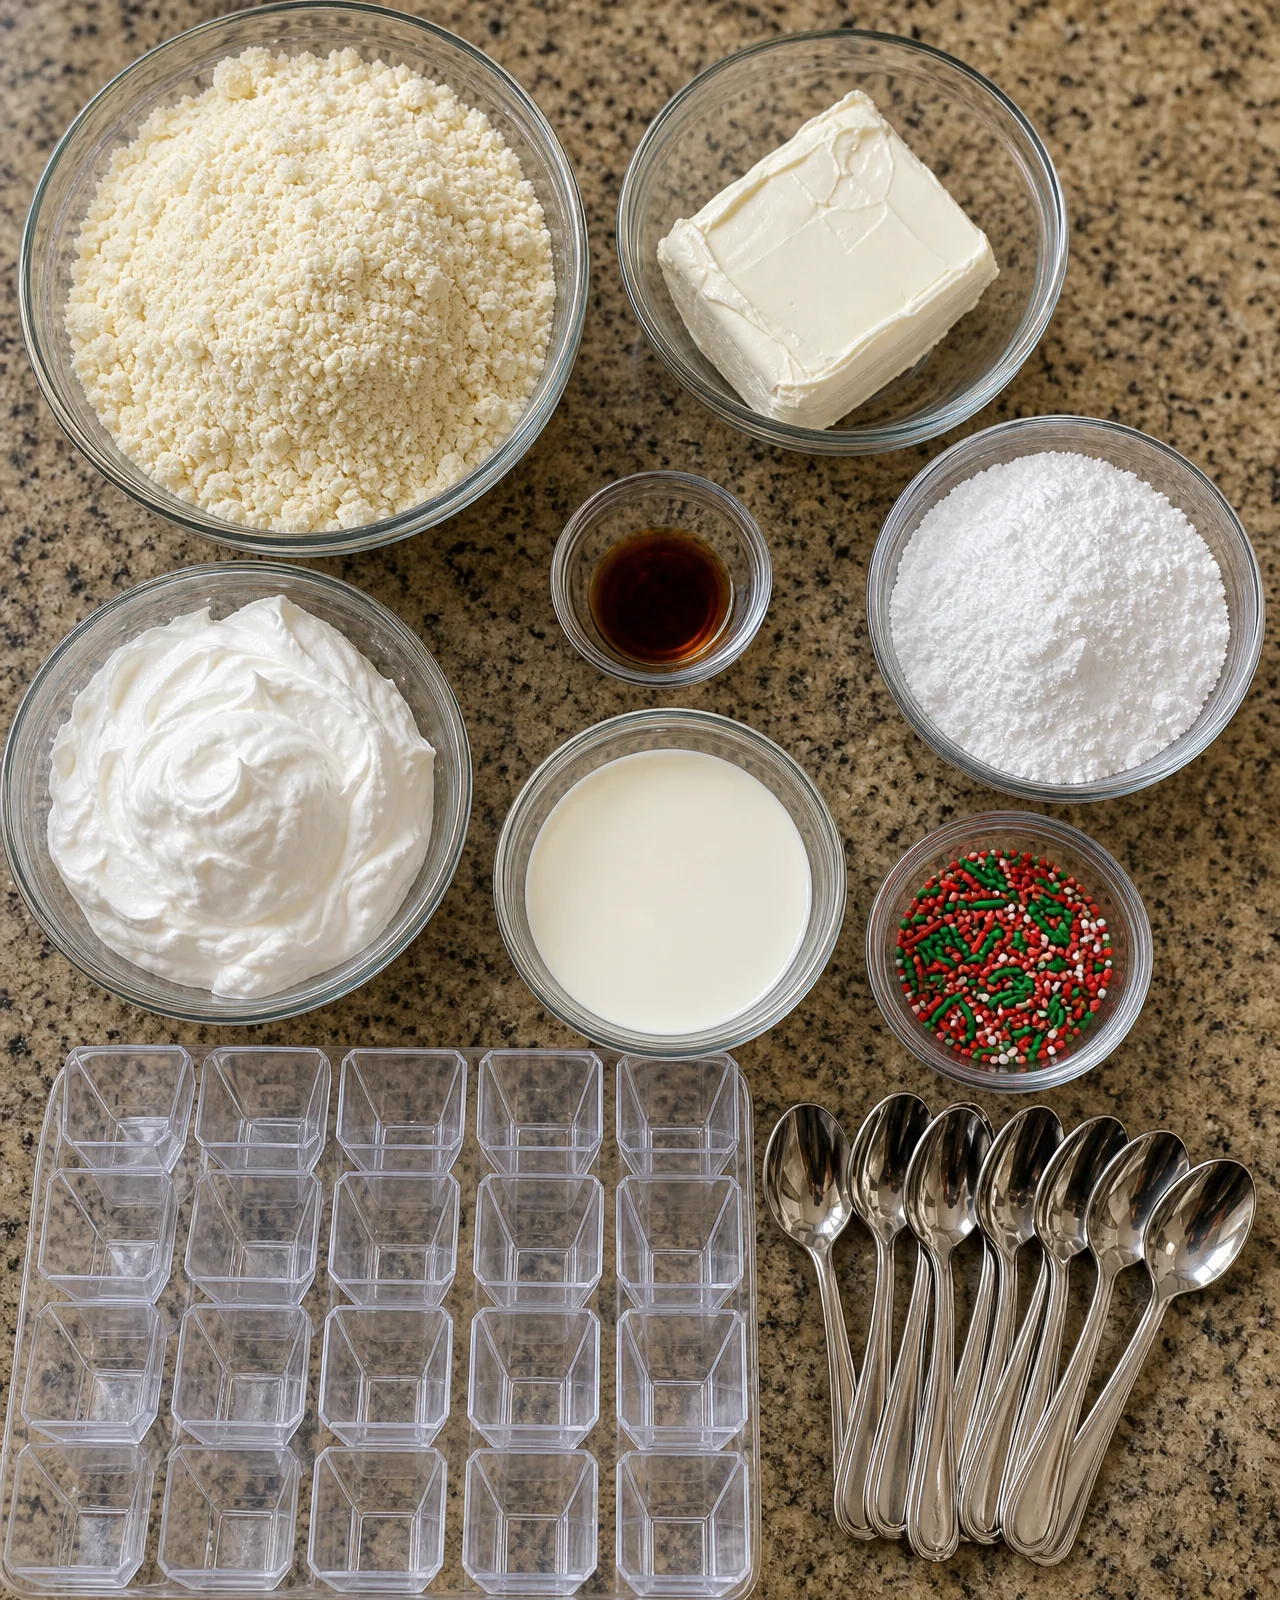
The addition of whipped topping contributes to the light and fluffy texture that makes each bite enjoyable. It is key to achieving that creamy consistency that you expect from dessert dips. Heavy whipping cream is also crucial for ensuring the mixture holds its shape when piped into the mini dessert cups. Finally, use festive red and green Christmas sprinkles not only to decorate the cups but also to add a fun and colorful flair. If you’re looking for alternatives, consider swapping in chocolate cake mix or flavored whipped topping to create a unique twist on this classic recipe.
- 1 box (15.25 oz) vanilla cake mix, heat-treated and cooled
- 8 oz cream cheese, softened
- 1 cup powdered sugar
- 1 tsp vanilla extract
- 8 oz whipped topping, thawed
- 1/2 cup heavy whipping cream
- 1/4 cup red and green Christmas sprinkles, divided
- 18–20 mini dessert cups (2–3 oz)
- 18–20 mini dessert spoons
How to Make Vintage Christmas Cake Dip Cups
Step 1: Heat-Treat the Cake Mix
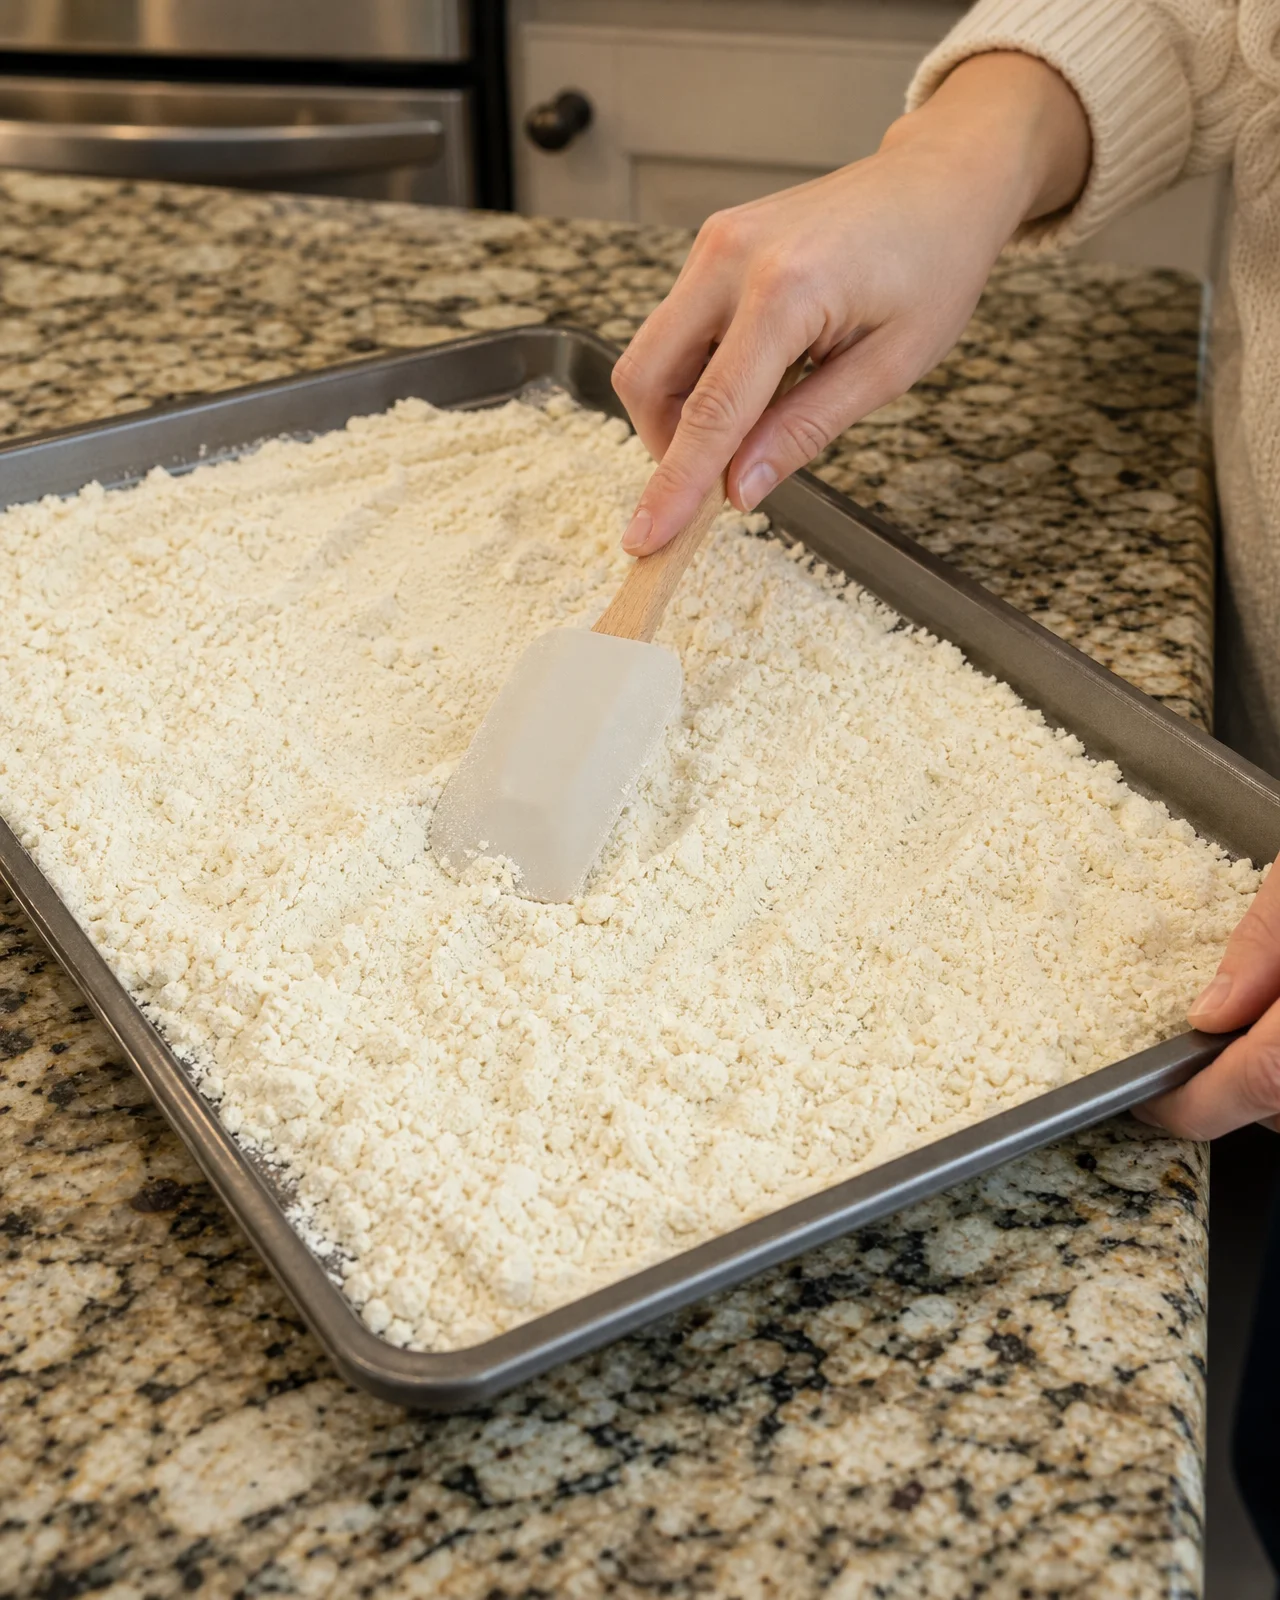
To start, preheat your oven to 350°F (175°C). Evenly spread the dry vanilla cake mix over a baking sheet to ensure it heats thoroughly. Bake the cake mix for 5–7 minutes, monitoring the temperature carefully until it reaches 165°F (74°C) throughout. This step is essential for making it safe to eat, as it eliminates any potential risks associated with raw cake mix. After baking, let the baked cake mix cool completely on the counter. This cooling period not only ensures that it’s safe to add to your dip but also contributes to a deeper flavor profile. You will want the cake mix to be at room temperature before mixing it with the other ingredients to avoid melting the cream cheese. As you prepare the rest of the dip, keep the cooled cake mix in mind; its texture will play a crucial role in the overall creaminess of your dip.
Step 2: Combine Cream Cheese and Cake Mix
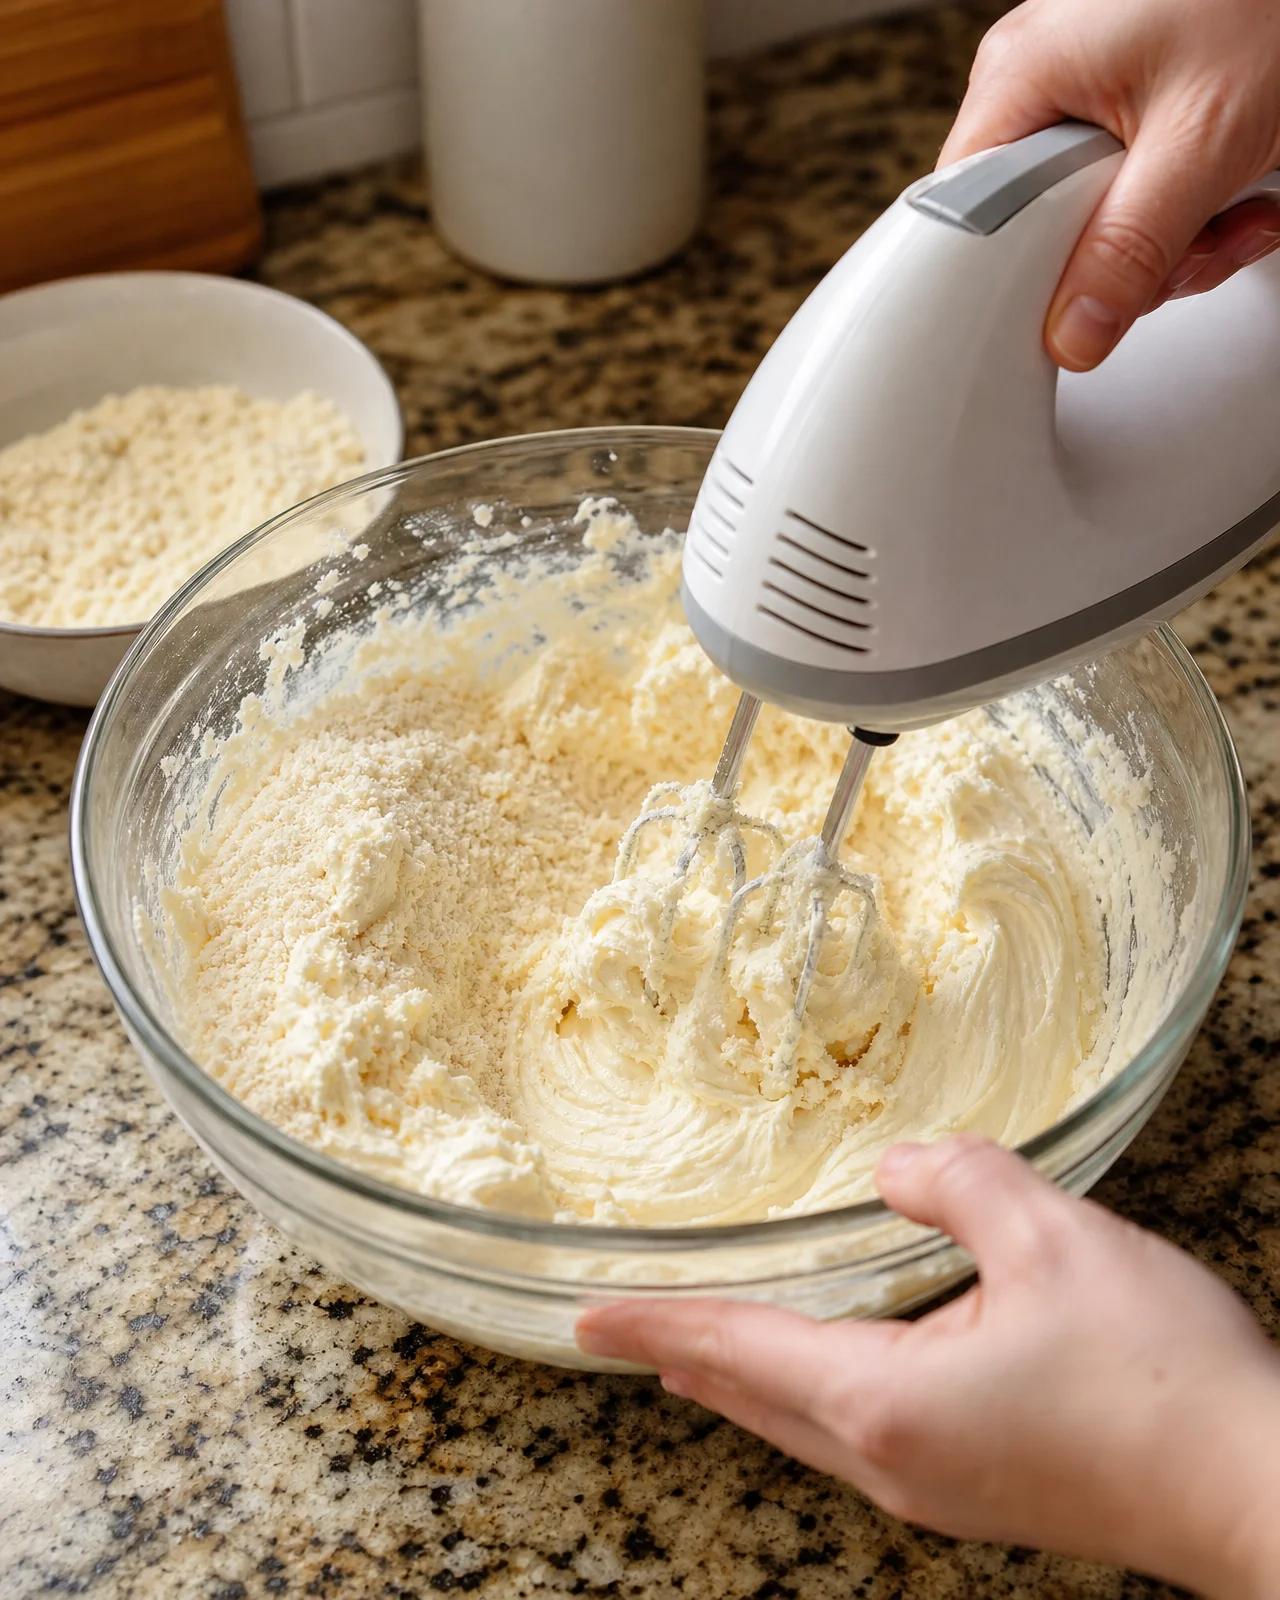
In a large mixing bowl, add the softened cream cheese and powdered sugar. Using an electric mixer, beat these ingredients together until the mixture is smooth and fluffy, which usually takes about 2-3 minutes. Make sure your cream cheese is at room temperature to achieve the best texture. Next, add the cooled, heat-treated vanilla cake mix to the bowl. Mix everything together until well combined and there are no dry spots. This mixture should be thick and creamy, forming the base of your dip. As you mix, carefully incorporate the vanilla extract, which adds a layer of flavor that beautifully complements the sweetness of the powdered sugar. Be gentle during mixing to maintain a light texture; the aim is to blend without overmixing, so the dip retains its airy characteristics.
Step 3: Fold in Whipped Topping and Assemble
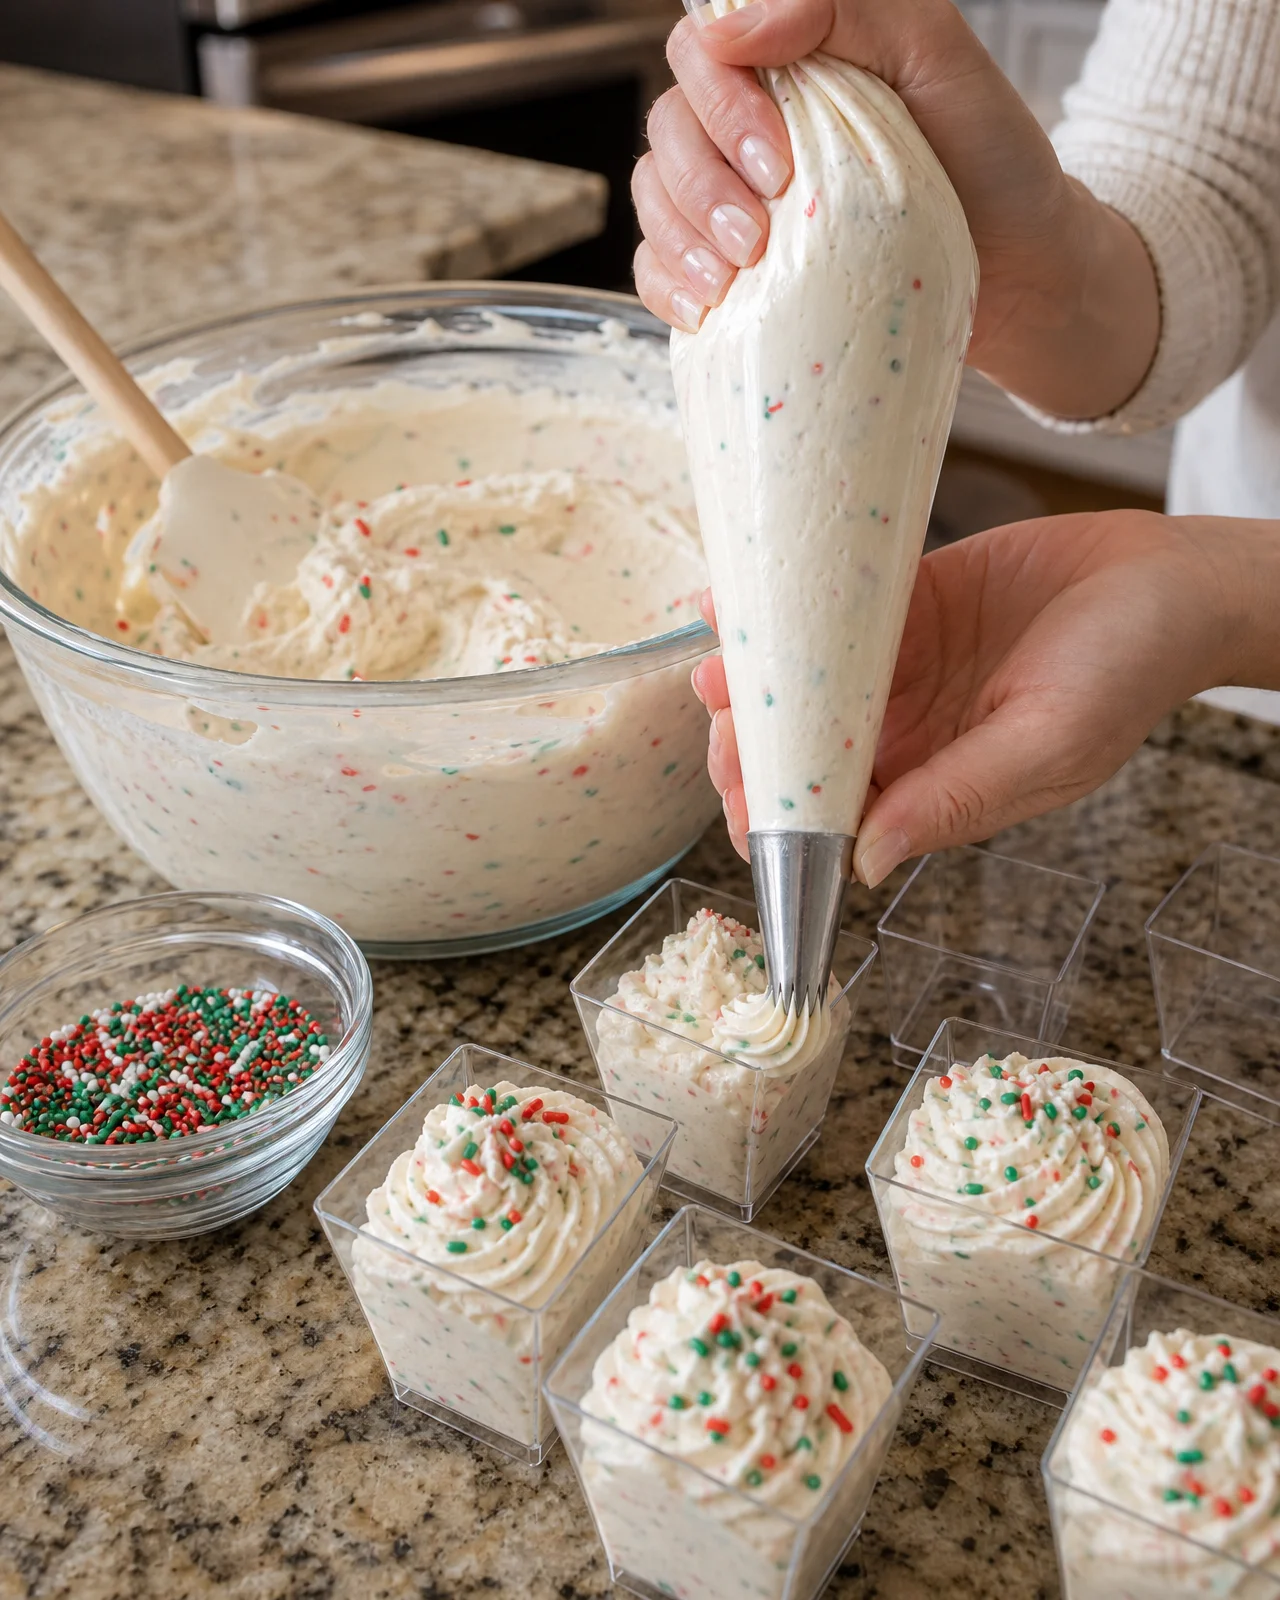
Gradually pour the heavy whipping cream into the cake mixture, folding gently until fully combined. This step is vital for enhancing the fluffiness of the dip. You should see the mixture becoming lighter and fluffier as you do this. Once fully integrated, gently fold in the thawed whipped topping to achieve a light and airy consistency. Take care not to overmix at this stage, as preserving the whipped topping’s texture is key to a delightful eating experience. After that, add 2 tablespoons of the festive red and green sprinkles to the creamy mixture, folding them in carefully. This will distribute the colors throughout the dip without deflating it. Now you’re ready to pipe your dip into the mini dessert cups. Transfer the fluffy mixture into a piping bag fitted with a star tip for an elegant finish. Pipe the creamy mixture into each mini dessert cup, filling them generously but not allowing them to overflow. To enhance the presentation, decorate the tops with the remaining sprinkles for that festive cheer.
Tips for Success
To ensure your Vintage Christmas Cake Dip Cups turn out perfectly, consider a few helpful tips. First, make sure to heat-treat the cake mix properly to eliminate any food safety concerns. If the cake mix is undercooked, your dip may not be safe to eat, so double-check the temperature while baking. Second, when mixing the cream cheese and powdered sugar, use room temperature ingredients for smoother blending, as this helps create a creamy texture.
Be cautious when incorporating the whipped topping; avoid overmixing, as this can lead to a dense texture instead of the desired light and fluffy consistency. If you find that the dip seems too thick, you can easily add a bit more heavy cream, mixing gently until you achieve your desired creaminess. Finally, always refrigerate the cups for at least 1 hour before serving. This chilling period allows the flavors to meld beautifully and ensures a refreshing treat for you and your guests.
Equipment Needed
To make Vintage Christmas Cake Dip Cups, you’ll require a few essential kitchen tools. Start with a large mixing bowl for combining your ingredients. An electric mixer will help create a smooth and fluffy texture for the cream cheese mixture. Measuring cups and spoons are crucial for accurately portioning your ingredients, while a baking sheet is needed for heat-treating the cake mix.
Also, a piping bag fitted with a star tip will allow you to elegantly pipe the dip into the mini dessert cups. Finally, ensure you have enough mini dessert cups and spoons for serving, making your presentation festive and inviting. Having these tools readily available will streamline your preparation process and ensure you can focus on creating this delightful treat.
Variations
While the Vintage Christmas Cake Dip Cups are delightful as-is, you can easily customize them to suit your taste. For instance, experimenting with different cake mixes like chocolate or red velvet can create a completely new flavor profile. If you want to enhance the festive spirit, consider swapping out the sprinkles for crushed peppermint candies or chocolate shavings, introducing a different look and taste to the dip.
To add a fruity twist, you can fold in diced strawberries or tart cranberries into the dip mixture, allowing their natural flavors to complement the creaminess. For texture variation, try layering the dip with cake crumbles or graham cracker crumbs. These alterations not only keep the dessert exciting but also make it versatile, perfect for various holiday gatherings and personal preferences.
Serving Suggestions
When serving your Vintage Christmas Cake Dip Cups, consider pairing them with a selection of holiday treats, such as gingerbread cookies or festive sugar cookies, to create a delightful dessert display. Arranging the dip cups on a tiered serving tray can enhance their visual appeal and make for an eye-catching presentation. If you’re hosting a holiday party, encourage guests to personalize their cups with various toppings, including additional sprinkles, chocolate drizzles, or fresh fruit slices. Don’t forget to serve the dip cups with mini dessert spoons, ensuring that everyone can easily indulge in this tasty festive treat at their leisure.
FAQs about Vintage Christmas Cake Dip Cups
Can I prepare these dip cups ahead of time?
Yes, you can prepare the Vintage Christmas Cake Dip Cups a day in advance. Just remember to keep them in the refrigerator until it’s time to serve.
What can I substitute for cream cheese?
For a lighter alternative, you could use Greek yogurt or mascarpone cheese, though this may slightly alter the flavor and consistency.
How long will leftovers keep?
These dip cups can be stored in the refrigerator for up to 3 days. Cover them tightly to maintain freshness.
Can I freeze these dip cups?
It is not recommended to freeze these dip cups, as the texture may change when thawed, making them less creamy. They are best enjoyed fresh.
What can I use if I don’t have mini dessert cups?
If mini dessert cups aren’t available, you can use small mason jars or even small glasses to serve this festive dip.
Final Thoughts
Vintage Christmas Cake Dip Cups are a delightful addition to any holiday gathering, offering an explosion of flavors and festive cheer. Their creamy vanilla base combined with vibrant sprinkles makes them visually appealing and enjoyable for guests of all ages. These festive treats are perfect for a holiday party, as an after-dinner dessert, or as a charming centerpiece on a dessert table. Be sure to chill them before serving to enhance their flavor and texture, allowing the components to meld beautifully. With these whimsical dip cups, you can spread joy and create sweet moments of indulgence that will leave lasting impressions on your friends and family this season. Enjoy the holiday spirit and share the joy of these delightful treats with those you love!
Print
Vintage Christmas Cake Dip Cups for a Festive Treat
- Prep Time: 20 minutes
- Cook Time: 7 minutes
- Total Time: 1 hour 27 minutes
- Yield: 18-20 servings 1x
- Category: Dessert
- Method: No-Bake
- Cuisine: American
- Diet: Vegetarian
Description
Vintage Christmas Cake Dip Cups are a festive and delicious treat that combines the flavors of vanilla cake with cream cheese and festive sprinkles.
Ingredients
- 1 box (15.25 oz) vanilla cake mix, heat-treated and cooled
- 8 oz cream cheese, softened
- 1 cup powdered sugar
- 1 tsp vanilla extract
- 8 oz whipped topping, thawed
- 1/2 cup heavy whipping cream
- 1/4 cup red and green Christmas sprinkles, divided
- 18–20 mini dessert cups (2–3 oz)
- 18–20 mini dessert spoons
Instructions
- Heat-Treat: Preheat oven to 350°F (175°C). Spread dry cake mix on a baking sheet and bake for 5–7 minutes, ensuring it reaches 165°F (74°C) throughout. Let cool completely.
- Mix: Beat softened cream cheese and powdered sugar until smooth and fluffy. Add vanilla extract and cooled cake mix. Mix well.
- Make It Fluffy: Gradually add heavy whipping cream, mixing until smooth. Gently fold in the whipped topping until creamy and light.
- Add Sprinkles: Fold in 2 tablespoons of festive red and green Christmas sprinkles.
- Fill & Decorate: Transfer the creamy mixture to a piping bag with a star tip. Pipe into mini dessert cups and decorate with the remaining sprinkles.
- Chill & Enjoy: Refrigerate for at least 1 hour before serving. Serve chilled with mini dessert spoons!
Notes
- Ensure the cake mix is heat-treated to make it safe to eat.
- You can use any type of sprinkles for decoration based on your preference.
- For a lighter texture, be careful not to overmix when folding in the whipped topping.
Nutrition
- Serving Size: 1 cup
- Calories: 150
- Sugar: 10g
- Sodium: 120mg
- Fat: 8g
- Saturated Fat: 4g
- Unsaturated Fat: 3g
- Trans Fat: 0g
- Carbohydrates: 16g
- Fiber: 0g
- Protein: 2g
- Cholesterol: 30mg