Why Raspberry Chocolate Roll Cake Is So Special
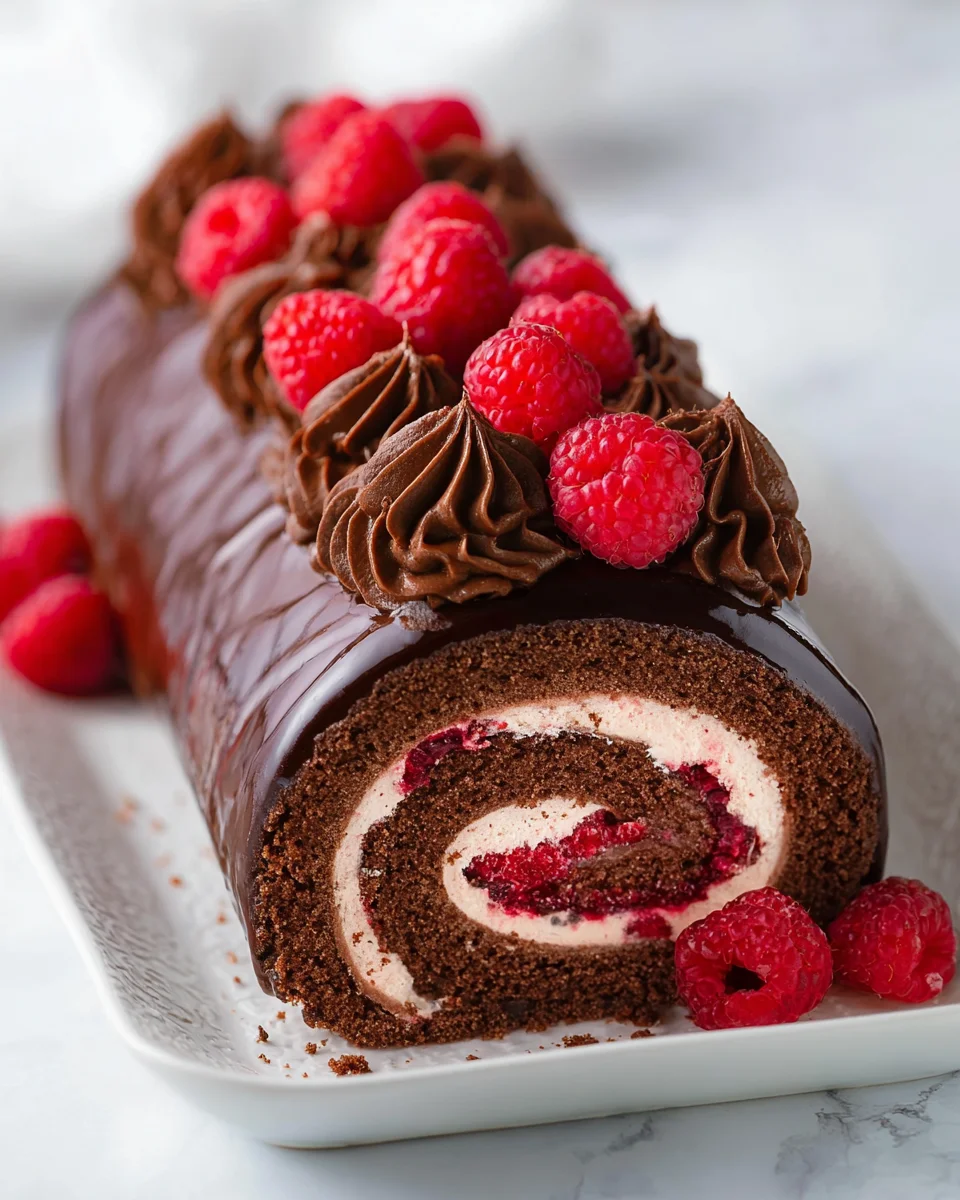
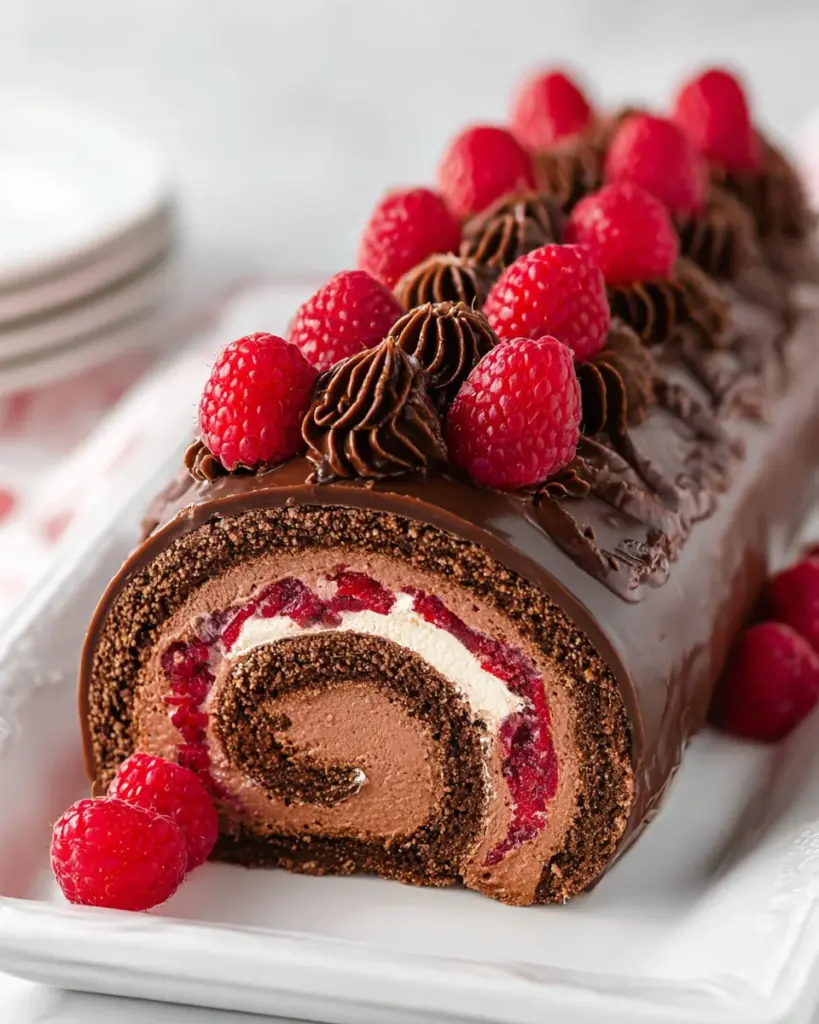
There’s something undeniably eye-catching about a cake roll. The moment you slice into it and reveal those perfect spirals of filling wrapped inside a soft sponge, it instantly feels like a professional-level dessert. But beyond the visual appeal, this Raspberry Chocolate Roll Cake delivers something even better—a bold combination of flavors that feels both rich and refreshing at the same time.
What makes this cake stand out is the contrast. The deep, slightly bittersweet chocolate sponge pairs beautifully with the bright, tangy raspberry filling, while the chocolate whipped cream adds a smooth, airy layer that ties everything together. It’s not overly sweet, not too heavy—just balanced enough to keep you going back for another slice.
This is also one of those desserts that feels special without requiring complicated ingredients. The technique might look intimidating at first, but once you understand the process, it becomes surprisingly manageable.
The Perfect Balance of Rich Chocolate and Tart Raspberry
Chocolate and raspberry are a classic pairing for a reason. The richness of chocolate can sometimes feel heavy on its own, but raspberries cut through that with a natural tartness that brightens every bite.
It’s like contrast in music—deep notes paired with high notes to create something more interesting than either alone.
A Show-Stopping Dessert for Any Occasion
Whether it’s a holiday gathering, a celebration, or just a weekend baking project, this cake always feels appropriate. It looks elegant, slices beautifully, and feels like something you’d find in a bakery display case.
Ingredients Breakdown and Flavor Profile
Each layer in this cake plays a specific role, both in flavor and texture.
Fresh Raspberry Filling Explained
The filling is made by cooking raspberries, sugar, and cornstarch, creating a thick, jam-like consistency. The addition of lemon juice enhances the brightness and keeps the flavor from feeling too sweet.
Straining the seeds is optional, but it creates a smoother texture if you prefer a more refined finish.
Light and Flexible Chocolate Sponge Cake
The cake itself is a sponge, not a dense cake. It relies on whipped egg whites for structure, which makes it light, flexible, and perfect for rolling.
The cocoa powder and espresso powder deepen the chocolate flavor, giving it a rich but not overpowering taste.
Chocolate Whipped Cream and Ganache Finish
The whipped cream layer adds softness and lightness, while the ganache provides a glossy, rich finish that makes the cake look polished.
Together, they create layers of texture—soft, creamy, and slightly firm.
Essential Tools for a Perfect Cake Roll
Must-Have Baking Equipment
You’ll need a jelly roll pan, parchment paper, mixing bowls, and a mixer.
Optional Tools for Professional Results
An offset spatula helps spread fillings evenly, while a cooling rack makes handling easier.
Step-by-Step Raspberry Chocolate Roll Cake Recipe
Making the Raspberry Filling
Cook raspberries with sugar and cornstarch until thick, then cool completely.
Preparing the Chocolate Sponge Cake
Mix dry ingredients, combine with yolk mixture, and fold in whipped egg whites.
Rolling and Cooling the Cake
Bake, then roll the cake while warm to set its shape.
Filling and Re-Rolling
Spread filling and whipped cream, then roll carefully.
Adding Ganache and Final Decorations
Pour ganache over the cake and decorate with whipped cream and raspberries.
Pro Tips for a Perfect Cake Roll
Making a Raspberry Chocolate Roll Cake can feel a bit intimidating the first time, but once you understand how the texture works and how to handle the cake, it becomes much more approachable. The key is flexibility—both in the cake itself and in your technique. When everything is done right, you’ll end up with a smooth, swirl-filled dessert that looks just as good as it tastes.
Preventing Cracks While Rolling
Cracking is probably the biggest concern when making a cake roll, and it usually comes down to timing and moisture. The most important step is rolling the cake while it’s still warm. At this stage, the sponge is soft and flexible, making it much easier to shape without breaking.
Using parchment paper to help guide the roll is a simple but effective trick. It keeps the cake from sticking and gives you control as you roll it tightly. As the cake cools in that rolled shape, it “remembers” the form, which makes it much easier to unroll and fill later.
Another helpful tip is the re-rolling method mentioned in your instructions. Gently unrolling and rolling the cake a few times as it cools helps maintain elasticity. It might seem like an extra step, but it significantly reduces the chances of cracks forming later.
Achieving a Light, Airy Texture
The sponge cake should feel light, not dense. That’s where the whipped egg whites come in—they provide the structure and lift. When folding them into the batter, it’s important to be gentle. Overmixing can deflate the air you just worked to incorporate.
Think of folding as turning the batter over itself rather than stirring. Use slow, deliberate motions until everything is just combined. It’s okay if a few streaks remain at first—they’ll disappear as you continue folding carefully.
Also, avoid overbaking. A dry cake is more likely to crack. Bake just until the top springs back when touched, then remove it immediately.
Common Mistakes and How to Avoid Them
Even though this cake looks impressive, most issues come down to a few small details. Once you know what to watch for, it becomes much easier to get consistent results.
Dense Cake or Deflated Batter
A dense cake usually means the batter lost too much air. This can happen if the egg whites were overmixed or folded too aggressively.
Make sure to whip the egg whites to stiff peaks and fold them in gently. Keeping that air in the batter is what gives the cake its soft, flexible texture.
Filling Leaking or Uneven Swirls
If the filling spills out when rolling, it’s often because there’s too much of it or it’s spread too close to the edges. Leaving a small border around the cake helps prevent overflow.
Rolling tightly and evenly also helps create those clean, defined swirls instead of uneven layers.
Variations and Creative Twists
Once you’ve mastered the classic version, this cake becomes a great base for experimenting with different flavors and styles.
White Chocolate or Berry Variations
Swap the chocolate sponge for a vanilla or white chocolate version, then keep the raspberry filling for a lighter, fruit-forward dessert. You can also mix berries—like strawberries or blackberries—for a more complex flavor.
These variations keep the same structure but create a completely different taste experience.
Holiday and Flavor Adaptations
For a festive twist, add a hint of orange zest to the raspberry filling or a touch of peppermint extract to the chocolate whipped cream. Small changes like these can make the cake feel seasonal and unique.
You can also decorate the outside differently—powdered sugar for a winter look or fresh berries for a summer feel.
Serving and Presentation Ideas
Presentation is where this cake really shines. The swirl alone is impressive, but a few finishing touches can make it look bakery-worthy.
Creating a Bakery-Style Finish
Pour the chocolate ganache evenly over the top and let it drip slightly down the sides for a polished look. Once it sets slightly, add whipped cream swirls and fresh raspberries on top.
For clean slices, use a sharp knife dipped in warm water and wipe it between cuts. This helps maintain those beautiful layers without smearing.
Serve slightly chilled for the best texture—the ganache will be set, but the inside will remain soft and creamy.
Storage and Shelf Life
This cake stores well, making it a great make-ahead dessert.
Keeping the Cake Fresh
Store the cake in the refrigerator, covered, for up to 3–4 days. The flavors actually develop more over time, making it even better the next day.
If you need to store it longer, you can freeze it (without fresh toppings) for up to a month. Wrap it tightly to prevent freezer burn, and thaw in the refrigerator before serving.
Conclusion
Raspberry Chocolate Roll Cake is one of those desserts that looks complicated but becomes surprisingly manageable once you understand the process. It’s all about balance—light sponge, rich chocolate, and bright raspberry flavor working together in every bite.
What makes it truly special is the combination of textures and flavors. The airy cake, smooth cream, and slightly tart filling create a dessert that feels both indulgent and refreshing at the same time.
Whether you’re making it for a special occasion or just want to challenge yourself with something new, this cake delivers both visually and in flavor. And once you slice into that perfect swirl, you’ll see exactly why it’s worth the effort.
FAQs
1. Why did my cake crack when rolling?
It was likely too cool or slightly overbaked. Roll while warm for best results.
2. Can I make the filling ahead of time?
Yes, the raspberry filling can be made 2–3 days in advance.
3. Can I skip the espresso powder?
Yes, but it enhances the chocolate flavor.
4. How do I get clean slices?
Use a warm knife and wipe it between cuts.
5. Can I freeze the cake roll?
Yes, without toppings, it freezes well for up to a month.
Print
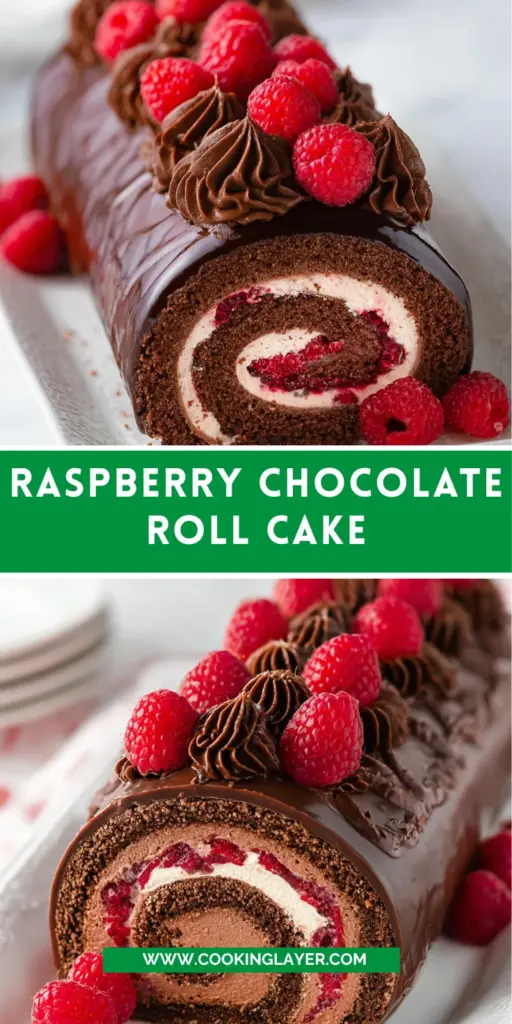
Raspberry Chocolate Roll Cake
Description
There’s something undeniably eye-catching about a cake roll. The moment you slice into it and reveal those perfect spirals of filling wrapped inside a soft sponge, it instantly feels like a professional-level dessert. But beyond the visual appeal, this Raspberry Chocolate Roll Cake delivers something even better—a bold combination of flavors that feels both rich and refreshing at the same time.
Ingredients
Raspberry Filling
6 tbsp (78g) sugar
1 1/2 tbsp cornstarch
1 tbsp water
1 tbsp fresh lemon juice
3 cups (336g) raspberries
Chocolate Cake
3/4 cup (98g) all-purpose flour
1/3 cup (38g) Dutch-processed cocoa powder
1 tsp baking powder
1 tsp espresso powder
1/2 tsp salt
4 large eggs, divided
3/4 cup (155g) granulated sugar
5 tbsp (72g) sour cream
1/4 cup (56g) butter, melted
1 tsp vanilla extract
Chocolate Whipped Cream Filling
1 cup plus 2 tbsp (210ml) heavy whipping cream, cold
2 tbsp (15g) powdered sugar
3 tbsp (22g) natural unsweetened cocoa powder
3/4 tsp vanilla extract
Chocolate Ganache and Toppings
6 ounces (1 cup | 169g) semi-sweet chocolate, finely chopped
3/4 cup (180ml) heavy whipping cream
Chocolate whipped cream, optional*
Raspberries, optional
Instructions
Make the filling
Add the sugar and cornstarch to a medium-sized saucepan and whisk together until no lumps remain. Add the water and lemon juice and stir together.
Heat over medium heat until the sugar begins to melt, then add the berries. Stir to coat with the sugar mixture. Continue to cook until the berries start to soften and let out juices. Use your spatula to mash the berries a bit.
Continue to cook and then remove from heat when the juices have begun to thicken, after about 3-4 minutes. Pour the mixture into another bowl and refrigerate until cool. Mixture will thicken as it cools. If you’d like to remove the seeds, you can strain the mixture right after you finish cooking it. You can make the filling up to 2-3 days ahead, if you’d like. It should be completely cooled before adding it to your cake roll.
Make the cake roll
Preheat oven to 350°F. Line a 17×12-inch jelly roll sheet pan with parchment paper. Make sure the parchment paper sticks up at least an inch above the sides of the pan on all sides. You’ll use the parchment paper later to lift the cake out of the pan and roll it up.
Whisk the flour, cocoa, baking powder, espresso powder and salt together in a medium bowl and set aside.
In a large bowl, combine the egg yolks and sugar and whisk together until well combined.
Add the sour cream, melted butter and vanilla extract and whisk together until well combined.
Add the dry ingredients and gently whisk together until well combined, then set aside.
Add the egg whites to a large mixer bowl and whip on high speed until stiff peaks form.
Gently fold about 1/3 of the whipped egg whites into the chocolate mixture to loosen up the batter.
Add the remaining egg whites and gently fold together until well combined.
Spread the cake batter evenly into the prepared pan and bake for 10-12 minutes, or until the top of the cake springs back when touched and a toothpick inserted comes out clean.
Remove the cake from the oven and immediately lift the cake out of the pan using the parchment paper and place it on the counter.
While the cake is hot, use the parchment paper the cake was baked in and start at the shorter end of the cake to slowly roll the cake up. You can just set the cake roll aside to cool completely, if you like. But to help avoid having the cake crack later, I like to unroll and re-roll the cake a few times during cooling to help it keep its elasticity. I first unroll it after about 5 minutes, then after another 5 minutes, and again after another 10 minutes. From there, I might roll it out 2-3 more times after 10-15 minute intervals. It should take about an hour to an hour and a half to cool completely, depending on the temperature of your home. You’ll want to fill it once it’s completely cool. Don’t let it sit for several hours.
Make the filling
When the cake has cooled and is ready to be filled, make the whipped cream filling. Add the heavy whipping cream, powdered sugar, cocoa powder and vanilla extract to a large mixer bowl and whip on medium speed until it just reaches stiff peaks.
Unroll the cake roll very carefully, looking out for areas where it may be sticking to the parchment paper to release it. You can use an offset spatula or something similar and run it along the parchment paper as you unroll the cake to help release it as it unrolls. I also like to gently lift up before I roll back, to give the cake a chance to release.
Spread the raspberry filling evenly onto the unrolled cake, leaving some space around the edges for it to move around a bit as you re-roll it. I recommend about ½ an inch on the long sides and an inch or two on the short side.