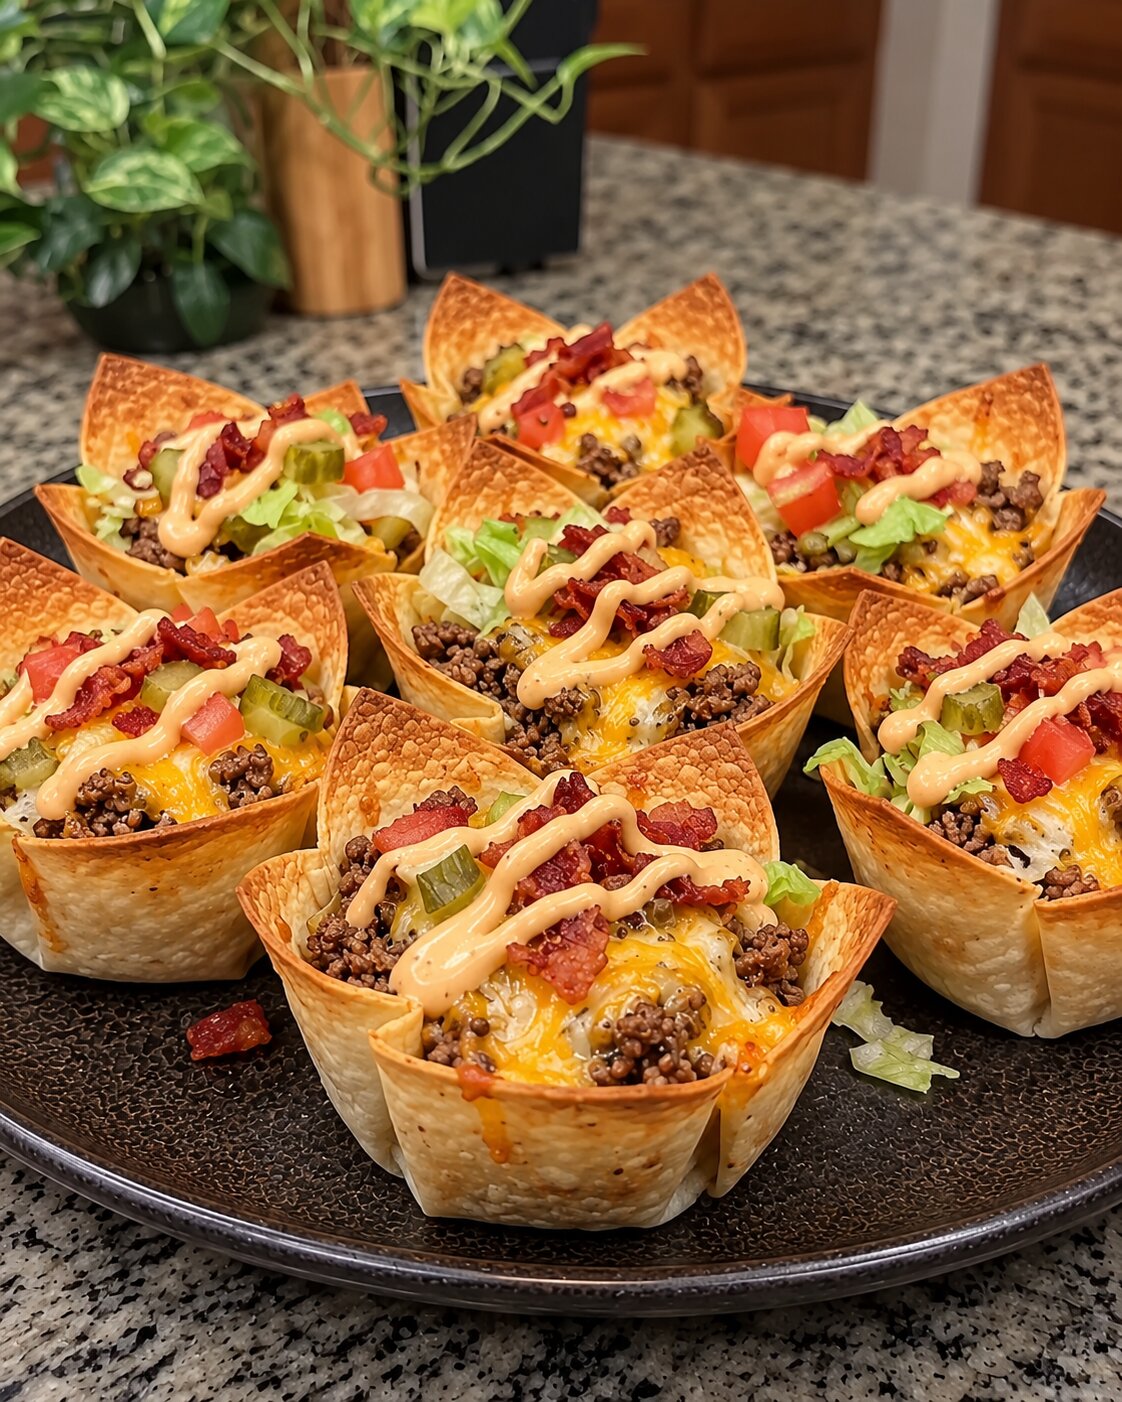

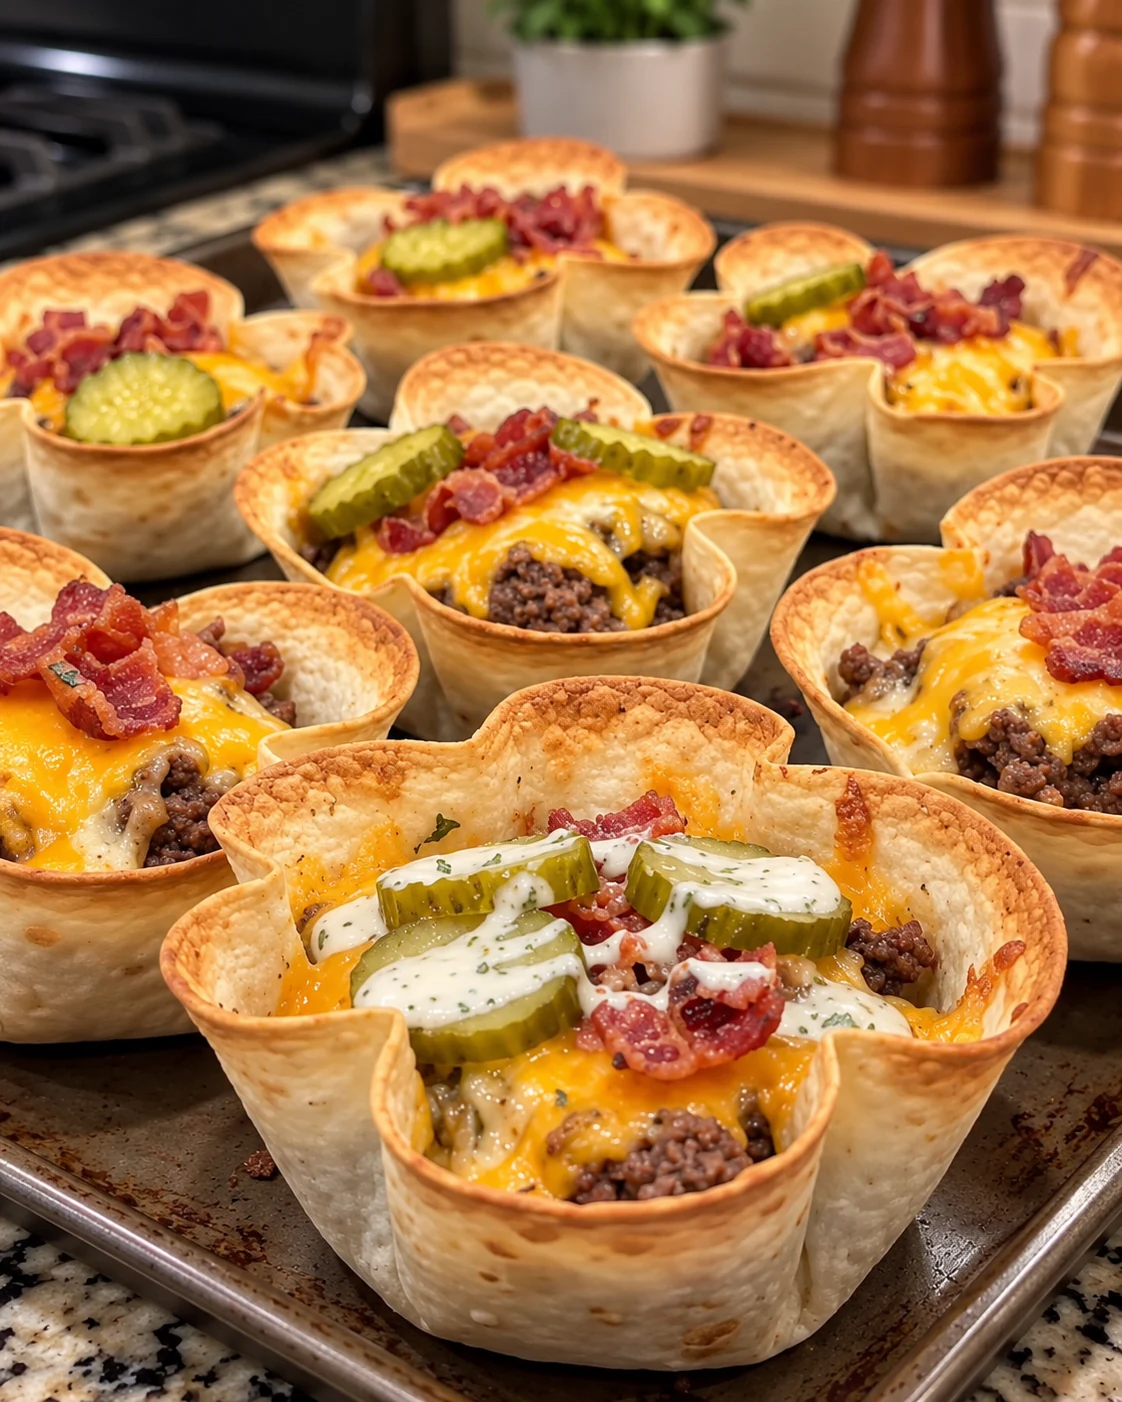
These bacon cheeseburger taco cups bring everything people love about a loaded cheeseburger into a crisp, hand-held party bite. Each soft flour tortilla is pressed into a muffin pan, lightly prebaked, then packed with juicy seasoned beef, smoky bacon, dill pickles, and plenty of sharp cheddar. A cool ranch drizzle and fresh toppings finish the cups just before serving, so every bite combines a crunchy shell, savory filling, tangy pickle, and creamy sauce.
The recipe is especially useful when you need an appetizer that feels substantial without requiring forks and plates. The cups are easy to portion, simple to customize, and sturdy enough for a game-day buffet. They also look impressive on a tray even though the method uses familiar supermarket ingredients and a standard muffin pan.
Why You’ll Love These Bacon Cheeseburger Taco Cups
The contrast is the best part. The tortilla edges become crisp and golden while the lower portion stays strong enough to hold the warm filling. Inside, 80/20 ground beef provides classic burger flavor, cheddar melts through the meat, and bacon adds a second layer of savory richness. Chopped pickles cooked briefly with the beef distribute tanginess throughout instead of leaving all the pickle flavor on top.
These cups are also practical. You can cook the beef-and-bacon mixture up to two days ahead, prepare toppings separately, and assemble shortly before guests arrive. Because each cup is self-contained, the recipe works for tailgates, birthday parties, casual holiday gatherings, or a fun family dinner. For another muffin-tin appetizer idea, try these cheesy beef and bean tortilla crunch cups.
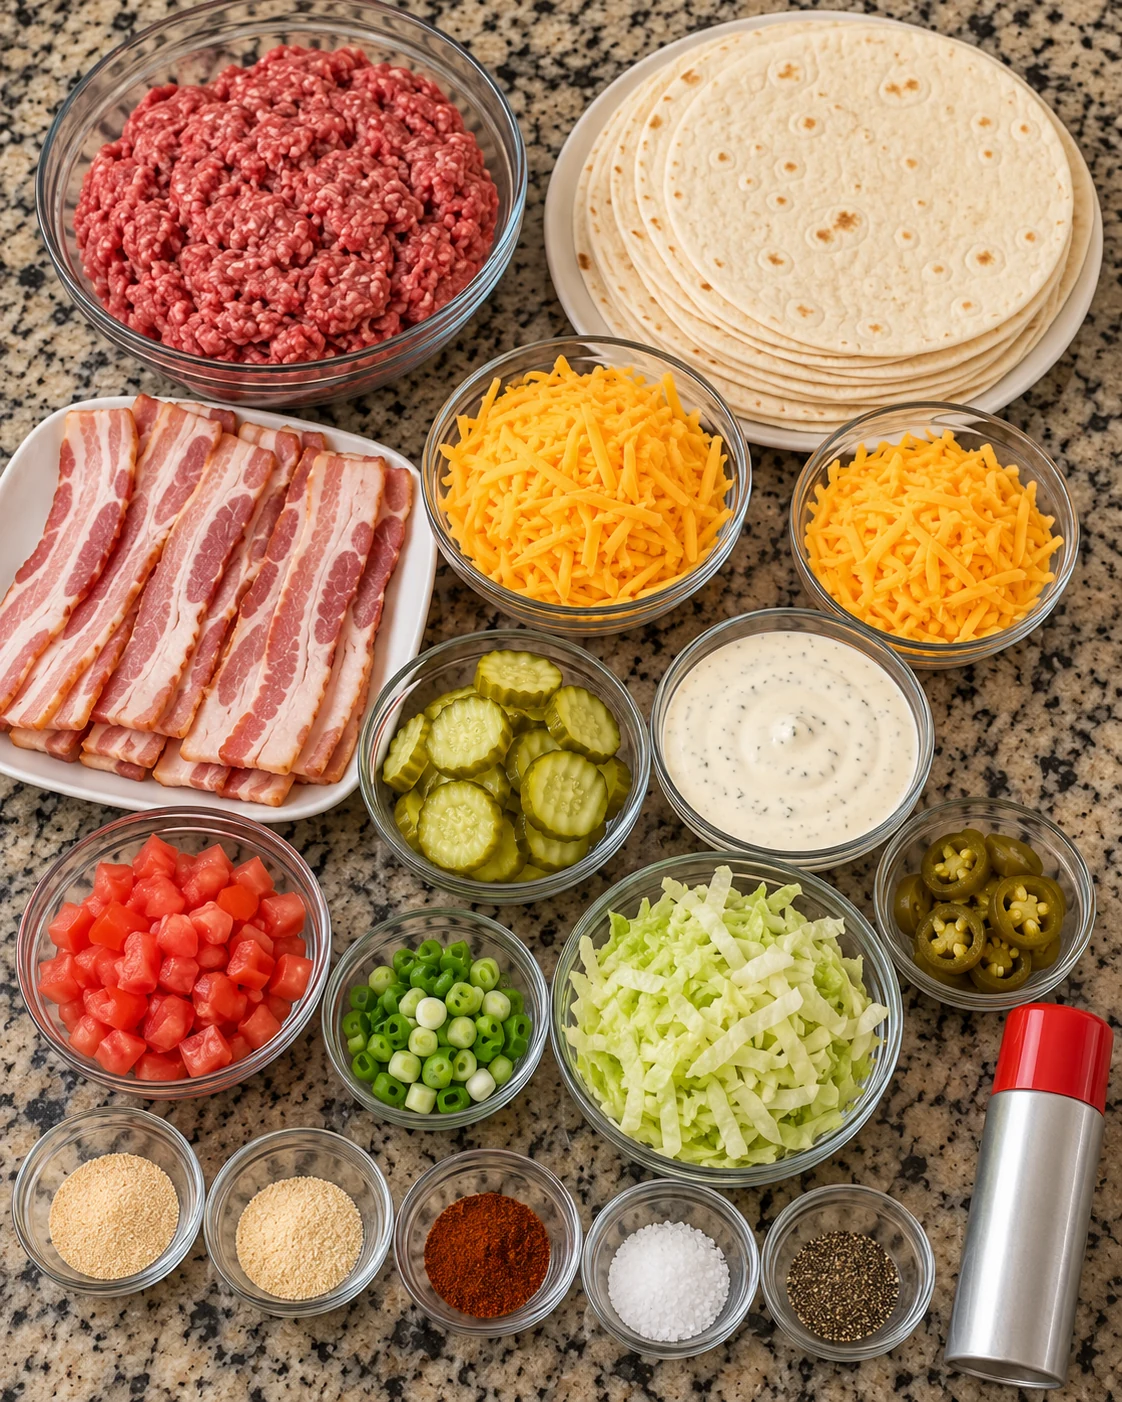
Ingredients You’ll Need
Ground beef: An 80/20 blend stays juicy and develops browned flavor. Drain excess grease after cooking so the tortilla shells remain crisp.
Thick-cut bacon: Eight slices provide enough bacon for both the filling and the finished tops. Cooking it first also leaves a spoonful of flavorful fat for browning the beef.
Sharp cheddar: Two portions go into the filling and over the assembled cups. Sharp cheddar has enough flavor to stand up to bacon, pickles, and ranch.
Dill pickles: Roughly chopped slices go into the beef, while whole or halved rounds make the cups instantly recognizable on the tray.
Small flour tortillas: Choose flexible tortillas sized to fit a standard muffin pan. Warm them briefly before shaping if they feel stiff.
Ranch and fresh toppings: Ranch, tomatoes, green onions, and shredded iceberg add coolness and color after baking. Pickled jalapeños are optional.
Ingredient Notes and Substitutions
Ground chuck is ideal, but any ground beef between 80 and 90 percent lean will work. If you use leaner beef, keep a little bacon fat in the pan so the filling does not taste dry. Turkey may be substituted, although it changes the classic cheeseburger character and may need a teaspoon of oil.
Medium cheddar, Colby Jack, or a cheddar-Monterey Jack blend can replace sharp cheddar. Pre-shredded cheese is convenient, but freshly shredded cheese melts more evenly because it lacks the powdery anti-caking coating. Bread-and-butter pickles make the cups sweeter; dill pickles keep the flavor bright and savory. Use the exact one-cup amount so the filling stays balanced.
Choose tortillas that are pliable and only slightly wider than the muffin wells. If they crack, wrap the stack in a damp paper towel and microwave for 15 to 20 seconds. Do not swap in hard taco shells because they cannot conform to the pan.
How to Make the Bacon Cheeseburger Filling
Start with the bacon. Arrange the slices in a large skillet over medium heat and cook for about 8 to 10 minutes, turning as needed, until crisp. Transfer them to paper towels. Crumble half for the filling and reserve the other half for topping. Pour off the rendered fat, leaving approximately one tablespoon in the skillet.
Add the ground beef and break it into small crumbles with a wooden spoon. Season with garlic powder, onion powder, smoked paprika, salt, and freshly ground pepper. Cook for 7 to 9 minutes, stirring occasionally, until no pink remains and the beef reaches 160°F. Drain excess grease thoroughly.
Return the skillet to low heat. Stir in the roughly chopped dill pickles, one-half cup cheddar, and half of the cooked bacon. The cheese only needs a minute to melt into the meat. Remove the skillet from the heat once everything is evenly combined; overcooking at this stage can dry the beef.
How to Shape Crispy Flour Tortilla Cups
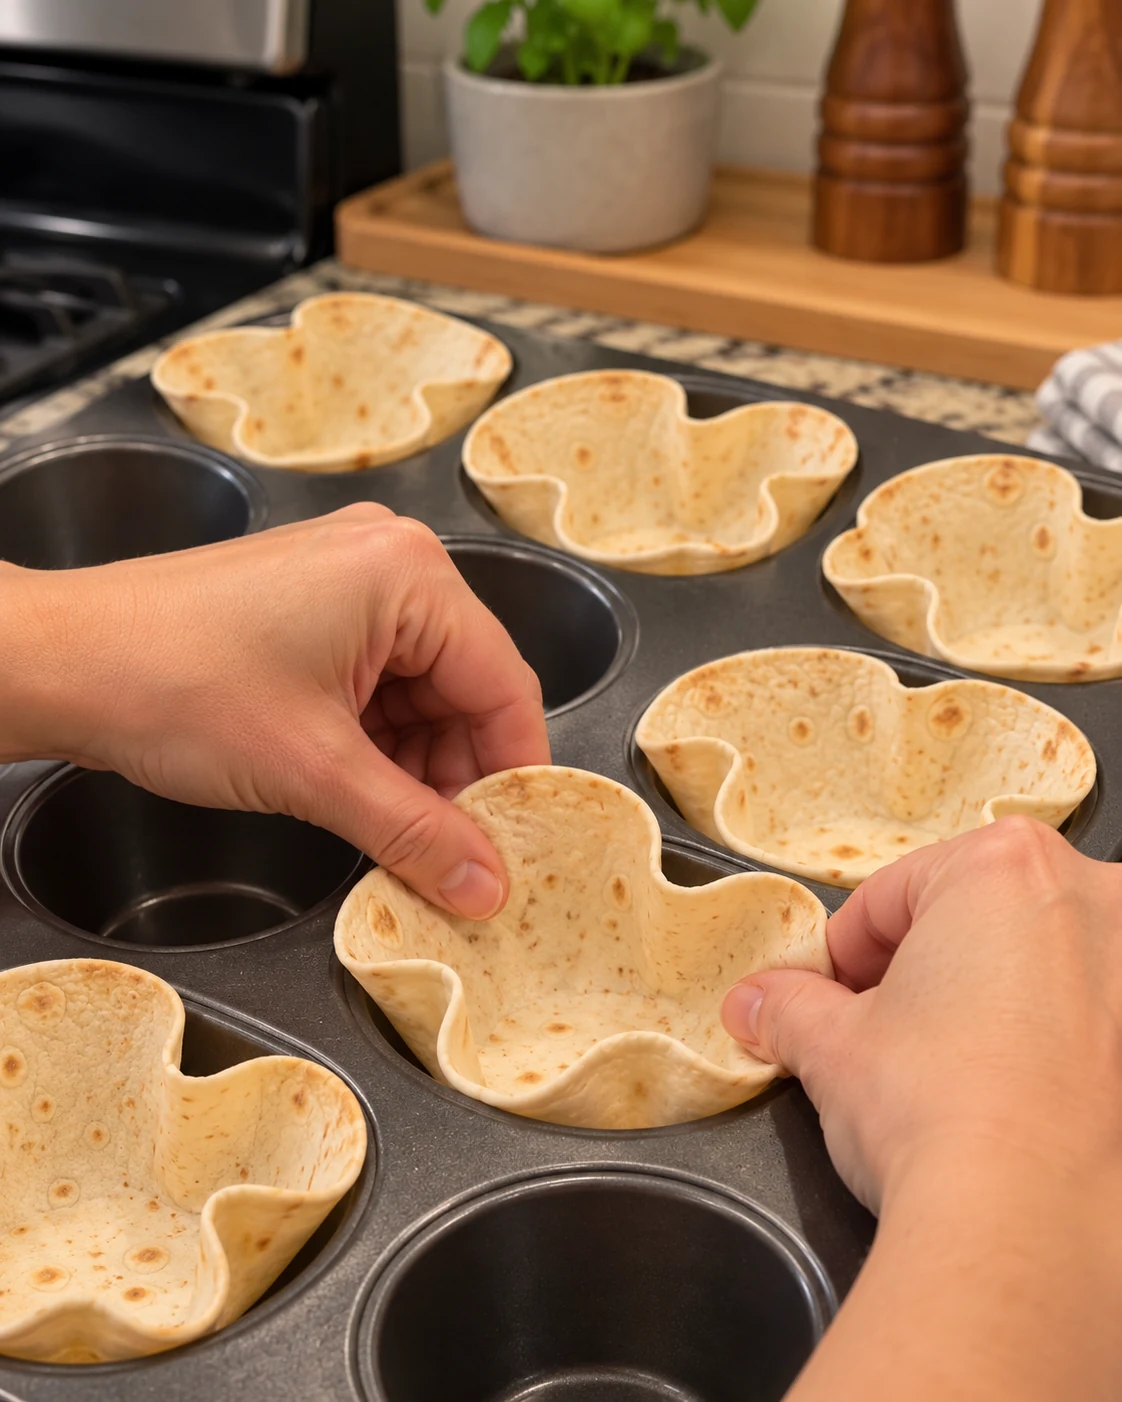
Heat the oven to 375°F and coat a standard 12-cup muffin pan with nonstick cooking spray. Warm the tortillas just until flexible. Center one tortilla over a cavity, then gently press the middle down while guiding the sides into soft folds. The raised edges should resemble petals and remain above the pan.
Avoid forcing a cold tortilla straight into the well, which can split it. Work one cup at a time and press firmly enough that the bottom sits flat. Once all 12 cups are formed, prebake them empty for 4 to 5 minutes. They should look set and slightly dry but not deeply browned. This short prebake is the key to a sturdy shell.
How to Assemble and Bake the Cups
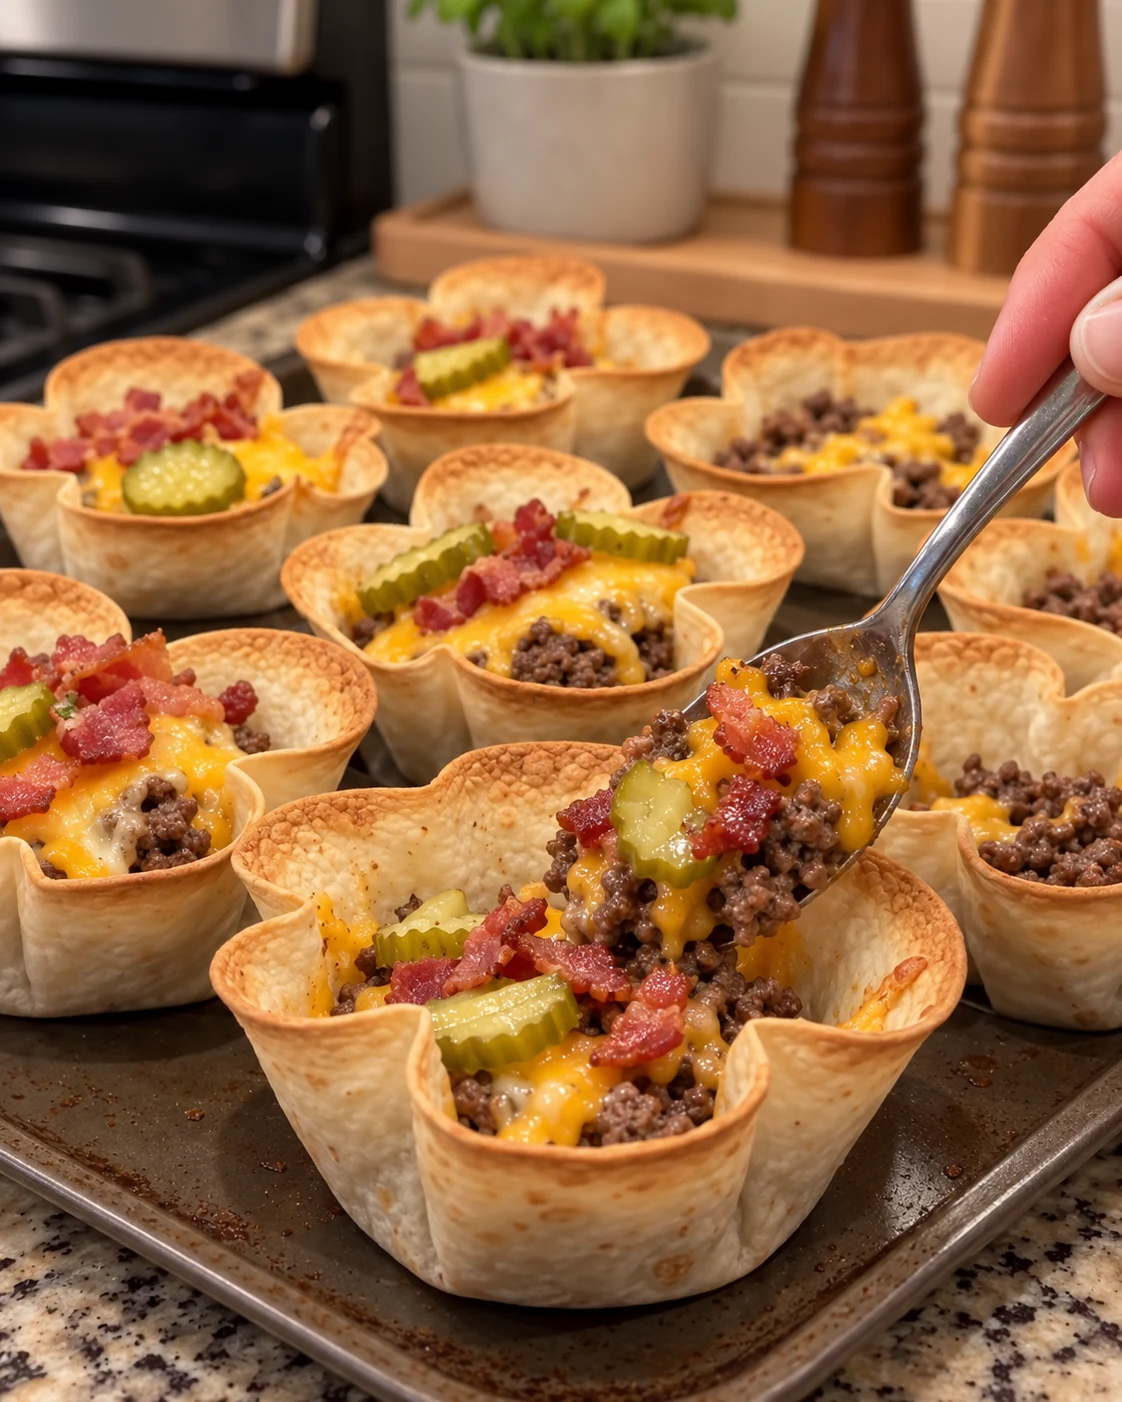
Divide the warm beef mixture evenly among the prebaked tortilla shells. A spring-loaded scoop or large spoon keeps portions consistent and reduces mess. Do not pack the meat tightly; a loose mound lets heat circulate and leaves space for cheese.
Top the cups with the remaining one-half cup cheddar from the filling ingredients plus the additional one-half cup listed for the shells. Add only a small ranch drizzle before baking, reserving most of the dressing for serving. Bake for 8 to 10 minutes, until the cheese has melted and the tortilla edges are golden brown.
Let the cups rest in the pan for 3 to 5 minutes. This brief pause allows the cheese to settle and makes the shells easier to lift without tearing. Run a thin offset spatula around any spot where cheese has touched the pan, then transfer the cups to a tray.
Finishing the Loaded Cups
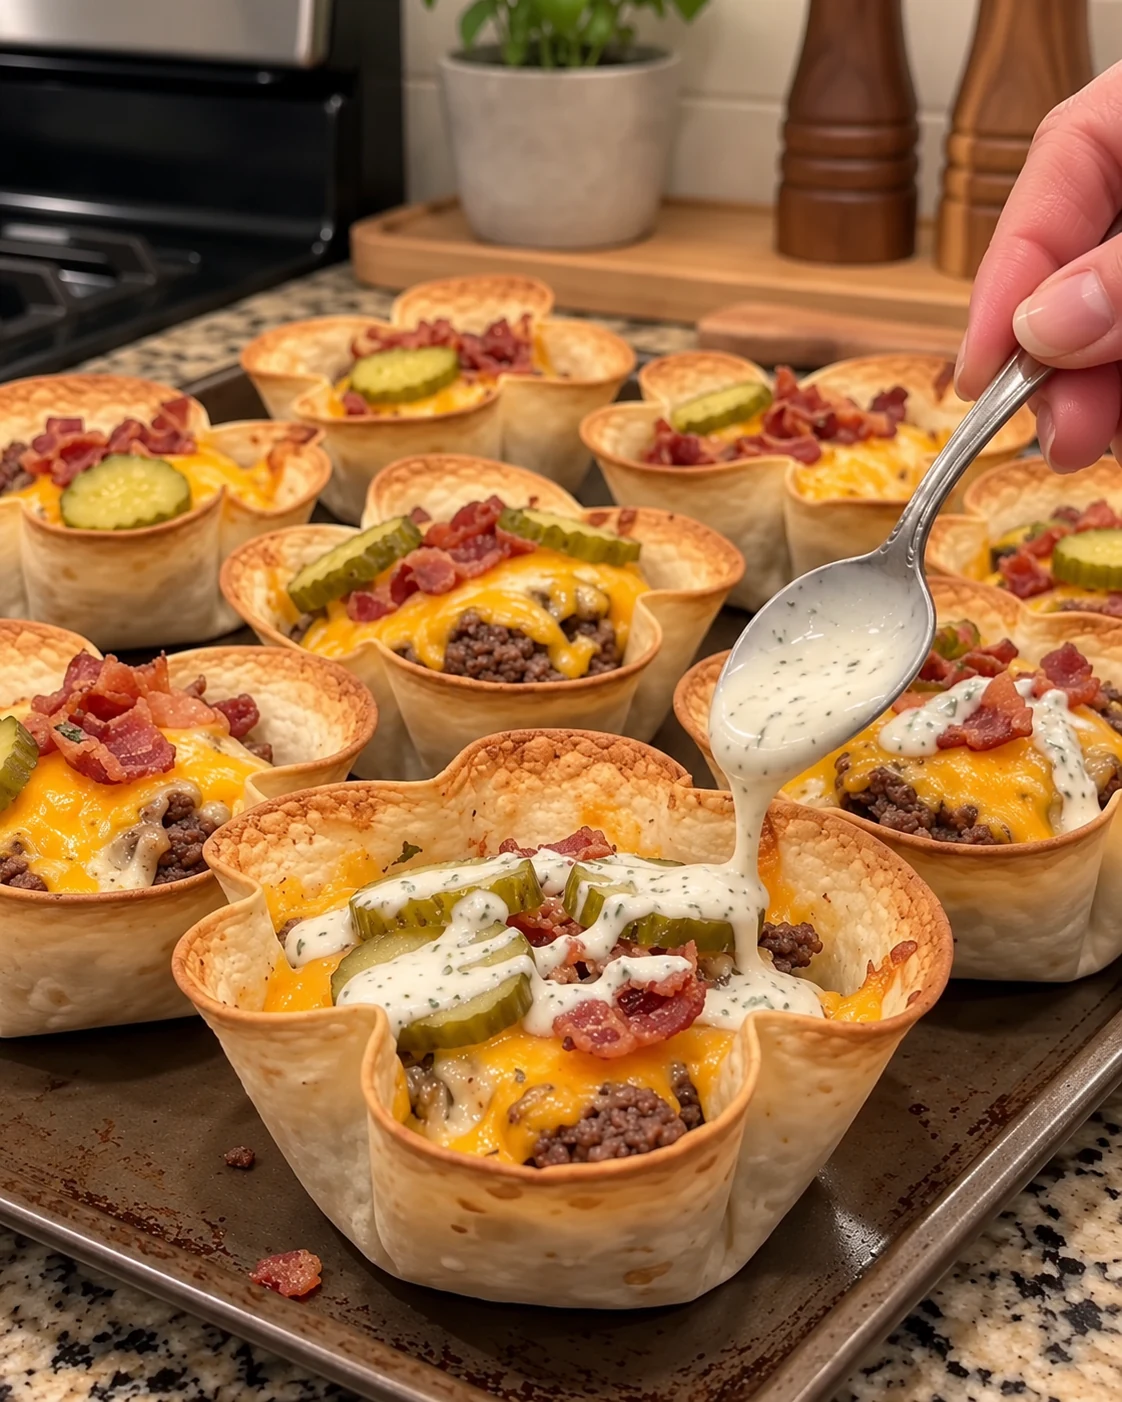
Add the cool toppings only after the cups leave the oven. Sprinkle on shredded iceberg, diced tomatoes, reserved bacon, and sliced green onions. Place thick dill pickle rounds on top and finish with the remaining ranch. Optional pickled jalapeños add pleasant acidity and heat.
Serve immediately for the strongest contrast between the crisp shell and juicy filling. If the tray must sit for a few minutes, keep the ranch in a squeeze bottle and let guests add it themselves. That small step prevents the tortilla edges from softening.
Tips for Extra-Crispy Tortilla Shells
- Drain the beef well. Excess rendered fat is the most common cause of soft bottoms.
- Prebake the empty shells. Four to five minutes sets the tortilla before moist filling is added.
- Use only a light ranch drizzle before baking. Save the majority for the finished cups.
- Do not overfill. A moderate portion allows the exposed tortilla edges to crisp.
- Rest briefly, not indefinitely. Three to five minutes helps release the cups, but a long rest traps steam.
Best Bacon, Cheese, and Pickle Combinations
Thick-cut bacon is worth using because the pieces remain distinct after baking. Hickory-smoked bacon gives the most familiar burger flavor, while peppered bacon adds a little heat. Avoid very sweet maple bacon unless you specifically want a sweet-savory result.
Sharp cheddar and classic dill pickles create the most balanced combination. Extra-sharp cheddar tastes bolder, while Colby Jack melts especially smoothly. Garlic dill pickles can deepen the savory notes. For a spicy version, combine cheddar with pepper Jack and replace part of the dill pickles with pickled jalapeños.
Common Mistakes to Avoid
Do not skip warming the tortillas. Cold tortillas crack and create holes that let cheese and grease escape. Do not use tortillas much larger than the muffin pan because excess material folds into a thick, chewy center. Conversely, tortillas that are too small will not form high enough sides.
Avoid leaving the cooked filling wet or greasy. Drain the beef before adding pickles and cheese, and blot very juicy pickles if necessary. Do not add lettuce and tomatoes before baking; the lettuce wilts and tomatoes release water. Finally, watch the tortilla edges during the last few minutes because they can go from golden to overly dark quickly.
Easy Recipe Variations
Spicy Ranch Pickle Cups
Mix sliced pickled jalapeños into the beef and use pepper Jack for half the cheddar. A spicy ranch dressing reinforces the heat.
Barbecue Bacon Cheeseburger Cups
Replace the ketchup-like tang of extra pickles with a teaspoon of barbecue sauce in each cup, then finish with cheddar and bacon. Keep the sauce modest so the shells stay crisp.
Fresh Burger Salad Cups
Use the same warm beef base, then add a larger mound of iceberg, tomato, green onion, pickle, and ranch after baking. These are lighter on cheese but still satisfying.
If you enjoy bite-size cheeseburger flavors, the site’s jalapeño ranch bacon cheeseburger potato cups offer another fun variation.
Best Dipping Sauces and Toppings
Ranch is the signature sauce here, but burger sauce, chipotle mayo, barbecue sauce, or honey mustard can be served on the side. Keep sauces separate until eating. Additional toppings might include finely diced red onion, sliced jalapeños, extra pickles, or a spoonful of tomato relish. Choose two or three extras rather than covering the cups so heavily that they become difficult to hold.
Serving Ideas for Game Days and Parties
Arrange the cups in concentric circles on a large platter with small bowls of ranch, pickles, and jalapeños in the center. For a larger buffet, pair them with a crunchy slaw, vegetable sticks, or a simple green salad. Two cups make a satisfying snack; three or four with salad can become an easy dinner.
For parties, label the spicy variation and keep a milder tray for children. Small paper food boats make serving tidy. Because the cups taste best warm, bring out half the batch first and hold the rest in a 200°F oven without fresh toppings.
Make-Ahead Instructions
Cook the bacon and beef filling up to two days ahead. Cool it promptly and refrigerate in a covered container. Store reserved bacon separately so it stays crisp. Chop tomatoes, lettuce, and onions the day of serving and keep them chilled in separate containers.
For best texture, shape and prebake the tortilla shells shortly before filling. If necessary, prebake them a few hours ahead, cool completely, and keep them uncovered at room temperature. Rewarm the filling before assembling so the final bake heats evenly.
Storage, Freezing, and Reheating
Refrigerate leftover cups without lettuce, tomatoes, or ranch in an airtight container for 3 to 4 days. Keep fresh toppings separate. To reheat, place the cups on a baking sheet in a 350°F oven until crisp and the center reaches 165°F. An air fryer at 325°F also works well for a small batch. The microwave warms them but softens the shells.
Freeze fully cooled, untopped cups in a single layer until firm, then transfer to a freezer container for up to two months. Reheat from frozen at 350°F, adding a few extra minutes, and finish with fresh toppings and ranch only after they are hot.
Frequently Asked Questions
Can I use corn tortillas?
Flour tortillas are recommended because they are flexible, form deep cups easily, and match the supplied recipe. Corn tortillas tend to crack unless carefully softened and produce a different flavor and texture.
Why are my tortilla cups soggy?
The likely causes are undrained beef, too much ranch before baking, skipping the empty-shell prebake, or leaving hot cups in the pan too long. Correcting those four points produces a crisper result.
Can I make mini taco cups?
Yes, but use smaller tortilla rounds and a mini muffin pan. Reduce both prebaking and final baking times, watching closely because small edges brown fast.
How do I keep the tortillas from tearing?
Warm them until pliable, press the center down first, and create a few broad folds rather than many tight creases. A light coating of spray in the pan also helps the baked cups release cleanly.
Can I serve these at room temperature?
They are best warm, when the cheddar is soft and the shells are crisp. For food safety and texture, do not leave the beef-filled cups at room temperature for more than two hours.
Final Thoughts
These crispy taco crunch cups turn familiar burger toppings into a cheerful, practical appetizer. The method is straightforward: cook bacon, brown and season beef, prebake flexible flour tortillas, fill, top with cheddar, and bake until golden. Pickles and ranch keep the rich filling lively, while fresh lettuce and tomato add a cool finish. Serve them warm from the tray and expect the first batch to disappear quickly.
Print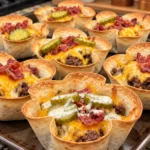
Crispy Loaded Double Bacon Cheeseburger Ranch Pickle Cheddar Taco Crunch Cups
- Prep Time: 15 minutes
- Cook Time: 20–25 minutes
- Total Time: 35–40 minutes
- Yield: 12 taco crunch cups (12 appetizer servings) 1x
- Category: Appetizer / Snack / Party Food
- Method: Stovetop and Oven
- Cuisine: American-Inspired
Description
Crispy flour tortilla cups loaded with seasoned beef, melted sharp cheddar, double bacon, dill pickles, fresh toppings, and creamy ranch.
Ingredients
Bacon Cheeseburger Filling
- 1 lb (450 g) ground beef (80/20)
- 8 slices thick-cut bacon
- 1 cup shredded sharp cheddar cheese, divided
- 1 cup dill pickle slices, roughly chopped
- 1 teaspoon garlic powder
- 1 teaspoon onion powder
- 1 teaspoon smoked paprika
- Salt, to taste
- Freshly ground black pepper, to taste
Crispy Taco Cups
- 12 small soft flour tortillas that fit a standard muffin pan
- Nonstick cooking spray
- 1/2 cup additional shredded sharp cheddar cheese
Ranch Topping
- 1/2 cup ranch dressing
- 1/2 cup diced fresh tomatoes
- 1/4 cup sliced green onions
- 1 cup shredded iceberg lettuce
- Pickled jalapeños, optional
Instructions
- Preheat the oven to 375°F (190°C) and grease a standard 12-cup muffin pan.
- Cook the thick-cut bacon in a skillet over medium heat for 8–10 minutes, until crispy.
- Drain the bacon on paper towels, crumble half for the filling, and reserve the remainder for topping.
- Leave approximately 1 tablespoon bacon grease in the skillet.
- Add ground beef, break it into small crumbles, and season with garlic powder, onion powder, smoked paprika, salt, and pepper.
- Cook for 7–9 minutes, until the beef reaches 160°F (71°C), then drain excess grease.
- Stir the chopped dill pickles into the beef.
- Add 1/2 cup shredded cheddar and stir over low heat until melted.
- Fold in half of the cooked bacon and remove the filling from the heat.
- Warm the soft flour tortillas briefly until flexible.
- Press one tortilla into each muffin cavity to form a deep bowl with folded raised edges.
- Prebake the empty tortilla shells for 4–5 minutes.
- Divide the bacon cheeseburger filling evenly among the 12 tortilla cups.
- Sprinkle with the remaining 1/2 cup cheddar from the filling ingredients and the additional 1/2 cup cheddar listed for the cups.
- Add a small drizzle of ranch, reserving most for serving.
- Bake for 8–10 minutes, until the cheese is melted and tortilla edges are golden.
- Let the cups rest for 3–5 minutes, then carefully remove them from the pan.
- Top with shredded iceberg lettuce and diced tomatoes.
- Sprinkle with the reserved crispy bacon, green onions, and optional pickled jalapeños.
- Finish with the remaining ranch dressing and serve immediately.
Notes
- Use soft, pliable flour tortillas; warm them briefly if they feel stiff.
- Drain the cooked beef thoroughly and prebake the shells to prevent soggy bottoms.
- Prepare the beef and bacon filling up to 2 days ahead.
- Refrigerate untopped cups for 3–4 days and keep fresh toppings separate.
- Freeze untopped cups for up to 2 months.
- Reheat at 350°F until the filling reaches 165°F, then add fresh toppings and ranch.